不同方法使用Buddy进行WordPress单元测试
Unit testing is the essential safeguard of every software development project. Whether you're working on a web app or a WordPress site, they are the first-line trenches for your code's quality. As your project can only benefit from well-written unit tests, it's always worth exploring different execution methods in this domain.
In this guide, we'll show you two methods of running unit tests with WordPress and how you can handle them with Buddy's pipelines.
Two methods of unit testing in WordPress
There are two main approaches you can take when creating WordPress unit tests:
- The official method used by Core WP and implemented with WP-CLI. This method requires a database, which de facto turns your unit tests into integration tests.
- Using a library such as WP_Mock or Brain Monkey, which mocks some of the data.
Although these approaches differ significantly, they're both worth exploring to see which one fits your use case better. What's most important, however, is that no matter which approach you choose, you can very easily automate them using Buddy's pipelines.
Creating a test plugin
Before we have a closer look at the approaches, let's start by creating a plugin that's going to be the common denominator and cornerstone for the tests in both scenarios. We shall call it unit-test-plugin:
wp scaffold plugin unit-test-plugin
As a result, a directory with the newly created plugin will be added to wp-content/plugins. Other files relevant for the tests are added to that new directory by default as well:
bin/install-wp-tests.php– this script installs a WP instance required to run the testsphpunit.xml.dist– this is the PHPUnit configuration filetests/bootstrap.php– this file activates the plugin we've just created every time the tests are runtests/test-sample.php– this is a sample test
By default, the test-sample.php file is set to exclude in phpunit.xml.dist. For the purpose of this guide, delete this line – it'll save you the hassle of writing unit tests right now, as it allows you to check if everything works the way it should by running the sample test.
Now it's time to add PHPUnit to the project. Create a composer.json file that contains these lines:
{
    "require-dev": {
        "phpunit/phpunit": "^5.7.21 || ^6.5 || ^7.5",
        "yoast/phpunit-polyfills": "^1.0"
    },
    "scripts": {
      "test": "@php ./vendor/phpunit/phpunit/phpunit"
    }
}
or
{
    "require-dev": {
        "yoast/phpunit-polyfills": "^1.0"
    },
    "scripts": {
      "test": "@php ./vendor/phpunit/phpunit/phpunit"
    }
}
if you are planning only to test WordPress 5.9 and above.
Now you can start the sample test by running
composer run test
Testing with the official method
The next step is configuring a pipeline in Buddy that will automatically run the tests on the selected event.
If you haven't used Buddy before, this article will tell you how to configure a pipeline for a PHP application.
Sync your repository with Buddy and add a new pipeline.
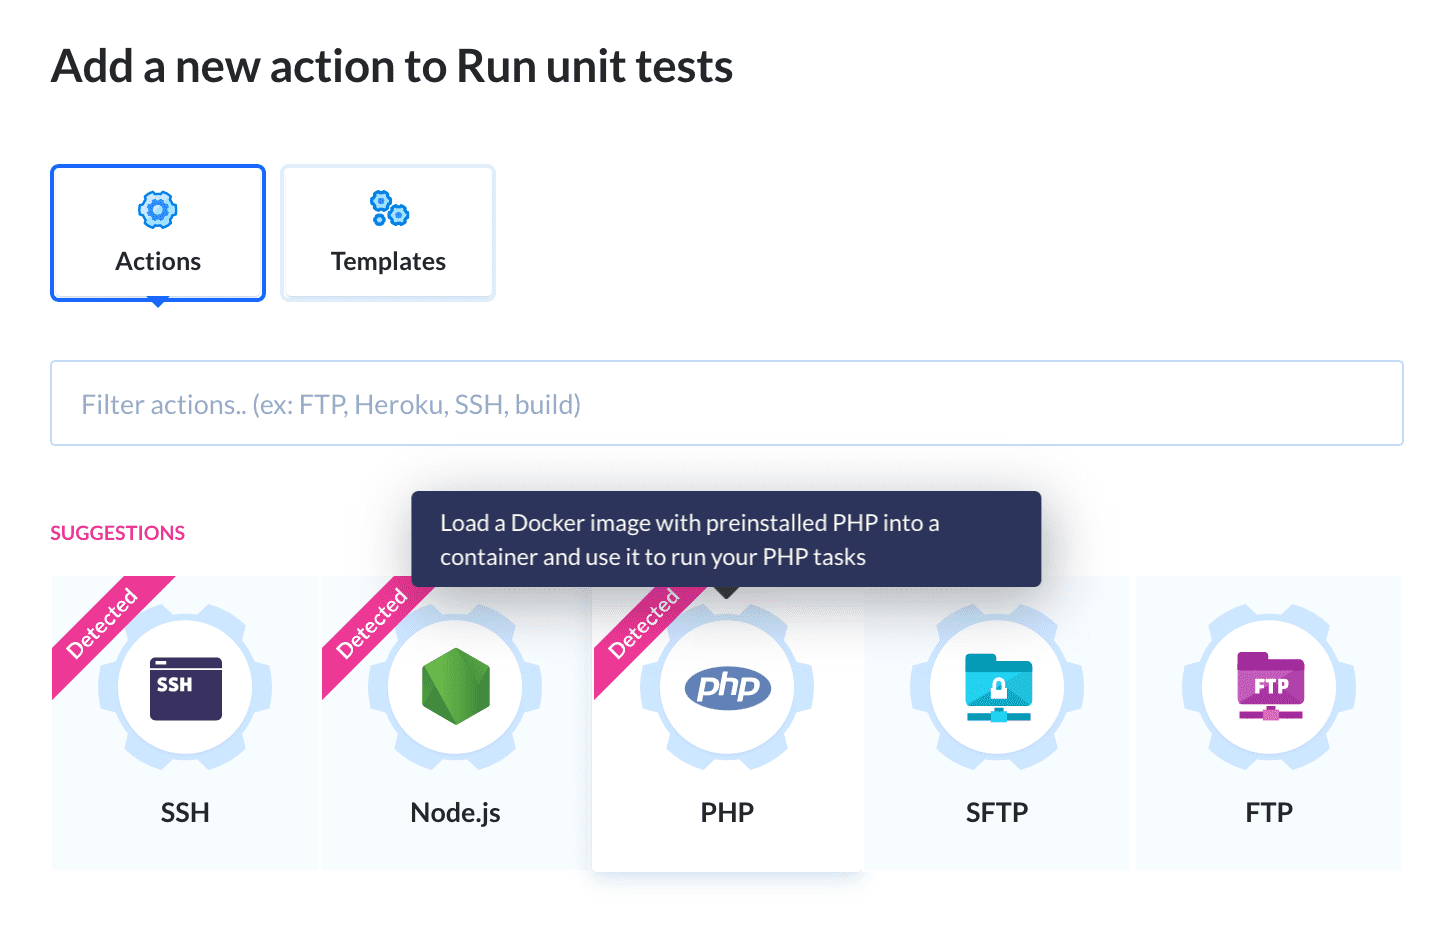
Buddy runs tests in isolated containers with preinstalled environment in the selected version. Look up and click the PHP action on the list to add it to the pipeline:
WP environment configuration
The first step is switching the default PHP to the official WordPress image. Go to the Environment tab and set the Image field to wordpress (official):

We'll also need to install SVN as it's required by the tests. Add the following line to the Customize environment field:
apt-get install -y subversion
Also, we'll install the test environment here by adding:
curl https://raw.githubusercontent.com/wp-cli/scaffold-command/master/templates/install-wp-tests.sh -o /bin/install-wp-tests.sh
chmod +x /bin/*.sh
/bin/install-wp-tests.sh wp_test root root mysql latest true
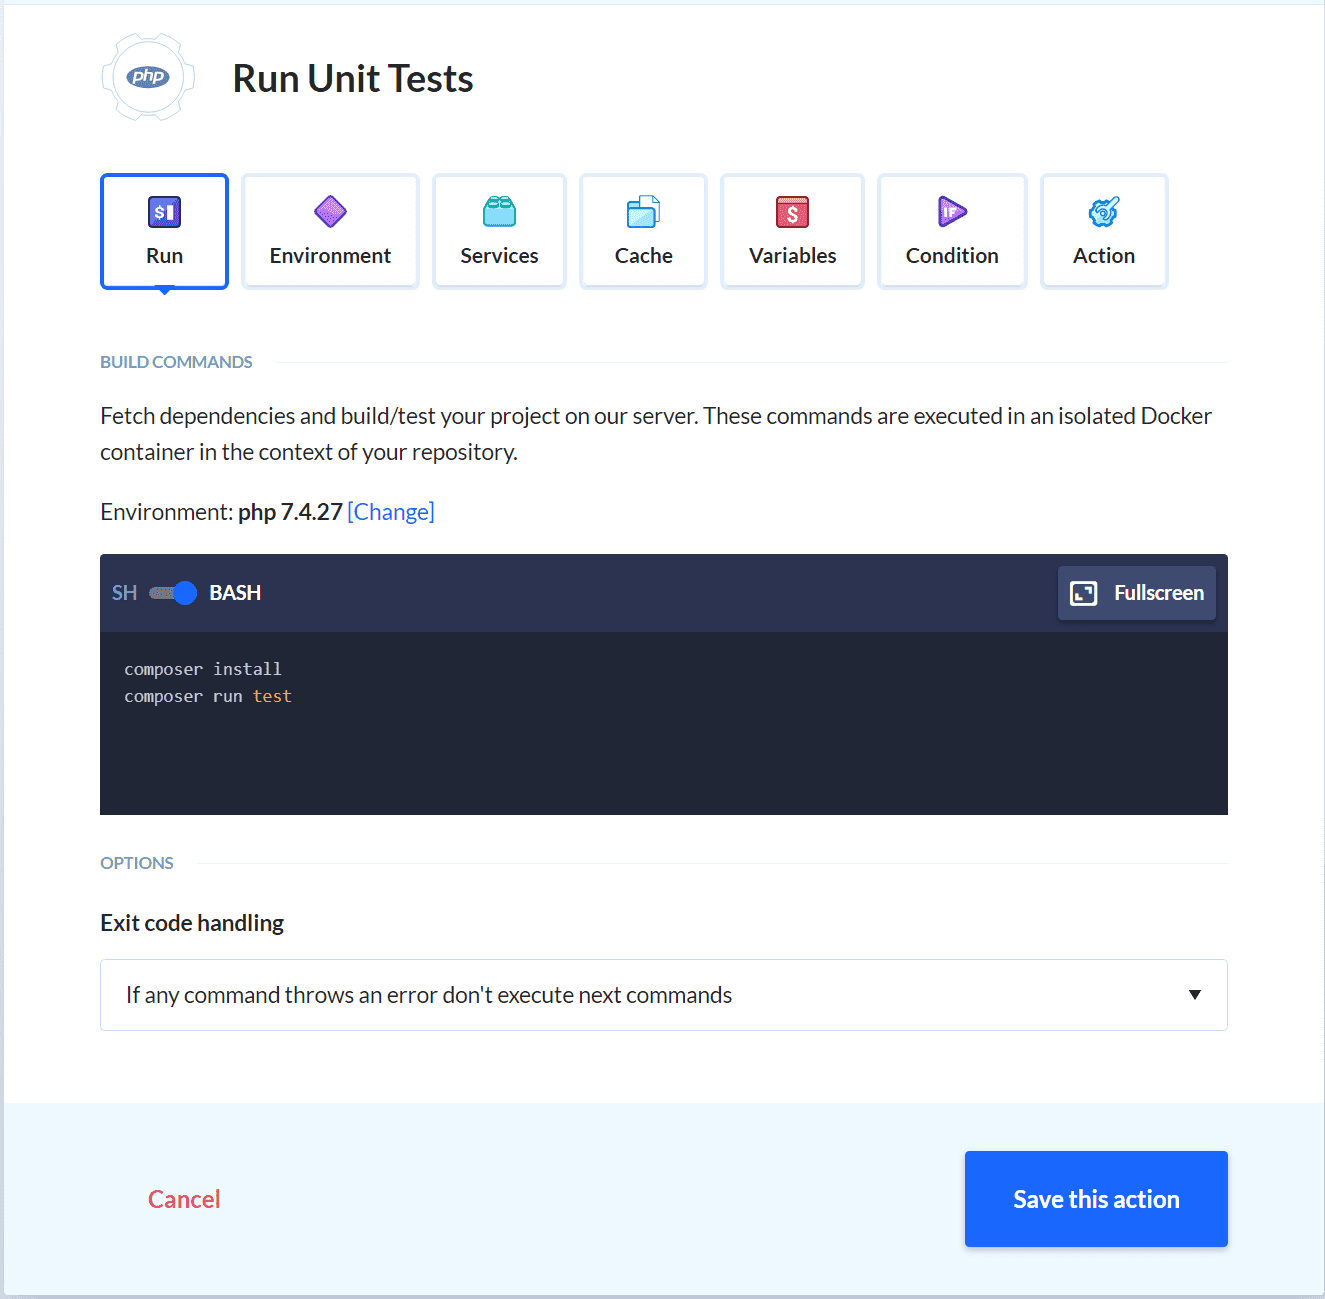
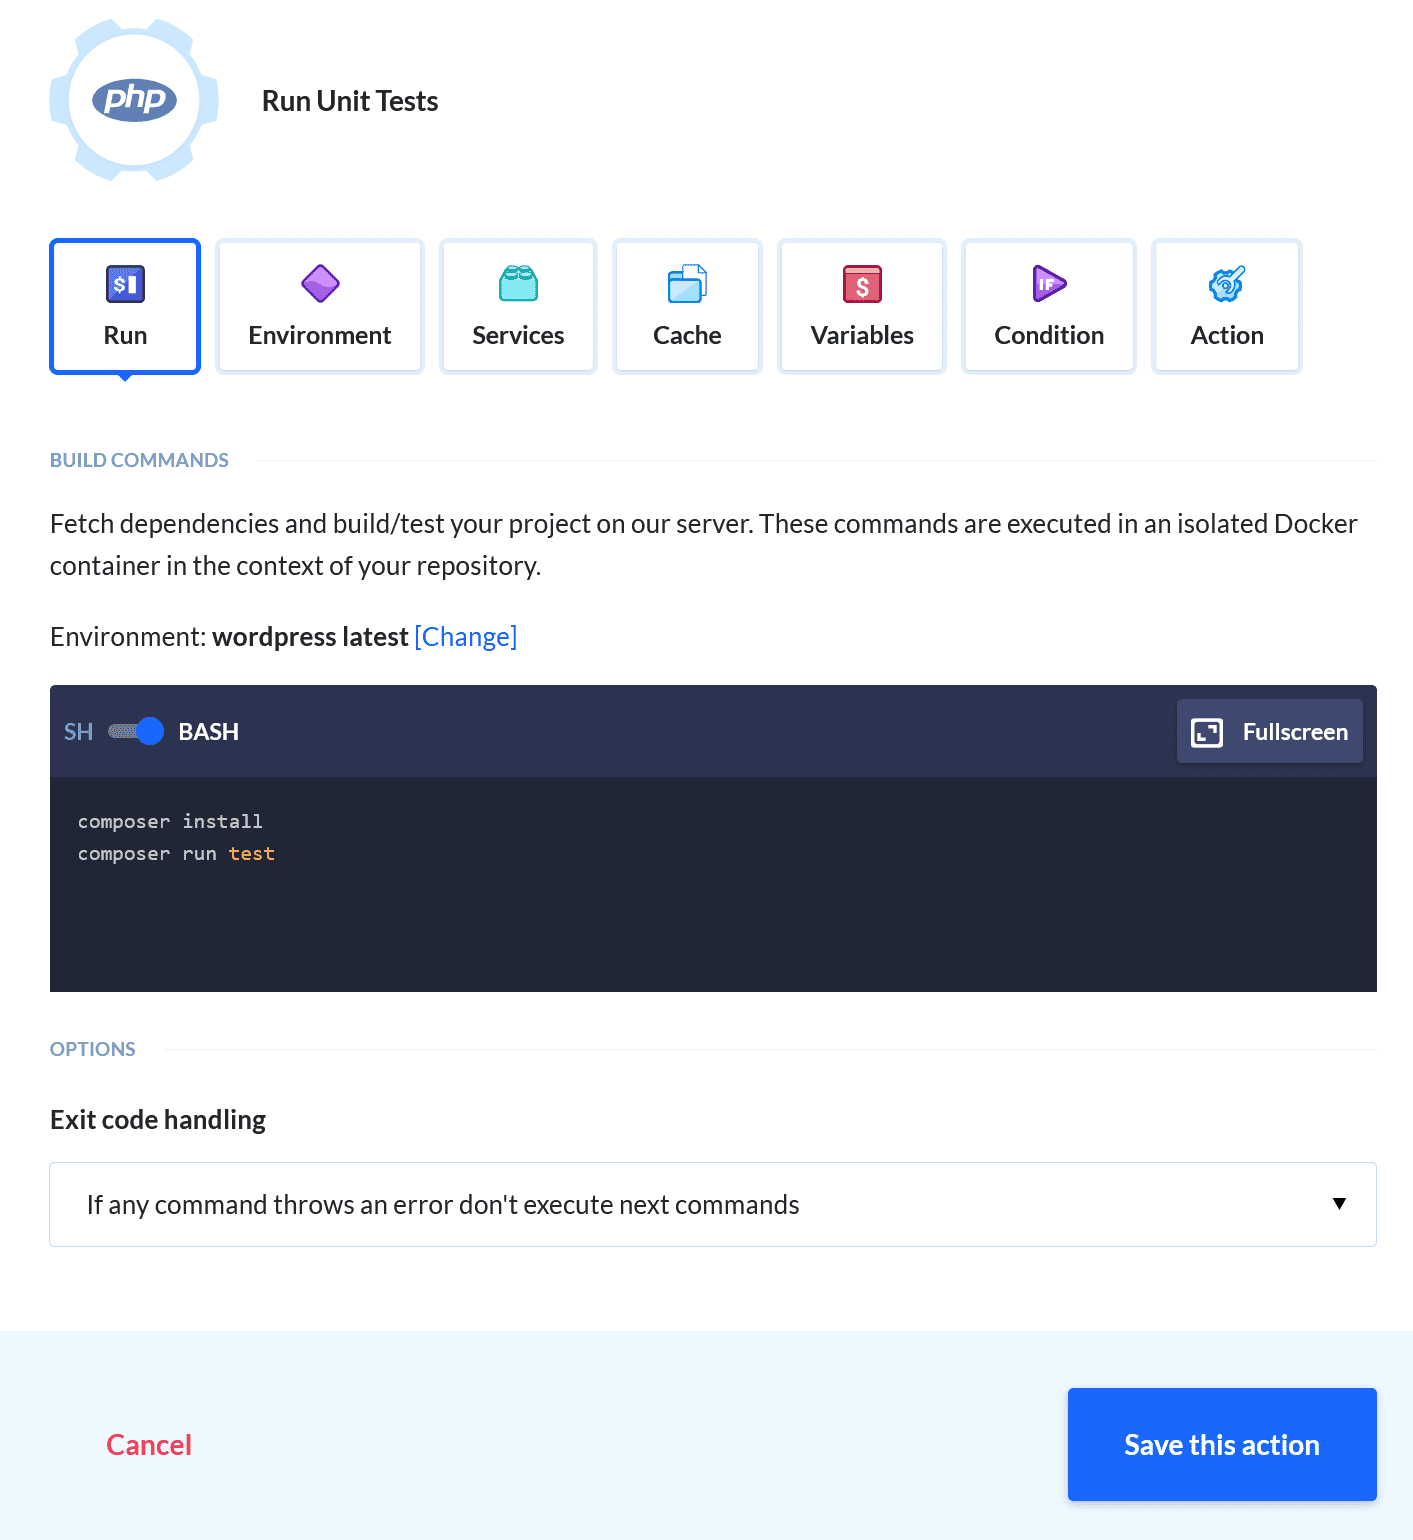
Command configuration
In the action's terminal, add the following commands:
composer install
composer run test
Here are the parameters that go with the install-wp-tests script. As you can see, we're installing the latest version of WordPress without creating a database:
./bin/install-wp-tests.sh <db-name> <db-user> <db-pass> [db-host] [wp-version] [skip-database-creation]
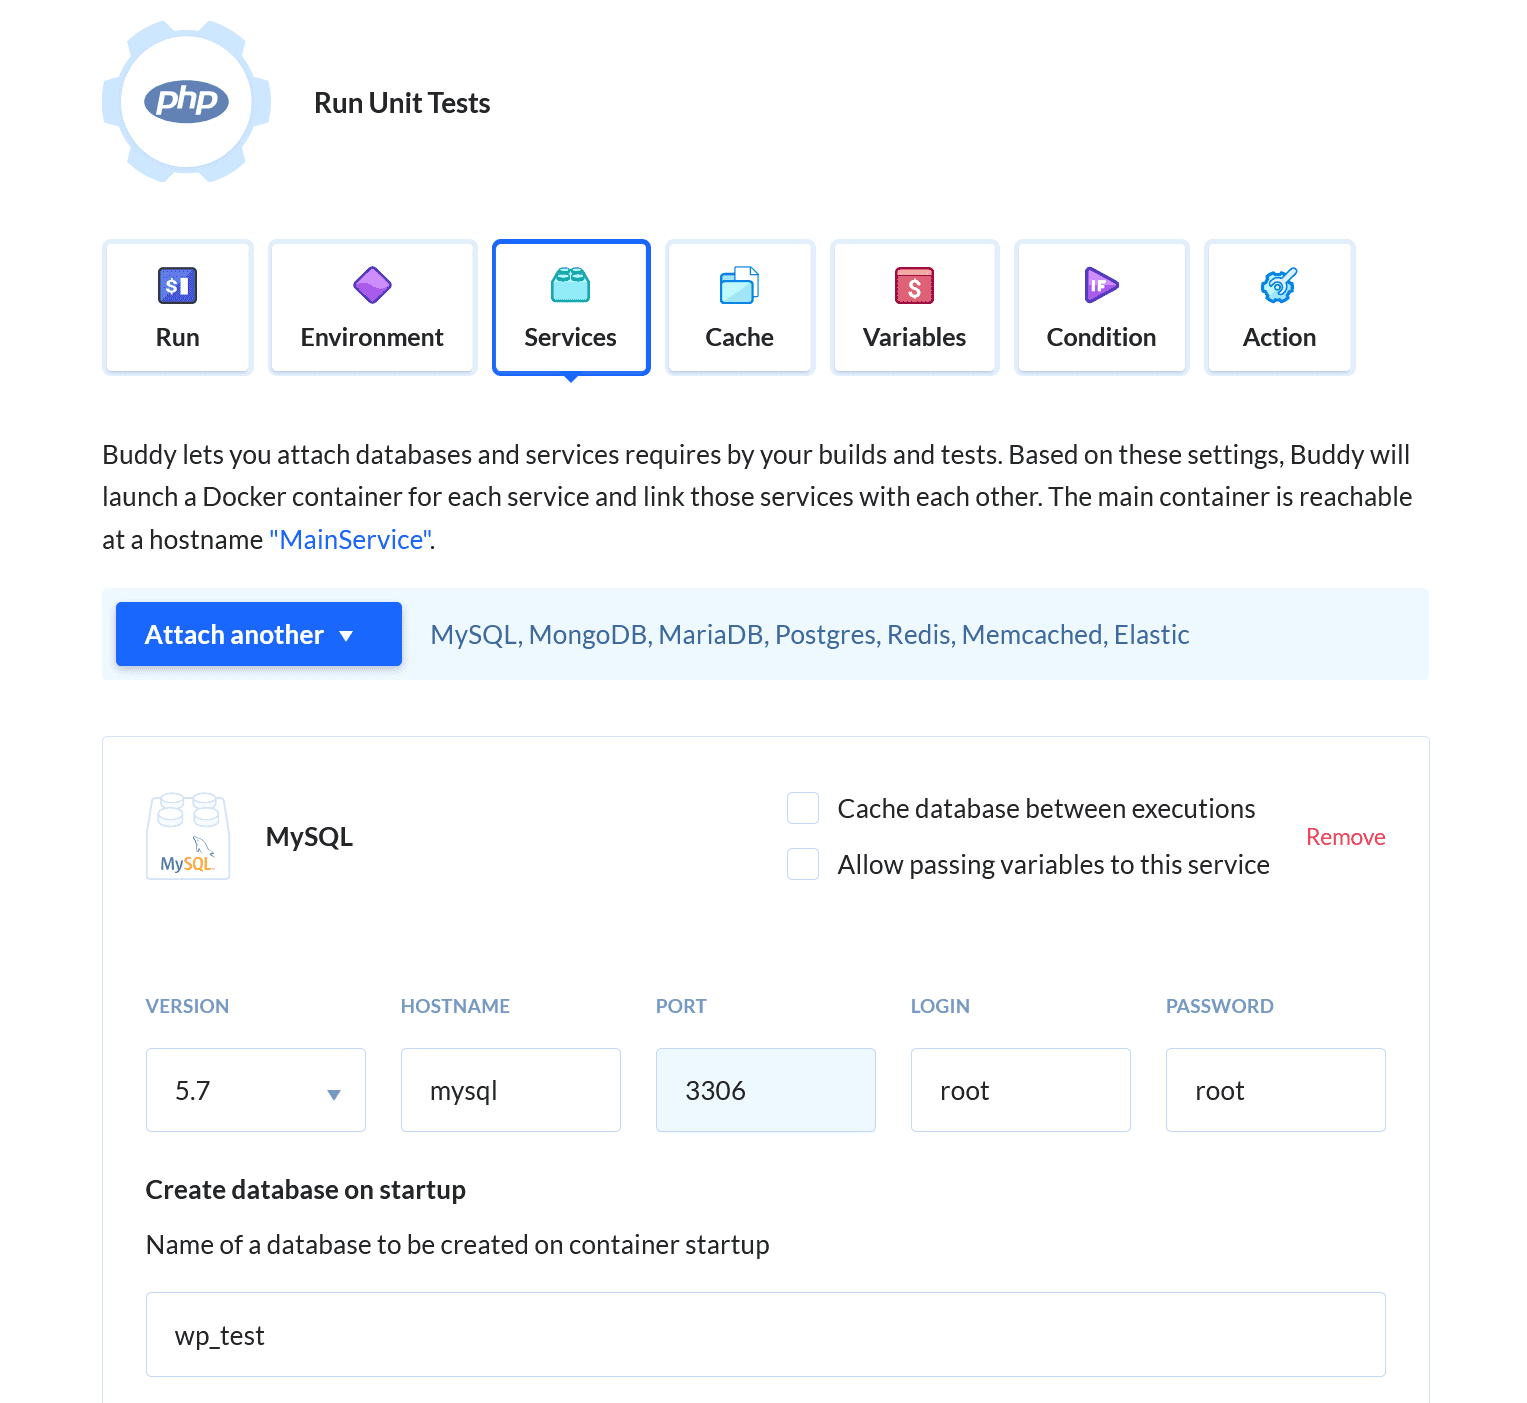
Database configuration
Open the Services tab and attach MySQL from the list. Make sure to enable creating a wp_test database on startup:
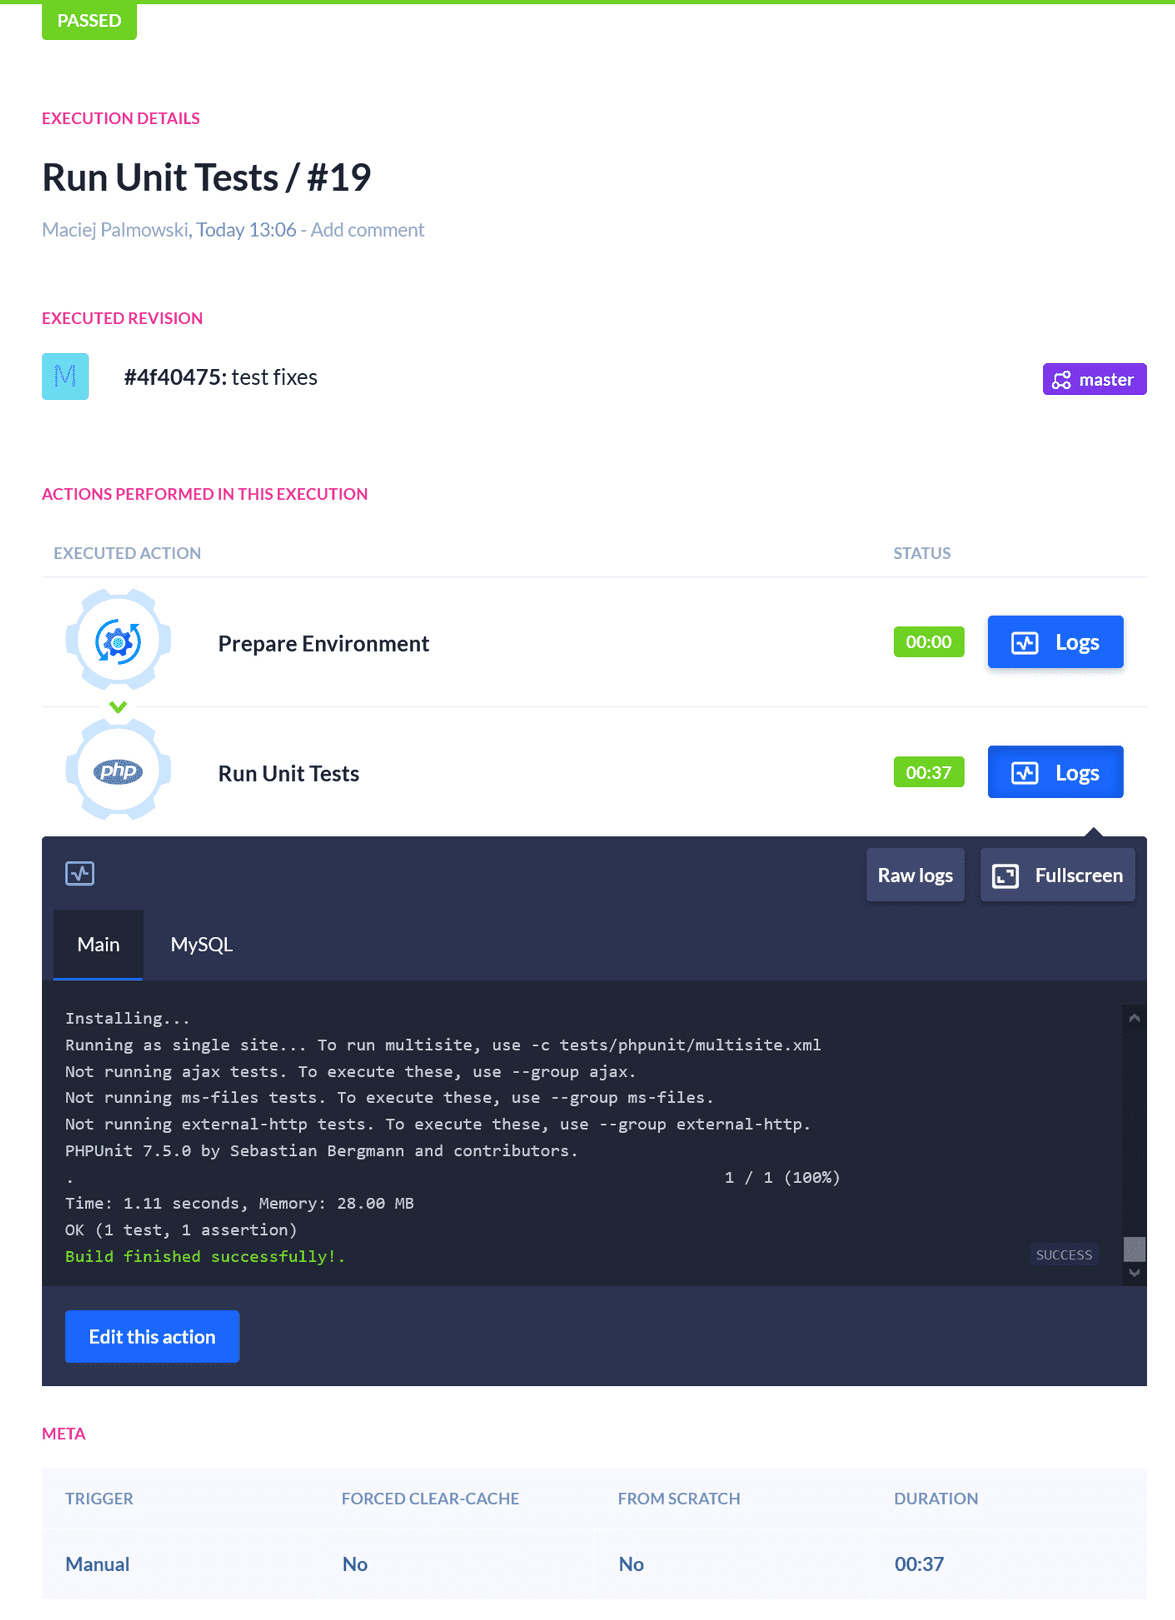
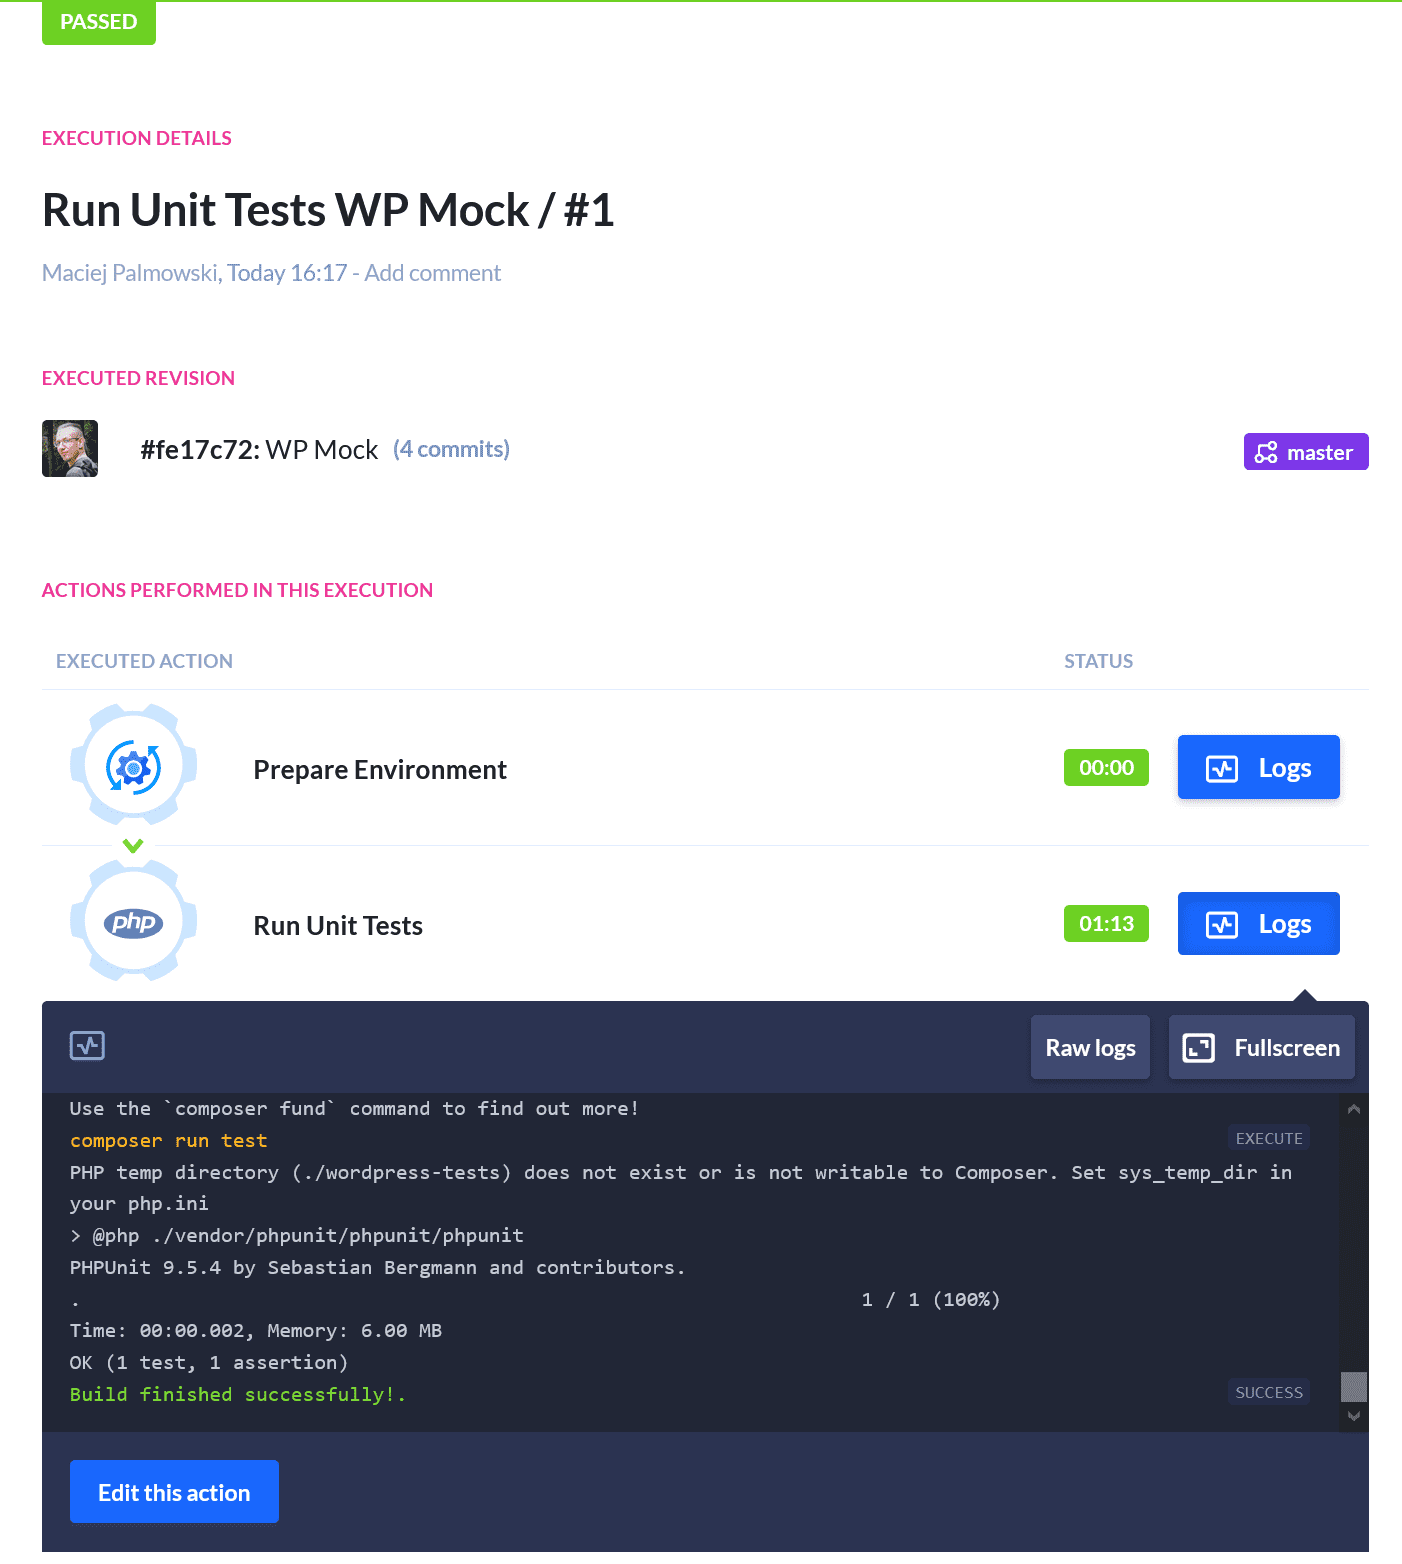
Running pipeline
At this point, we're ready to run the tests. If everything goes according the plan, the pipeline will pass and you'll see this message in the logs of the PHP action:
Testing with WP_Mock
Thanks to libraries such as WP_Mock or Brain Monkey, you can run unit tests without running WordPress (and creating the database). The process is streamlined and requires only some basic configuration to get going.
WP_Mock installation
Installing WP_Mock is extremely simple – you basically need to run one command:
composer require --dev 10up/wp_mock:0.4.2
Next, modify the bootstrap.php file to make it look like this:
<?php
// First we need to load the composer autoloader so we can use WP Mock
require_once __DIR__ . '/../vendor/autoload.php';
// Now call the bootstrap method of WP Mock
WP_Mock::bootstrap();
/**
 * Now we include any plugin files that we need to be able to run the tests. This
 * should be files that define the functions and classes you're going to test.
 */
require_once __DIR__ . '/../unit-test-plugin.php';
Once you're done, the last thing to do is adjusting the test file:
<?php
/**
 * Class SampleTest
 *
 * @package Unit_Test_Plugin
 */
/**
 * Sample test case.
 */
class MyTestClass extends \WP_Mock\Tools\TestCase {
    public function setUp() : void  {
        \WP_Mock::setUp();
    }
    public function tearDown() : void  {
        \WP_Mock::tearDown();
    }
    /**
     * A single example test.
     */
    public function test_sample() {
        // Replace this with some actual testing code.
        $this->assertTrue( true );
    }
}
And that's it – this enables you to create and run unit tests without installing WordPress!
Creating a Buddy pipeline
Since you don't need to install WordPress or configure the database to run tests with WP_Mock, the pipeline gets a tad simpler, too.
As there's no need to adjust file permissions or attach MySQL, you only need to run two commands in the PHP action:
composer install
composer run test
Don't forget to set the image to WordPress in the Environment tab, too.
If everything was configured correctly, the pipeline will run successfully:
Which method is better?
As usual, there's no definitive answer to this question as it depends on your needs and the limitations of your project. It is possible, however, to present a list of pros and cons for both approaches.
Official method
- ✅ much better compability with WordPress hooks (filters and actions)
- ❌ requires a database which means the tests are not isolated
WP_Mock/Brain Monkey
- ✅ doesn't require a database which means the unit tests can be fully isolated
- ✅ faster and easier to set up
- ❌ some parts of the code need to be mocked
Regardless which approach you choose, there's one thing you can always be sure of – Buddy's got your back! With excellent WordPress and PHP support, you can automate whatever test scenario you need.
Thanks for reading!