如何开发、测试与部署Symfony项目
After reading this guide you will be able to:
- Install Symfony
- Create a new Symfony project
- Add a new functionality
- Create form, controller, and view
- Prepare a Continuous Integration pipeline
- Prepare a continuous delivery pipeline
- Deploy a working Symfony application to AWS Elastic Beanstalk
Actions used in this guide:
You can fork the project used in this guide from our GitHub account: github.com/buddy-works/symfony-first-steps
Creating Symfony project
Let’s begin with installing Symfony:
wget https://get.symfony.com/cli/installer -O - | bash
Next, create a new project and name it symfony-first-steps:
symfony new symfony-first-steps
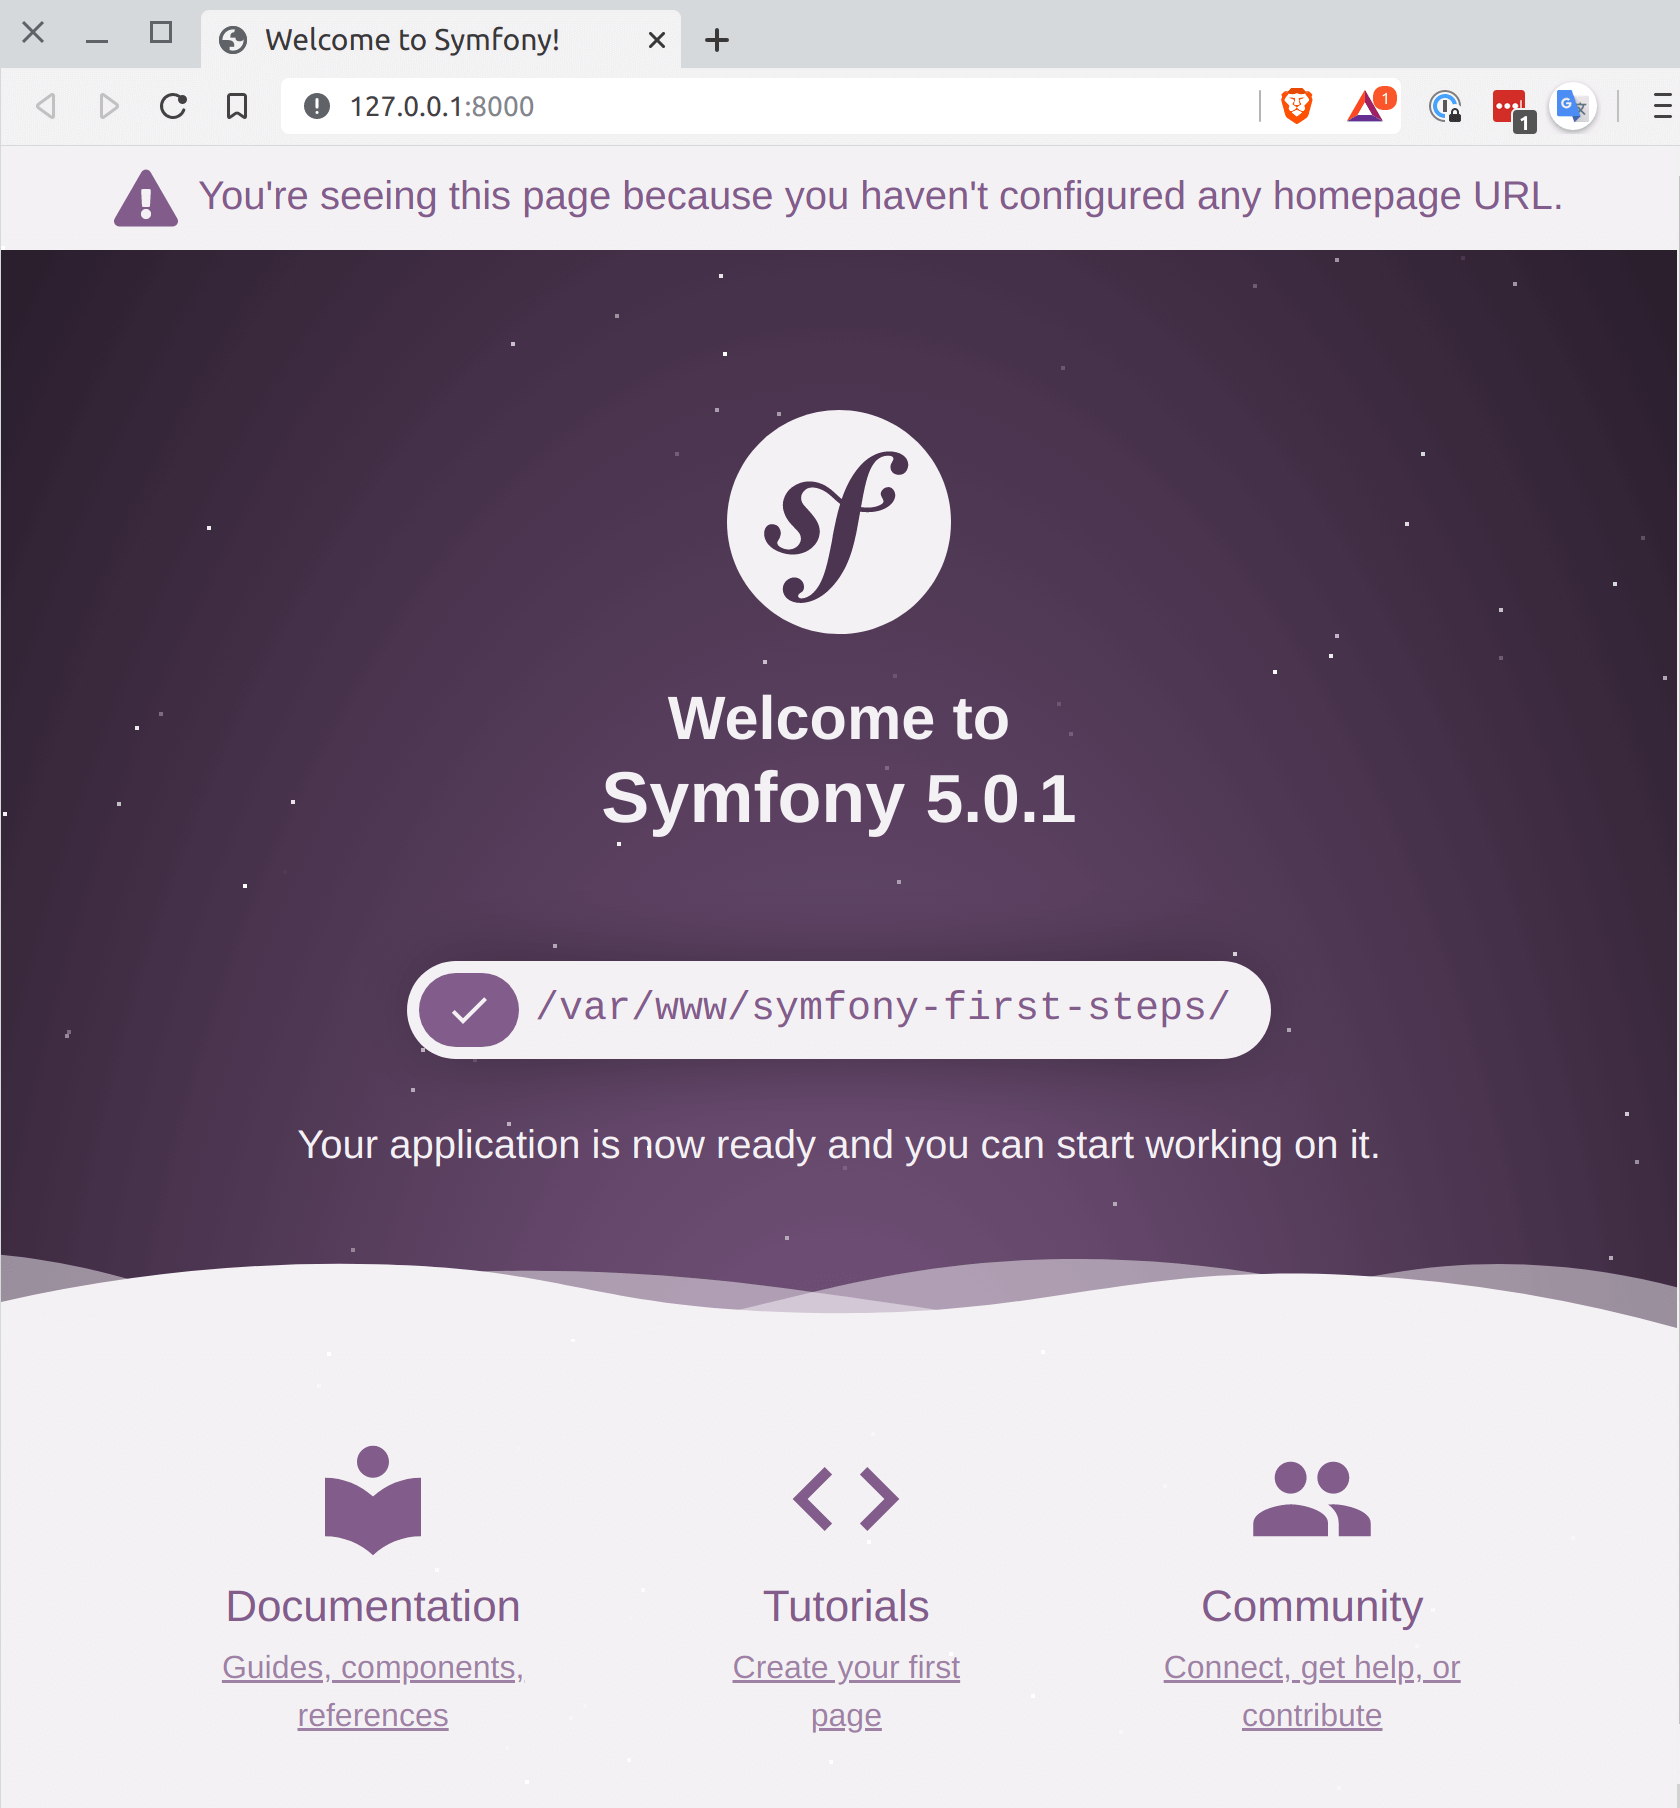
Go to the project's folder and set up a dev server to check if everything went fine:
cd symfony-first-steps
symfony serve
The project should launch at the default address 127.0.1:8000
Business logic
The project is ready, so let's have a look at the specs of the application to write: The application should accept any text and return the number of occurrence for each word in the received paragraph.
Gotcha. Grab your coffee and onwards we go!
PHPUnit installation
Begin with installing PHPUnit, an obvious part of test-driven development:
composer require --dev phpunit/phpunit
Making sure that it works should be obvious as well:
bin/phpunit
Writing tests
After some installation processing, a warning will appear that no tests were detected. Let’s write a test then:
<?php

declare(strict_types=1);

namespace App\Tests\Unit\Service;

use App\Service\WordCounter;
use PHPUnit\Framework\TestCase;

final class WordCounterTest extends TestCase
{
    /**
     * @dataProvider textDataProvider
     */
    public function testWordCounter(string $text, array $result): void
    {
        self::assertEquals($result, (new WordCounter())->count($text));
    }

    public function textDataProvider(): \Generator
    {
        yield 'basic text' => ['Lorem ipsum dolor sit amet, ipsum dolor sit.', [
            'Lorem' => 1,
            'ipsum' => 2,
            'dolor' => 2,
            'sit' => 2,
            'amet' => 1,
        ]];
        yield 'leetspeak text' => ['l0r3m 1p5um d0l0r 517 4m37, 1p5um d0l0r 517.', [
            'l0r3m' => 1,
            '1p5um' => 2,
            'd0l0r' => 2,
            '517' => 2,
            '4m37' => 1,
        ]];
        yield 'ignore spaces' => ['Some       text     with     tabs and    spaces', [
            'Some' => 1,
            'text' => 1,
            'with' => 1,
            'tabs' => 1,
            'and' => 1,
            'spaces' => 1,
        ]];
    }
}
For the moment, one you run bin/phpunit the tests will fail and color the console red. What you should do is add the implementation of the new service that counts words:
<?php

declare(strict_types=1);

namespace App\Service;

final class WordCounter
{
    /**
     * @return array<string,int>
     */
    public function count(string $text): array
    {
        $words = explode(' ', preg_replace('/[^A-Za-z0-9?![:space:]]/', '', $text));

        return array_reduce($words, function (array $counts, string $word): array {
            if (trim($word) !== '') {
                $counts[$word] = isset($counts[$word]) ? ++$counts[$word] : 1;
            }

            return $counts;
        }, []);
    }
}
Run bin/phpunit again. Now, you should get the following:
Form development
With the tests working, we can now create a form that will receive the text, transfer it to our service after an initial validation, and return it to the template to display it to the user. All of this will be handled by the controller working on the provided URL (in this case, just /). In other words, the controller will be the entry point for our application. So let's start with creating a controller.
Controller
By default, each URL is configured in the config/routes.yaml file. For the needs of this guide, however, we will use annotations, which are a little more convenient. For that we'll need an additional package:
composer require annotations
Next, create a new file src/Controller/HomeController.php with the following content:
<?php

declare(strict_types=1);

namespace App\Controller;

use Symfony\Component\HttpFoundation\Response;
use Symfony\Component\Routing\Annotation\Route;

final class HomeController
{
    /**
     * @Route("/")
     */
    public function index(): Response
    {
        return new Response('Word Counter');
    }
}
Once you refresh your browser (http://127.0.0.1:8000/), you'll see:
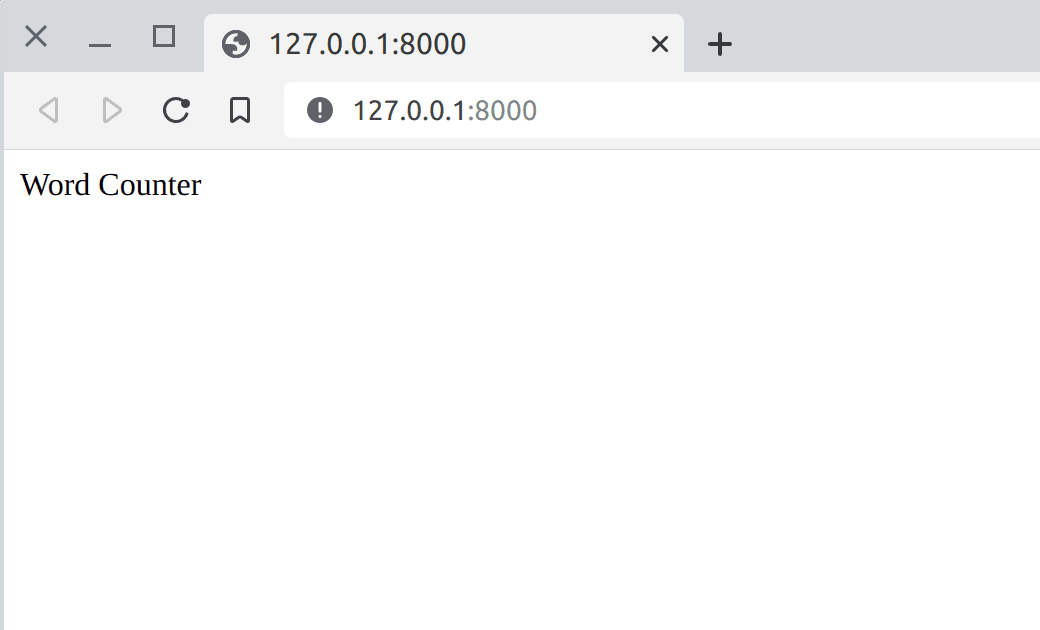
You can read more about creating controllers in the official Symfony documentation.
The first business value has been delivered – now we can move to the view.
View
The text returned from the controller was pretty simple. In reality, however, our intention will be to render a website in HTML. To avoid mixing HTML with PHP, we'll use a template engine. The default template engine for Symfony is Twig.
In the console, enter:
composer require twig
Next, create a new view in the templates folder (it was created automatically by Twig). Add a new file templates/home.html.twig with the following content:
{% extends 'base.html.twig' %}
{% block body %}
<div class="container">
<div class="row">
<div class="col">
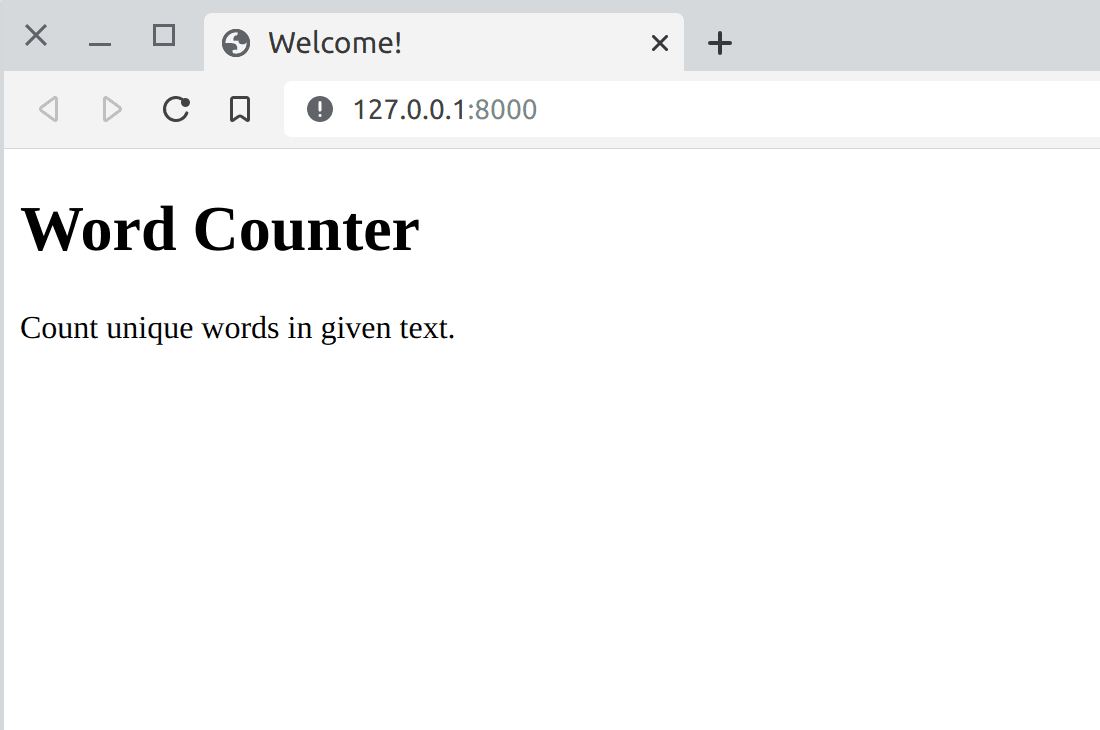
<h1>Word Counter</h1>
<p>Count unique words in given text.</p>
</div>
</div>
</div>
{% endblock %}
Here we are using ready Bootstrap components. We shall add Bootstrap later while creating the form.
Right now we need to slightly modify our controller. To make the whole process easier, we'll inherit the AbstractController class and use the render method to generate our view. After the changes, the whole piece will look as follows:
<?php

declare(strict_types=1);

namespace App\Controller;

use Symfony\Bundle\FrameworkBundle\Controller\AbstractController;
use Symfony\Component\HttpFoundation\Response;
use Symfony\Component\Routing\Annotation\Route;

final class HomeController extends AbstractController
{
    /**
     * @Route("/")
     */
    public function index(): Response
    {
        return $this->render('home.html.twig');
    }
}
The website will look like this:
Form
We will now add a form that will allow you to receive user data, validate it, and pass it to our word counting service.
The recommended workflow when working with Symfony forms is the following:
- Build the form in a Symfony controller or using a dedicated form class;
- Render the form in a template so the user can edit and submit it;
- Process the form to validate the submitted data, transform it into PHP data and do something with it (e.g. persist it in a database).
Let's begin with fetching the package with forms:
composer require symfony/form
Symfony recommends to put as little logic as possible in the controllers. That's why it's better to move complex forms to dedicated classes instead of defining them in controller actions. Besides, forms defined in classes can be reused in multiple actions and services.
So in the file src/Form/Type/CountWordType.php we should create the following form:
<?php

declare(strict_types=1);

namespace App\Form\Type;

use Symfony\Component\Form\AbstractType;
use Symfony\Component\Form\Extension\Core\Type\SubmitType;
use Symfony\Component\Form\Extension\Core\Type\TextareaType;
use Symfony\Component\Form\FormBuilderInterface;

final class CountWordType extends AbstractType
{
    public function buildForm(FormBuilderInterface $builder, array $options)
    {
        $builder
            ->add('text', TextareaType::class, ['label' => 'Text to count'])
            ->add('submit', SubmitType::class, ['label' => 'Count words'])
        ;
    }
}
Now we can add Bootstrap so that our form renders nicely and we can build our application brick by brick as in the good old days.
In the templates/home.html.twig file, add the styles and JavaScript required by Bootstrap:
<!DOCTYPE html>
<html>
    <head>
        <meta charset="UTF-8">
        <title>{% block title %}Welcome!{% endblock %}</title>
        {% block stylesheets %}
            <link rel="stylesheet" href="https://stackpath.bootstrapcdn.com/bootstrap/4.1.3/css/bootstrap.min.css" integrity="sha384-MCw98/SFnGE8fJT3GXwEOngsV7Zt27NXFoaoApmYm81iuXoPkFOJwJ8ERdknLPMO" crossorigin="anonymous">
        {% endblock %}
    </head>
    <body>
        {% block body %}{% endblock %}
        {% block javascripts %}
            <script src="https://code.jquery.com/jquery-3.3.1.slim.min.js" integrity="sha384-q8i/X+965DzO0rT7abK41JStQIAqVgRVzpbzo5smXKp4YfRvH+8abtTE1Pi6jizo" crossorigin="anonymous"></script>
            <script src="https://cdnjs.cloudflare.com/ajax/libs/popper.js/1.14.3/umd/popper.min.js" integrity="sha384-ZMP7rVo3mIykV+2+9J3UJ46jBk0WLaUAdn689aCwoqbBJiSnjAK/l8WvCWPIPm49" crossorigin="anonymous"></script>
            <script src="https://stackpath.bootstrapcdn.com/bootstrap/4.1.3/js/bootstrap.min.js" integrity="sha384-ChfqqxuZUCnJSK3+MXmPNIyE6ZbWh2IMqE241rYiqJxyMiZ6OW/JmZQ5stwEULTy" crossorigin="anonymous"></script>
        {% endblock %}
    </body>
</html>
Now, it’s time to insert the newly created form CountWordType into our template with the main site. First we need to create it in the controller. The index action will look as follows:
public function index(): Response
    {
        $form = $this->createForm(CountWordType::class);

        return $this->render('home.html.twig', [
            'form' => $form->createView(),
        ]);
    }
To insert the form into the template, we just need to add {{ form(form) }} right below the first paragraph:
{% extends 'base.html.twig' %}

{% block body %}
    <div class="container">
        <div class="row">
            <div class="col">
                <h1>Word Counter</h1>
                <p>Count unique words in given text.</p>

                {{ form(form) }}
            </div>
        </div>
    </div>
{% endblock %}
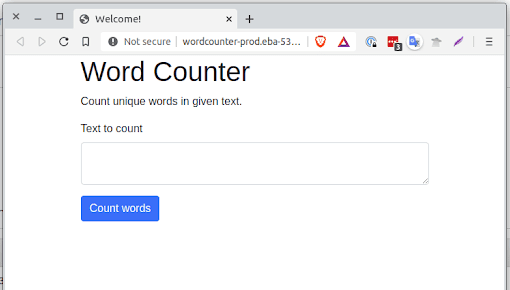
Now the website should look like this:
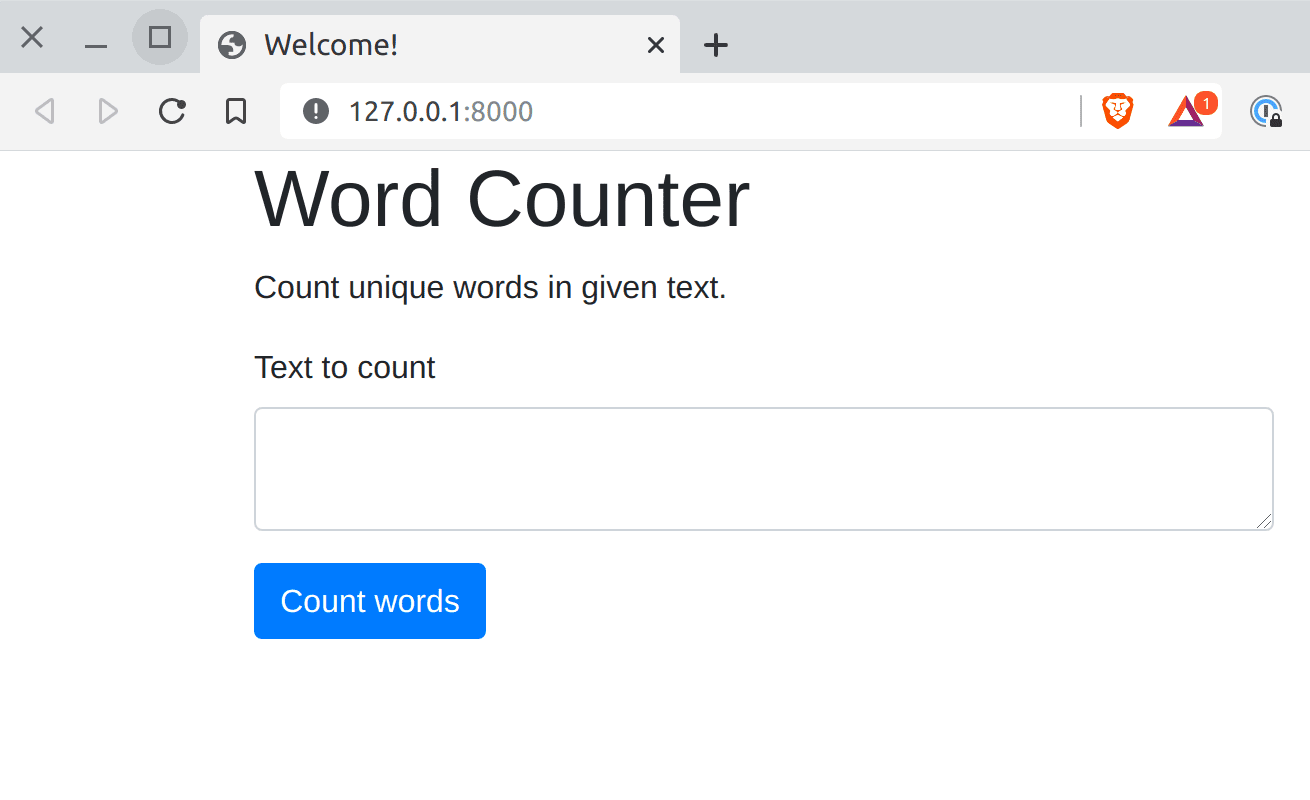
The next step is adding form support to our controller. By filling out the sample form with text and clicking the Count words button, a new request is sent to our application. By using the Symfony form, we can handle it with one simple handleRequest method:
  public function index(Request $request): Response
    {
        $form = $this->createForm(CountWordType::class);
        $form->handleRequest($request);
        if ($form->isSubmitted() && $form->isValid()) {
            return $this->render('home.html.twig', [
                'results' => $this->wordCounter->count($form->get('text')->getData()),
                'form' => $form->createView(),
            ]);
        }

        return $this->render('home.html.twig', [
            'form' => $form->createView(),
        ]);
    }
As you can see, if the form was submitted and is correct, i.e. $form->isSubmitted() && $form->isValid(), the service result is returned to the view:
'results' => $this->wordCounter->count($form->get('text')->getData())
We now only need to display the results by using the previously created template:
{% block body %}
    <div class="container">
        <div class="row">
            <div class="col">
                <h1>Word Counter</h1>
                <p>Count unique words in given text.</p>

                {% if results is defined %}
                    <h2>Results:</h2>
                    <ul style="column-count: 4;">
                        {% for word, count in results|sort|reverse %}
                            <li>{{ word }}: {{ count }}</li>
                        {% endfor %}
                    </ul>
                {% endif %}

                {{ form(form) }}
            </div>
        </div>
    </div>
{% endblock %}
Continuous Integration
In this section we shall prepare a pipeline that will let you implement Continuous Integration into your process.
It is worth reminding that the pipeline itself is not Continuous Integration. Continuous integration is a technique which involves merging the results of work carried out by multiple developers to the shared mainline of code as often as possible.
In order to merge the results, a series of factors must be fulfilled:
- The application is built correctly
- The application works correctly (tests)
- The application is prepared for deployment
All these things can be guaranteed by a properly configured pipeline.
Composer script
Before we configure the pipeline, let's prepare some Composer scripts. In the “scripts” section of the composer.json file add the following:
        "phpunit": [
            "bin/phpunit --colors=always"
        ],
        "tests": [
            "@phpunit"
        ]
This way, we are leaving some room for additional tools (e.g. PHPStan or PHP CS Fixer) without altering the testing script:
composer tests
Testing pipeline
At this stage, your code is ready to be committed and pushed to the repository. Create a new project in Buddy and attach the repo with our Symfony website.
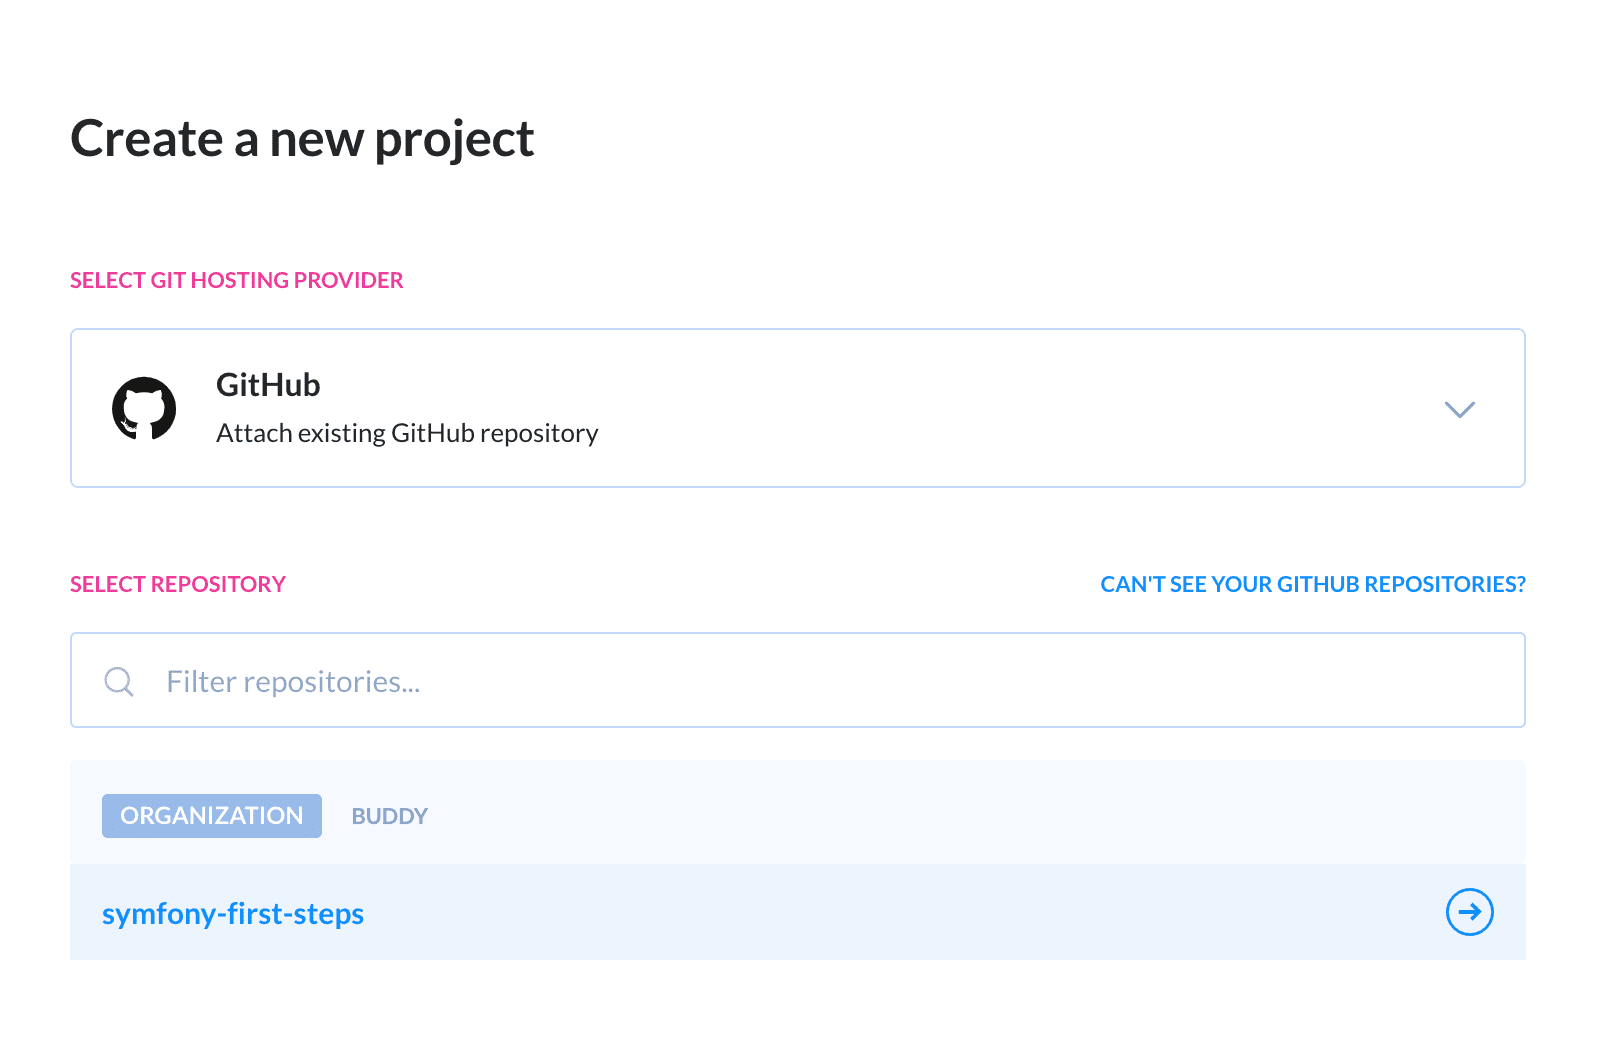
If you don't have the project at hand, a working application is available on our GitHub account.
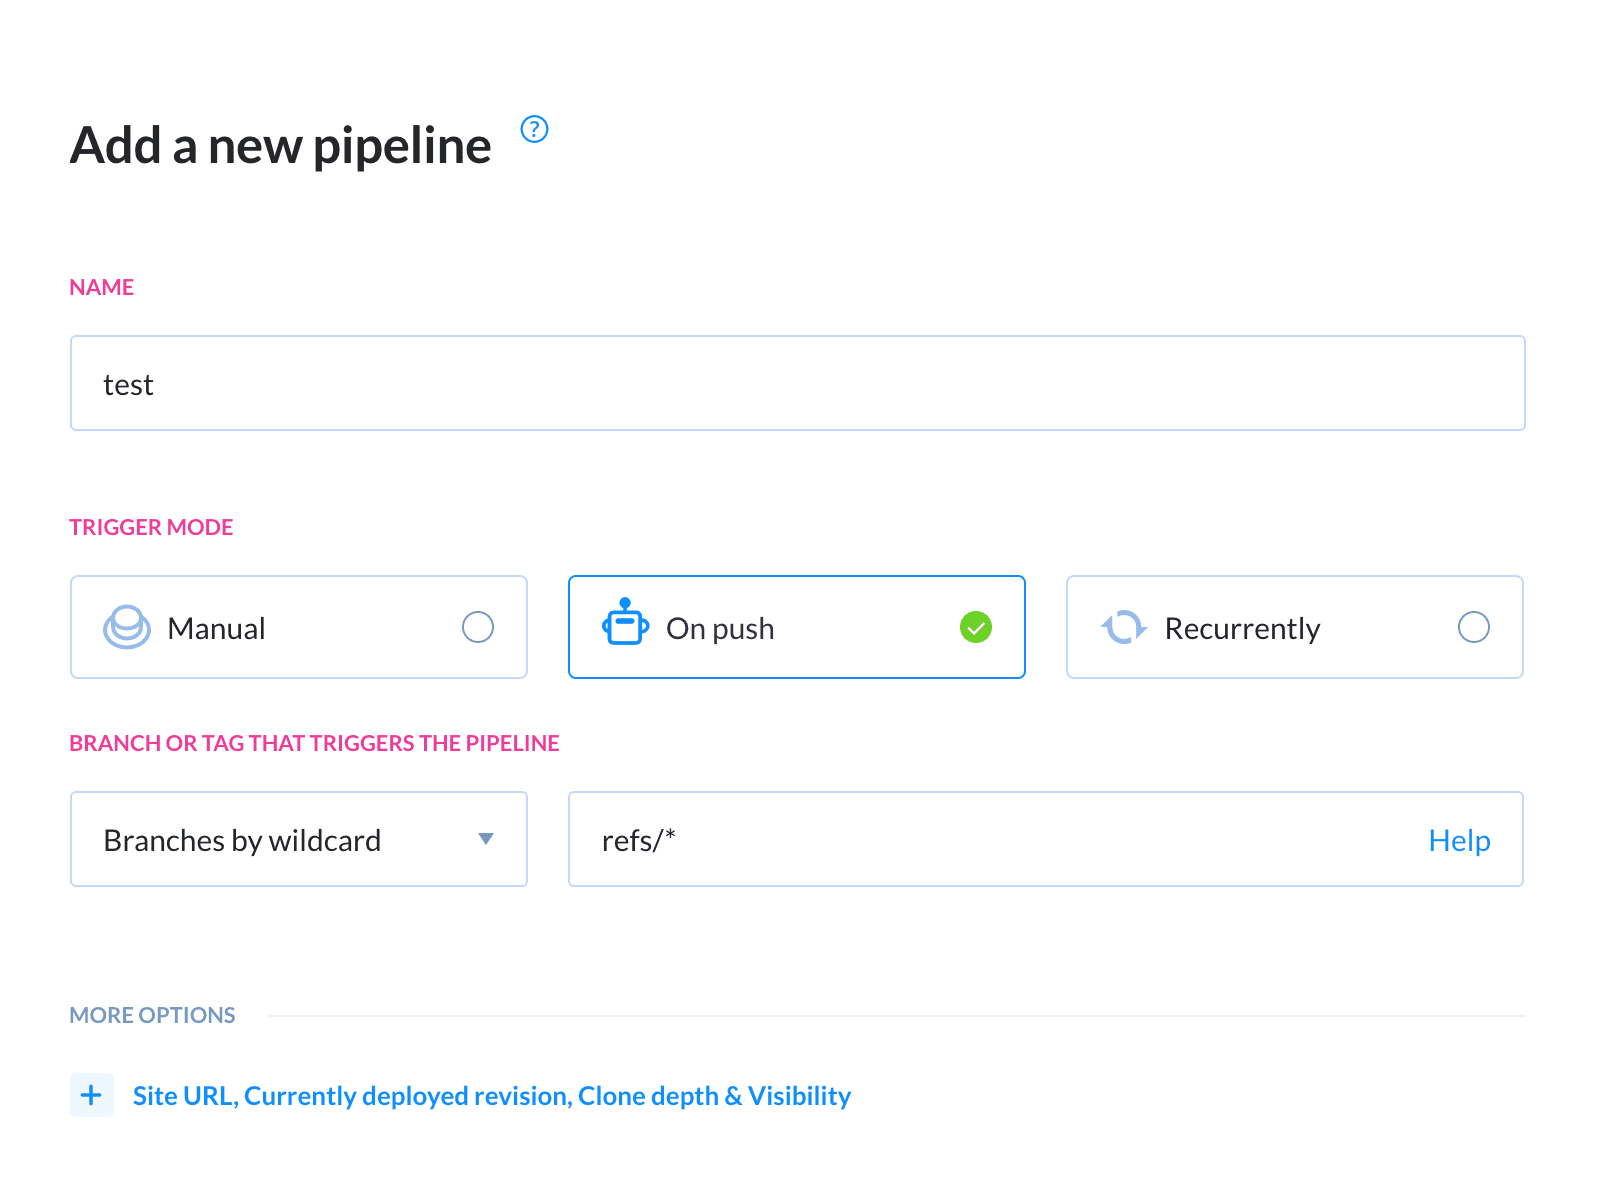
Click Add a new pipeline, enter the name (e.g. "test") and set the trigger mode to On push. Select the Branch by wildcard option from the dropdown and enter refs/* next to it. In this way, your pipeline will be triggered on every newly pushed change:
With the pipeline defined, we can add the PHP action:
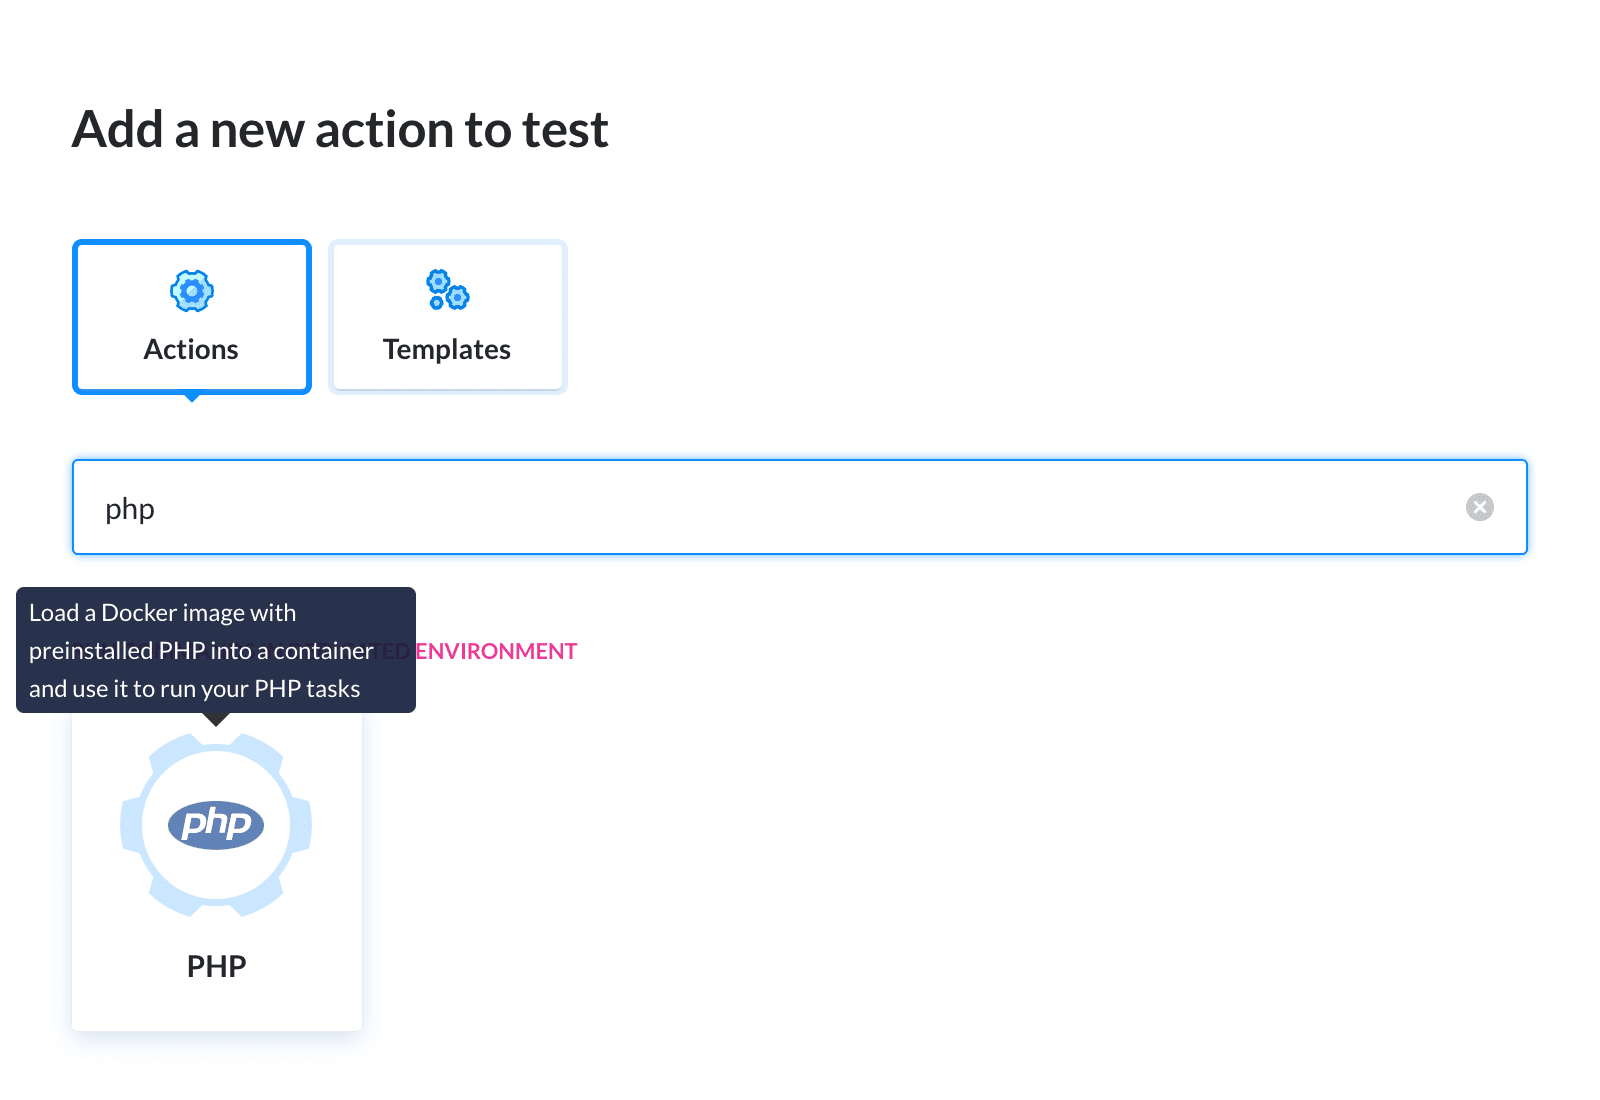
The PHP action is an isolated container with preinstalled PHP and dependencies in which Buddy runs tasks and commands on your code.
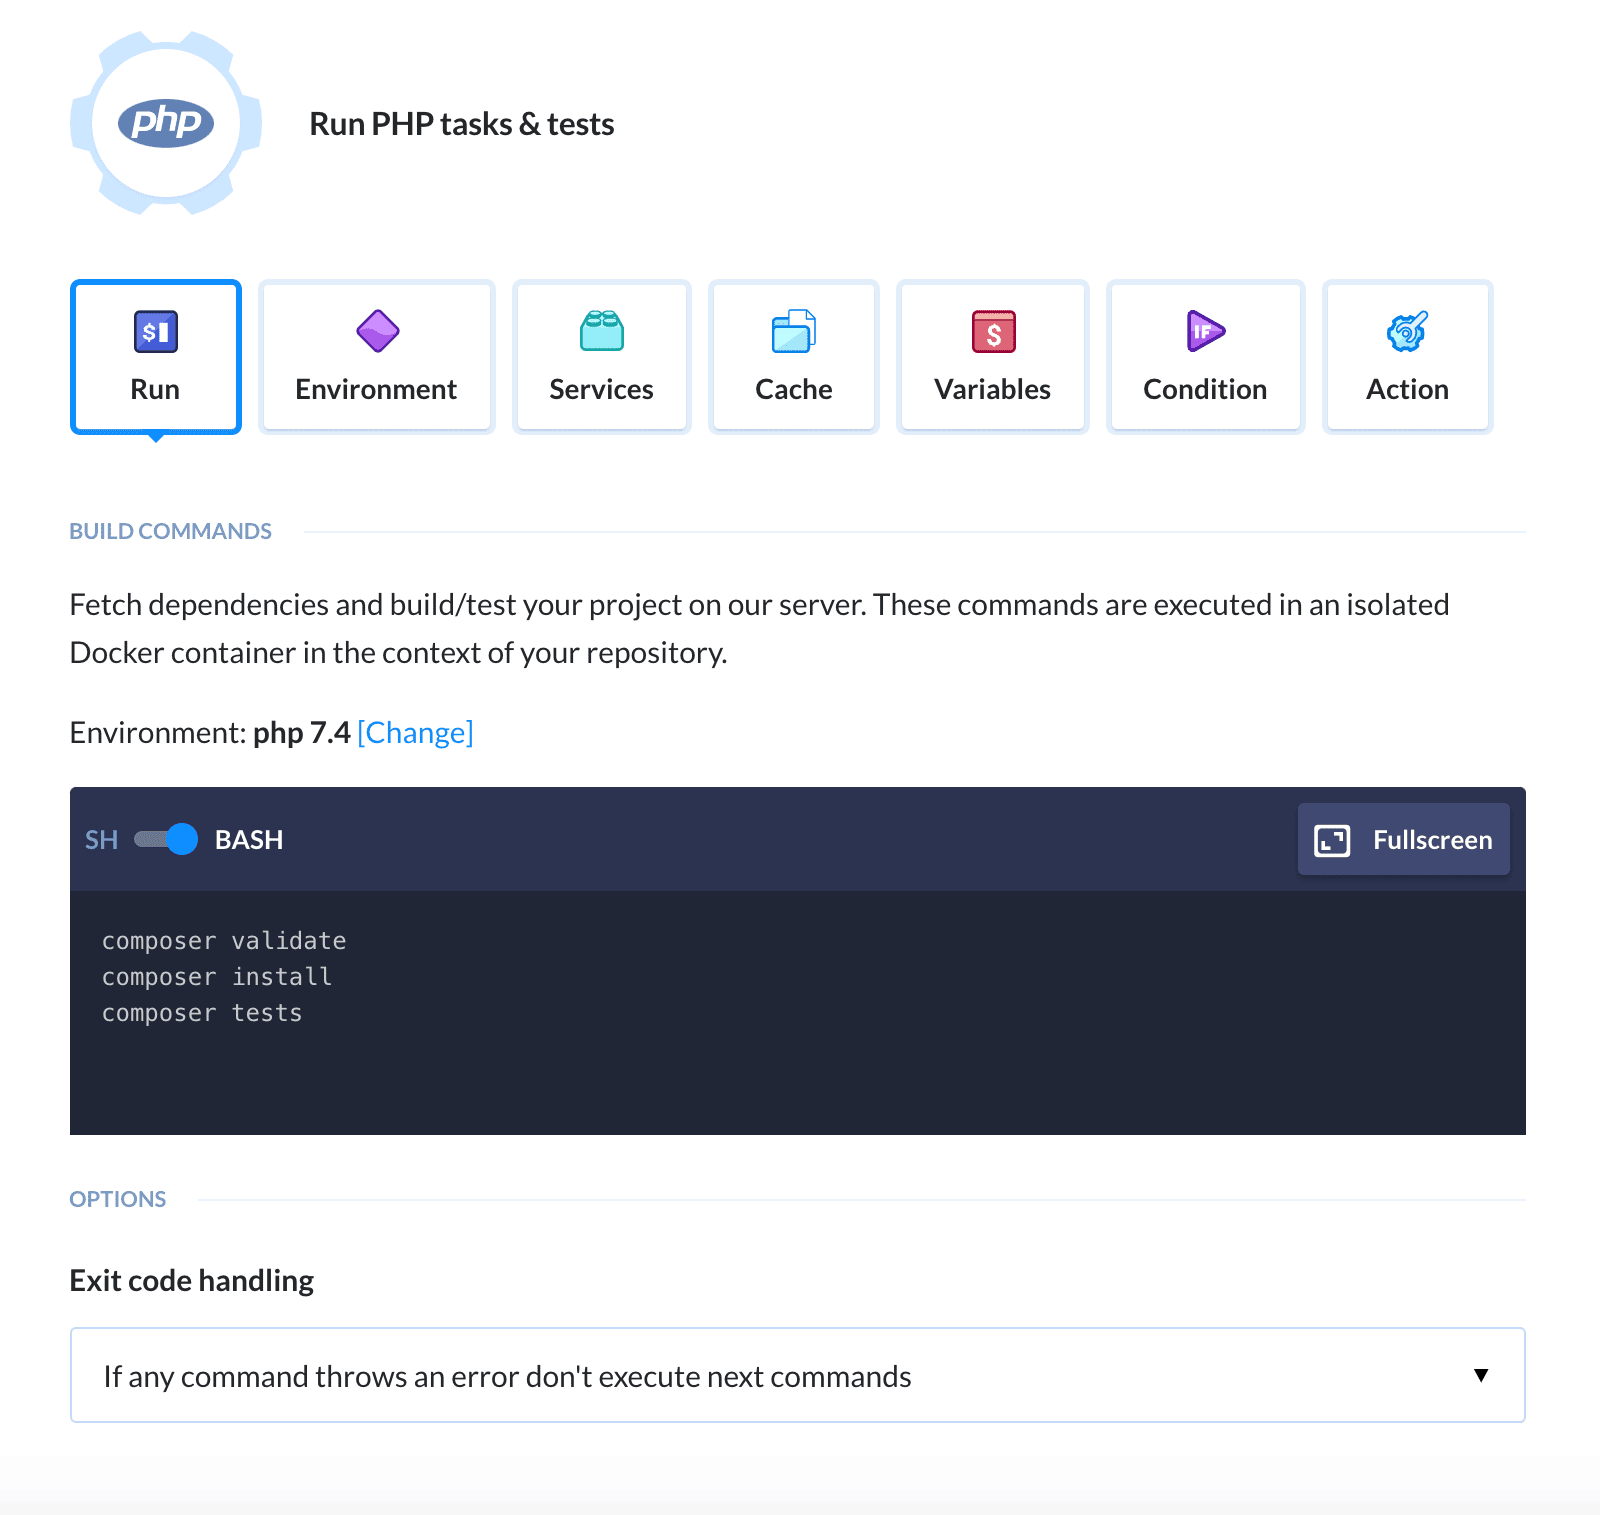
Add the following to the commands box:
composer validate
composer install
composer tests
The pipeline prepared in this way will test our code against every push to the repository, just in line with the principle of Continuous Integration. Time to release our application to production! 👹
Continuous Delivery
For the purposes of this guide, we'll use AWS Elastic Beanstalk to deliver the application to customers. If you wish, you can swap the action with a different hosting service, such as Google App Engine, Heroku or Azure App Service.
Deployment pipeline
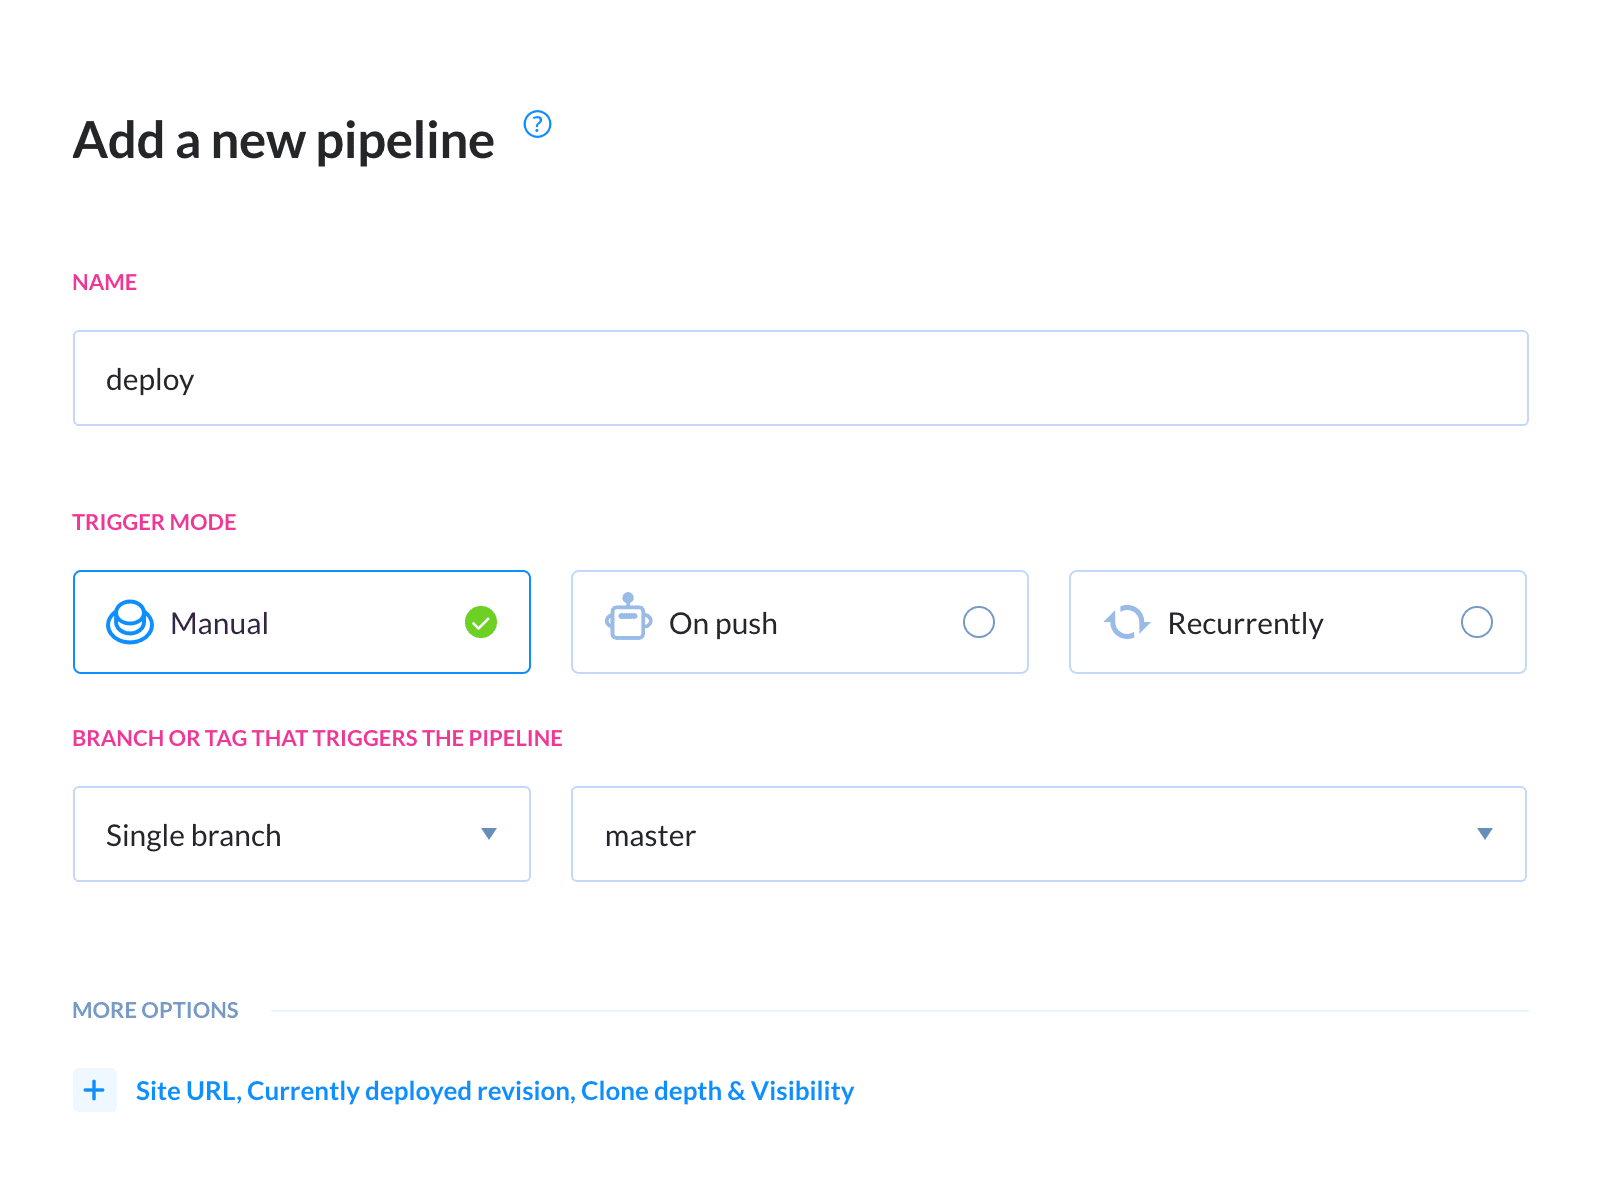
Let's add another pipeline focused on deployment. Set the name to “deploy” and select Master as the source branch. Make sure to set the trigger mode to manual to save yourself from unexpected trouble:
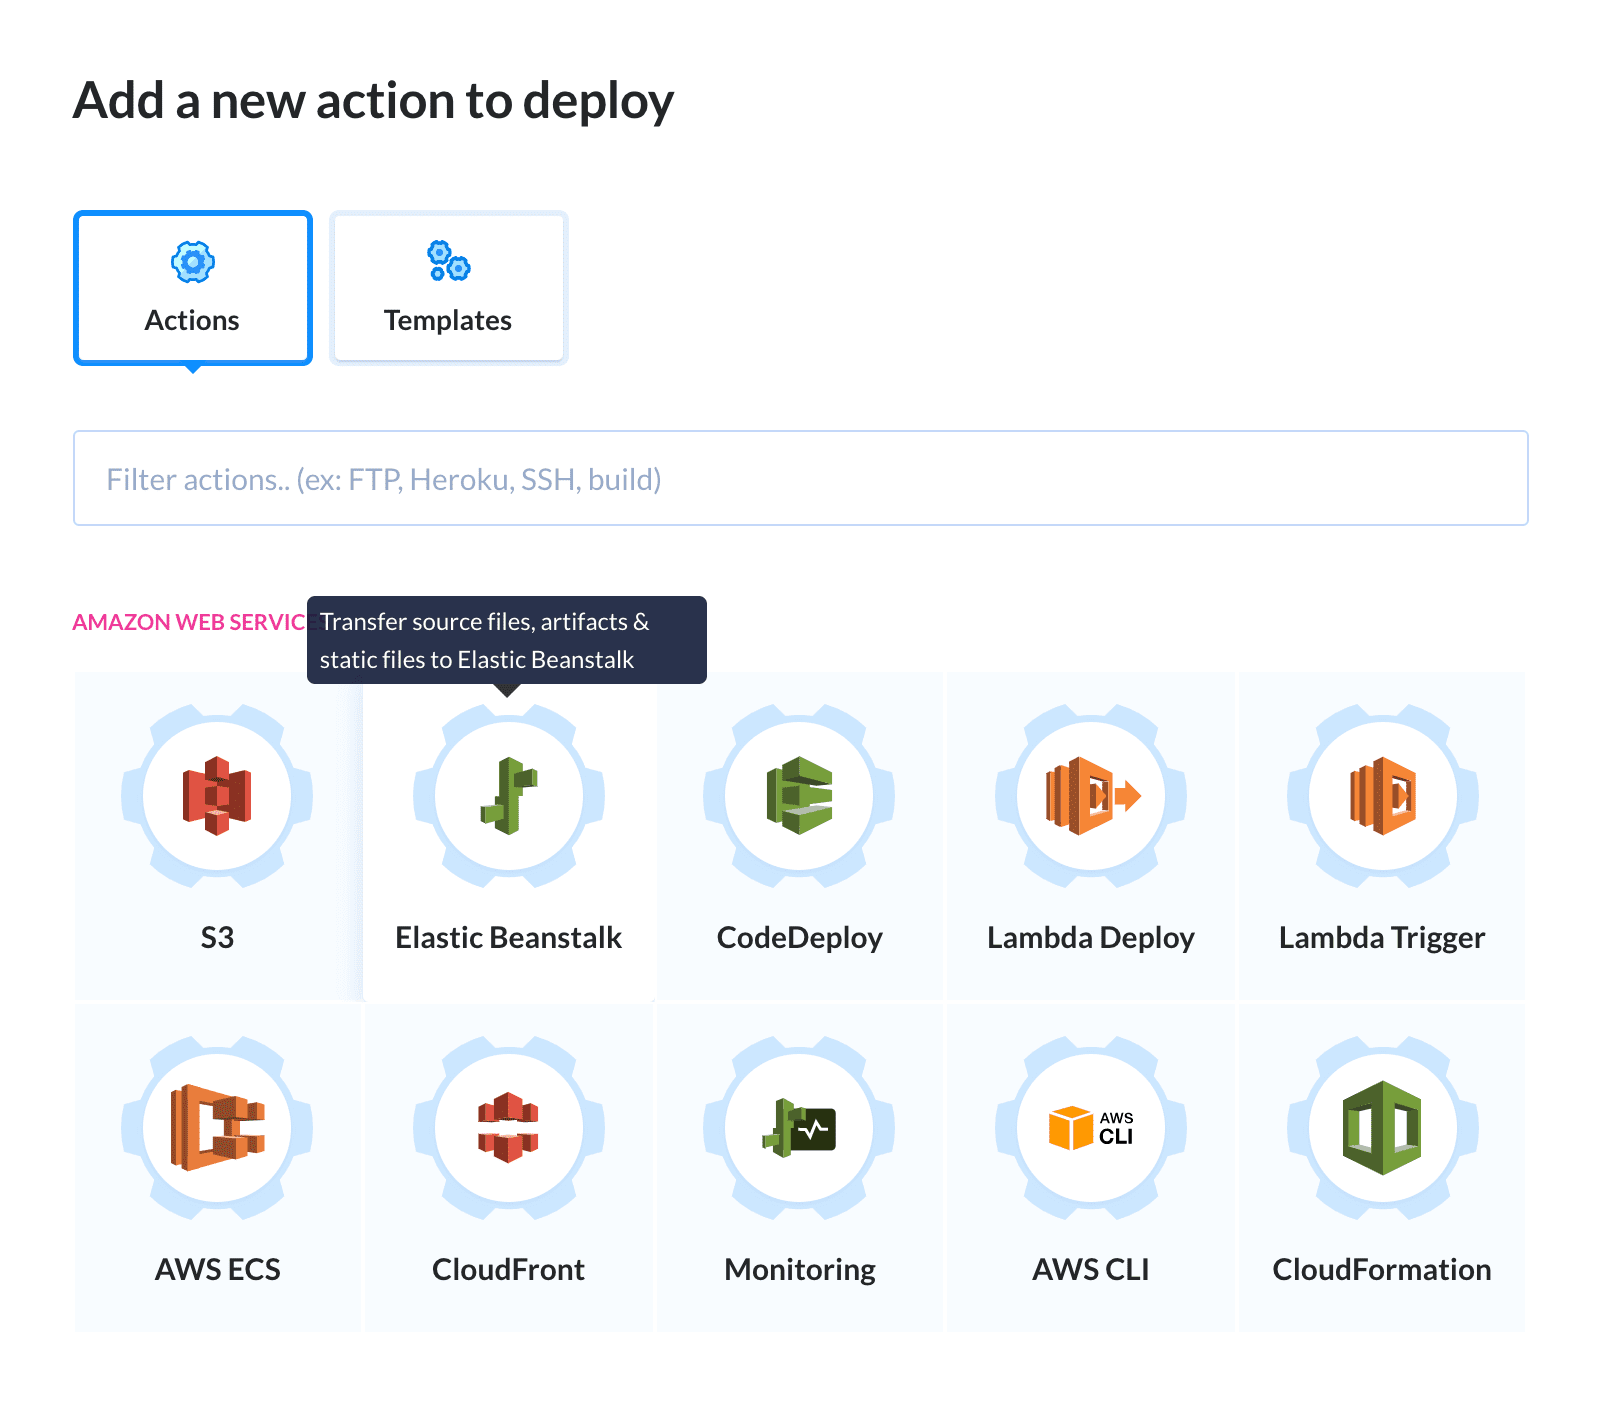
Now, look up the Elastic Beanstalk action in the Amazon action roster:
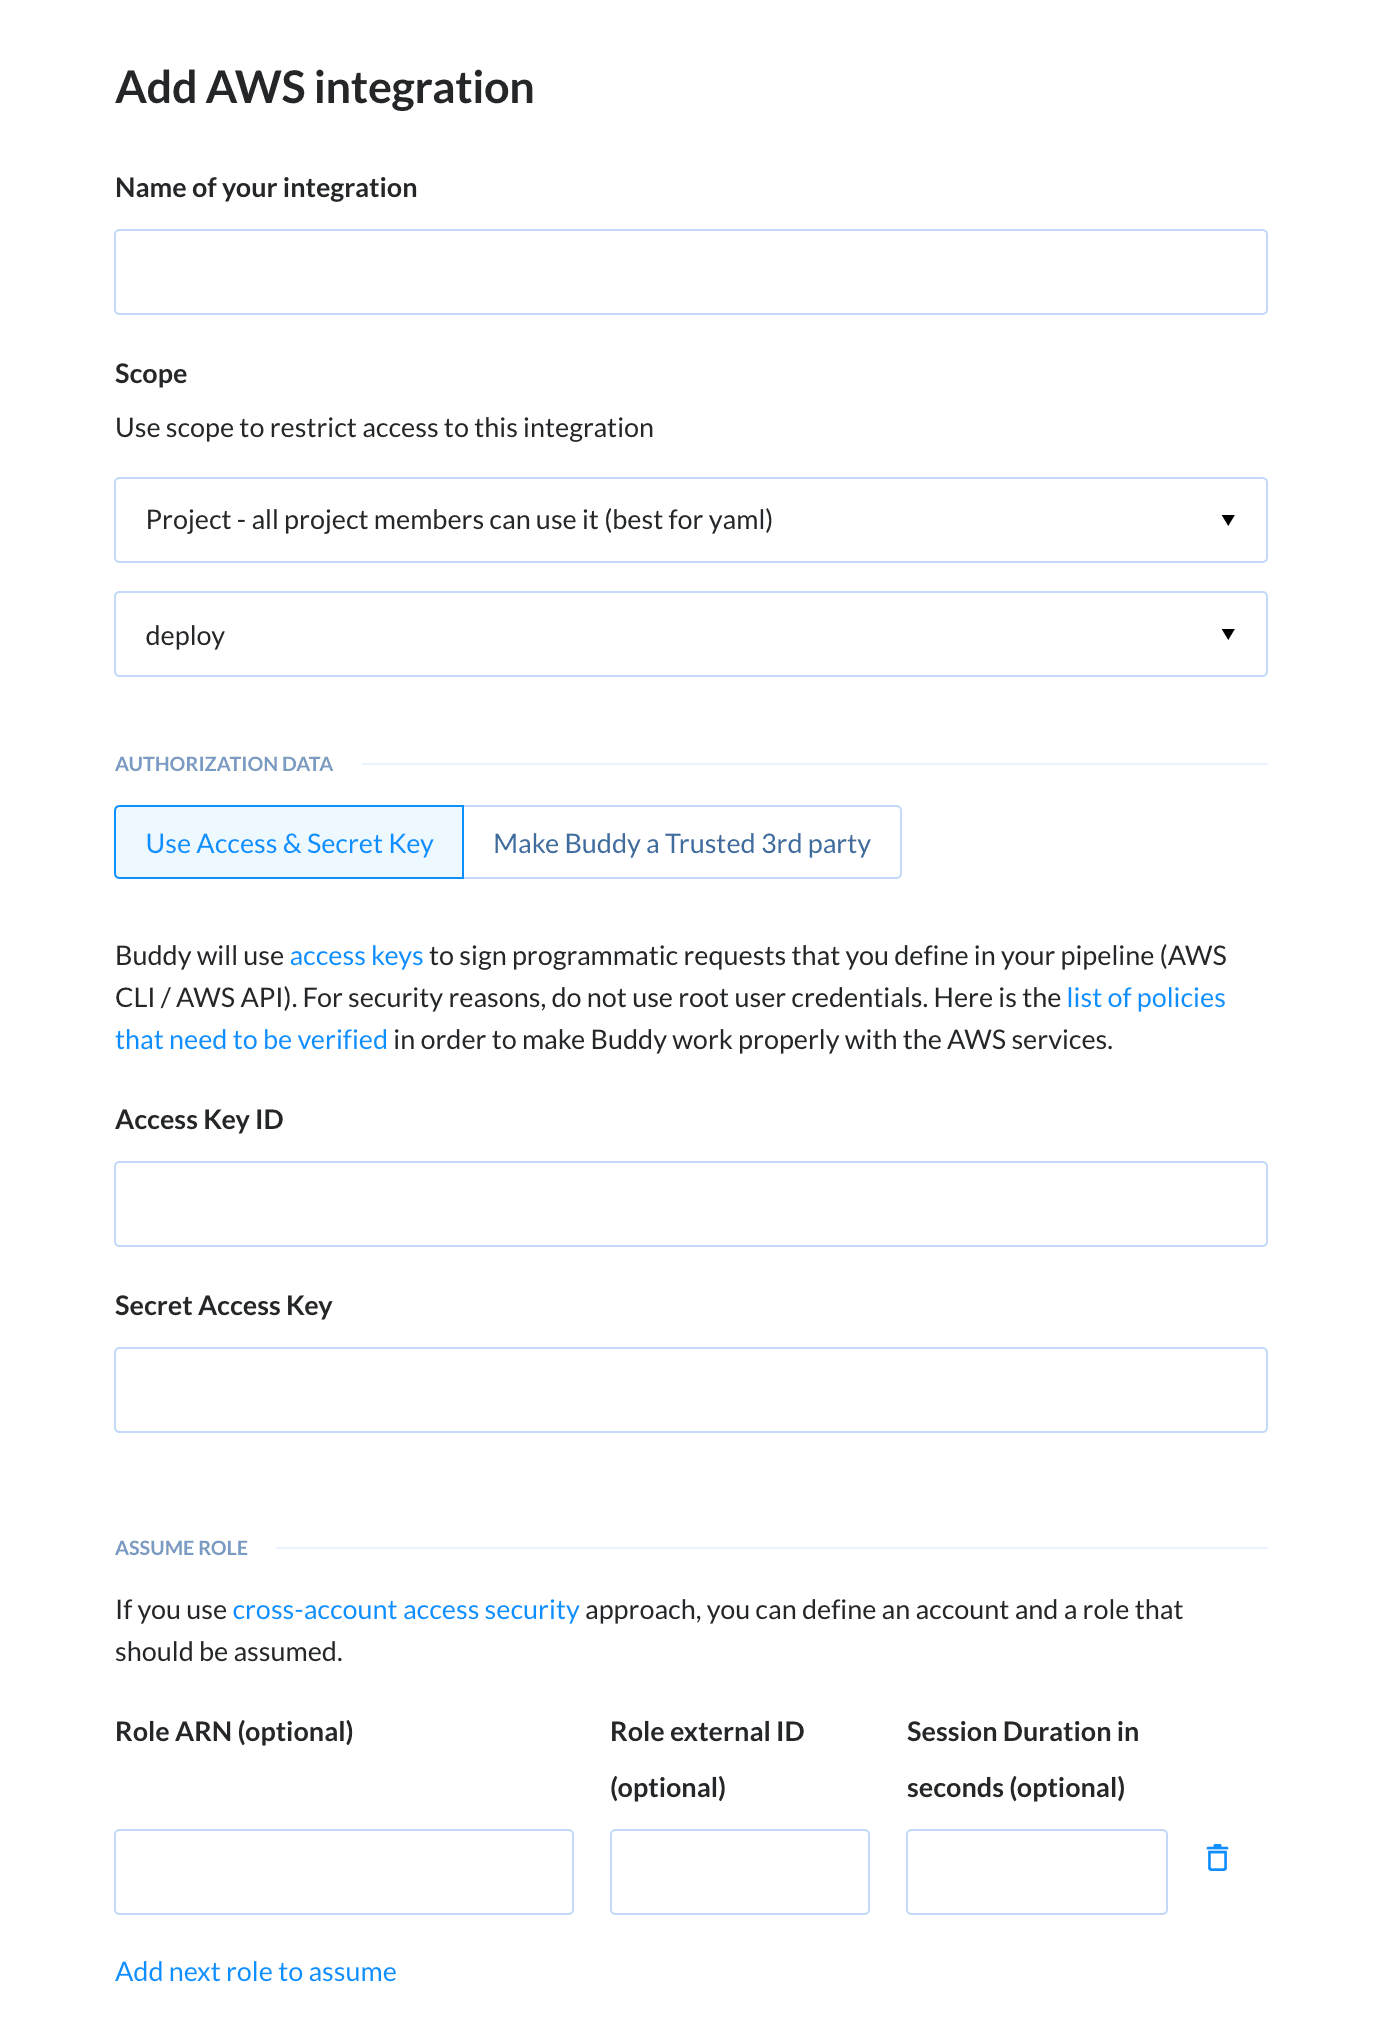
You will be asked to define your integration. You can do it with a key, by making Buddy a trusted 3rd party, or by assuming a role:
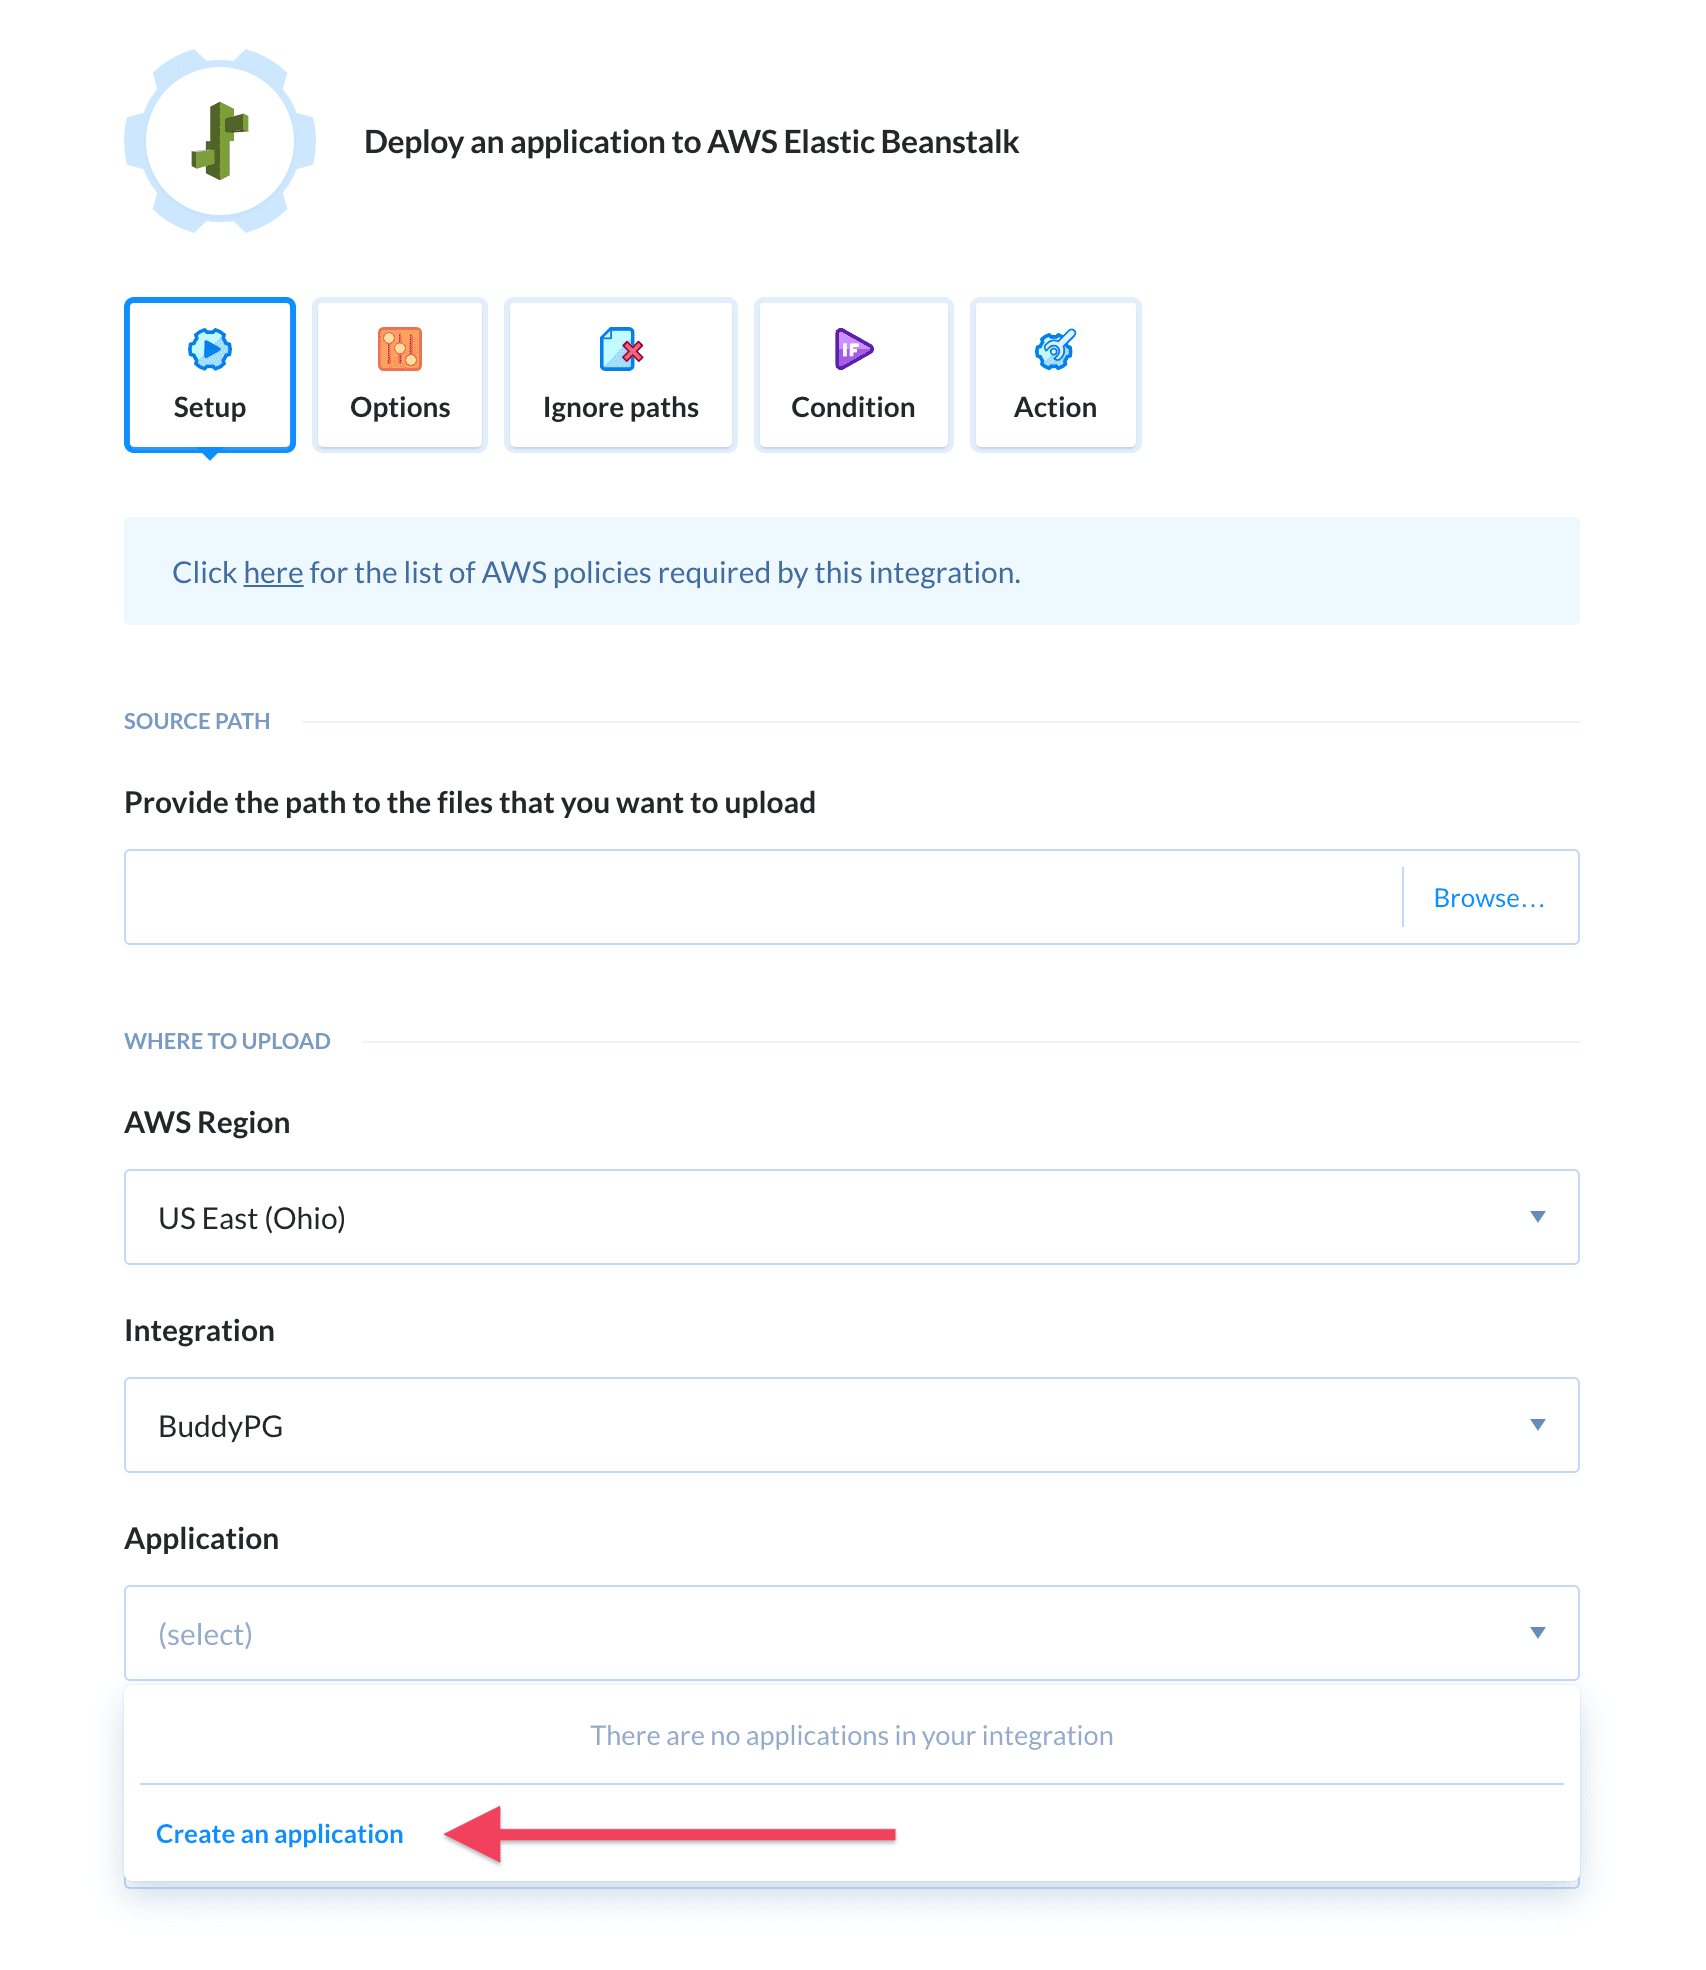
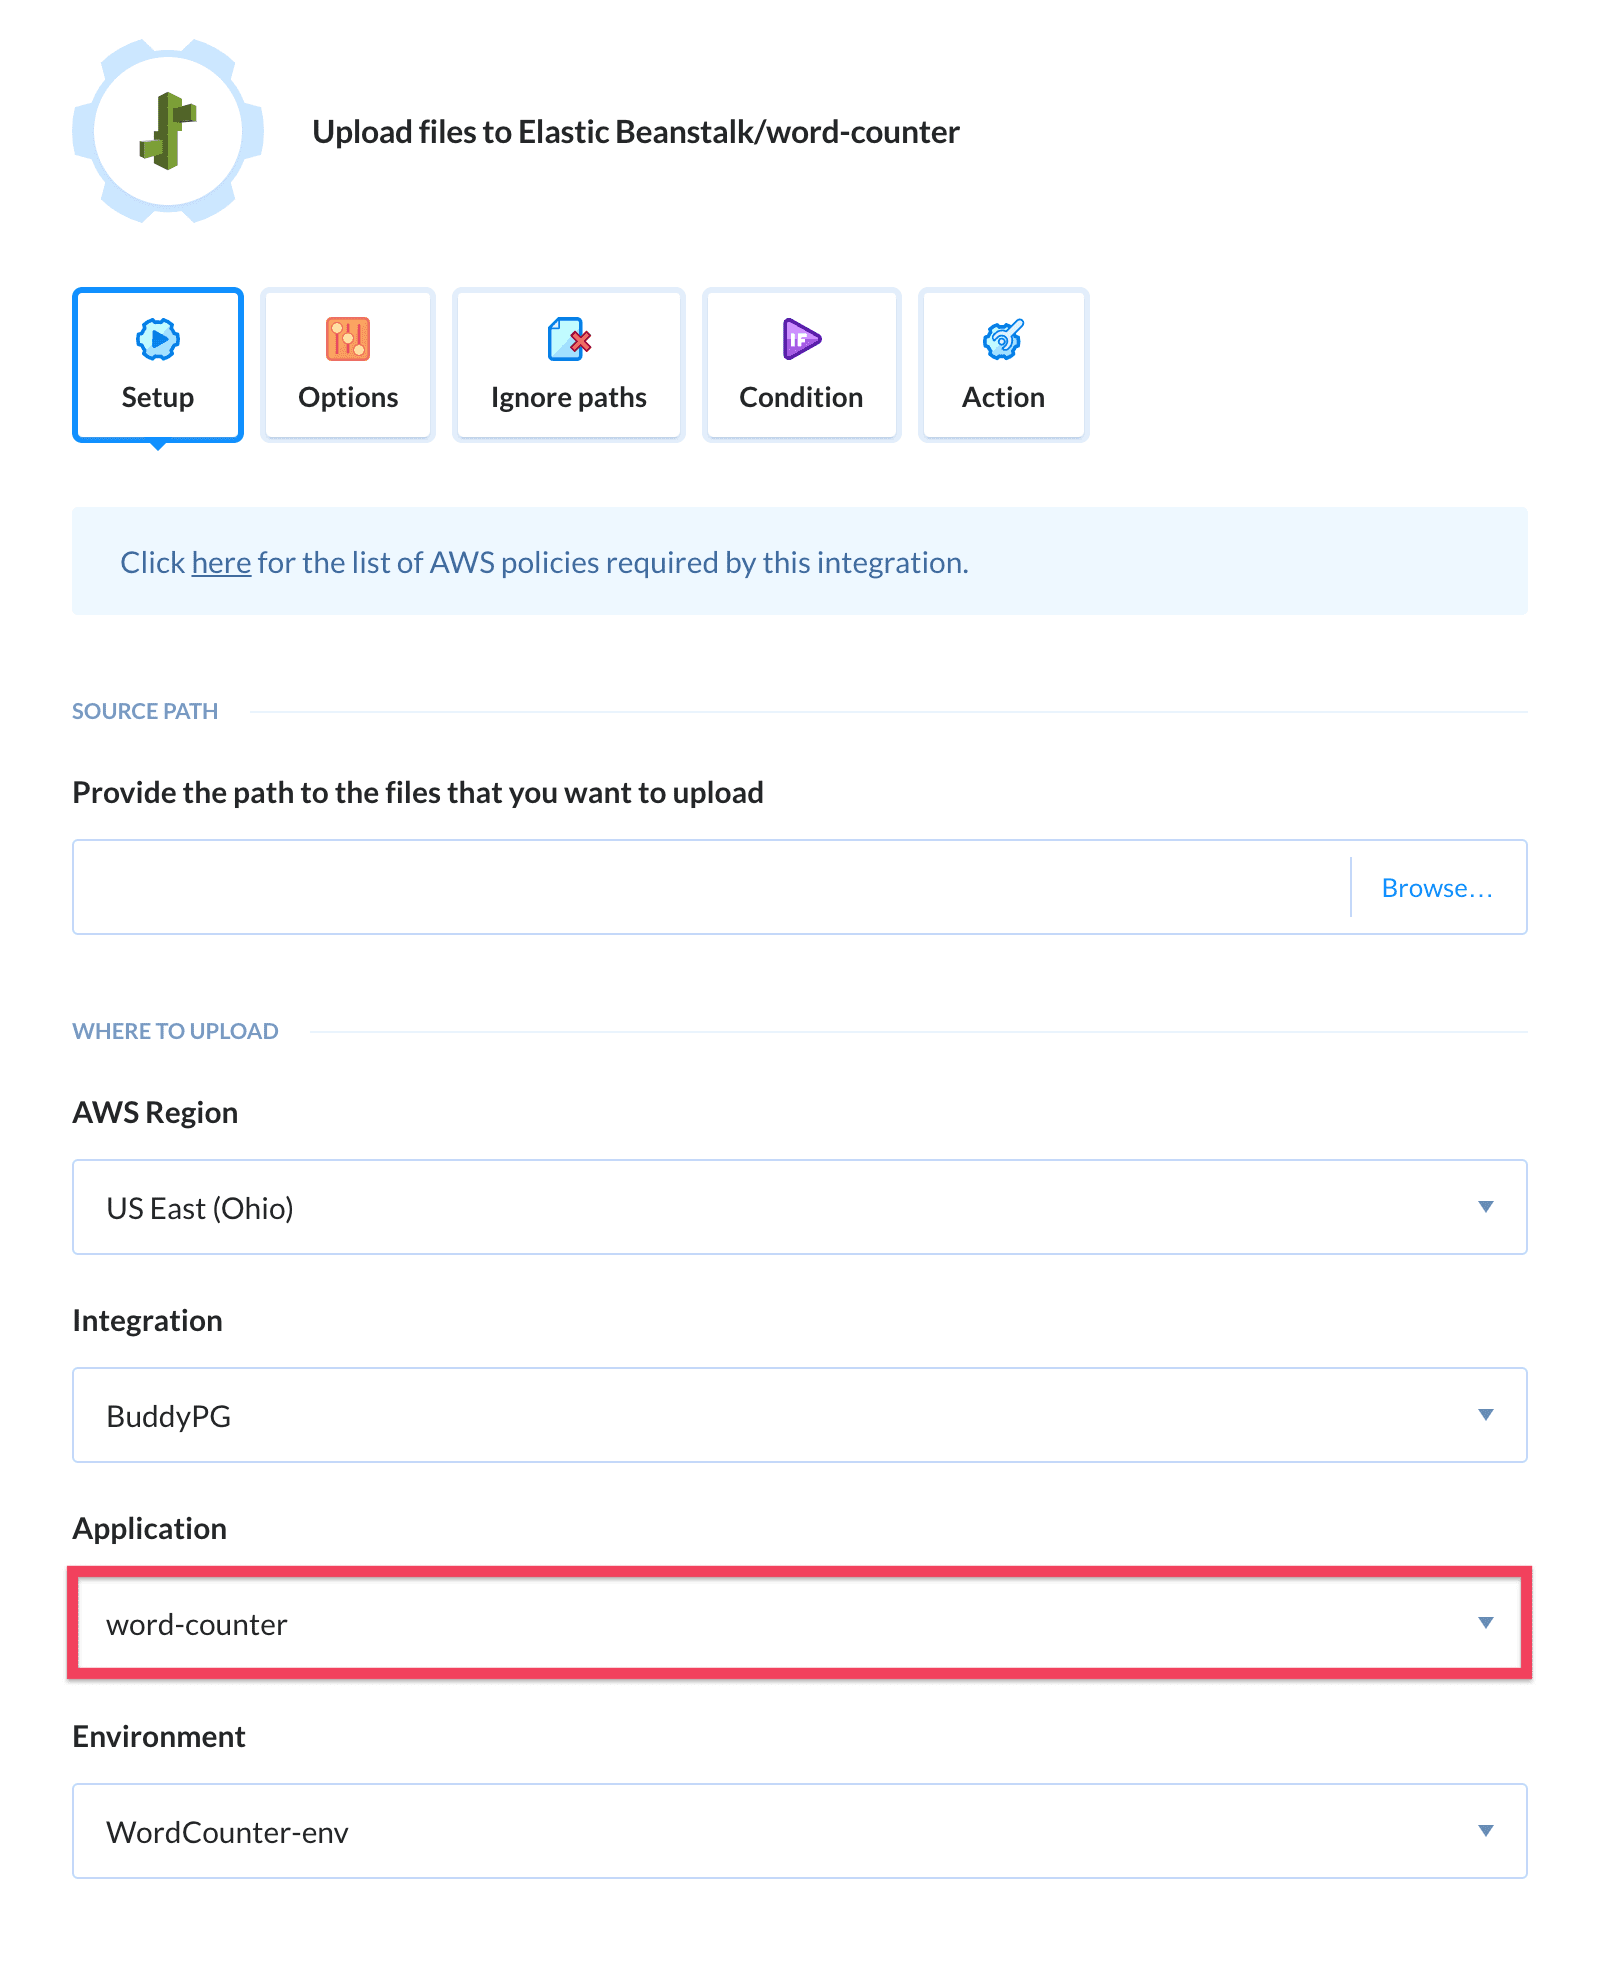
Select your AWS region and choose Create an application on the applications list.
In the AWS console, create a new EBS application and name it “word counter”:

Go back to Buddy and refresh the list of applications. Select "word counter" as the deployment destination.
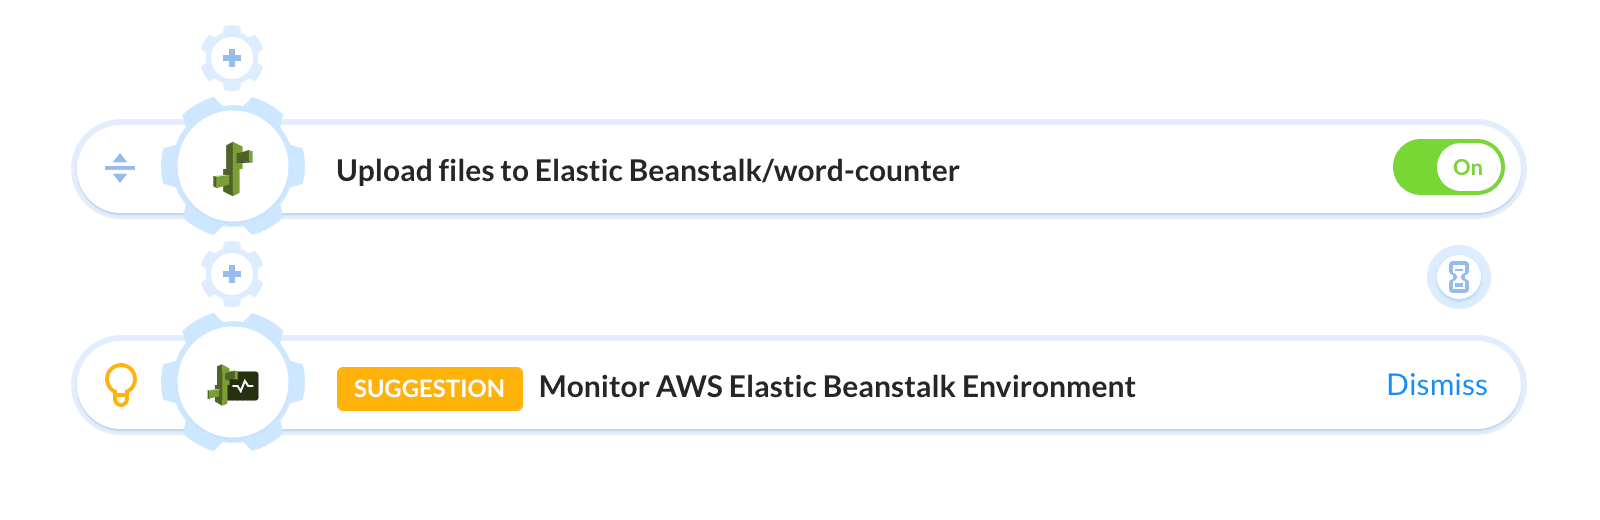
A cool feature of Buddy is that it suggests actions connected with our workflow. In other words, once we add deployment to Elastic Beanstalk, Buddy will propose adding a monitoring action for the EB service:
Once again, we need to choose the region, application, and environment.
Make sure to check the Failed if yellow option, so that you can be 100% sure that the application is up and running after the deployment. We also recommend setting Wait until ready to at least 5 minutes. This way the health checks will be performed only after the entire deployment has finished.
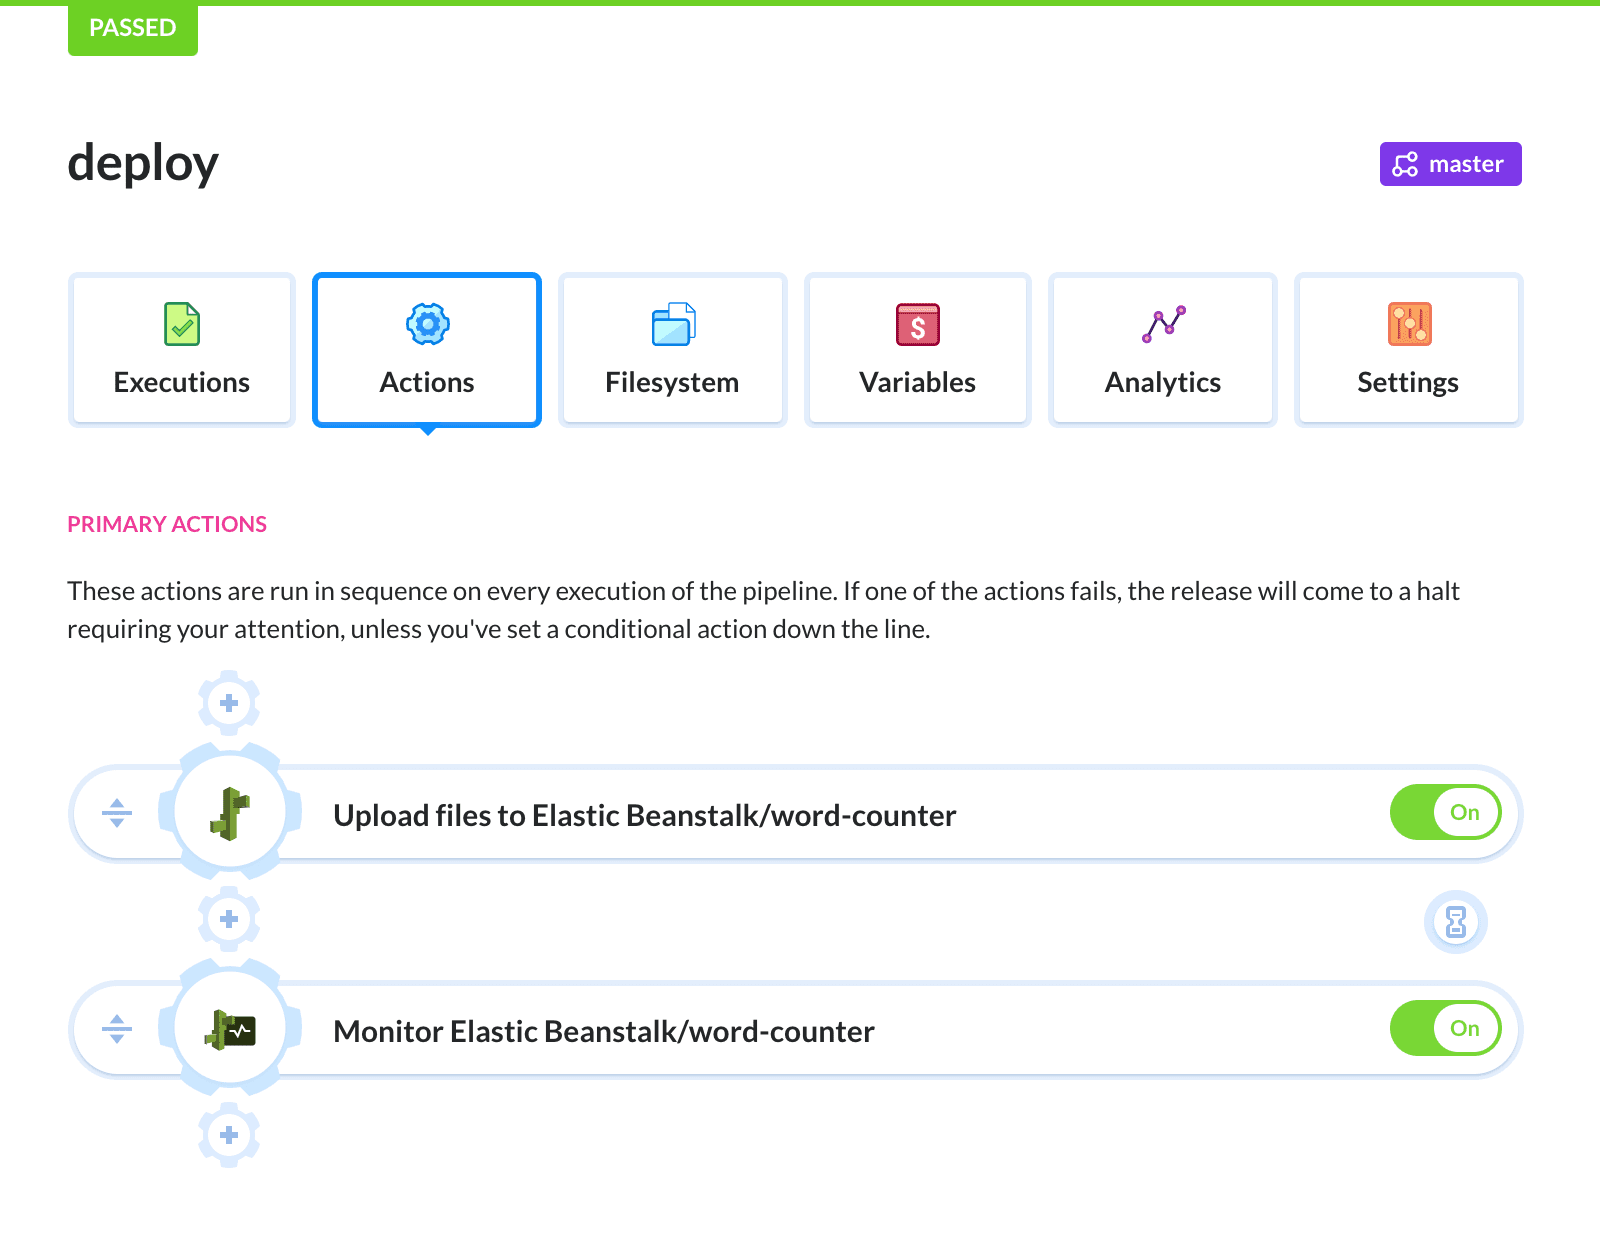
The deployment pipeline now looks like this:
Click the Run button to execute the pipeline. Buddy will fetch the latest version of the application, deploy it to Elastic Beanstalk, and run post-deployment health checks:

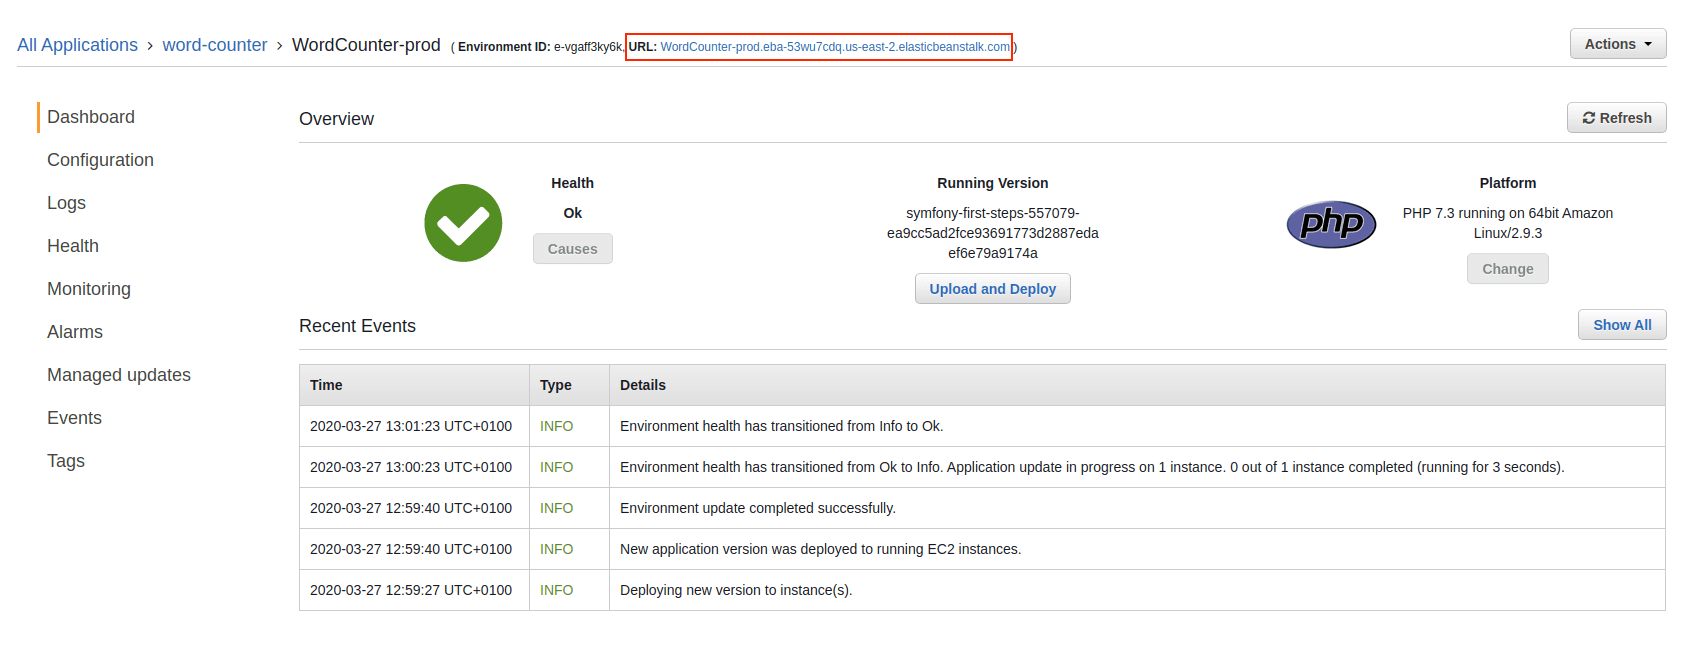
The application is now available from the AWS board:
EBS environment
After the first deployment, our app will not be working properly yet: we need to configure the EBS environment by indicating the main location for the web server. We can do it in the AWS console by modifying the Software section of the application's environment settings. In the Document root field, enter /public as the value:
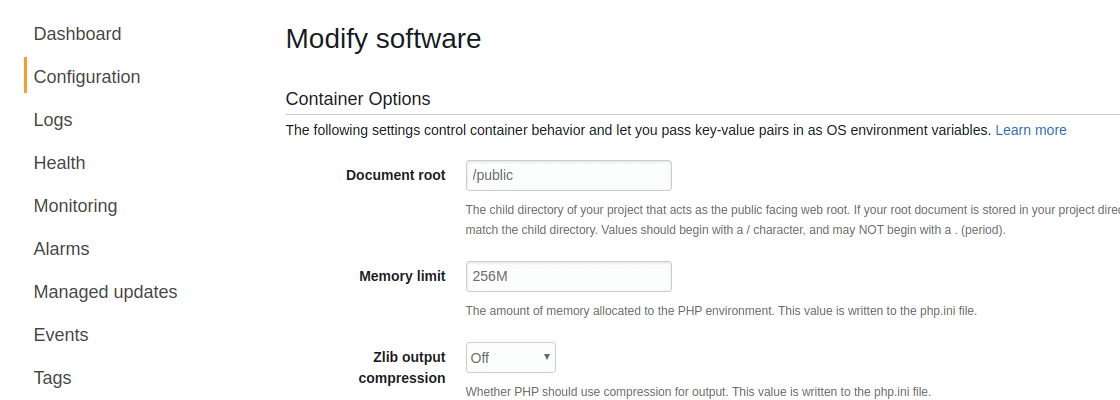
Now we need to wait a bit until AWS uploads the config to the server and we can enjoy a fully working application! 🙌
You can enter the address of your website in the pipeline settings so you can open it directly from Buddy:

Towards Continuous Deployment
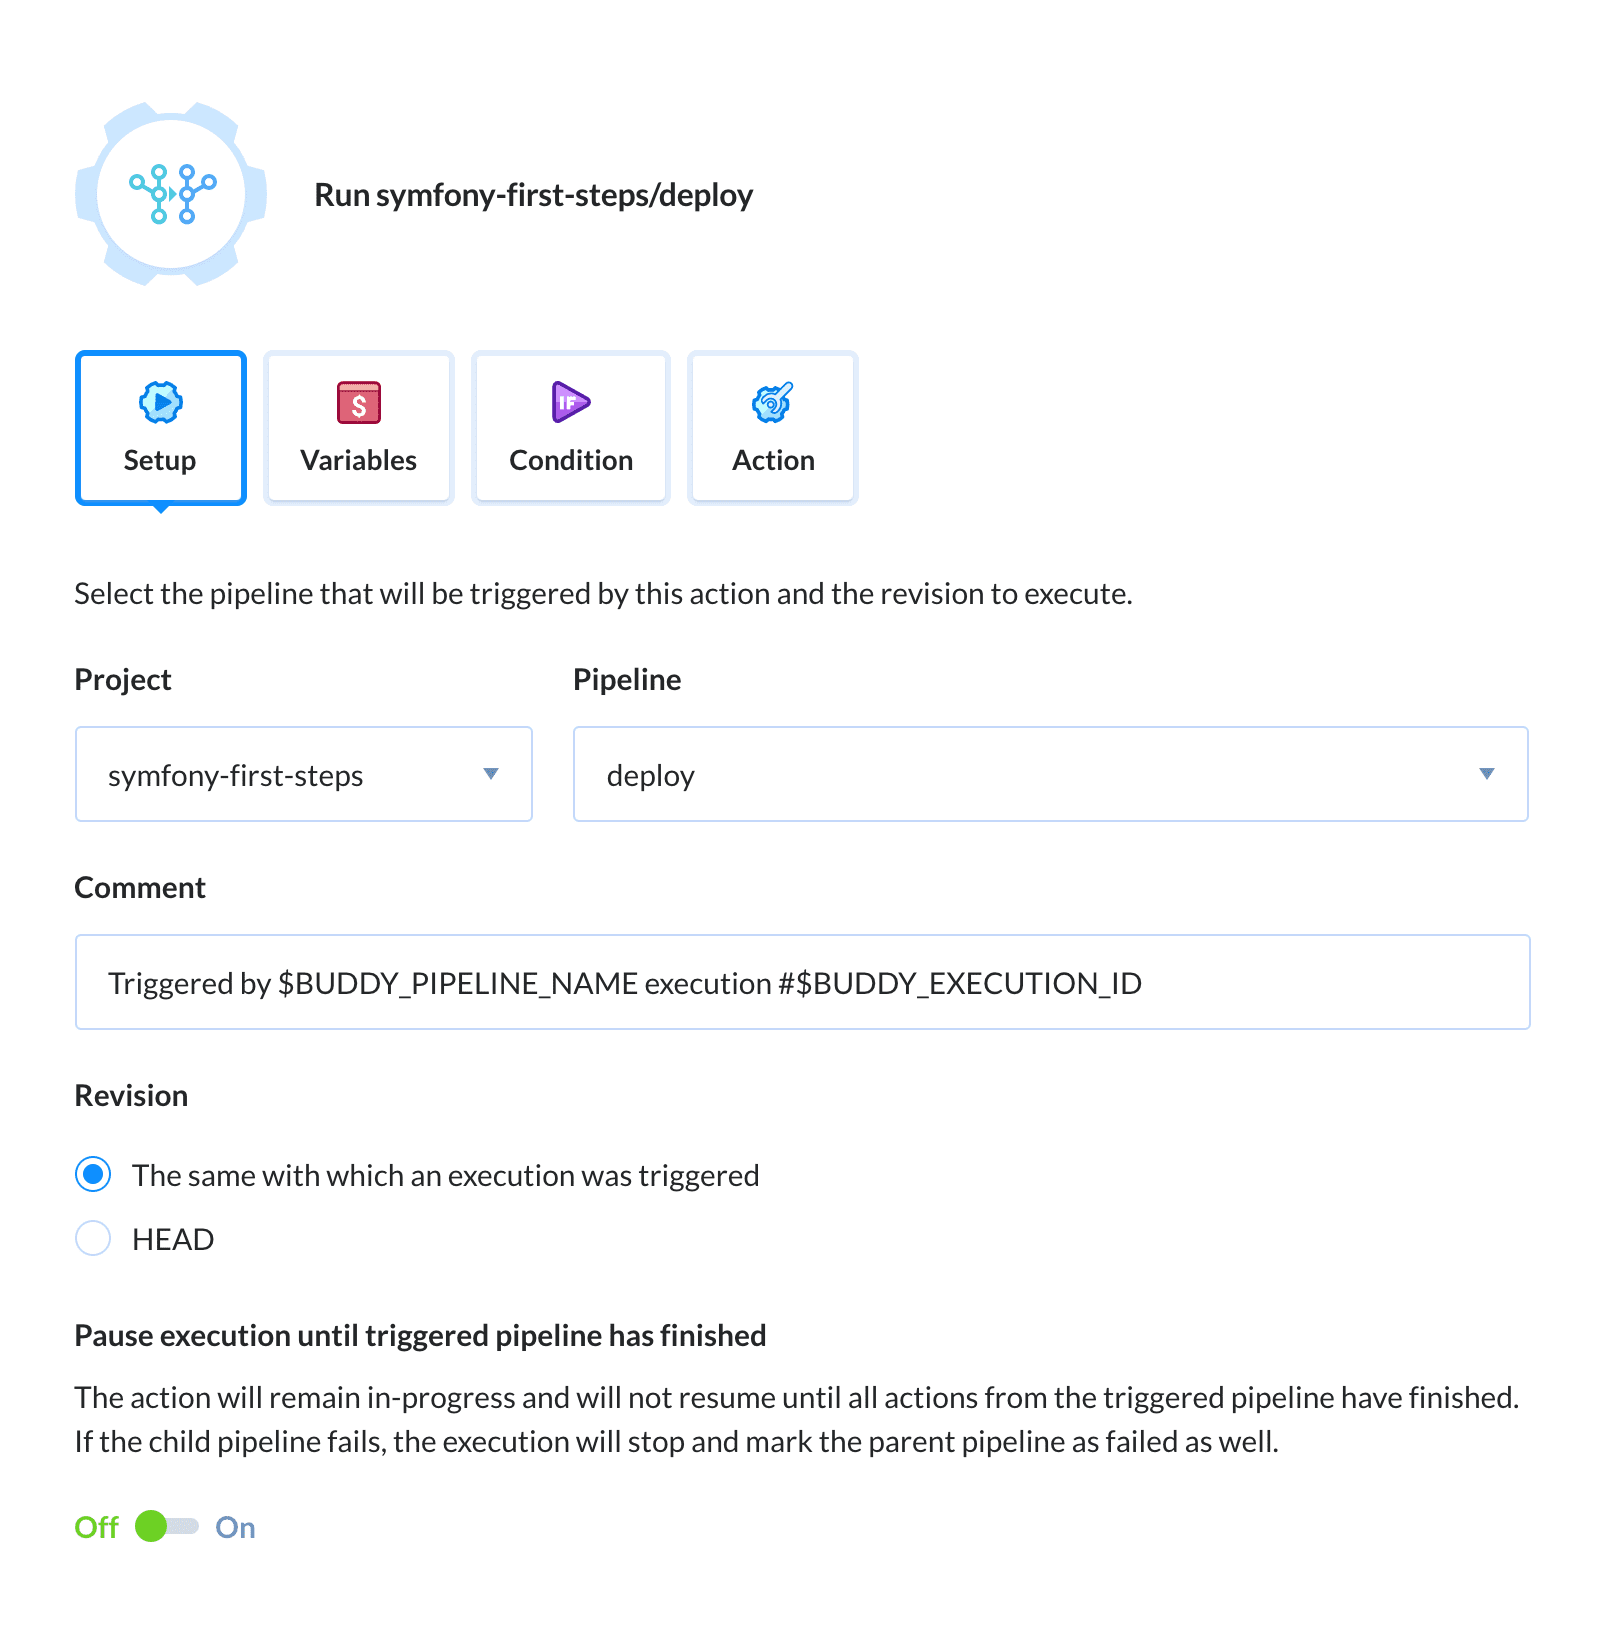
The last step is combining both pipelines into one CI/CD ecosystem. For that we'll use an extra action that will trigger the deployment from the testing pipeline. Go to the pipeline with the PHP and add the action Run another pipeline at the end:
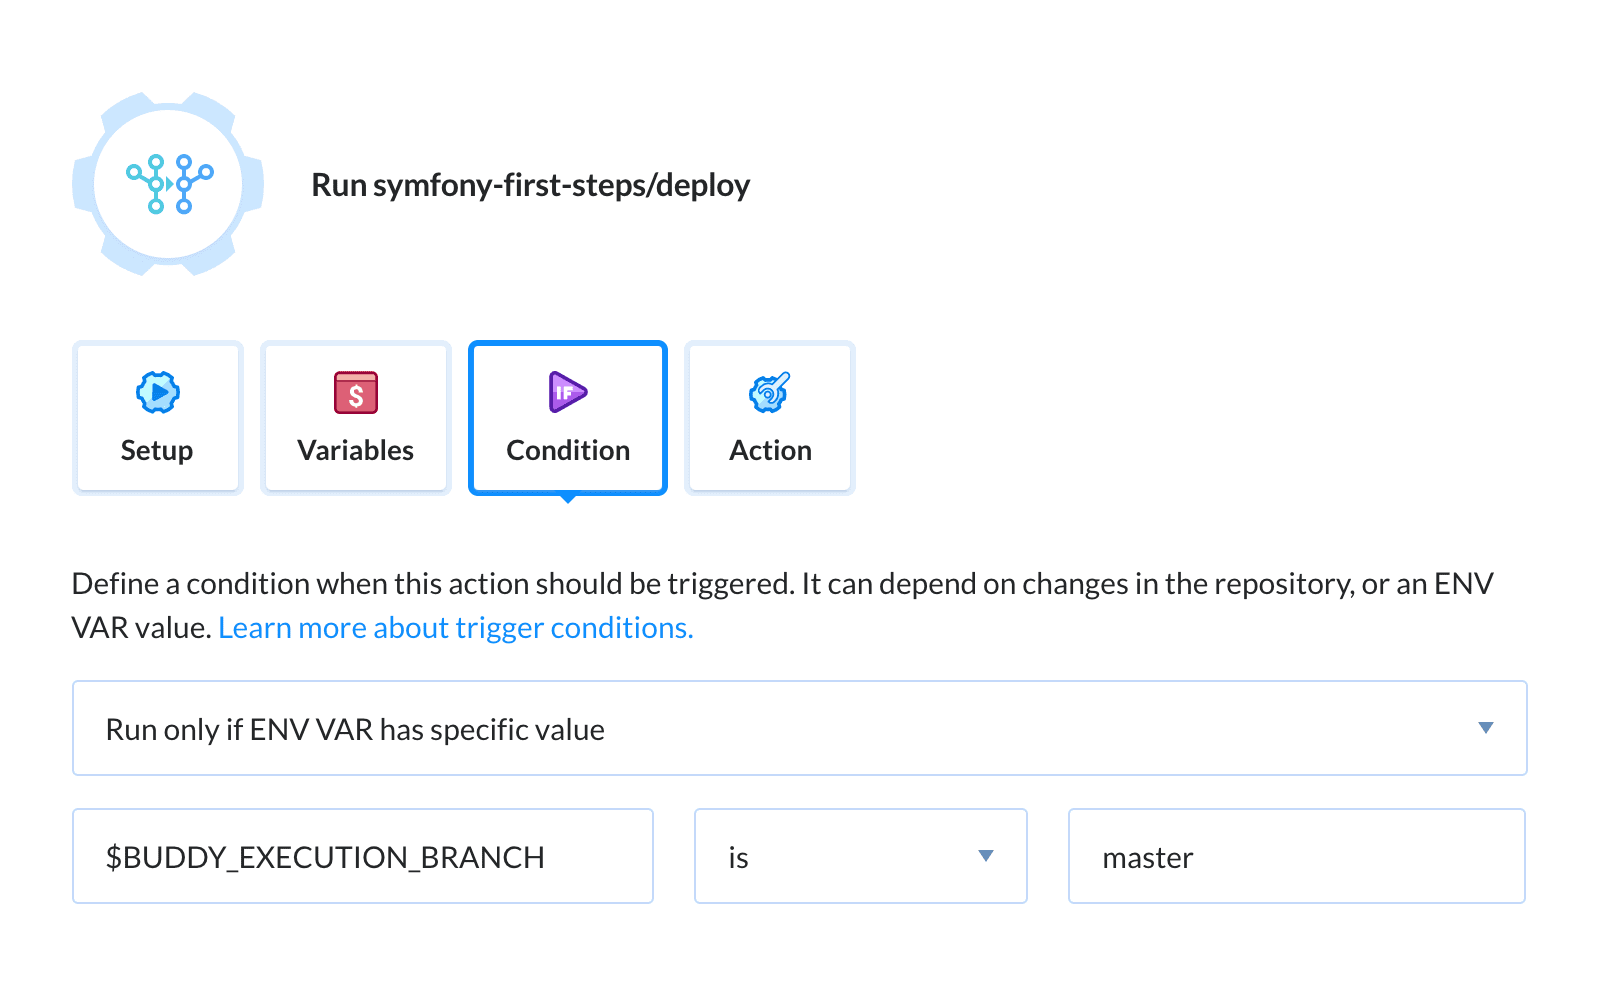
As you remember, the tests are executed for all branches in the project. However, since the deployment is restricted to the master branch only, we don't need to trigger it for pushes made to other branches. That's why we'll apply a trigger condition that will run the action only if the tests ran successfully on the master branch:
- Go to the Condition tab and select the ENV VAR from the dropdown list
- Set the variable to
$BUDDY_EXECUTION_BRANCHand the value tomaster
In this way, we were able to build a fully automatic deployment pipeline. Every time your code will be pushed to the master branch (e.g. as a result of accepting a merge request) it will also be tested. If all the tests pass correctly, another pipeline will be launched that will deploy your application to production. As you can see, from the moment you push your code, everything will happen automatically. Employing this kind of delivery process is called Continuous Deployment.
Contrary to Continuous Delivery, deployment to Production in Continous Deployment is full automatic. We do not recommend this kind of workflow for large-scale projects unless you run a 100% reliable DEV > STAGE > PRODUCTION environment densely covered with unit, integration, and end-to-end tests on every step of development.
Bonus: Conditional notifications
One more cool feature of Buddy are conditional notifications. For example, you can add a messaging service like Slack or Discord that will send a message to your QA team in case the tests have failed, or inform your DevOps team that something went wrong during the deployment. Such approach protects you from being flooded with irrelevant information and allows your team to quickly take action if required.
To send a notification whenever a pipeline fails, add it to Actions run on failure right below the primary actions:

Summary
Thank you for reading the guide, I hope everything worked as expected! 😎 Feel free to leave your questions and suggestions in the comments, or contact us via the live-chat – the support team is always super responsive when it comes to solving delivery problems or helping debug a deployment issue. Below you'll find some more resources that will help you optimize your PHP workflow (and learn a bit more about Buddy).
Cheers!
Arek
Related read
- Buddy Actions explained – all actions of Buddy arranged in categories and explained in detail
- 5 ways to deploy PHP applications – from git pull to Docker, choose the best deployment method for your workflow
- 11 examples of CI/CD pipelines – the most popular use-cases of day-to-day development automation
- How to use MySQL in PHP builds – learn how to properly attach the MySQL service to build containers