如何准备与恢复WordPress备份
According to w3techs.com WordPress is the most popular CMS in the world with over 62% of market share. What's more, one third of the global web is built on Wordpress and the number is still rising.
With such significant numbers in play one would think the websites are respectively secured in case of possible data loss. Unfortunately, the majority of developers still think of WP backups as something extremely complicated and not worth the time invested. However, it all boils down to writing a couple of scripts or using a backup plug-in.
In this guide we'll show you how to prepare a backup of your WordPress instance and turn it into an automatic daily process with BuddyWorks.
Actions used in this guide:
Why you should backup your WordPress site
- With WordPress you can use countless plug-ins and themes to configure your site + customize it with your own code. This means that you can introduce changes that will mess it up, too.
- If the plug-in that you used is broken, or you accidentally left a breach in code, there's a risk your website gets hacked and will need immediate backup.
- There's always a risk that the server with your website goes down, however minor it can be.
Preparing WordPress backup with WP-CLI
This guide requires SFTP to be installed on your server.
To prepare the backup we'll use WP-CLI. It's a very handy tool to run WP-related tasks, such as creating new WP instances, or updating and activating themes and plugins. Let's configure it to backup and restore your CMS.
Install WP-CLI
Log in to the server and open the directory with your WP instance. Download WP-CLI using
curl -O https://raw.githubusercontent.com/wp-cli/builds/gh-pages/phar/wp-cli.phar
Once you do it, you can check if everything's installed properly with
php wp-cli.phar --info
Backup database
To fully backup your website, you need to secure the files of your WP engine together with themes and plug-ins, and make a backup of your database:
php wp-cli.phar db export databasefile.sql
The databased will be dumped as an SQL file into the directory with your WP instance.
WP export
A good practice is to perfom wp export which generates an XML file containing authors, terms, posts, comments, and attachments. Such backup is useful in case we broke our WP instance and instead of restoring it in full we'd like to create a new WP instance and fill it with previous content.
php wp-cli.phar export
The export will be dumped to the directory with your WP instance.
Zip your backup
The last part is zipping the folder with your WP instance together with the exports that we did before. Just run the command with the path to your instance:
tar --create --gzip --verbose --absolute-names --file=/wp_backups/backup-$(date +%Y-%m-%d-%H).tar.gz -C $PATH_TO_WP_INSTANCE .
Keep your backups in safe place
Once the backup file is created, you should download and store it somewhere safe, be it your own computer or another server:
scp user@1.2.3.4:/wp_backups/backup-$(date +%Y-%m-%d-%H).tar.gz ./
You can also upload the file to DropBox, Amazon S3, or any other cloud storage.
Automate backups with BuddyWorks
Daily backups
Sign up at https://buddy.works with your GitHub/Bitbucket profile
Select the repository with your WordPress files
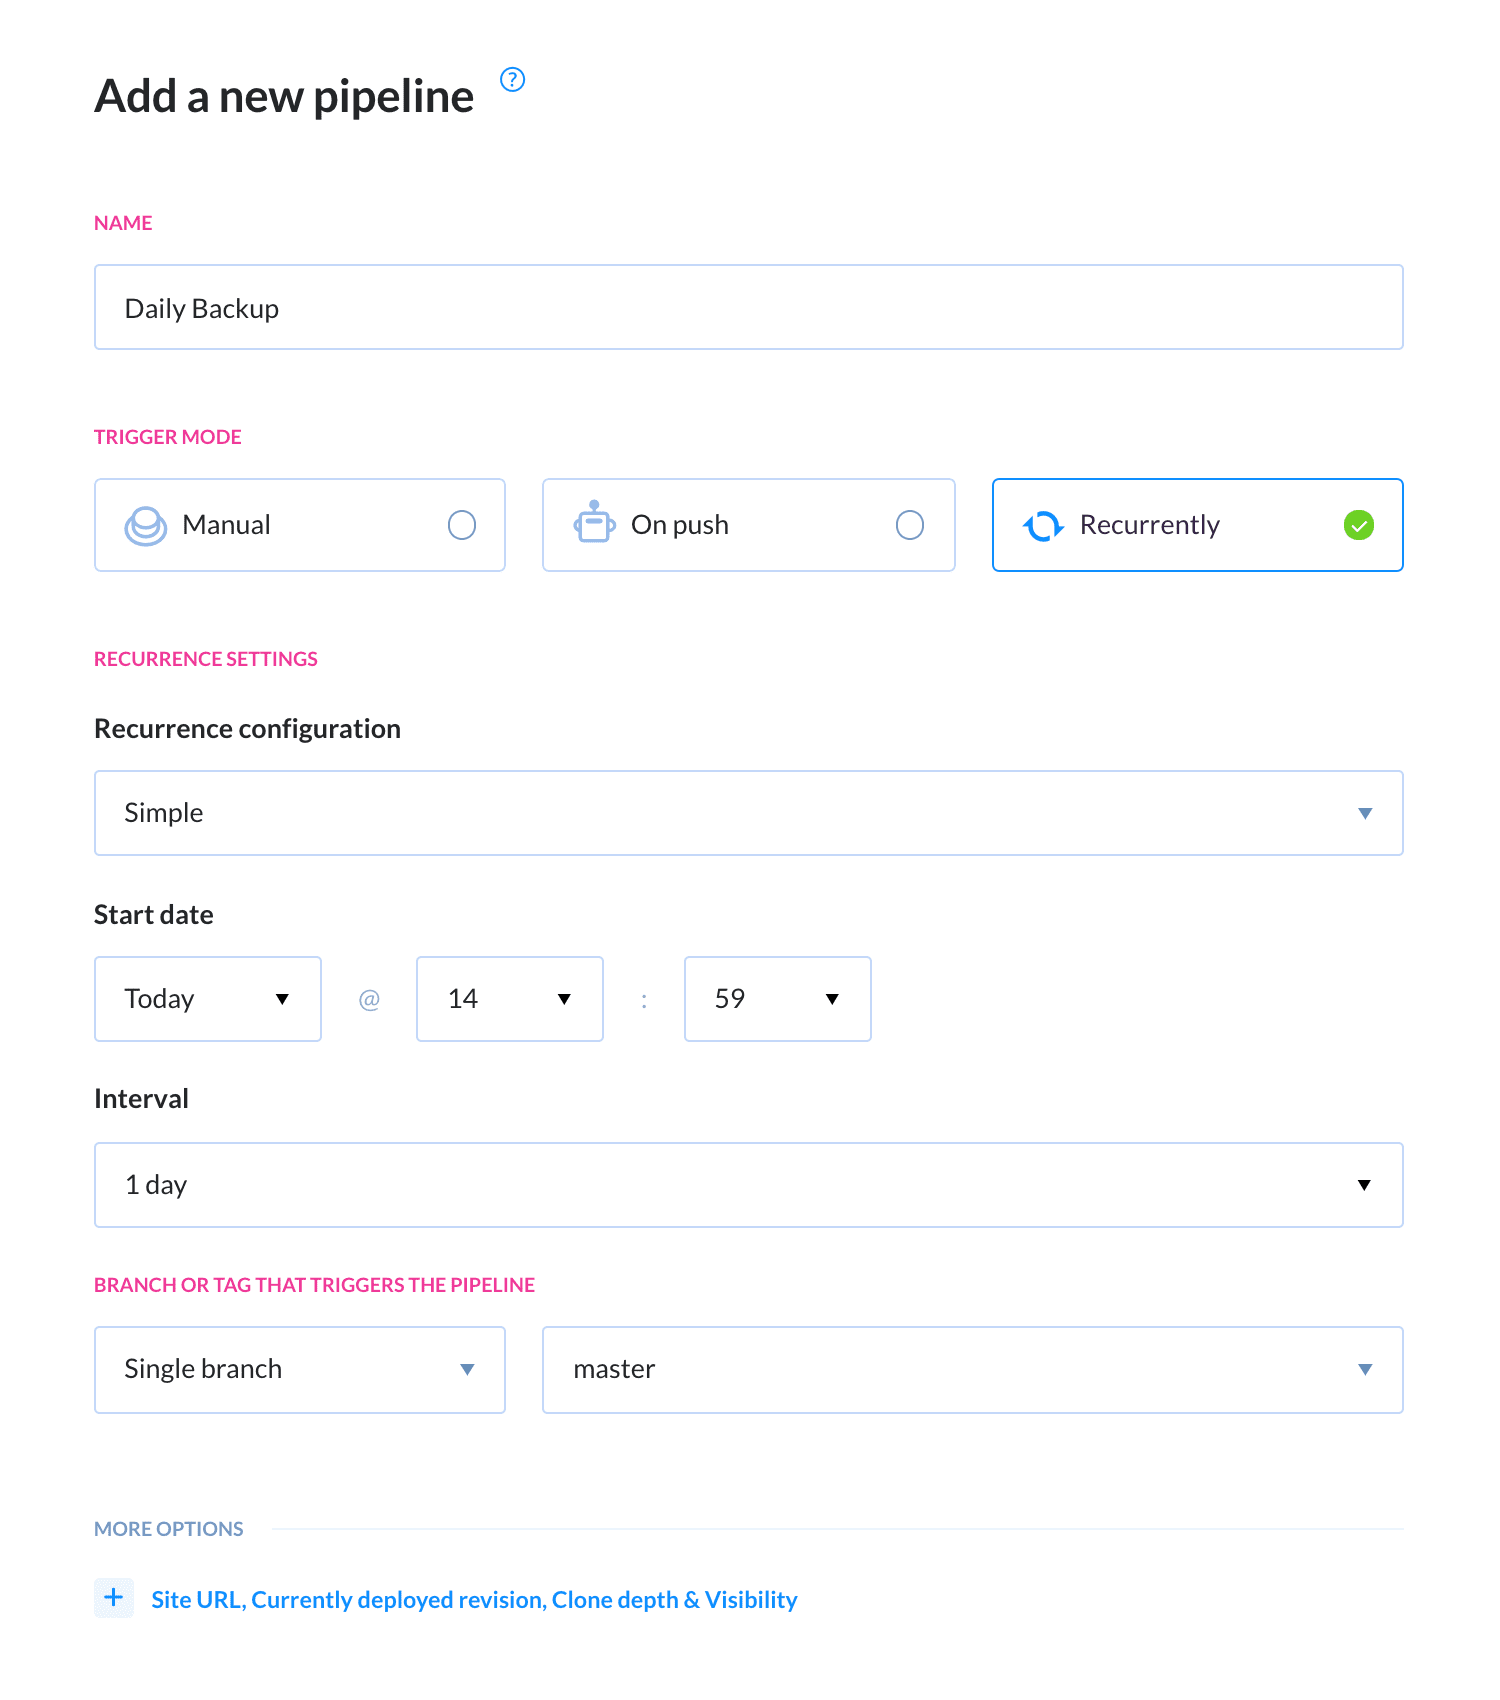
Create a new delivery pipeline and set the Trigger Mode to Recurrently. Select the interval in which your backup will be restored, eg. once a day:
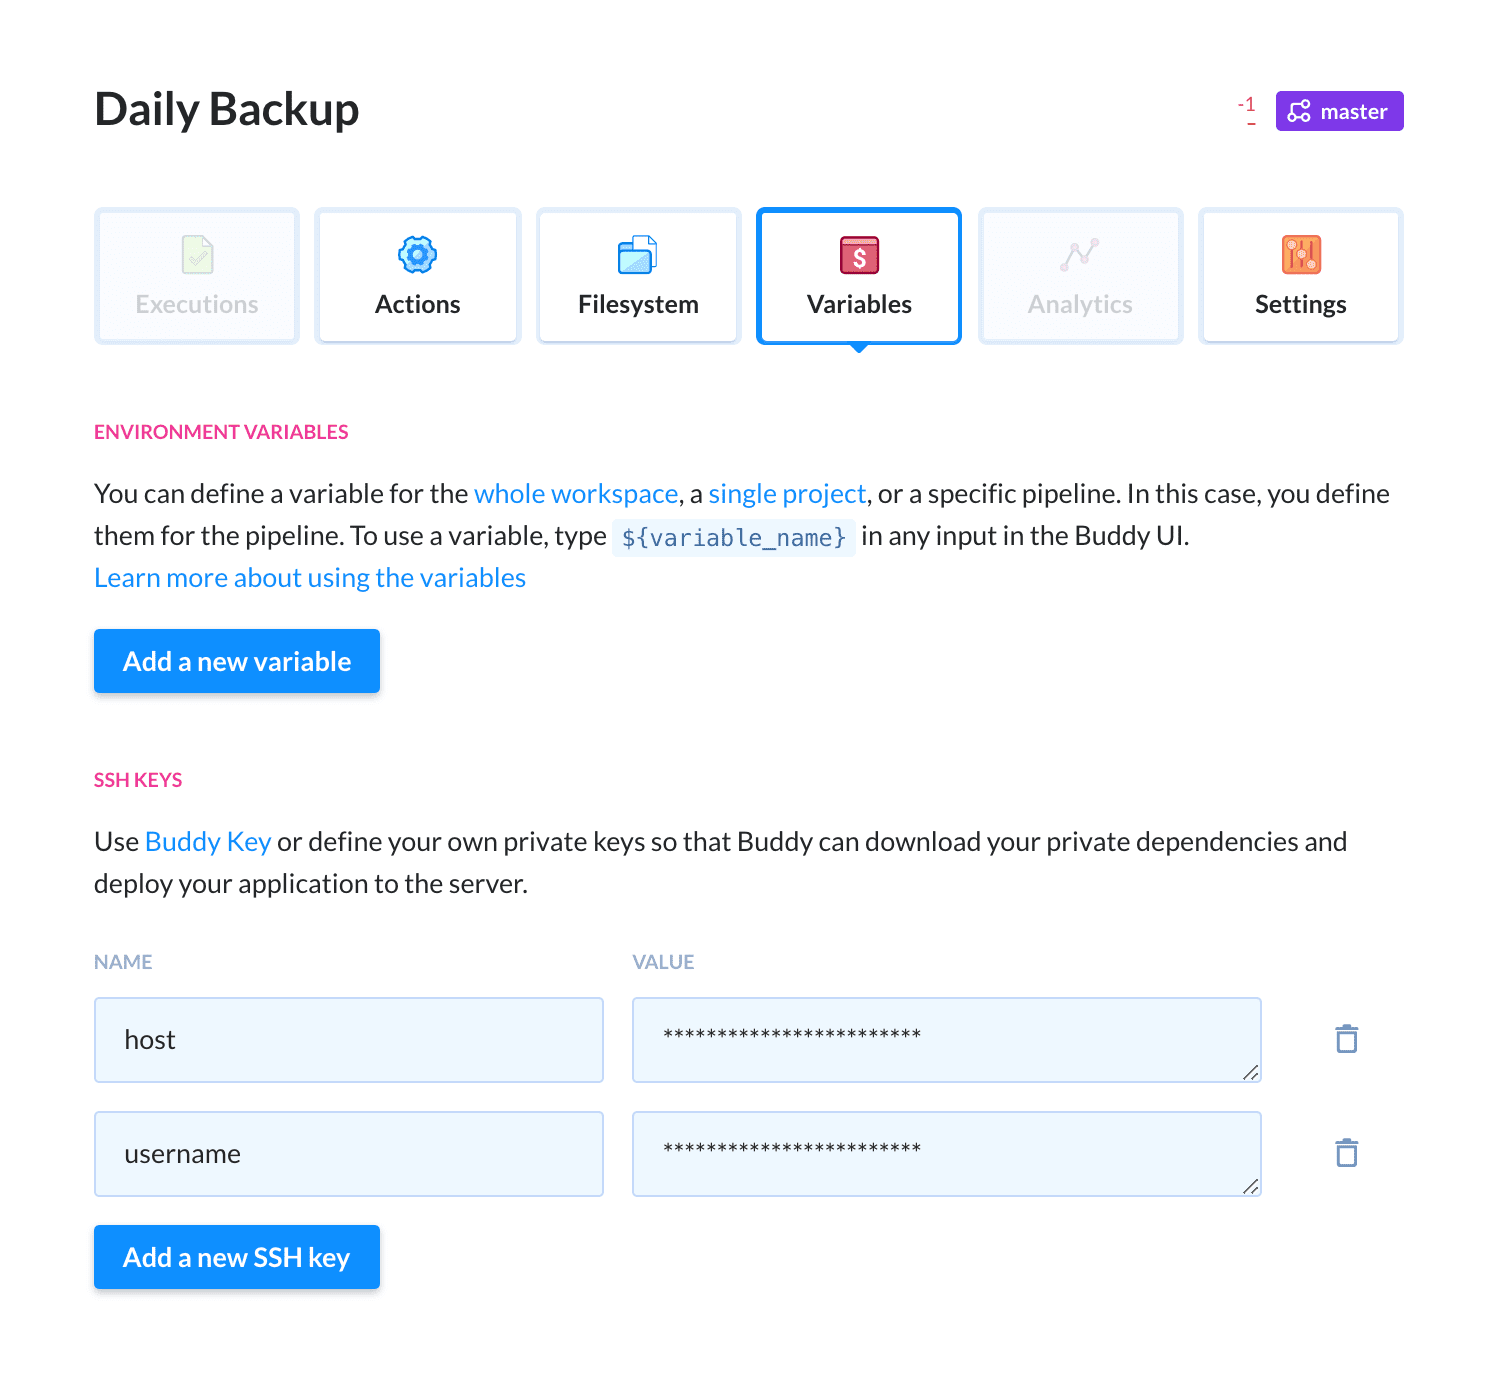
Let's add some variables before configuring the action. Go back to the general Pipelines view, click the newly created pipeline, and switch to the Variables tab. Add the key that Buddy will use to authorize in your repository (at the bottom), and two variables with host and username:
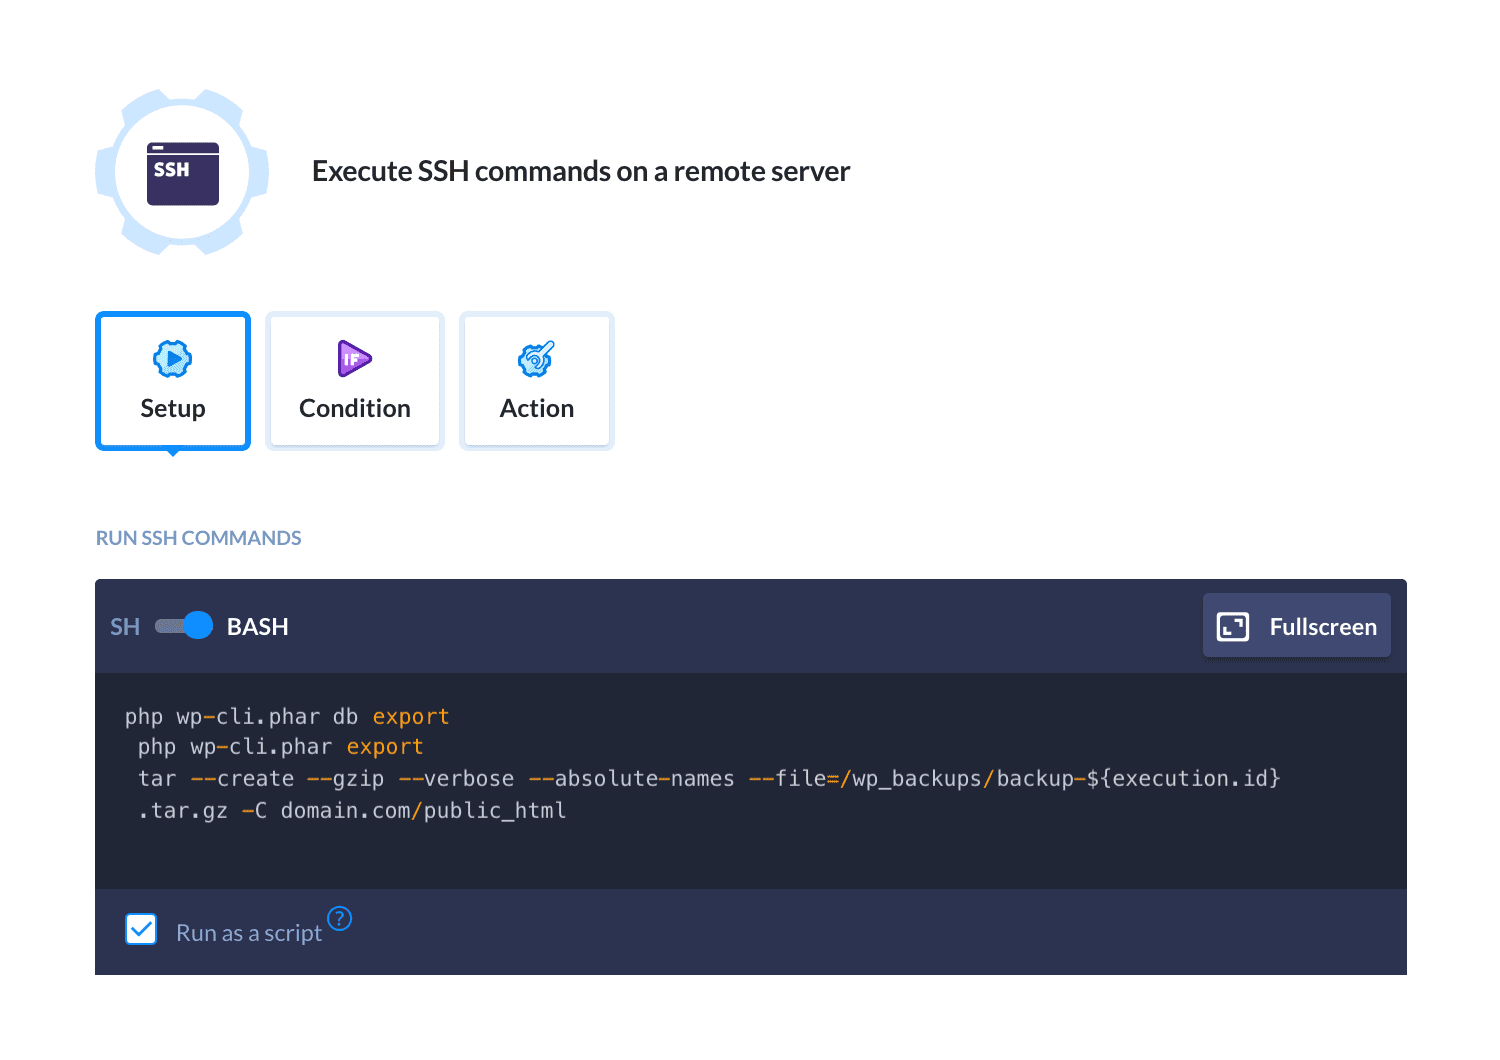
Switch to the Actions tab and select the SSH action. Enter the variables for host and username and enter the script that will perform your backup. We shall name the file as the ID of the execution for convenience:
php wp-cli.phar db export
php wp-cli.phar export
tar --create --gzip --verbose --absolute-names --file=/wp_backups/backup-${execution.id}
.tar.gz -C domian.com/public_html
Save and test the action to check if connection details are correct.
For the next action, select the Local shell. We'll use it to download the file to the pipeline's filesystem:
mkdir -p /root/.ssh
ssh-keyscan ssh.dhosting.pl >> /root/.ssh/known_hosts
sshpass -p "${ssh_pass}" scp -r ${ssh_login}@${ssh_host}:/URL-BACKUP-FOLDER/wp_backup-now.tar.gz    wp_backup/wp_backup-now.tar.gz
The last step is uploading the backup file to an external server. You can choose from a variety of deployment options: FTP, SFTP, Amazon S3, Rackspace, and so on. In this example we'll use S3, so the whole pipeline will look like this:

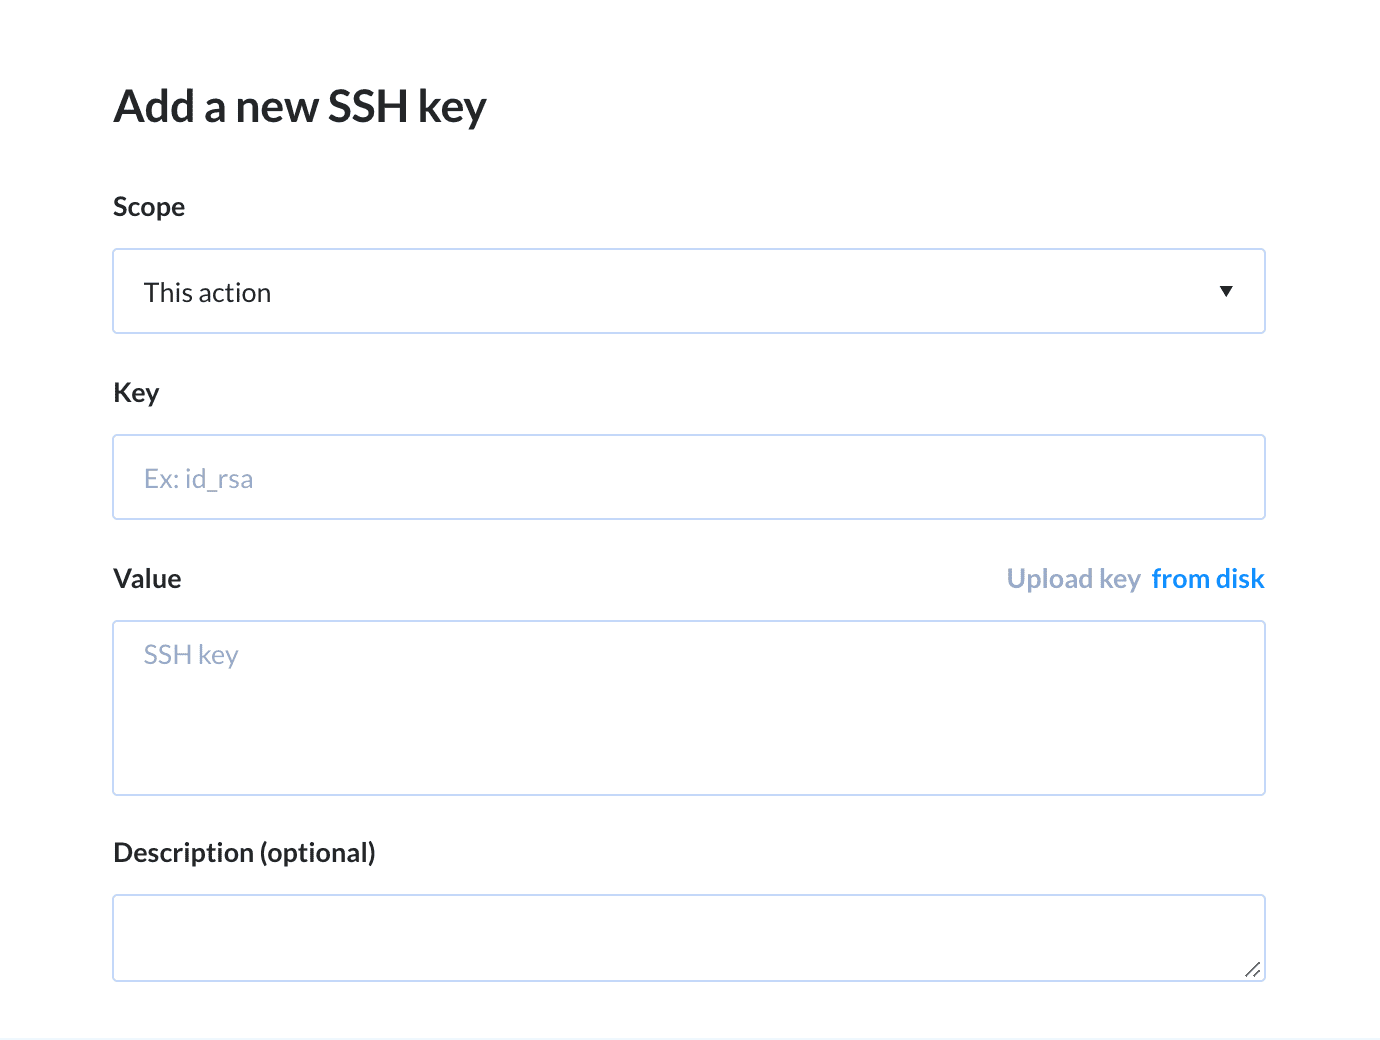
You can add the SSH variables in the Variables tab:
Restoring WP instance
Hopefully, you won't have to do that very often, but that is the purpose of doing back ups: to be able to restore your website at any time.
Restoring backup in full
Upload the backup file to the server with your instance
If you want to use a previously used database, you first need to clear it using
php wp-cli.phar db reset --yesWhen ready, import the database using
php wp-cli.phar db import ./${sql_name}
If the website is going to be restored at a different address, make sure to scan the database and change the URL to the new one:
php wp-cli.phar search-replace 'http://OLD-URL.com' 'http://NEW-URL.com' --recurse-objects --network --skip-columns=guid
Importing backup to a new WP instance
Restoring a backup file is a great idea if you'd like to create a new WP instance with the same contents as the old one. In this case you need to remember that the XML import does not contain the settings, so you need to upload and configure your plug-ins and the rest of the stuff yourself.
Once you install WordPress on the new server, you can import the previously exported XML using
php wp-cli.phar import example.wordpress.2016-06-21.xml