流水线:您实现持续交付、部署的门槛
This guide will help you introduce pipeline-based Continuous Delivery to your development project. Continuous Integration & Delivery is not only a flavor of the month – it’s an industry standard. If you want to catch up with the hottest IT trends, this guide is for you. Also, in case you are already familiar with the continuous approach, you can simply skip the first part and move on to the pipelines section.
Objectives of this guide
With this guide you’ll be able to:
- Understand the concept of continuous delivery
- Understand the notion “delivery pipeline” and find out how to use it to automate your work
- Grasp best practices and analyze sample development workflow
Why you should care about Continuous Delivery
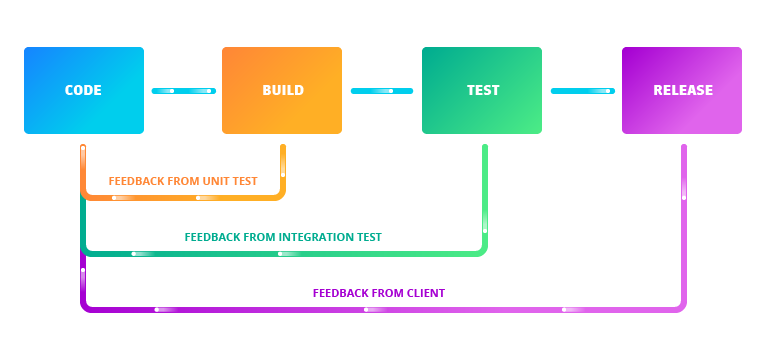
The term Continuous Delivery is still a bit confusing, the more it’s often replaced by the notion of Continuous Deployment and mentioned in the context of Continuous Development. All the phrases stem from the agile approach to development, where the cycle time is cut down as much as possible. Why? The faster the product moves to the next stage of the development process, the faster you receive feedback and will be able to deliver another, better version – see graphics below.
The advantages of shorter cycle time, when every change in the code becomes a deployment, are obvious and include:
- Delivering new features faster
- Receiving feedback in an instant
- Improving quality
- Reducing the risk of unsuccessful implementation of the change
- Saving time required to perform tasks manually
To benefit from continuous approach to development, you have to automate your work as much as possible. However, the implementation of CI/CD processes can be time and resource-consuming. In the next part of this guide we are going to show you how to easily implement the automated continuous approach in large and small projects using Buddy and its pipelines.
The most powerful tool we have as developers is automation.
General information concerning pipelines
What is a pipeline actually? The idea is pretty straightforward:
A pipeline is a set of actions, executed by a Git push or by a developer in a specific order that delivers an app or website from a Git repository to wherever a developer wants.
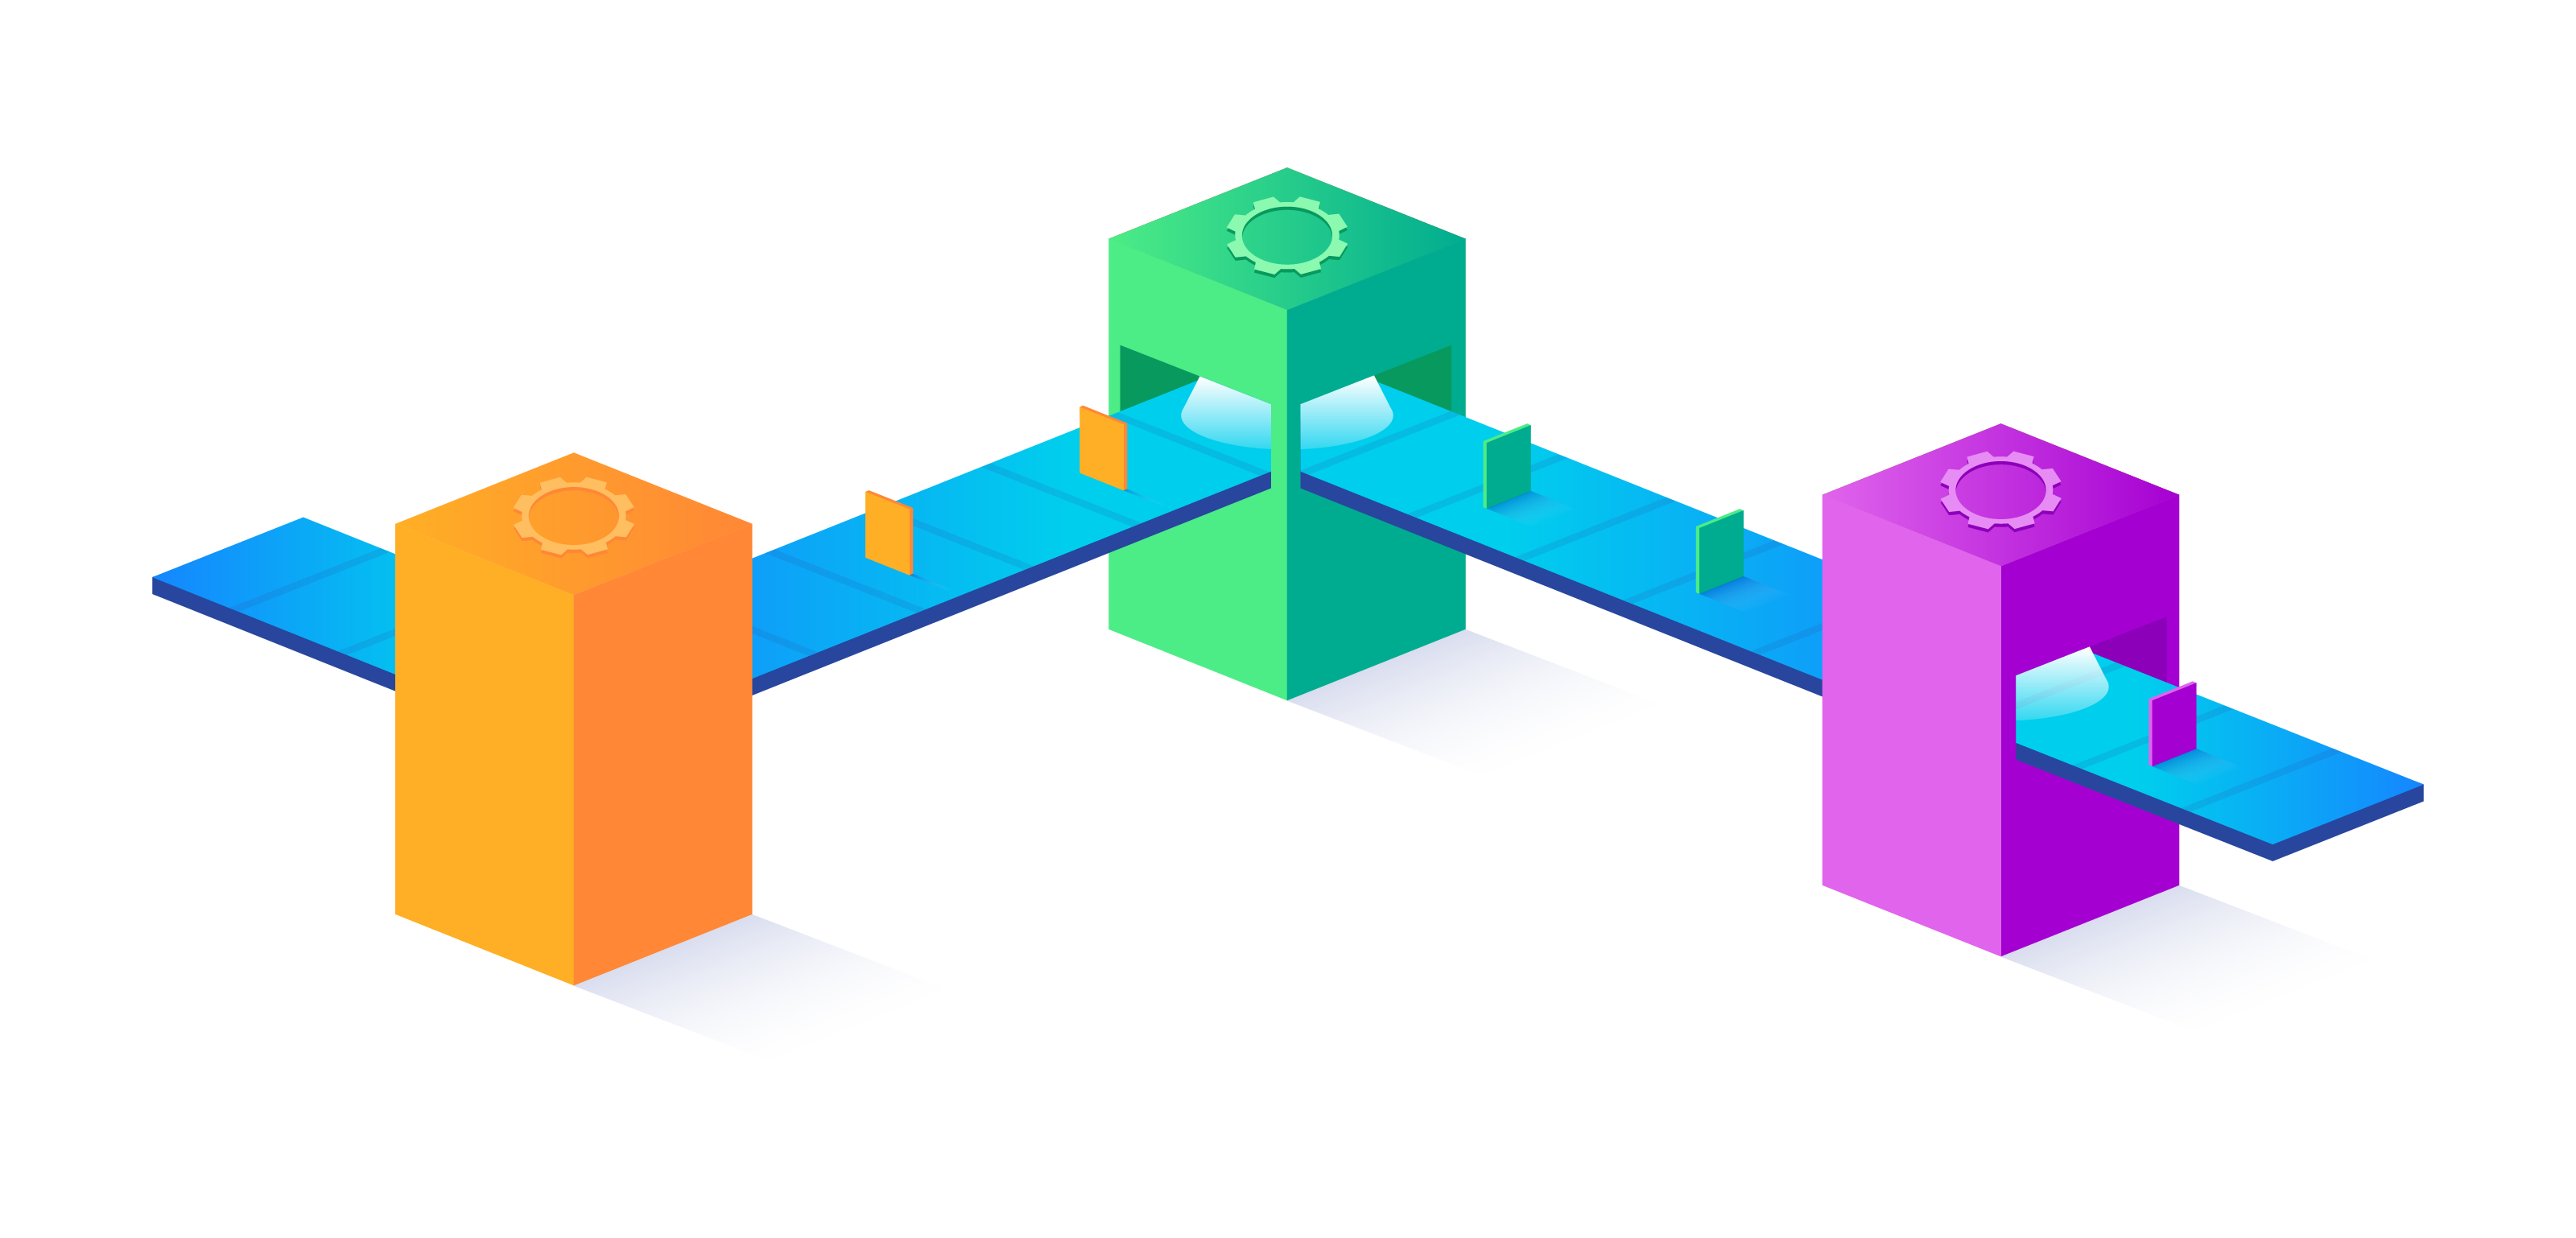
The pipeline resembles a little bit a production line, where some items are assembled, examined if they meet the quality standards, wrapped and packed in boxes and sent to the customers. In software development we simply skip fancy wrapping paper and decorative boxes and do our job – deliver software in a continuous manner.
Industrial production lines vary depending on the nature of the business. In case of software delivery it’s exactly the same – they will be different for every project and every team, depending on the technology and the approach used. However, every pipeline has the same major sections:
- Build and Integrate
- Test
- Deploy

All the above actions should be performed automatically and you can easily achieve this with Buddy and the pipelines.
Pipelines in Buddy
Buddy offers the possibility to design Continuous Delivery pipelines tailored to individual needs. It supports all the general stages mentioned in the previous section. And actually Buddy can do much more. Let’s take a look at the functions.
Introductory information
The main component in Buddy is a project. It consists of two main elements: a Git repository and a set of pipelines, defining when and how the source code from the repository will be processed (compiled, tested, prepared for deployment) and delivered to a given server.
When you log into Buddy for the first time, you have to add new project and connect it to the Git repository you are going to automate (GitHub or BitBucket) or push your Git repository to Buddy (you can host your Git project in Buddy without any external provider).
Let’s assume you have already created your project and connected it with the repository. Now you are ready to add the first pipeline.
Creating a Pipeline
We are going to create a pipeline that will:
- Build the application on every push to master branch
- Deliver the application files to server
- Restart the application on server
- Notify you if any of the above actions fails
Go to Pipelines screen and click Add a new pipeline.
Enter the pipeline name (e.g. MyFirstPipeline). Select the trigger mode On every push and select the master branch. Then, click Add a new pipeline:
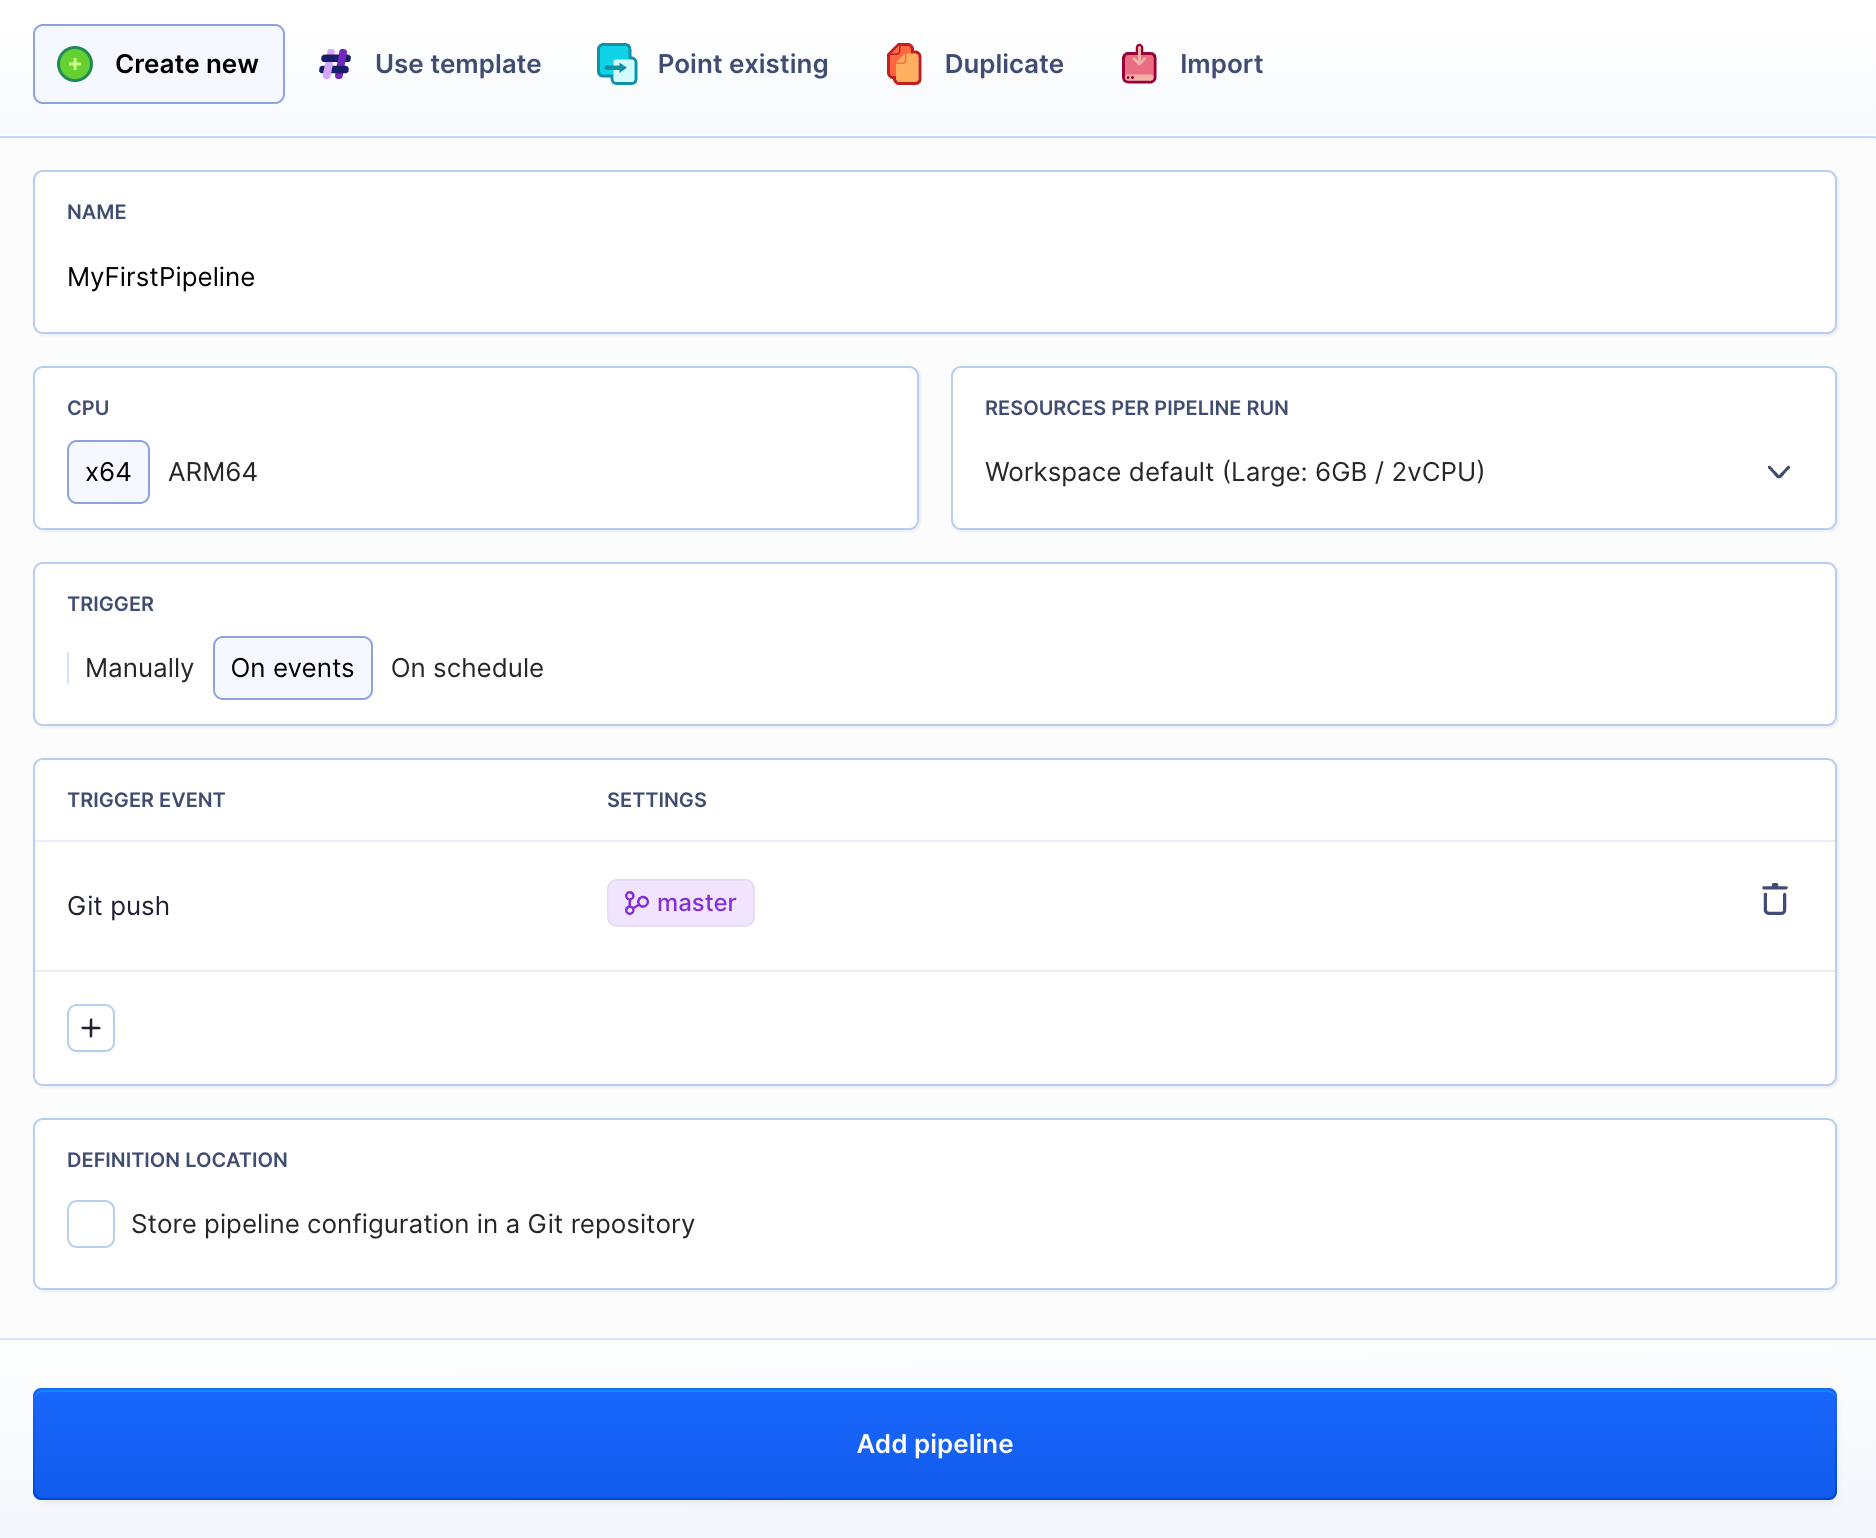
Buddy will create MyFirstPipeline and display the set of available actions.
Now we are going to add actions (build application, deliver to server, restart application) to MyFirstPipeline.
Action #1: Build my Node app in a Docker container
Usually your code requires compilation. Buddy allows you to build applications in Docker containers, which are more or less similar to virtual machines. The user defines what tool would be used during building the application and what commands would be executed.
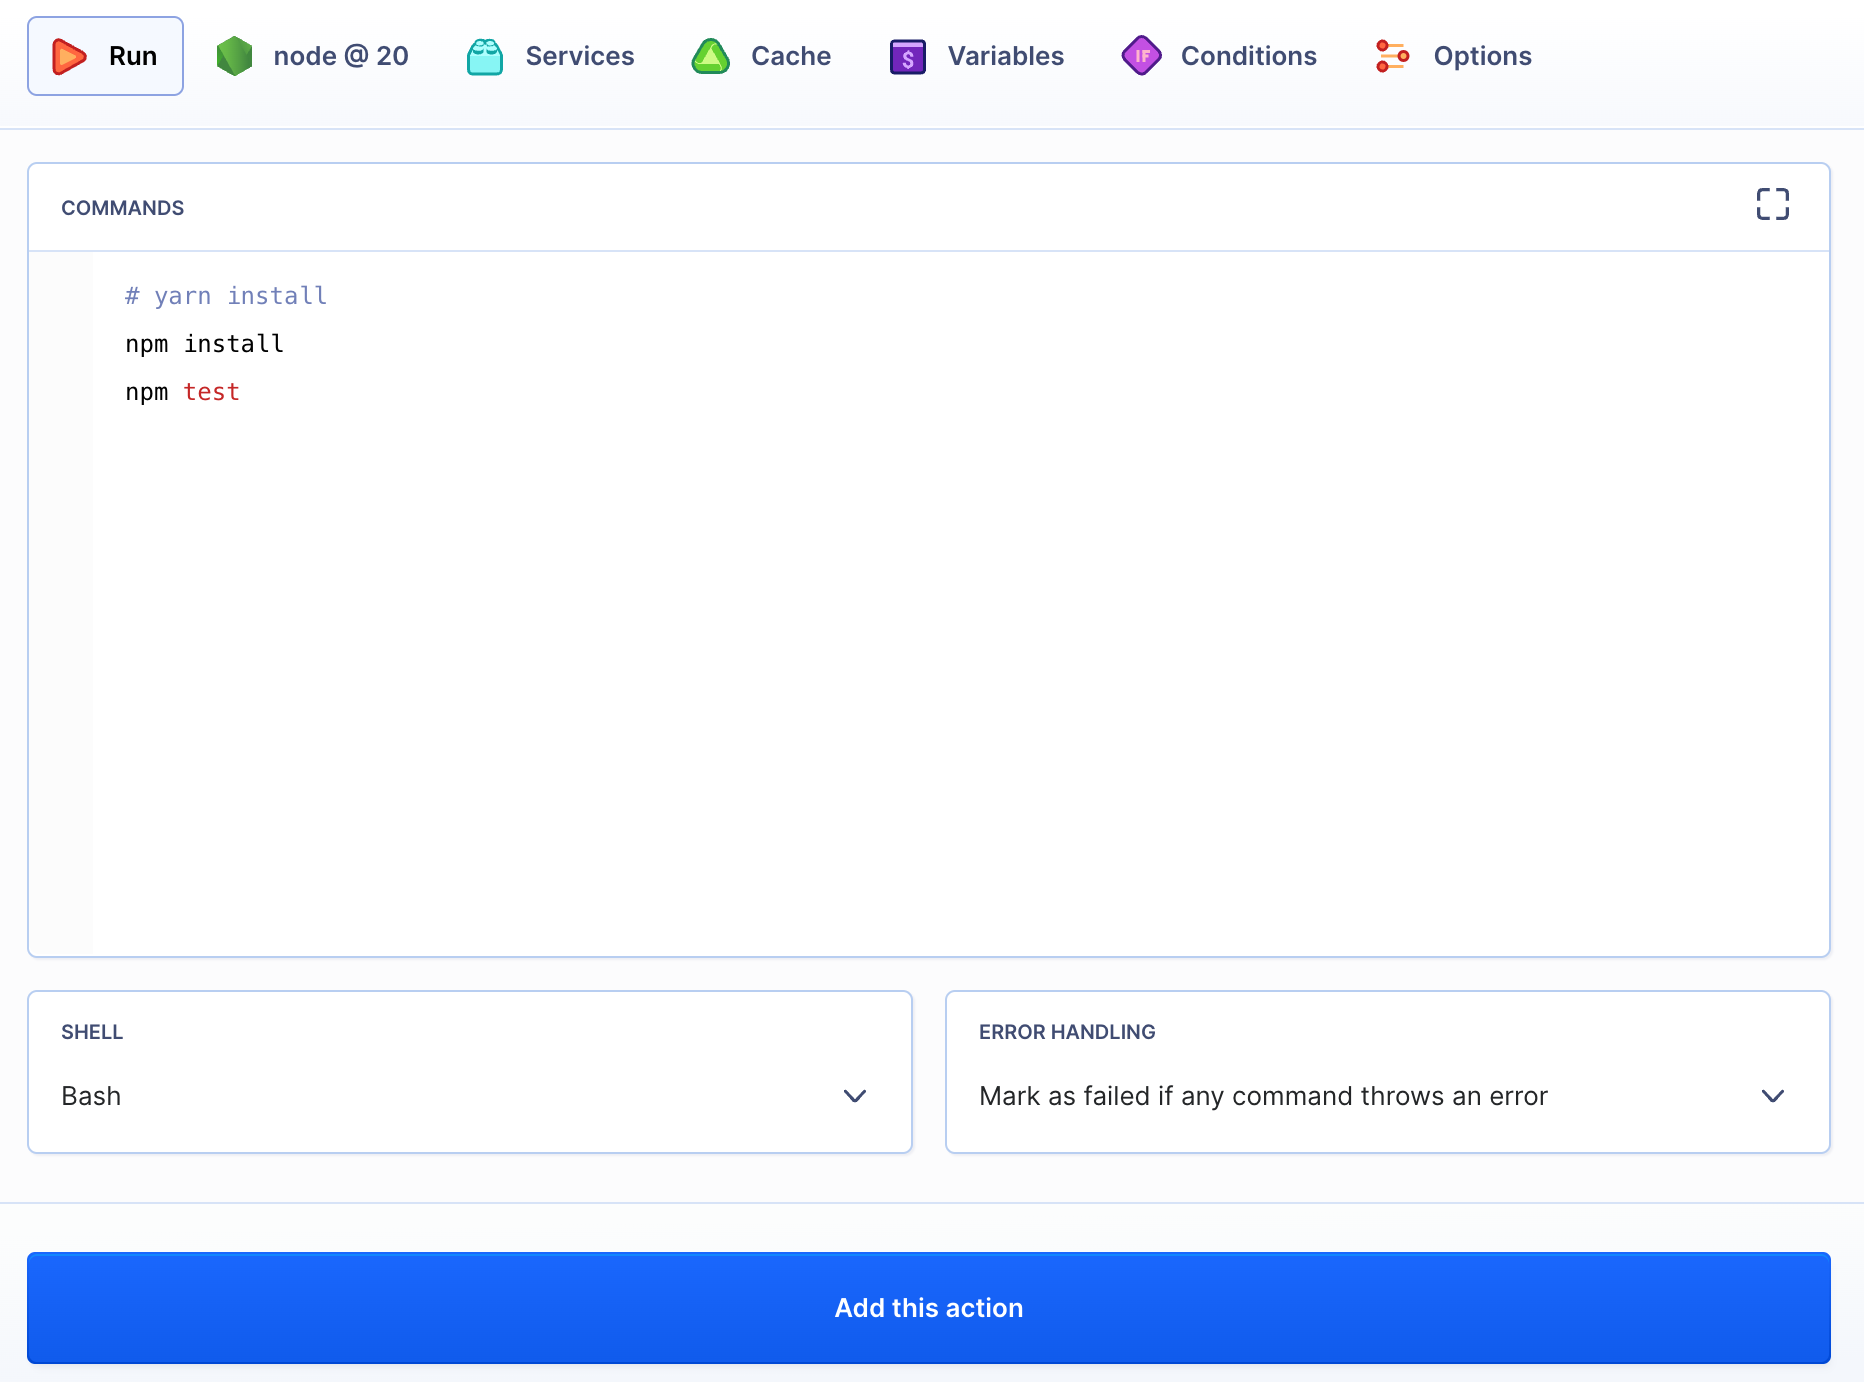
In our sample pipeline we shall build a Node.js application with Gulp. To do this, pick a pre-defined action for Node.js.:

All we need to do now is enter the commands that will build the application, pick the version of Node and enter the commands that will install Gulp:
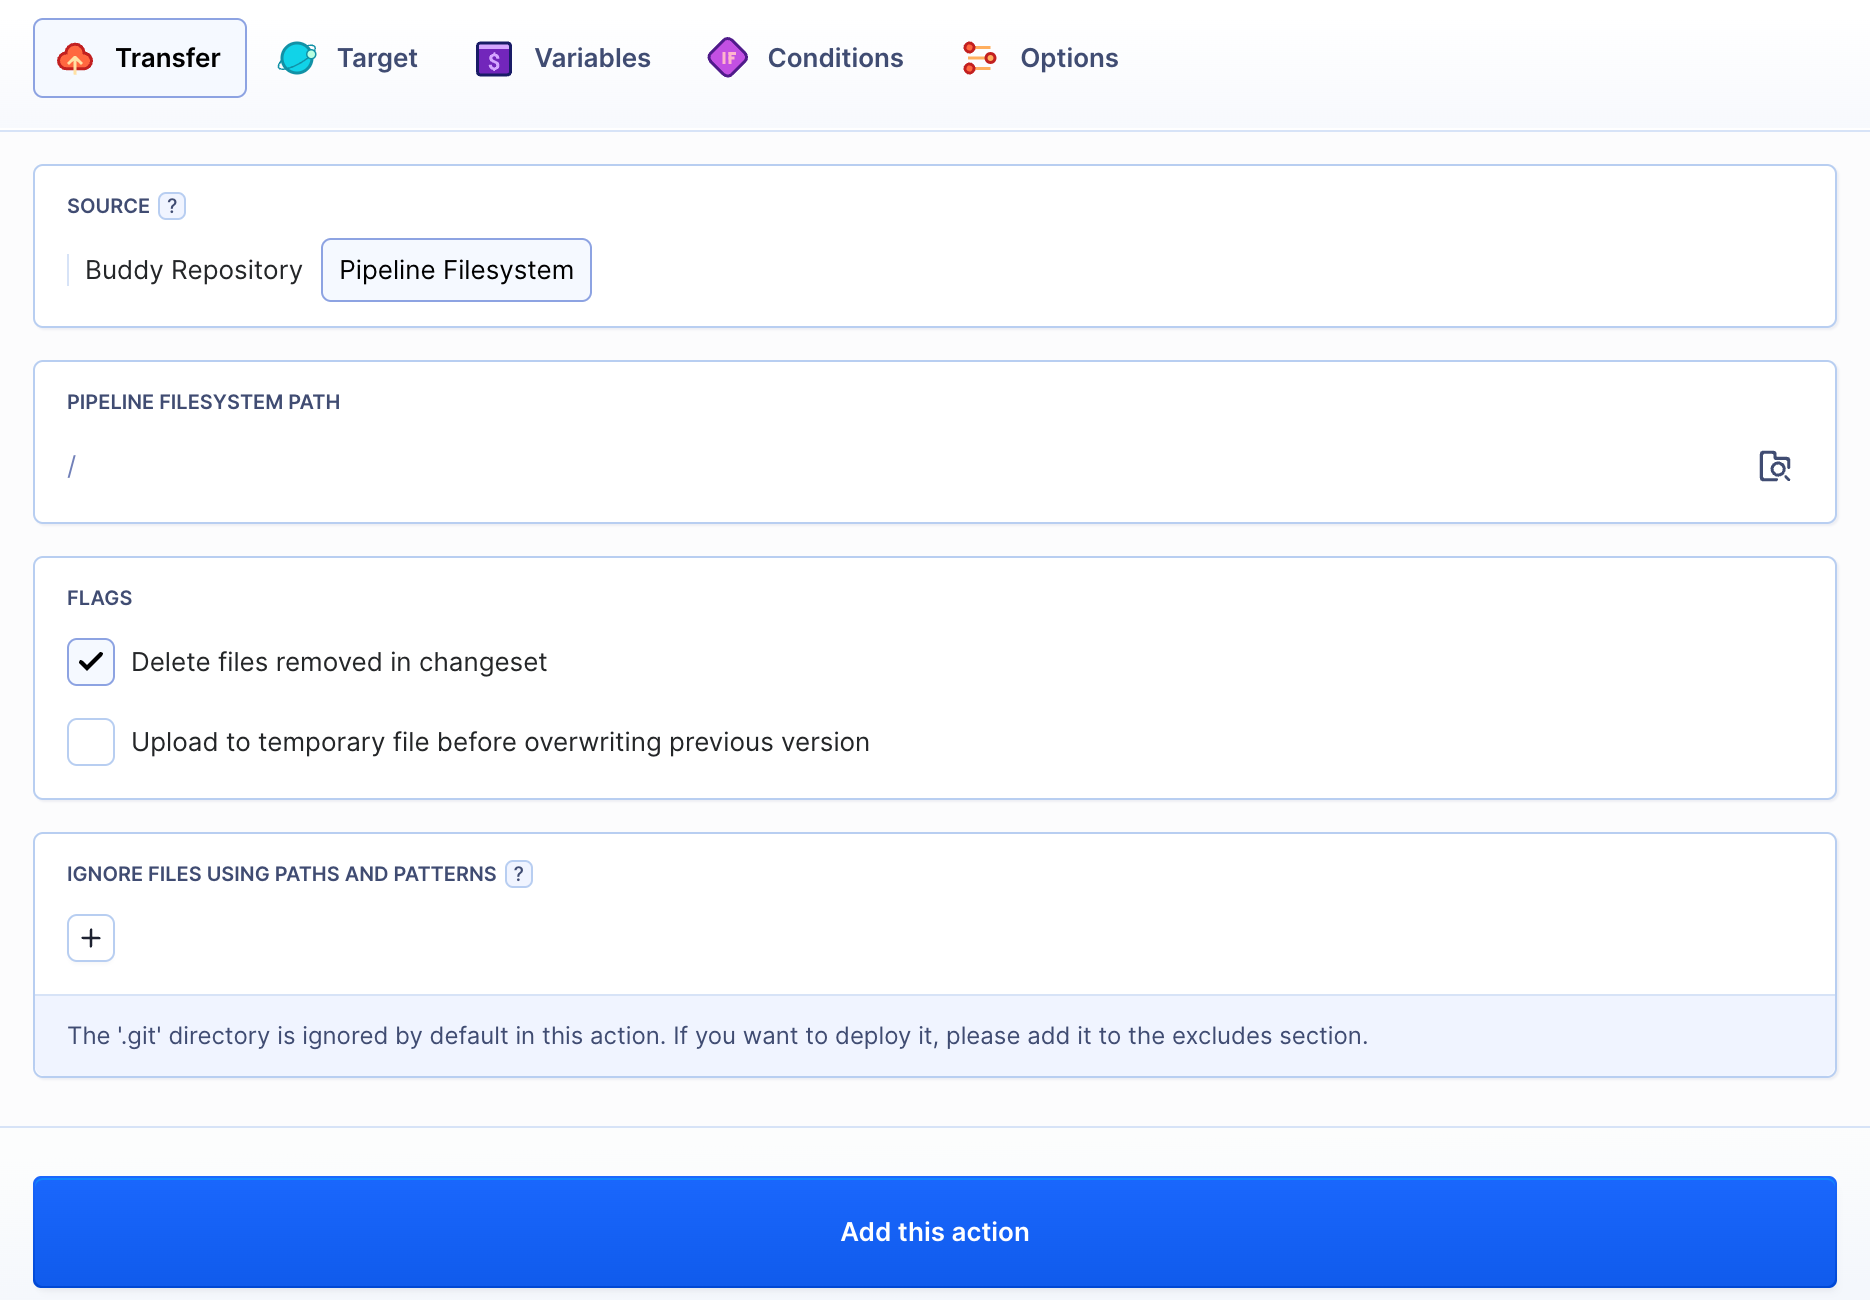
Action #2: Deploy the build to the server
We have just added the action that will build the application. Upon completion of this step, we need to upload the application to server. This can be performed by another action from Buddy’s actions set. You may chose from a variety of protocols like FTP/FTPS/SFTP or upload you application to Elastic Beanstalk, S3, Google Cloud Engine and so on.
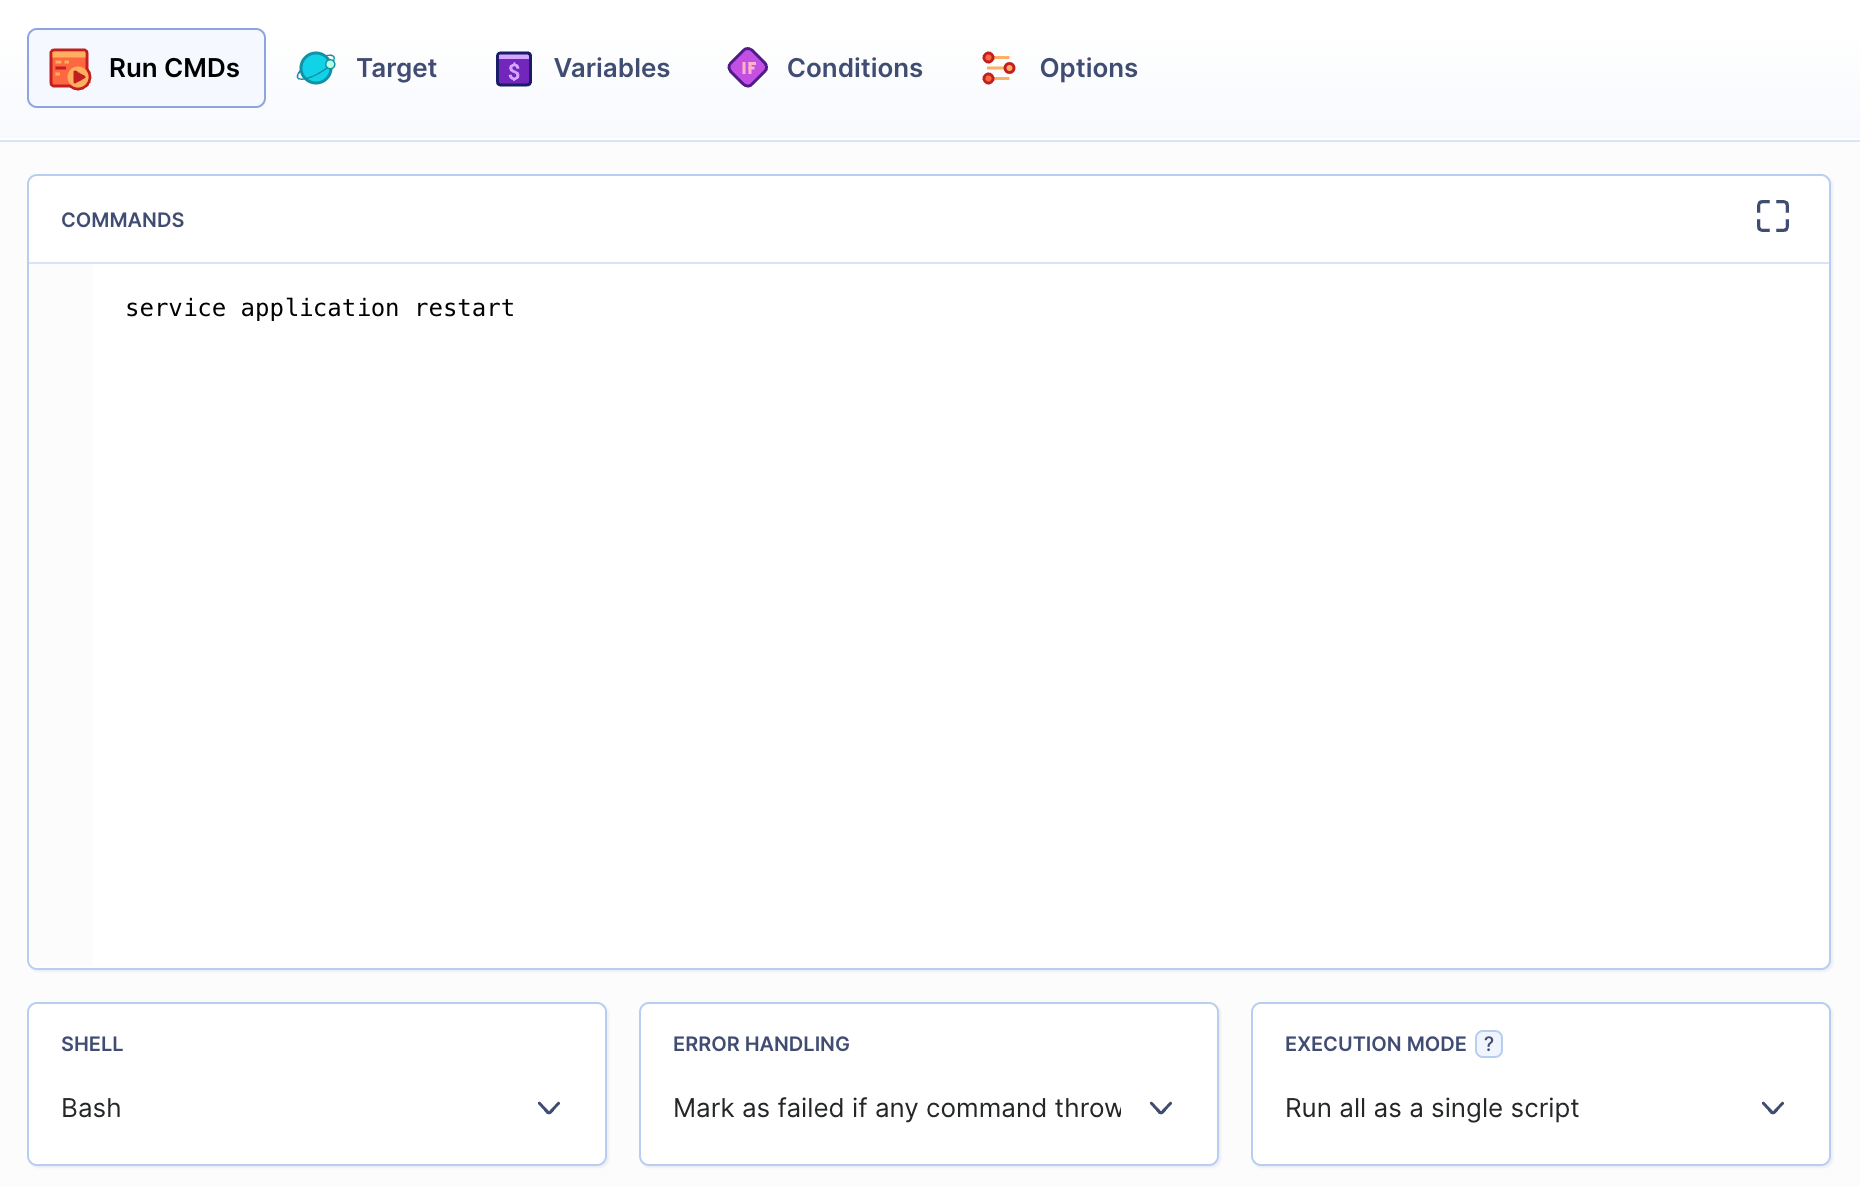
Action #3: Restart my app on the server
Very often you will need to perform certain operations on the server where you deployed your application, e.g. database update or service restart. All you need to do in Buddy is adding an SSH action, where you define the connection data and operations you want to perform. In our example we will connect with the server and restart the application:
Bonus actions: Turn the maintenance mode on/off**
Of course you should inform your users that the service is offline for maintenance instead of leaving them with a website churning out downtime errors. Thus, we are going to add two more SSH actions to our pipeline that will take care of notifying them the solution is currently unavailable:
- The first one will switch on maintenance break screen before delivering the application to server
- The second one will switch off maintenance break screen when application restart is complete
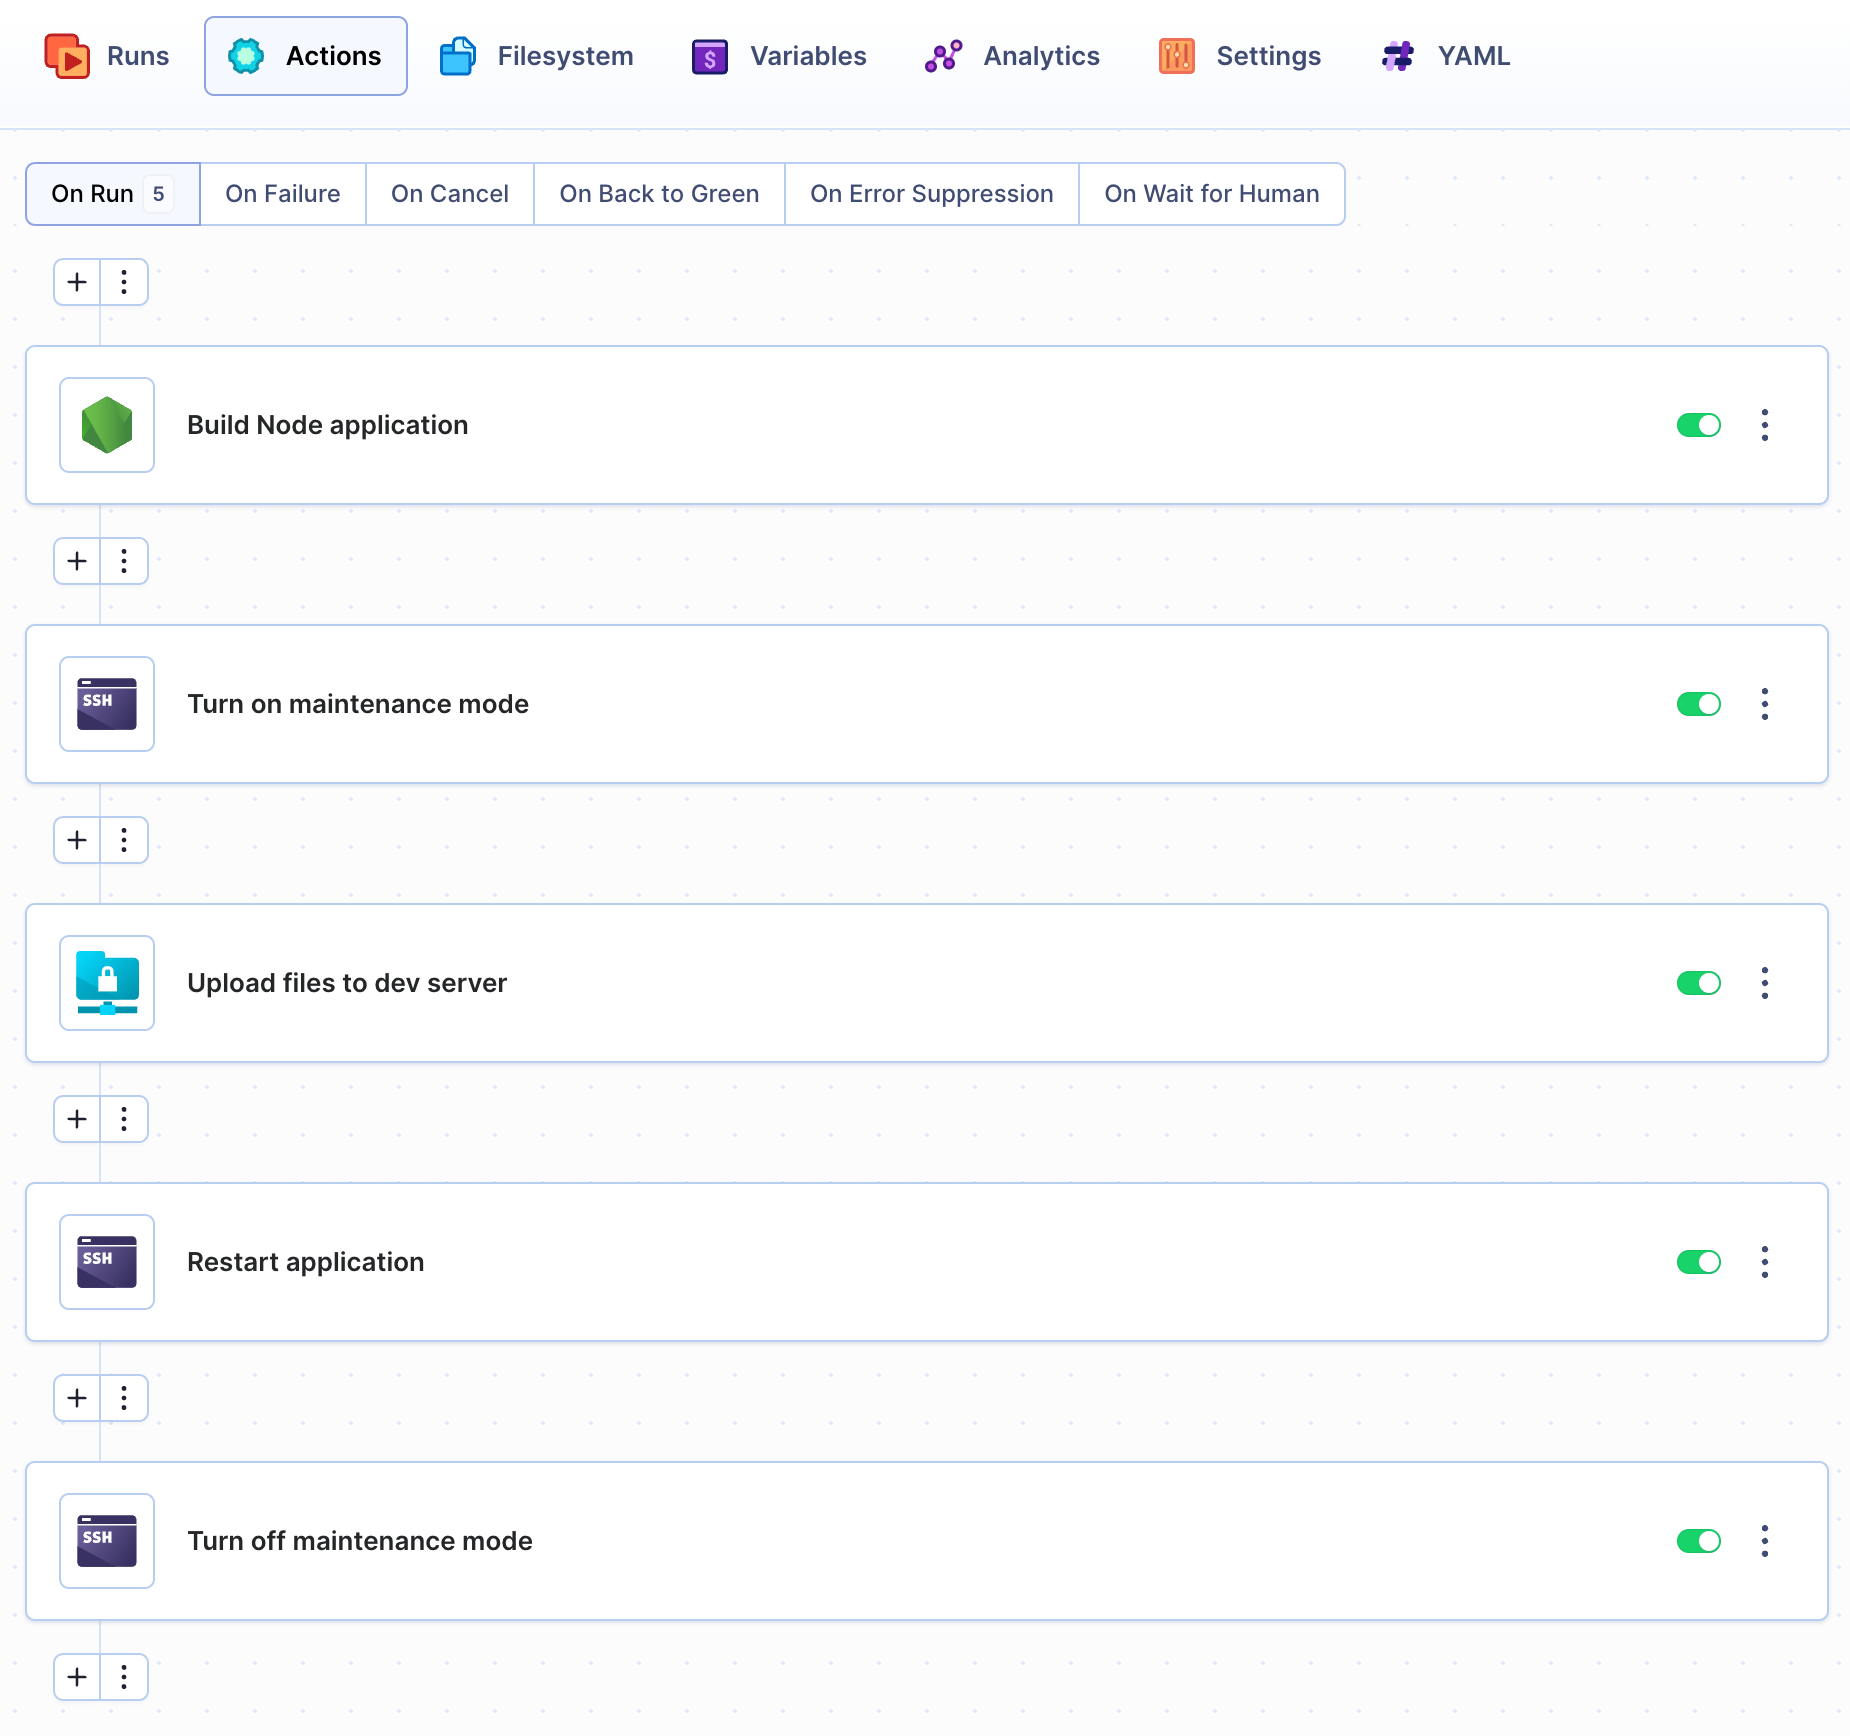
And this is how your final pipeline should look like:
Run, Pipeline, Run!
That’s it – your pipeline is ready. It will automatically build the application, deliver it to server and restart the application, notifying you if any of those operations fails. Let’s check how it works.
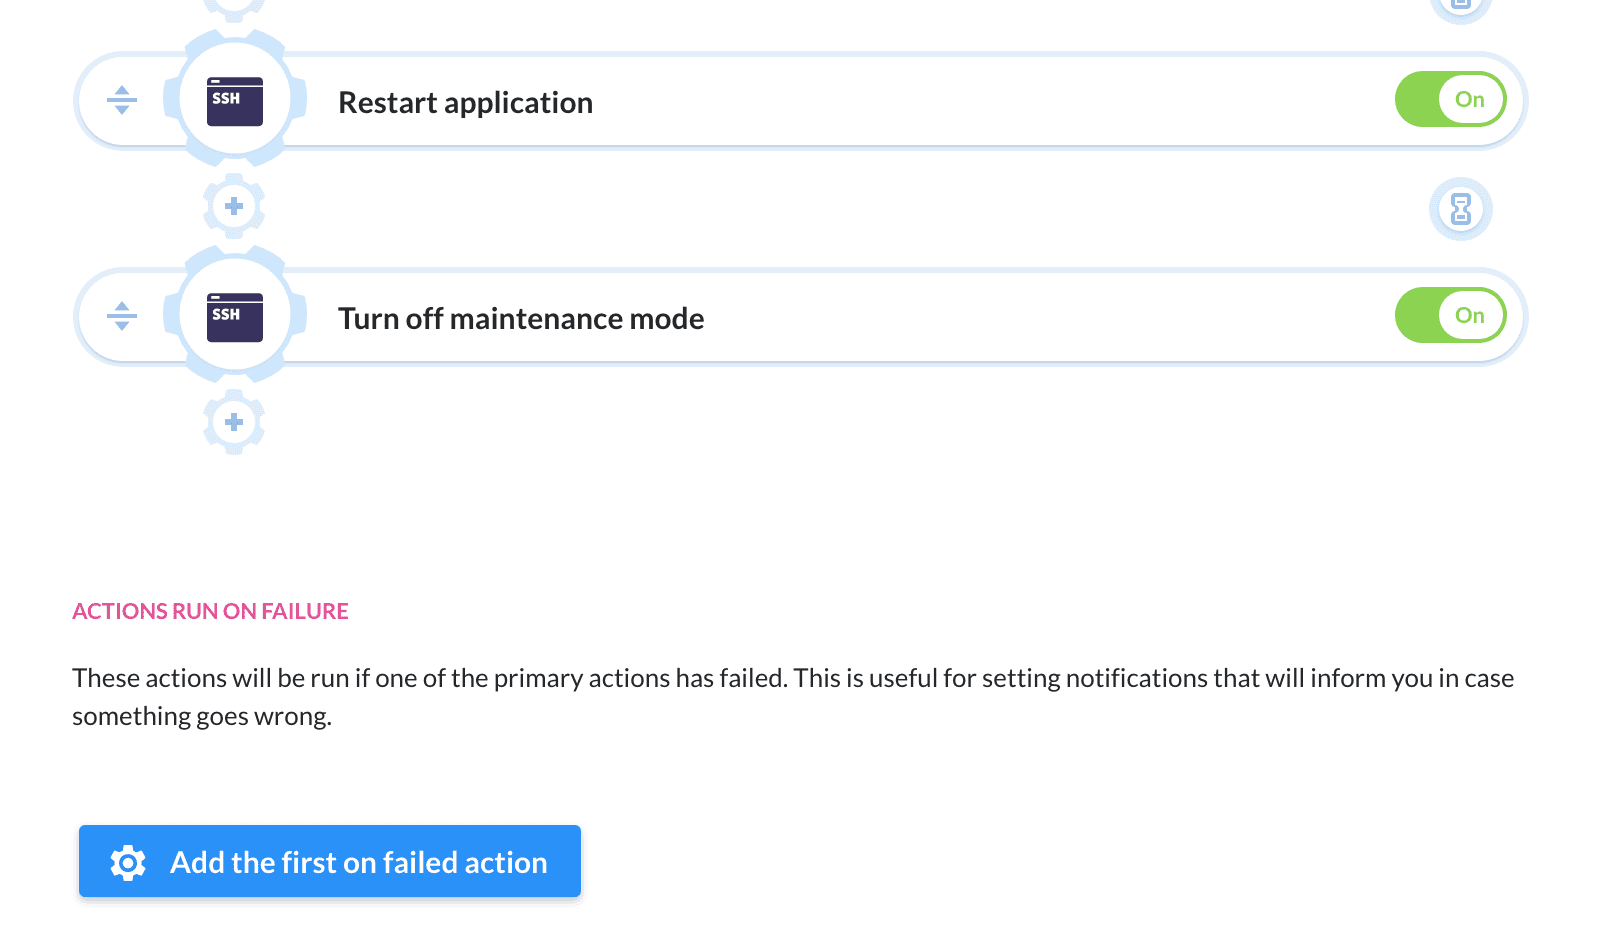
When something goes wrong your Pipeline got you covered
We defined the pipeline, which builds the application on every push to the master branch, uploads it to server and restarts application on the server. But what if any of these actions fails, for example if the upload is unsuccessful? The user should be notified. In Buddy all you need to do is adding a notification action in the On failure section, where you can pick the appropriate option such as e-mail or SMS messages, or Slack.
Wait, there could be more
When you open the Pipelines tab, you will find MyFirstPipeline on the list, together with other pipelines you defined. For each project you can define an unlimited number of pipelines. Usually they will include one pipeline that builds the application on every push, and the pipeline that delivers the application to the production server.

The pipelines screen also provides information on when the pipeline was run, for which branch deploy is executed and if the server is up-to-date with the reference server. Here you can also check the pipelines currently in progress and the ones that failed since one of the actions in the pipeline failed.