如何在Laravel Dusk上运行Selenium测试
Introduction
In our introductory guide to Laravel we explained how to create unit and feature tests and how to automate them with Buddy. In this guide, we'll show you how to run E2E tests using Laravel Dusk.
Laravel Dusk is a type of browser tests introduced in Laravel in v5.4. The tests use ChromeDriver by default, but they can be easily configured to use Selenium in a different browser as well.
Forking test project
We shall run the tests against a simple calculator app embedded in our sample project on GitHub.
Before you start, make sure that you have installed everything required to run Laravel on your machine.
Fork and clone the following repository: github.com/buddy-works/laravel-first-steps.
git clone git@github.com:buddy-works/laravel-first-steps.gitAfter you clone the repo, check out and run the app locally by running:
cd laravel-first-steps
composer install
php artisan serve
You can read how to prepare such calculator in our guide to Laravel basics that we mentioned above.
Laravel Dusk installation
Installing Dusk requires a couple of steps:
- Install Laravel Dusk and add it to the project's dependencies:
composer require --dev laravel/dusk
- Register DuskServiceProvider. For that, open
app\Providers\AppServiceProvider.phpand add theusestatement:
use Laravel\Dusk\DuskServiceProvider;
- Register the provider in the
registermethod by adding this part of code:
if ($this->app->environment('local', 'testing')) {
     $this->app->register(DuskServiceProvider::class);
    }
With the changes applied, the AppServiceProvider.php file should look like this:
    <?php

namespace App\Providers;

use Illuminate\Support\ServiceProvider;
use Laravel\Dusk\DuskServiceProvider;

class AppServiceProvider extends ServiceProvider
{
    /**
     * Bootstrap any application services.
     *
     * @return void
     */
    public function boot()
    {
        //
    }

    /**
     * Register any application services.
     *
     * @return void
     */
    public function register()
    {
        if ($this->app->environment('local', 'testing')) {
            $this->app->register(DuskServiceProvider::class);
        }
    }
}
- Finally, install Dusk by running
php artisan dusk:install
Writing Laravel Dusk tests
- To start with, remove the sample test, or it will return errors:
rm tests/Browser/ExampleTest.php
- Once done, let's add our first test. Run the
artisancommand and add the name of the test class:
php artisan dusk:make MyFirstDuskTest
The class is created in the tests/Browse directory. Let's write a simple test that:
A. Opens the website with the calculator
B. Runs a 1 + 3 addition
C. Checks the result.
Open the test class file tests/Browser/MyFirstDuskTest.php and add these lines:
<?php

namespace Tests\Browser;

use Tests\DuskTestCase;
use Illuminate\Foundation\Testing\DatabaseMigrations;

class MyFirstDuskTest extends DuskTestCase
{
    /**
     * A Dusk test example.
     *
     * @return void
     */
    public function testExample()
    {
        $this->browse(function ($browser) {
            $browser->visit('/')
                    ->type('a', 3)
                    ->type('b', 1)
                    ->press('Execute')
                    ->assertPathIs('/calc')
                    ->assertSee('4');
        });
    }
}
Local testing
- First, set the website's address in the
.envconfig file. This is the address that will be used in the tests:
APP_URL=http://localhost:8080
- Then, we need to run the application. We'll launch it on the port defined in the previous step:
php artisan serve --port=8080
- With the app running, launch the tests using this command:
php artisan dusk
Automation with Buddy CI
Pipeline setup
With everything set up locally, we can use Buddy CI to automate the whole process. Let's create a pipeline that will run the tests once a day at a given time.
If you haven't forked our Laravel repository yet, do it now as we'll need it for the example below.
In case you haven't written any tests before, they are available on the dusktests branch.
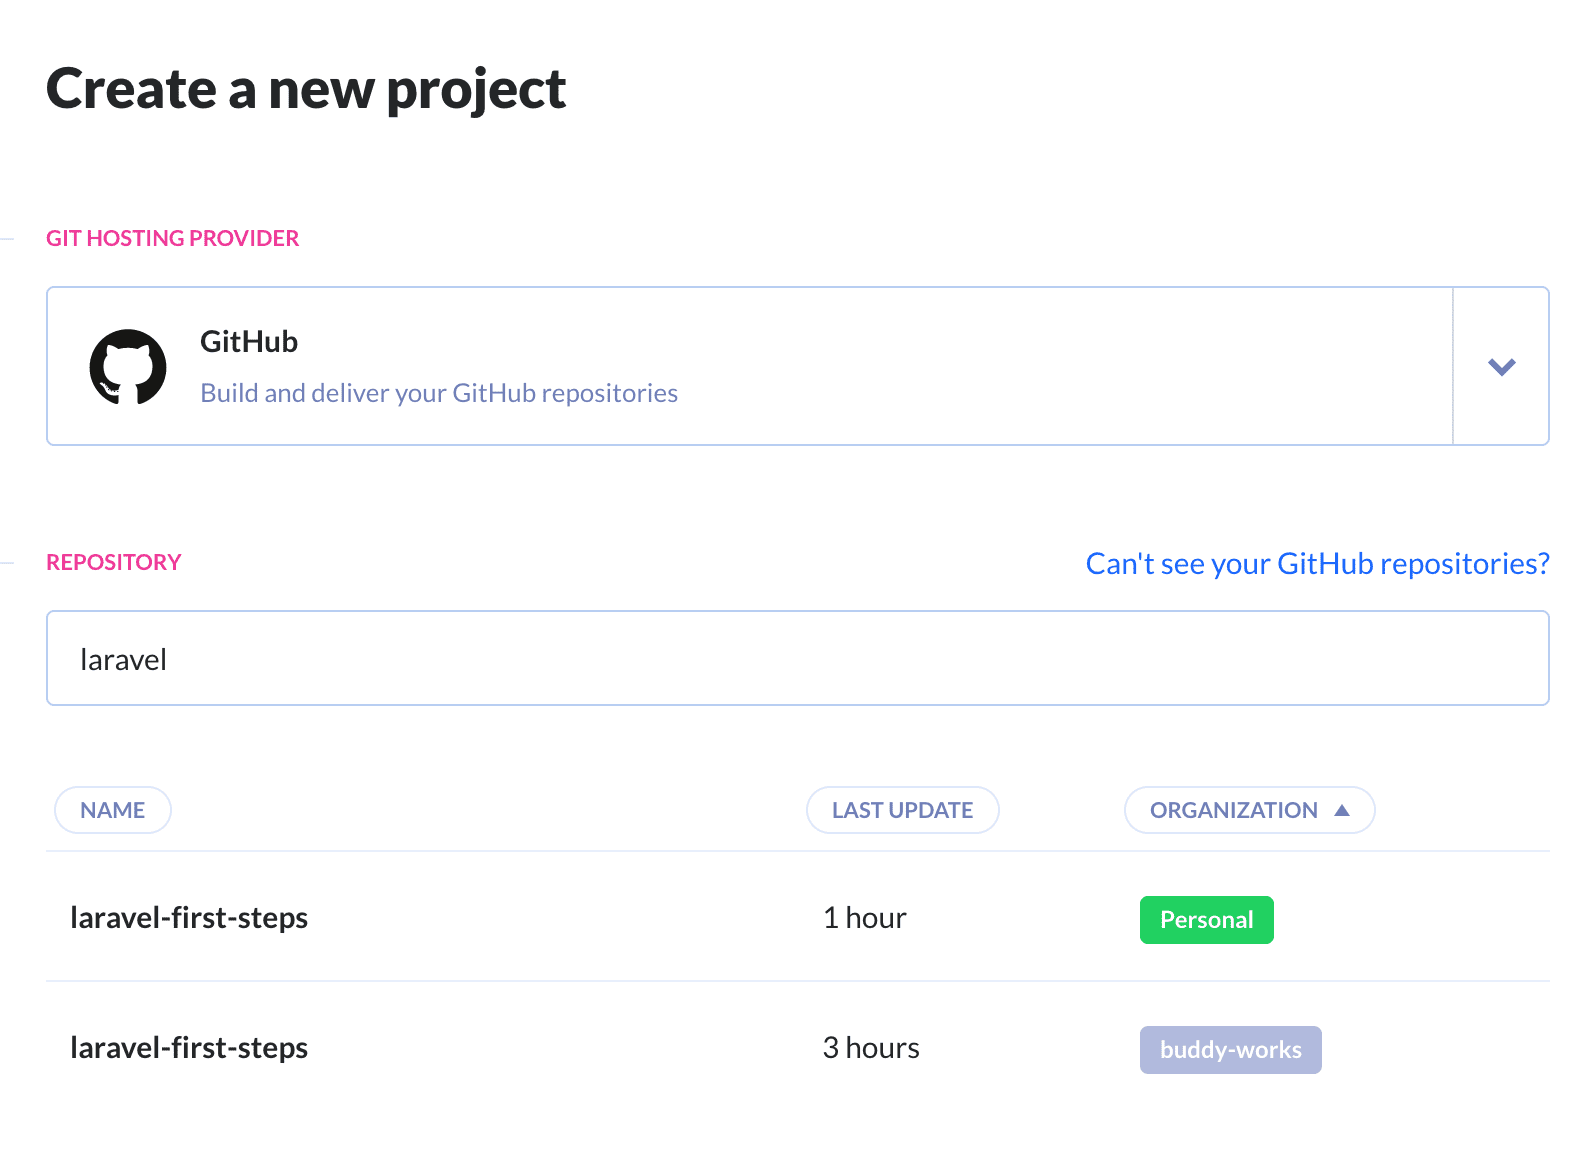
- Create a new project, choose GitHub as the provider, and select the forked Laravel repository:
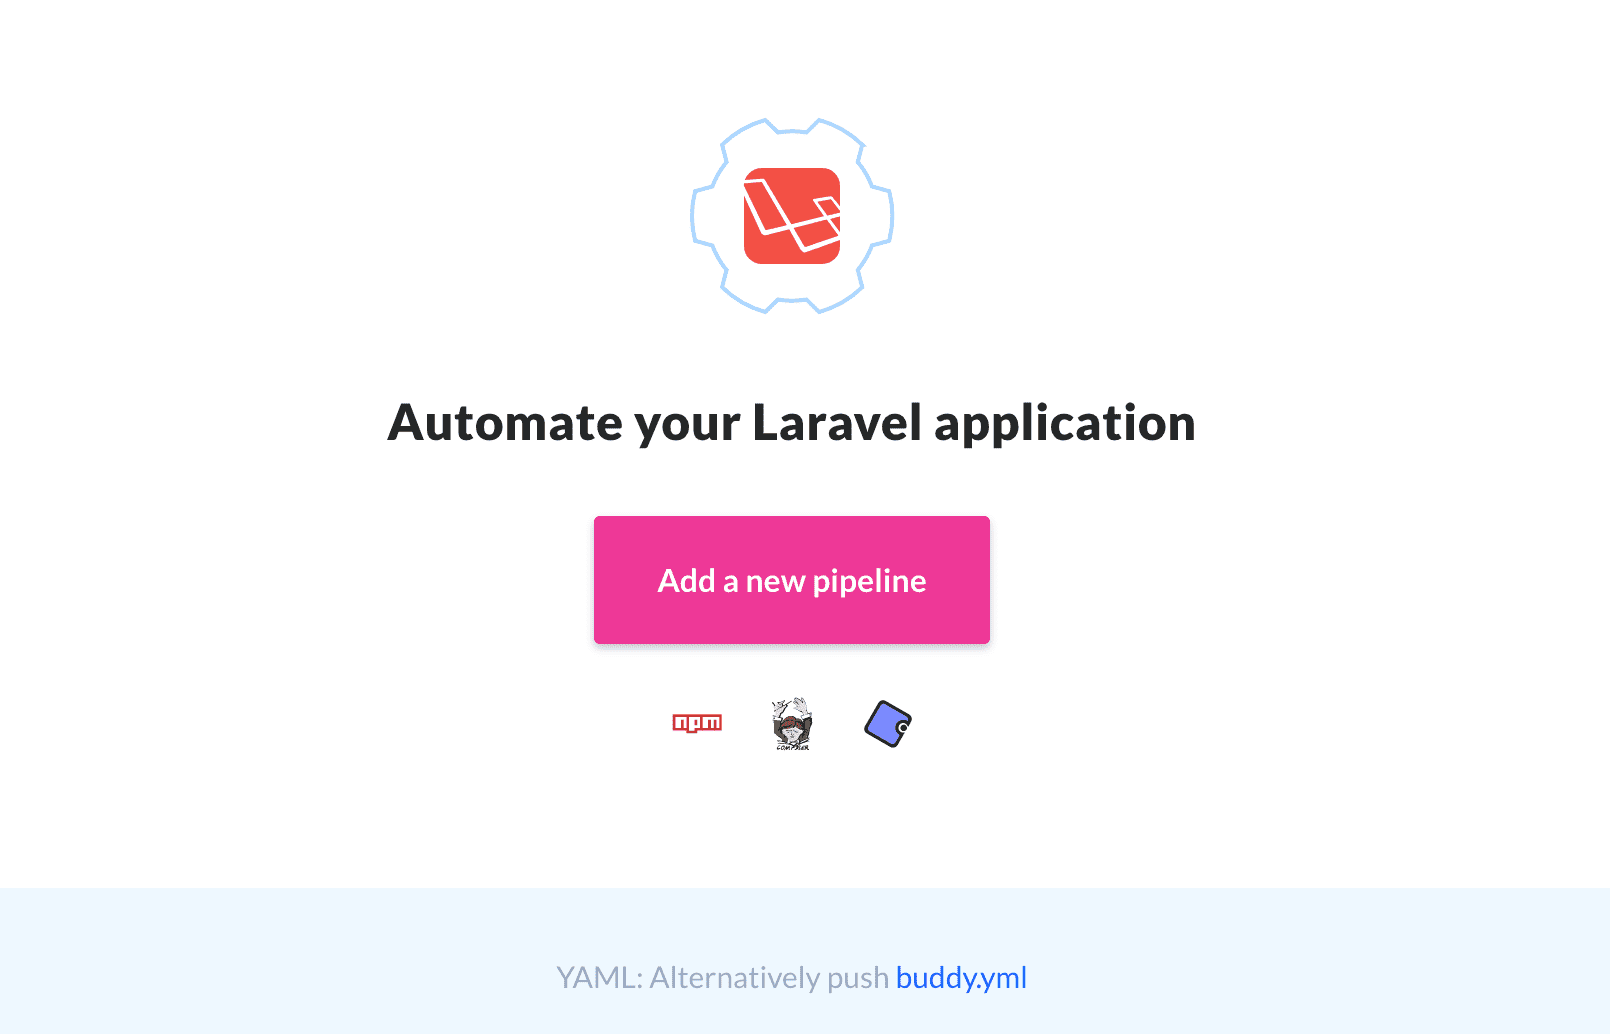
- Buddy will synchronize the project and detect the type of its contents:
- Click the button to add a new pipeline. Change the source branch to
dusktests, and set the trigger mode toRecurrentto run the tests on a given time interval:
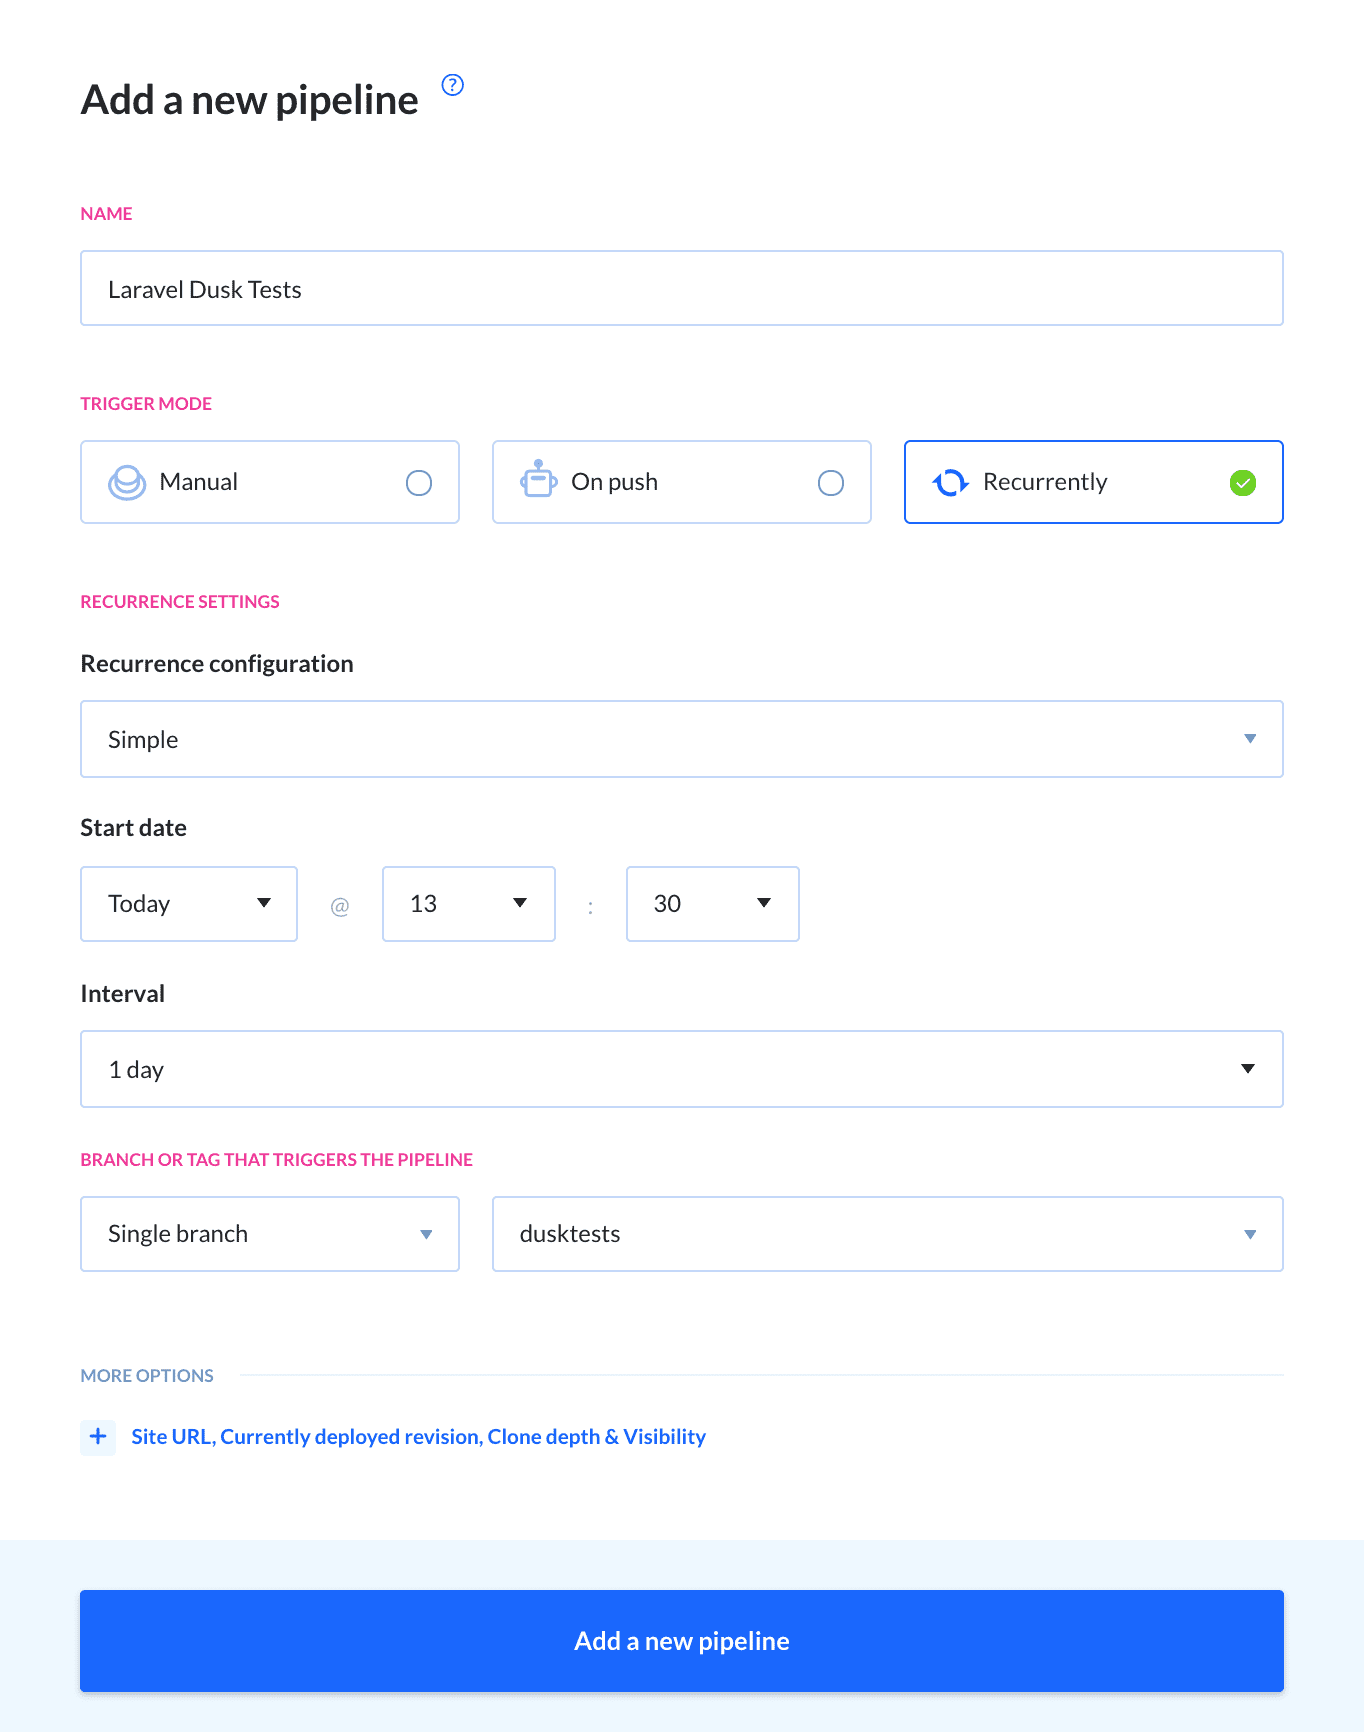
You can also configure the pipeline with a YAML file and push it to the dusktests branch.
Test action configuration
With the pipeline in place, we can now configure the tests:
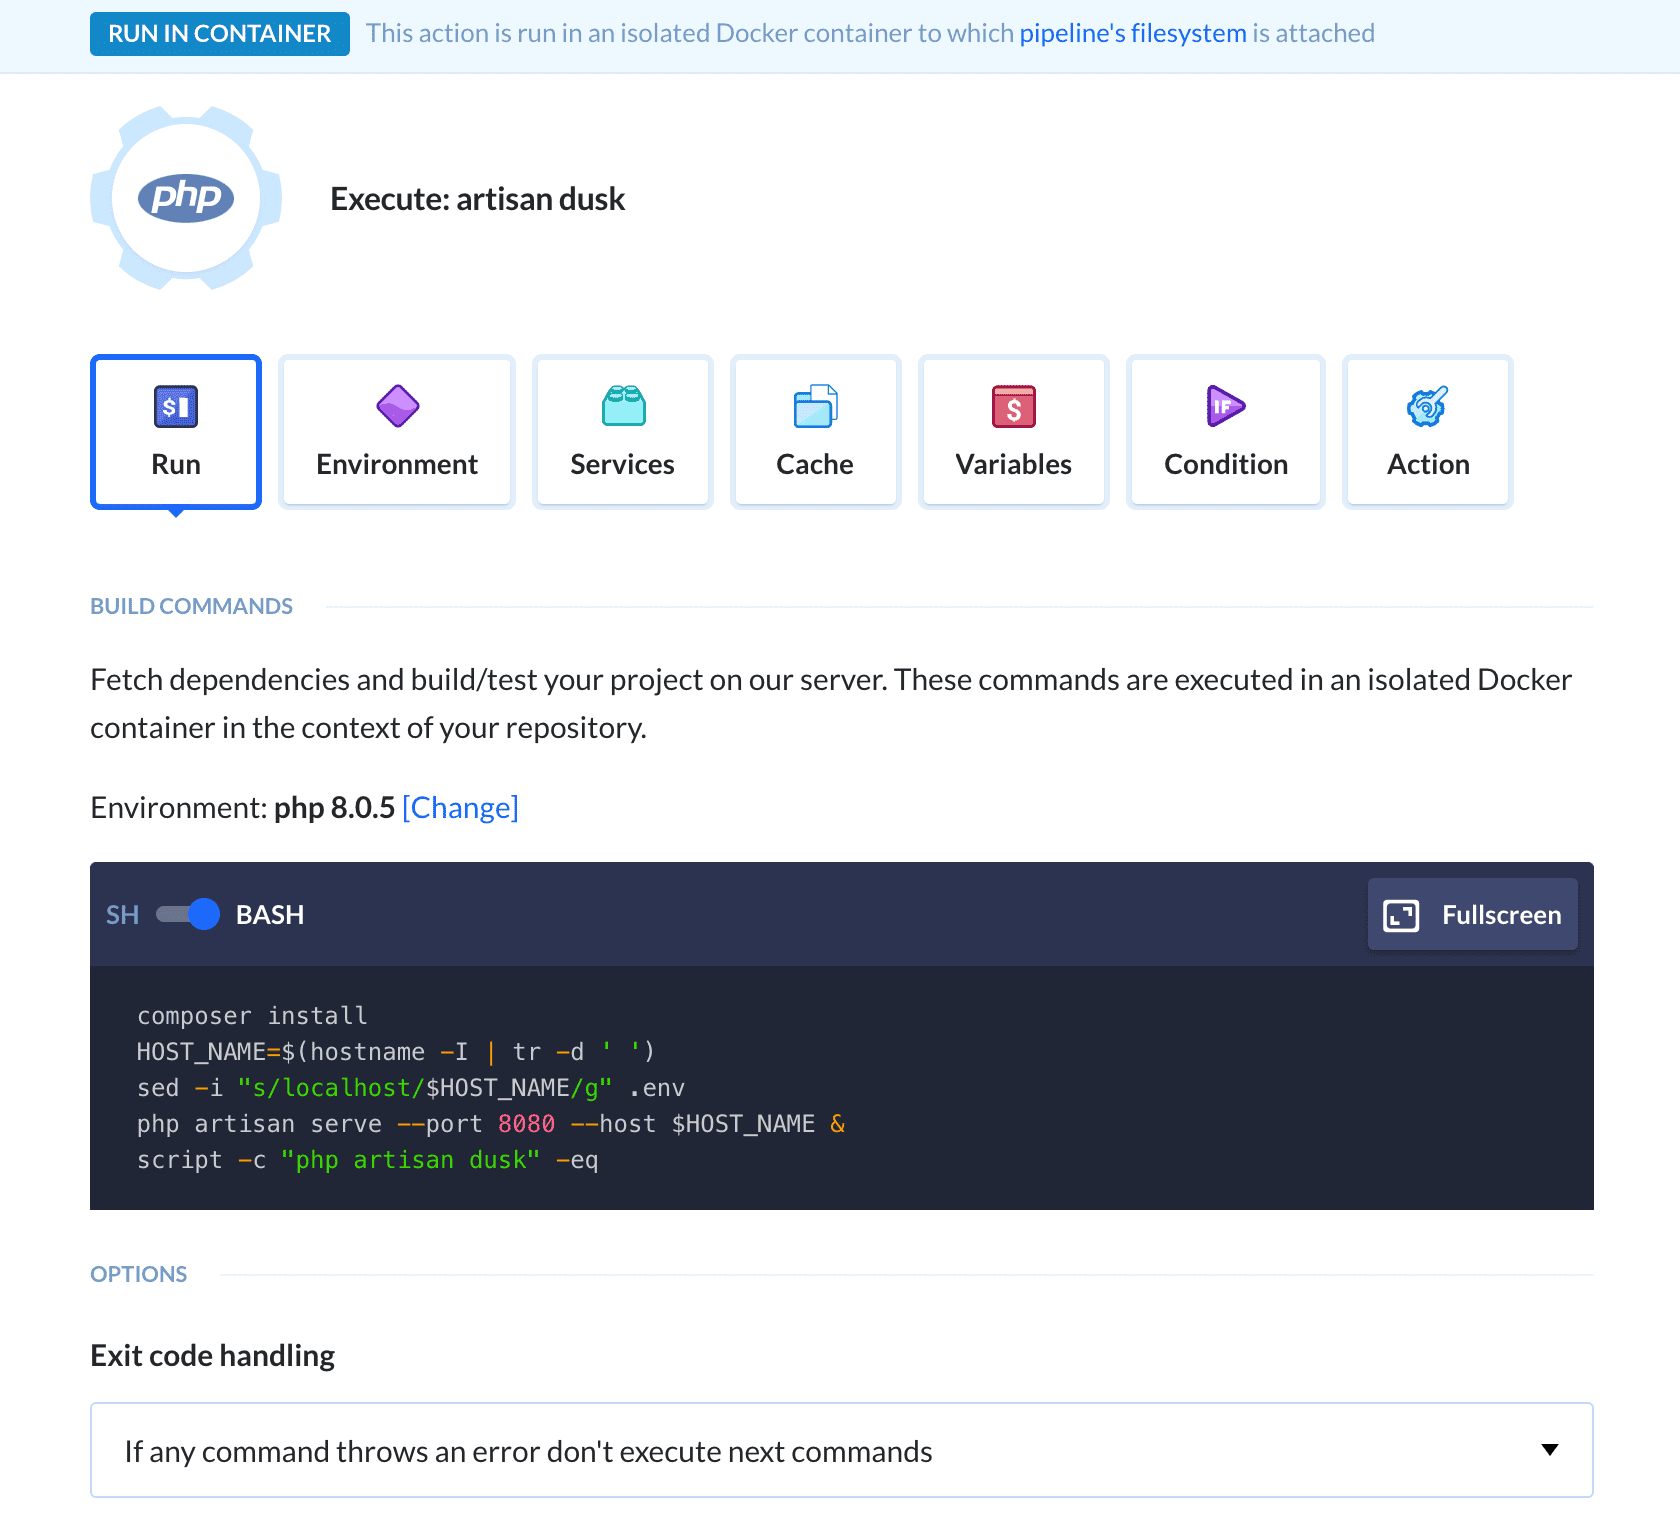
- Add the PHP action and paste the following commands:
composer install
HOST_NAME=$(hostname -I | tr -d ' ')
sed -i "s/localhost/$HOST_NAME/g" .env
php artisan serve --port 8080 --host $HOST_NAME &
script -c "php artisan dusk" -eq
Script details
HOST_NAME=$(hostname -I | tr -d ' ')– fetches and trims the IP of the containersed -i "s/localhost/$HOST_NAME/g" .env– changes the IP in.envto the fetched addressphp artisan serve --port 8080 --host $HOST_NAME &– runs application with host and portscript -c "php artisan dusk" -eq– runs the Dusk tasks; we cannot do that with a script command because command fields in Buddy are not interactive
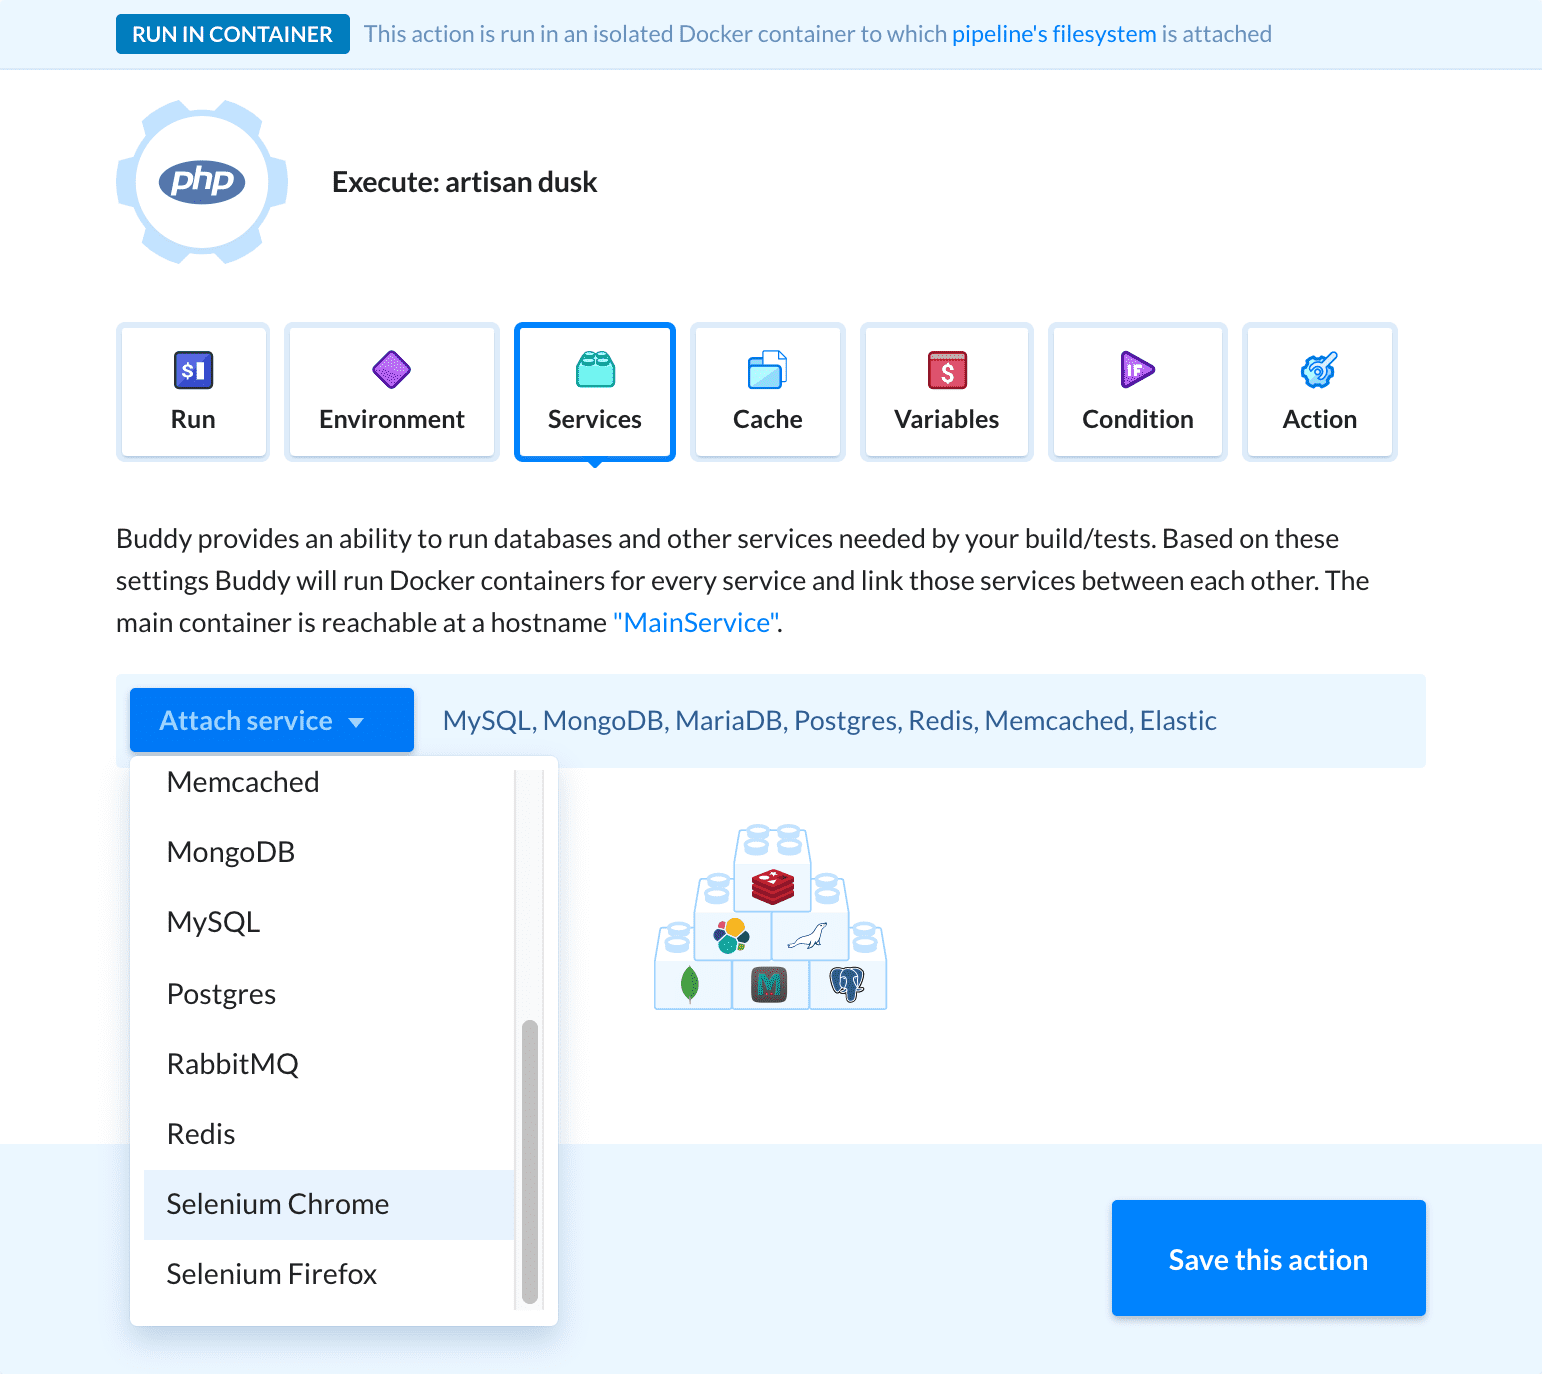
- Switch to the Services tab and attach Selenium Chrome:
The last thing to do is to update the config file with the details of the testing server and push it to the repository. The example below will let you run the tests both locally and remotely on Buddy. In Buddy, Selenium tests are available at
http://selenium-ch:4444/wd/hub. Open the filetests\DuskTestCase.phpand set the driver address as follows:protected function driver()
{
$options = (new ChromeOptions)->addArguments([
'--disable-gpu',
'--headless',
'--window-size=1920,1080',
]);
return RemoteWebDriver::create(
env('SELENIUM_HUB', 'http://localhost:9515'), DesiredCapabilities::chrome()->setCapability(
ChromeOptions::CAPABILITY, $options
)
);
}
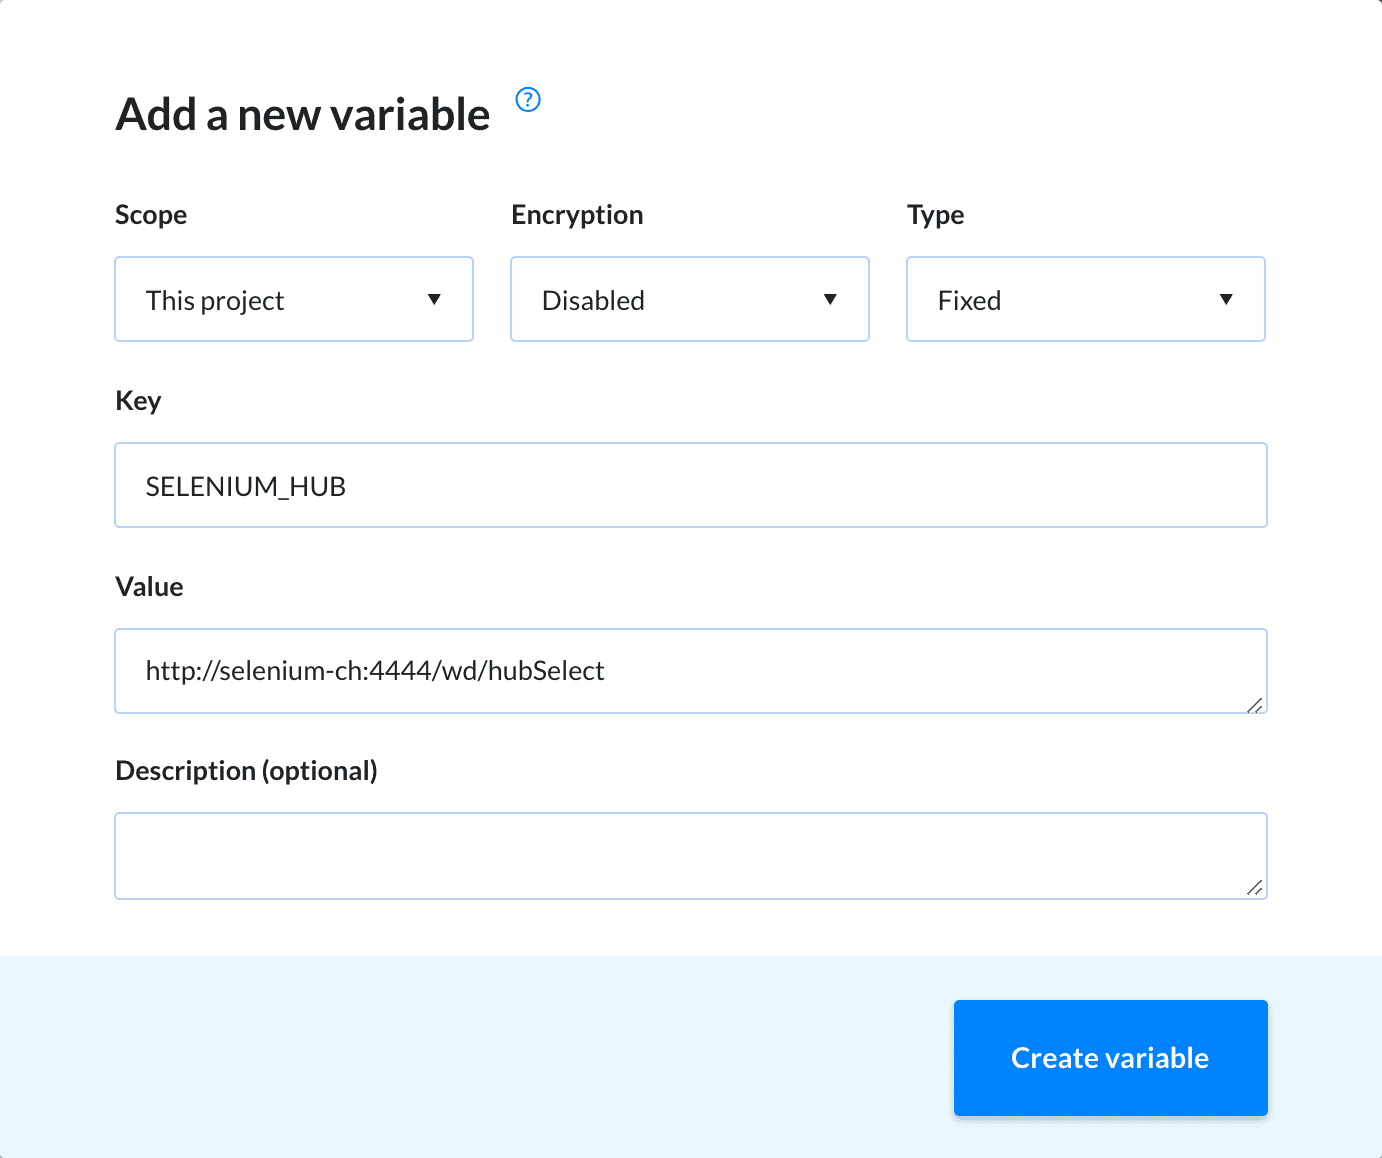
The URL http://localhost:9515 is the default address of the Chrome driver. As you can see, we used an environment variable to store the address of the Selenium Hub – this is a good practice that will allow you to test your code in different environments without the need for editing the files.
To add the variable, switch to the Variables tab and click Add a new variable. Set the key to SELENIUM_HUB, paste http://selenium-ch:4444/wd/hub to the value input, and configure the scope (workspace, project, or pipeline).
If you're using the dusktests branch instead of configuring the tests on your own, the details of the testing server will be already added to the config file.
Running the tests
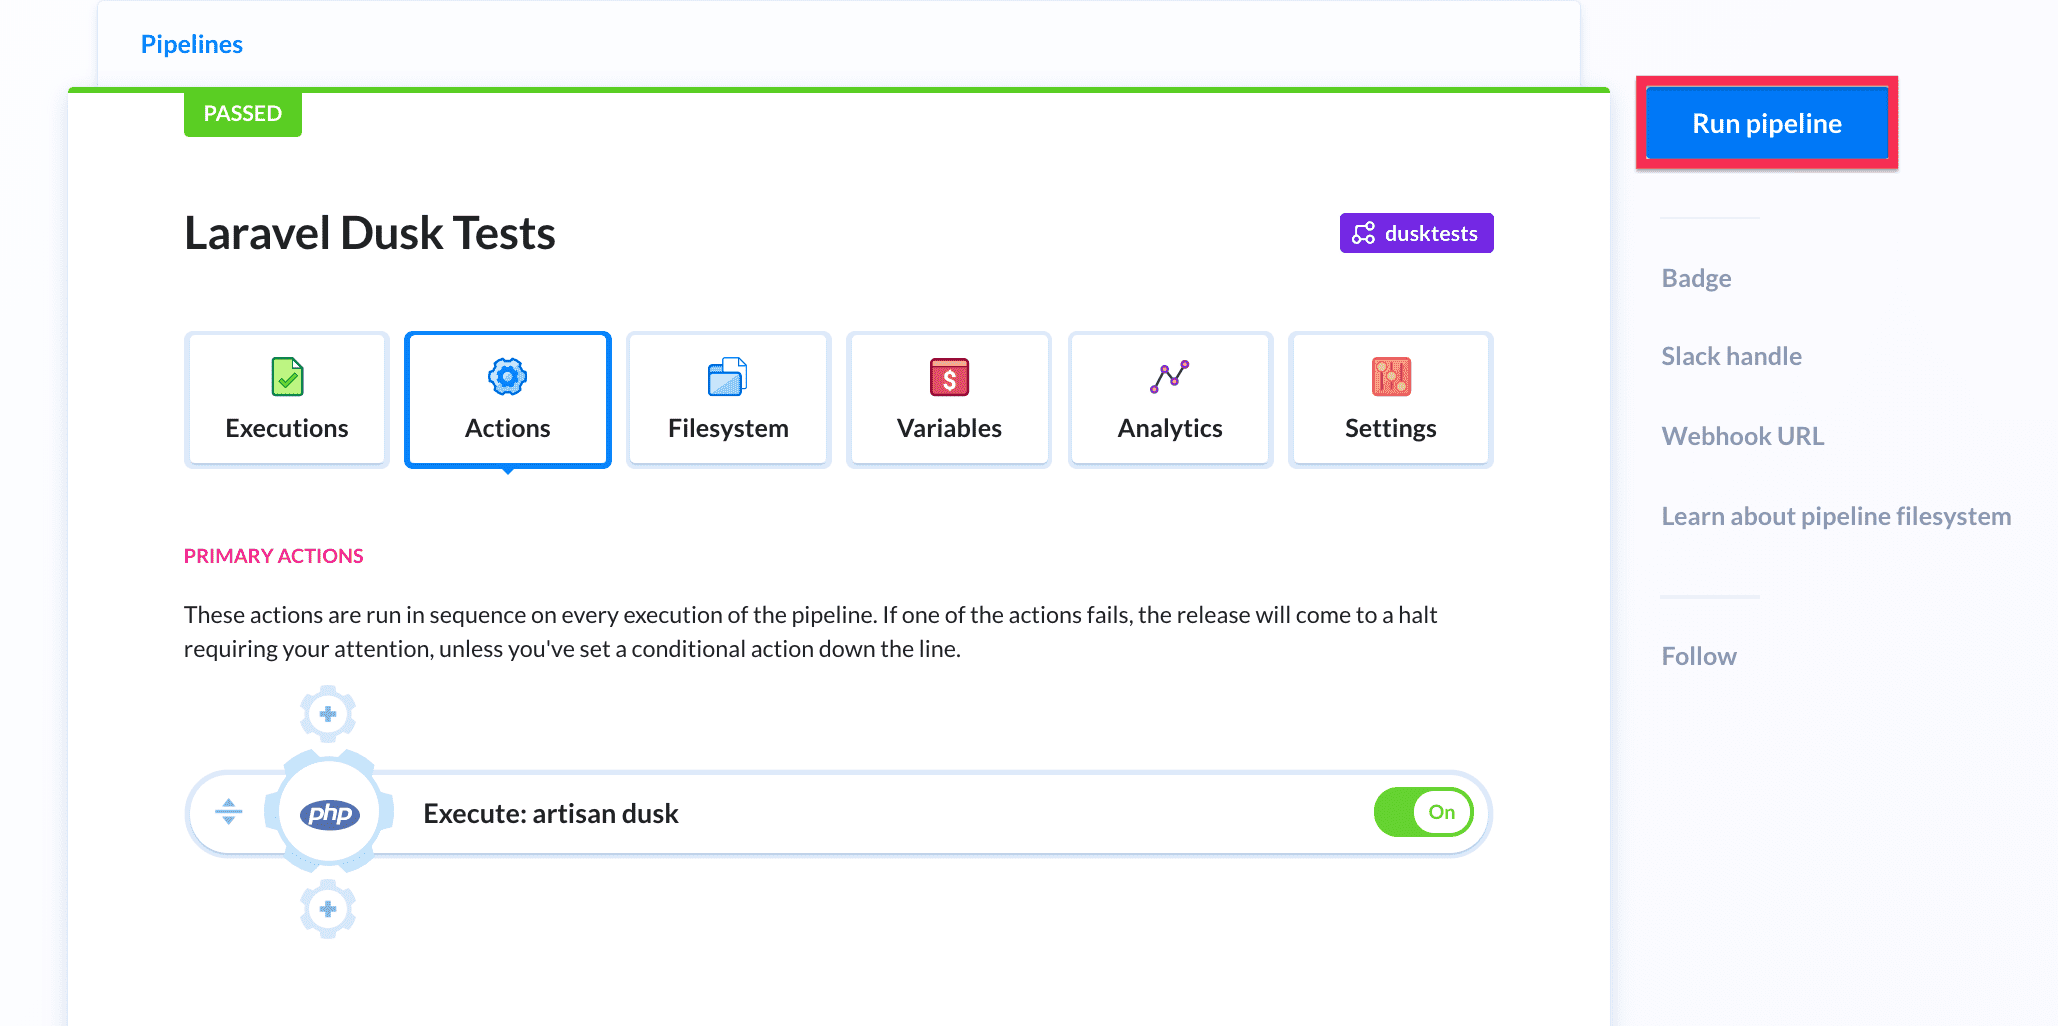
The tests have been configured to run on the interval, but you can run them manually at any time with the Run button:
Once the tests have finished, you can view the execution logs in the dedicated tab:
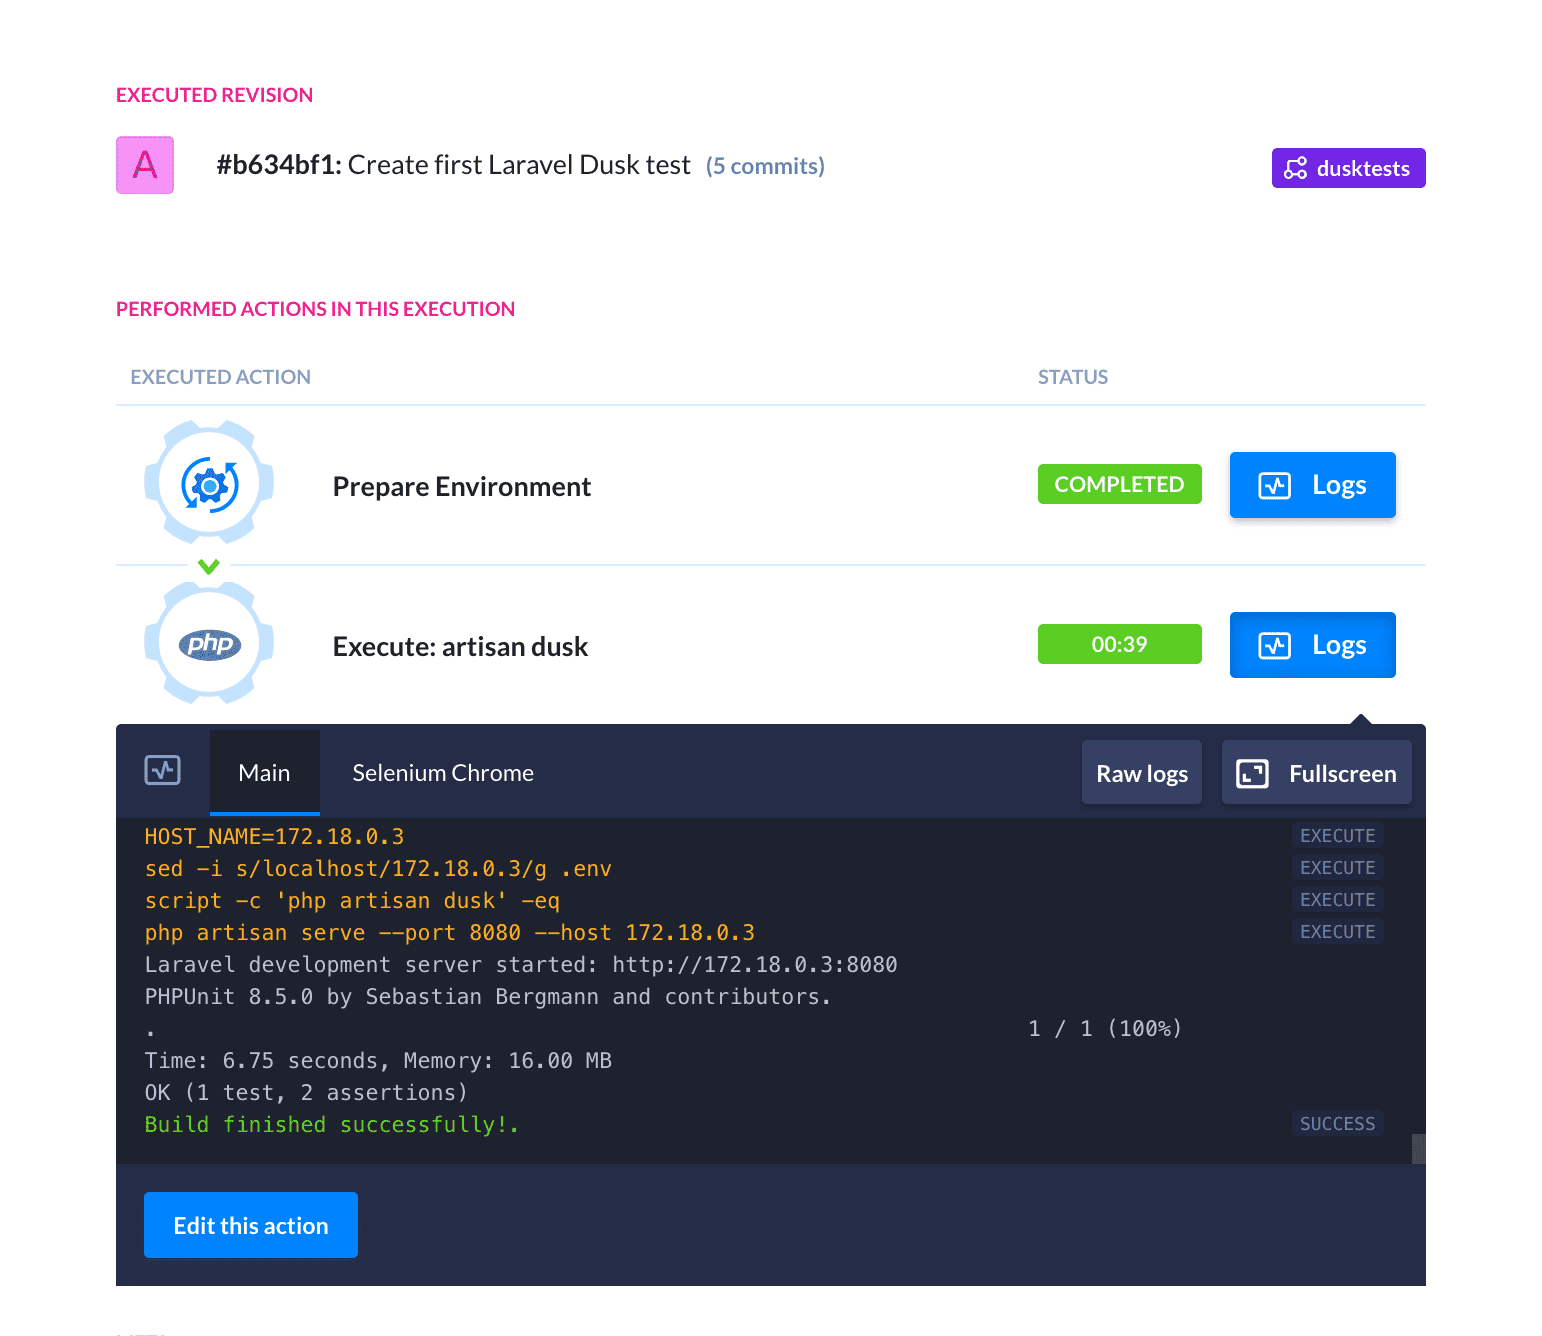
Congratulations! You have successfully written and configured browser tests for your PHP/Laravel application!
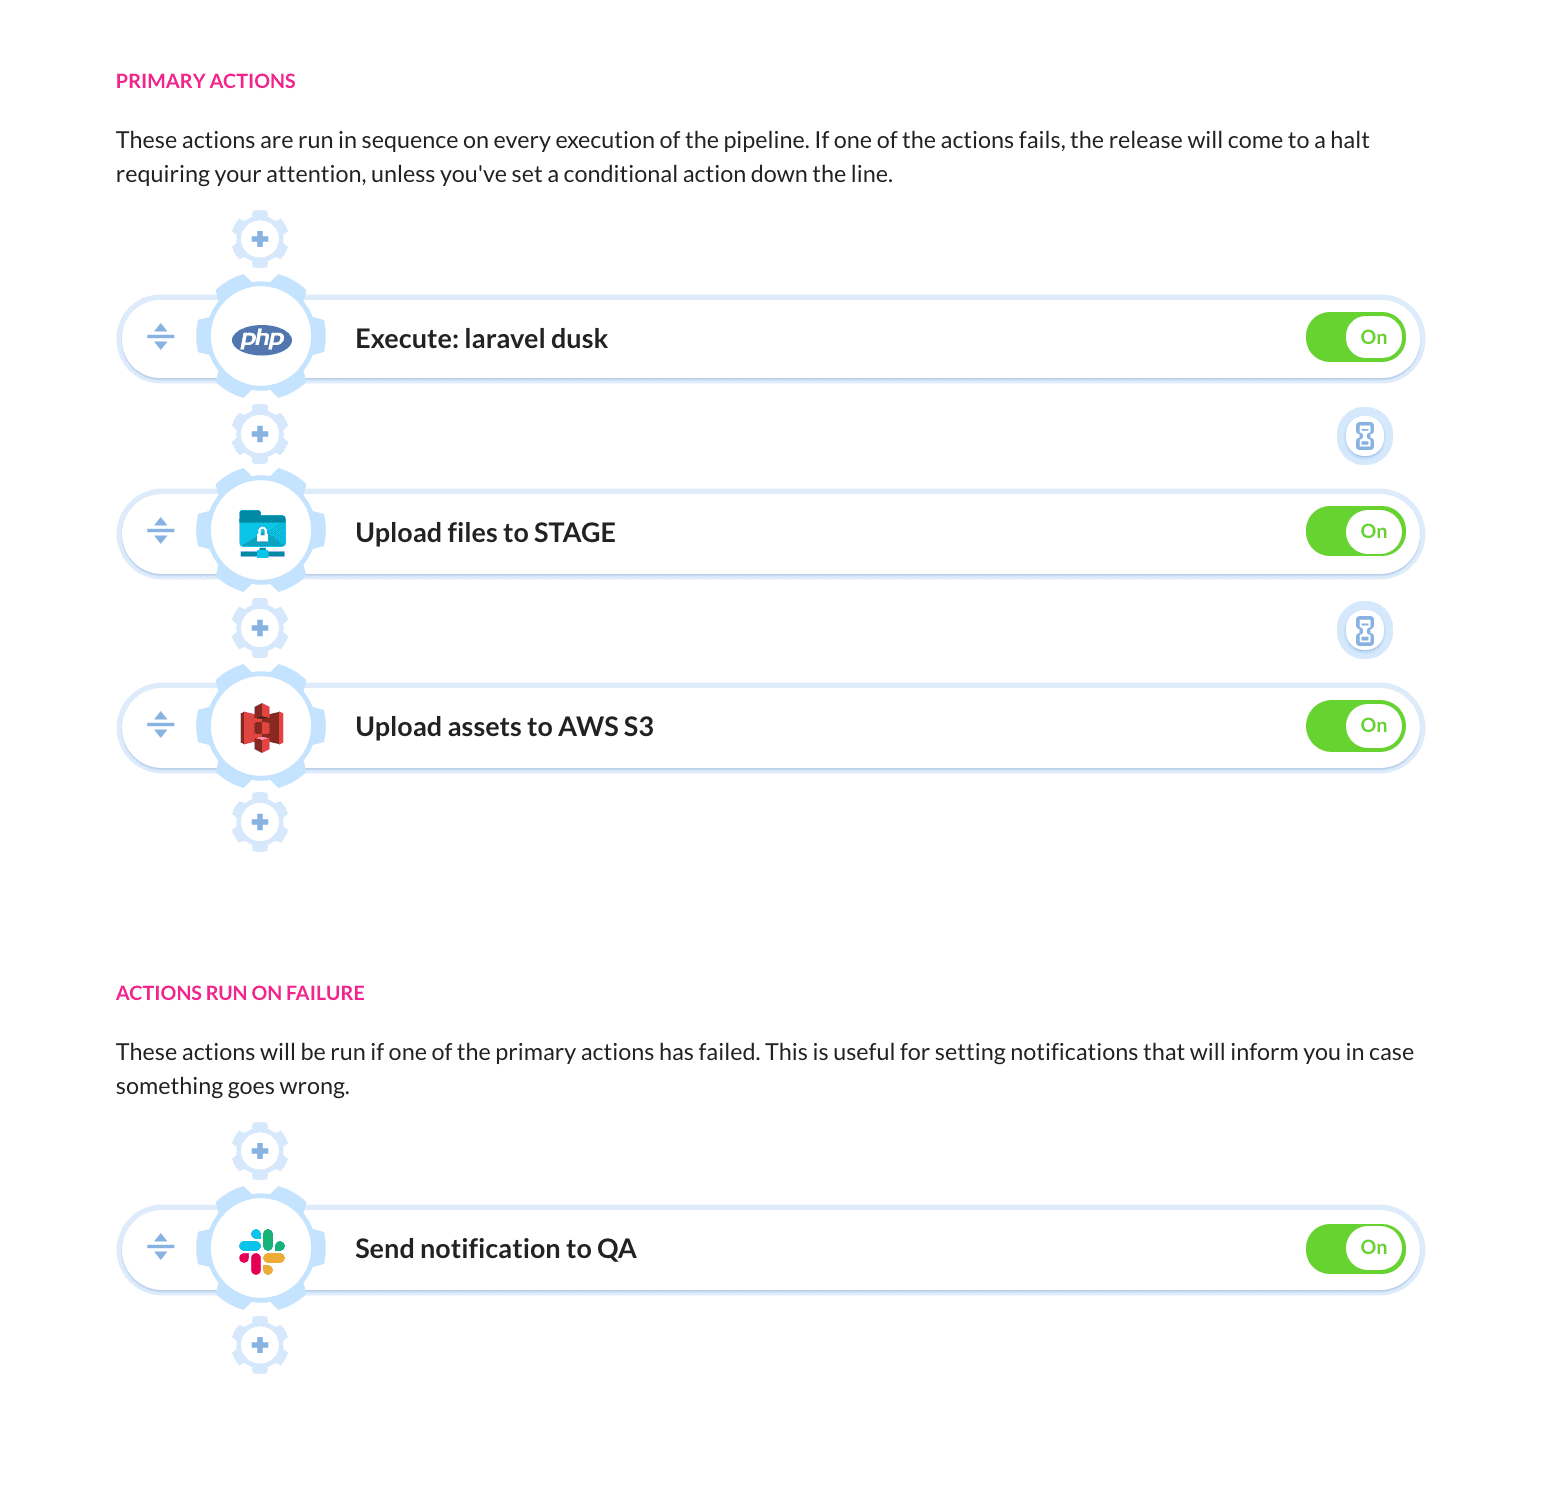
Auto-deployment
Just like with regular Laravel unit tests, you can expand your delivery process by adding action to deploy the app to your hosting provider for immediate feedback. Combine it with notifications and you'll never miss a thing going on in your project: