Docker中的Laravel
In this article, we'll show you how to create a Docker image of a Laravel application, push it to an image registry, and use Docker in Continuous Delivery.
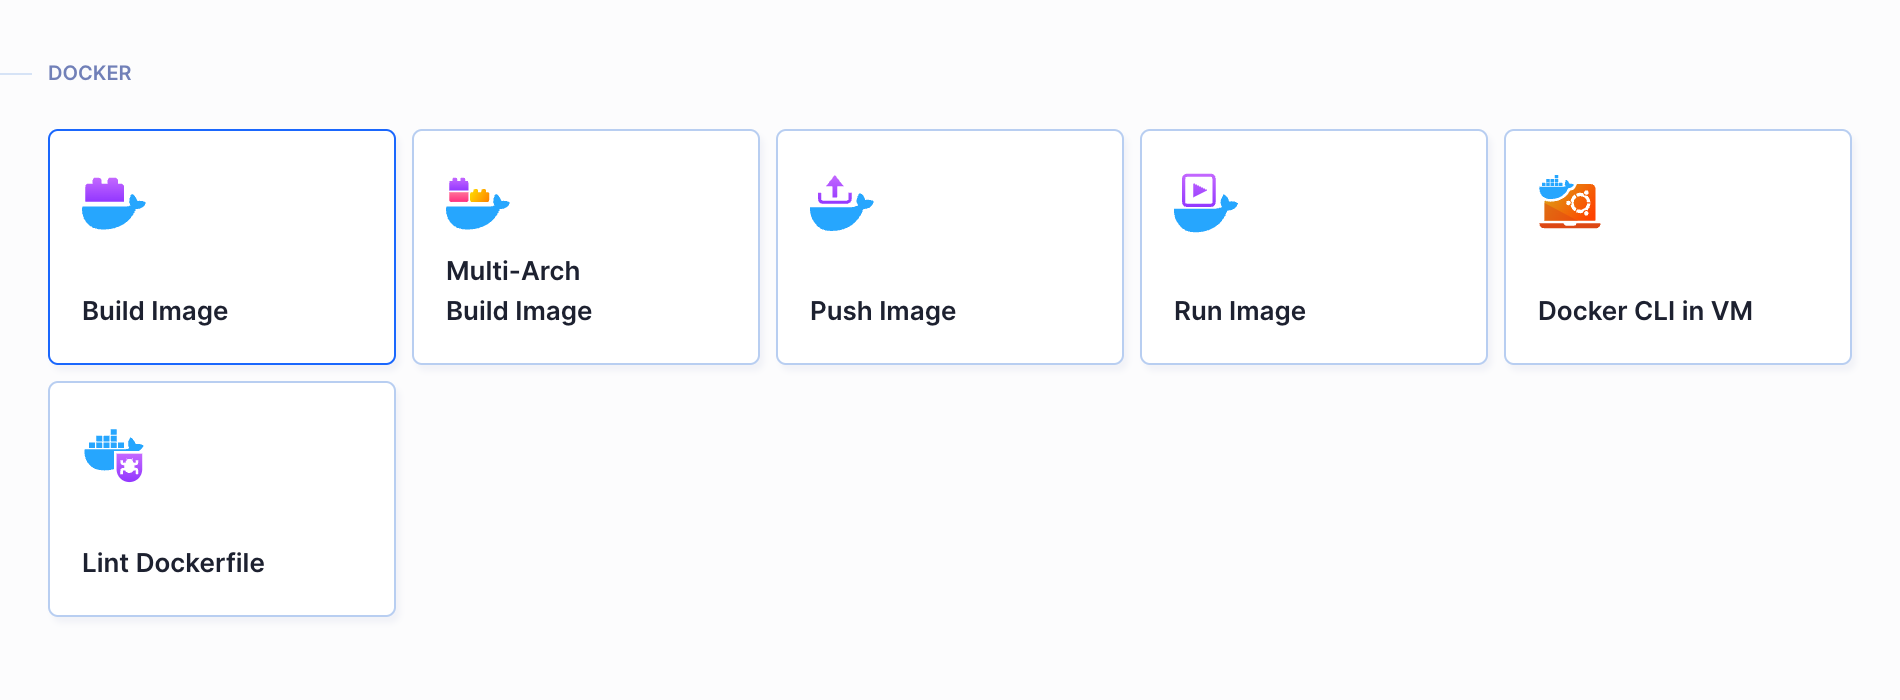
Actions used in this guide:
Introduction
What is Laravel?
Laravel is a fast, user-friendly, and well-documented framework that you can use to build all kinds of web applications. According to its official website:
Laravel is a web application framework with expressive, elegant syntax. (...) Laravel strives to provide an amazing developer experience, while providing powerful features such as thorough dependency injection, an expressive database abstraction layer, queues and scheduled jobs, unit and integration testing, and more.
What is Docker?
Docker is a virtualization method that has a huge impact on today's software development landscape. Its main draw is a different approach to virtualization architecture that eliminates the "works on my machine" issue when working across different environments. A perfect companion for developers who code in collaboration with others. Here are some key aspects of Docker:
- it's faster and less resource-consuming than 'traditional' VM's
- it's easy to set up and configure
- it's a breeze to reuse: pick an existing Docker image as the cornerstone of your setup and install any libraries or packages not bundled with the image
- it's shareable: you can push images to Docker registries and pull them on other machines, just like you push and pull code from Git
Hungry for more insight on Docker and containers? Watch this video by The Simple Engineer:
Laravel in Docker
In theory, Dockerization means activities leading to the launch of the application in a Docker container. In case of a Laravel app, this can be translated into the following steps:
- writing a Dockerfile for the application
- building a Docker image from the Dockerfile and pushing it to the registry
- pulling the image and running launching the app on the server
In this guide, we're going to containerize a simple calculator written with the Laravel framework. Simply fork the repository and Dockerize Laravel with the instructions below!
To check out how the calculator works before baking Laravel into a Docker image, run this command in the repository:
php artisan serve
If you'd like to see how to create such app from scratch, we described how to write and run the calculator in this guide.
Install Docker
Begin with installing Docker on your machine:
Write a Dockerfile
The Dockerfile is a text that defines the contents and launching method of our Docker image. Create a new file in the repository and name it Dockerfile. Populate the file with the following lines. We are going to break them down one by one later on.
FROM php:8.0.5
RUN apt-get update -y && apt-get install -y openssl zip unzip git
RUN curl -sS https://getcomposer.org/installer | php -- --install-dir=/usr/local/bin --filename=composer
RUN docker-php-ext-install pdo mbstring
WORKDIR /app
COPY . /app
RUN composer install

CMD php artisan serve --host=0.0.0.0 --port=8181
EXPOSE 8181
Dockerfile details
Line 1
Just like we mentioned in the introduction, Docker images can be inherited from other users. Using official Docker images guarantees the template is well written and prepared. In this case, we shall PHP in version 8.0.5:
FROM php:8.0.5
Docker images are shared through image registries. The most popular is Docker Hub. You can browse the list of all official Docker images here.
Lines 2-4:
These lines cover the installation of tools required to install Laravel: Git, Zip, Unzip, and OpenSSL. Next, we run the installation command and run PHP modules: PDO and mbstring.
RUN apt-get update -y && apt-get install -y openssl zip unzip git
RUN curl -sS https://getcomposer.org/installer | php -- --install-dir=/usr/local/bin --filename=composer
RUN docker-php-ext-install pdo mbstring
Lines 5-7:
Here we set the working dir in the container to /app, copy the application files to it, and install Docker compose with composer install"
WORKDIR /app
COPY . /app
RUN composer install
Line 8:
Use CMD to set the command that will be run when launching the Docker image. In our case, we're going to serve the application with php artisan set to port 8181:
CMD php artisan serve --host=0.0.0.0 --port=8181
Line 9:
Expose port 8181 outside the launched container. This is the same port our application is going to use:
EXPOSE 8181
Build Docker image for your Laravel project
With the Dockerfile in place, we're ready to create the Docker image. Fire up the terminal, go to the directory with the Dockerfile, and run:
docker build -t my-first-image .
The -t parameter is the tag of the Docker image. The dot at the end of the command means that we're going to build the image in the context of the parent directory. In other words, the files that will be copied to the /app directory in the container are files from the contextual directory of the build (in this case: repository directory).
Run Docker image
Time to run Laravel in Docker! Launch the container with docker run. Don't forget to add the parameter with the port!
docker run -p 8181:8181 my-first-image
Your Laravel application is now available from your browser at http://localhost:8181.
Sharing images through Docker registry
Once created, a Docker image can be pushed to a Docker registry from which it can be pulled and run by other users. You can create a private registry and serve images from your server, or use a cloud-hosted solution. Currently, the most popular cloud registries are:
In this part of the guide we'll show you how to add an image to Docker Hub so you can use it on another computer. Here's what you need to do:
- Create a profile on Docker Hub or log in with an existing one.
- Build the Laravel Docker image and tag it with your Docker Hub username:
docker build -t [USERNAME]/my-first-image .
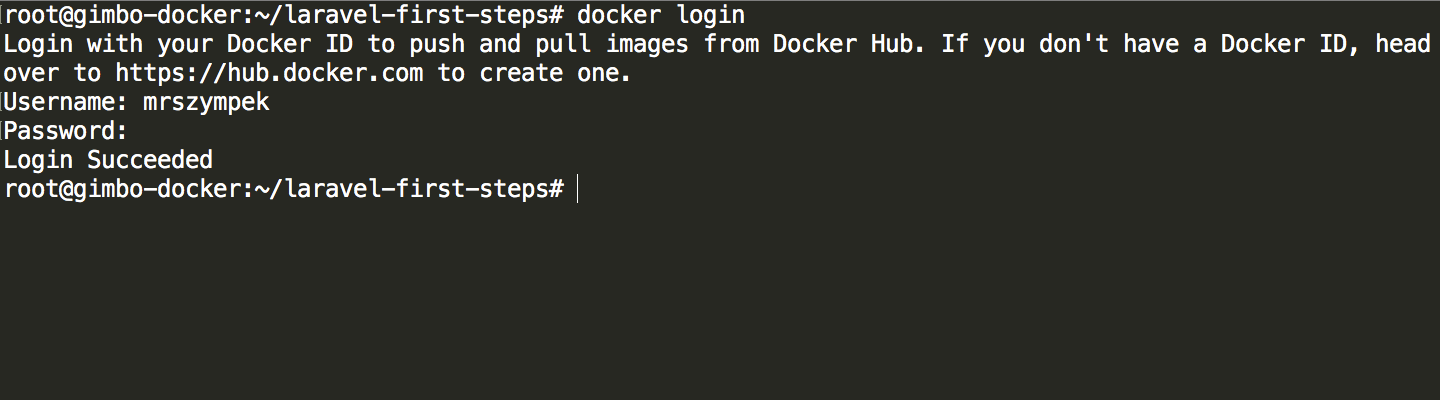
- Log in to Docker Hub with your username and password:
docker login
- Push the image to the registry:
docker push [USERNAME]/my-first-image
That's it. From now on you can pull and run the image on any computer with Docker installed. The default docker run command will automatically pull and run the image from the selected location:
docker run [USERNAME]/my-first-image

The download from a public provider might take a while depending on the load, so if you run your business from a location with a slow internet connection, consider setting up a private registry for better performance.
Docker in practice: Use cases
So far we've covered the technical process of building and sharing Docker images. Below we share some concrete appliance of Docker in everyday work.
Docker in development
Every developer knows that before you start working on an application you first need to prepare your work environment. This involves a series of pains, including but not limited to:
- installing the framework in version
X - installing the database in version
Y - installing the library in version
Z
The more advanced the project, the more dependencies and setup it involves, which considerably prolongs the process of delivering the application. We won't even mention the dependency hell when you're trying to develop two applications with different requirements on one computer.
With Docker, you don't need to write documentation detailing environment setup because the entire working environment is defined in the Laravel Dockerfile and safely stored in Git. This means you can go back to any revision of the file in the repository to see how your project evolved.
What's even more convenient, you don't need anything but Docker to run the software on your computer because everything else – frameworks, libraries, dependencies – is stored in the Docker image. What you do is run git clone, docker build, and docker run and the app is already running on your computer.
It's also possible to create a Dockerfile that will serve the application directly from the directory where you code, so that you won't have to rebuild the Docker image on every change!
Docker in QA
The phrase above is bound to appear whenever a tester and a developer discuss a new feature. In reality, 99% of such problems result from compatibility issues between different environments in which the application is run. One developer codes the application on Linux, another one on Mac, and QA runs the tests on Windows. With Docker, the environment is the same for every member of the team: the app is forwarded to QA in the form of a Docker image pre-configured in the Dockerfile.
Docker for dev/stage/production
Usually, the development process is divided into three consecutive environments:
- Development – where the actual coding takes place
- Staging – where the application is reviewed and tested
- Production – where the final version of the application is hosted
Each of these environments is assigned to a separate branch in the repository. When the work in the development branch is over, it is merged to the staging branch, where the QA runs their tests. Then, the staging branch is merged into the master (production) branch and the application is ready to be reviewed by the client.
With Docker, each environment is described in a separate Dockerfile for every branch. If you change something in the DEV branch, the STAGE branch remains in its original state until the changes have been merged.
Continuous Delivery with Buddy
Buddy is a tool that lets you streamline the process of building, pushing, and running Docker images to a manual trigger or a single push to the repository.
In this part of the guide, we'll add a pipeline that will build and test a Docker image, push it to the selected registry, and run it on the server.
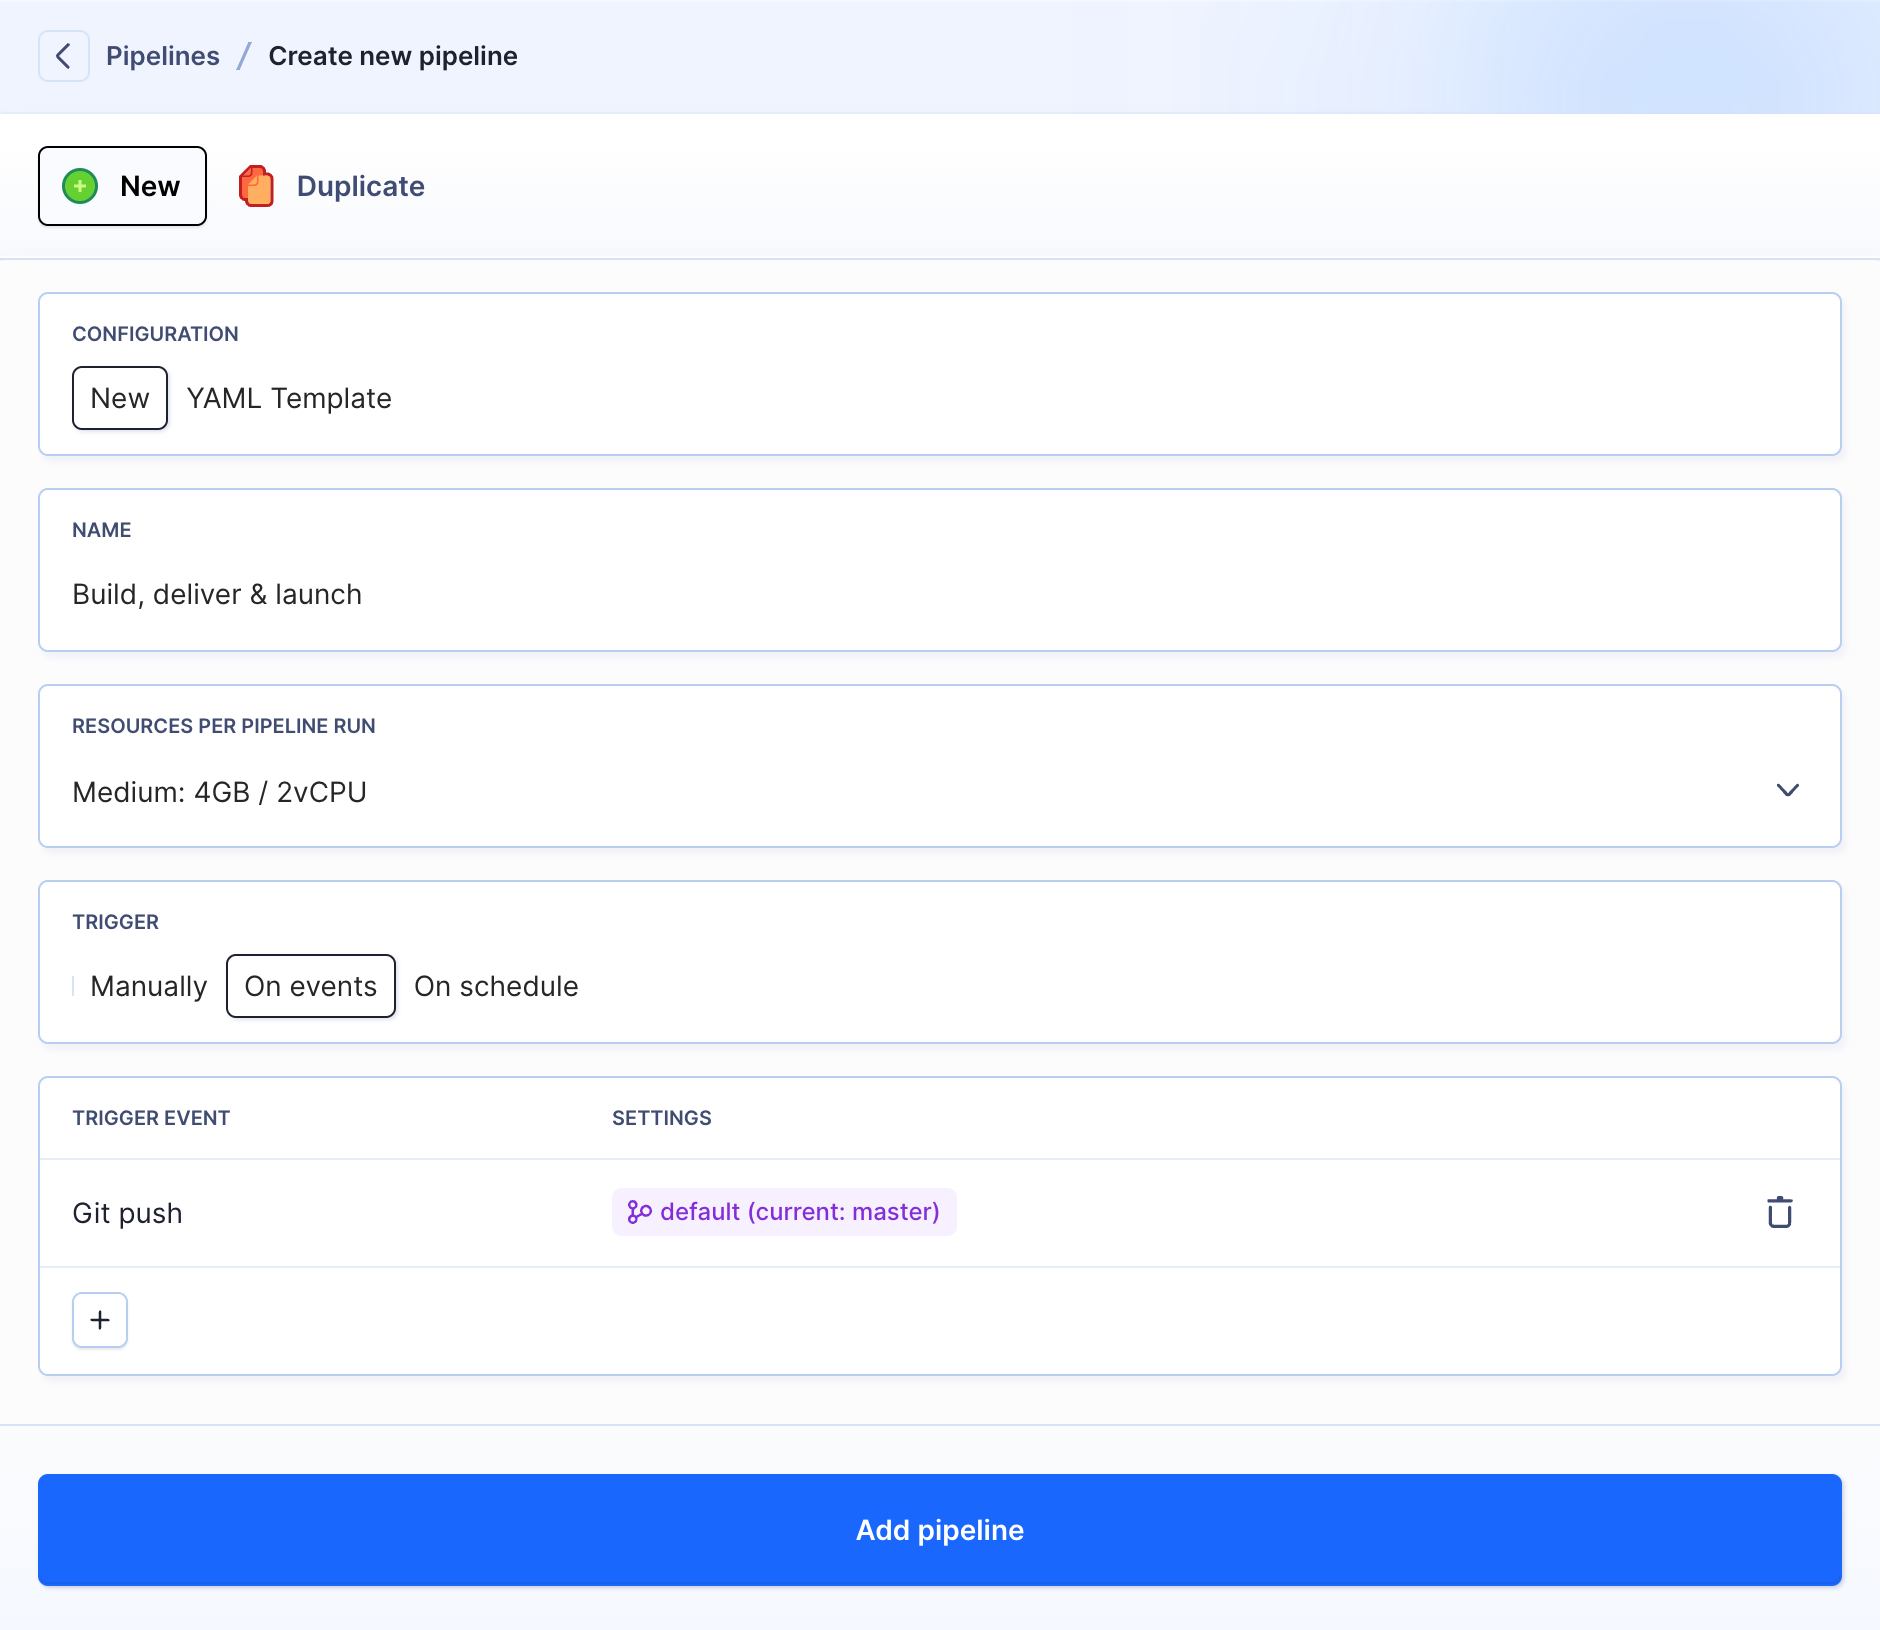
Pipeline configuration
Buddy drops configuration-as-code in favor of visual pipelines that can be arranged using preconfigured actions.
All you need to start is a repository with your project:
sign up
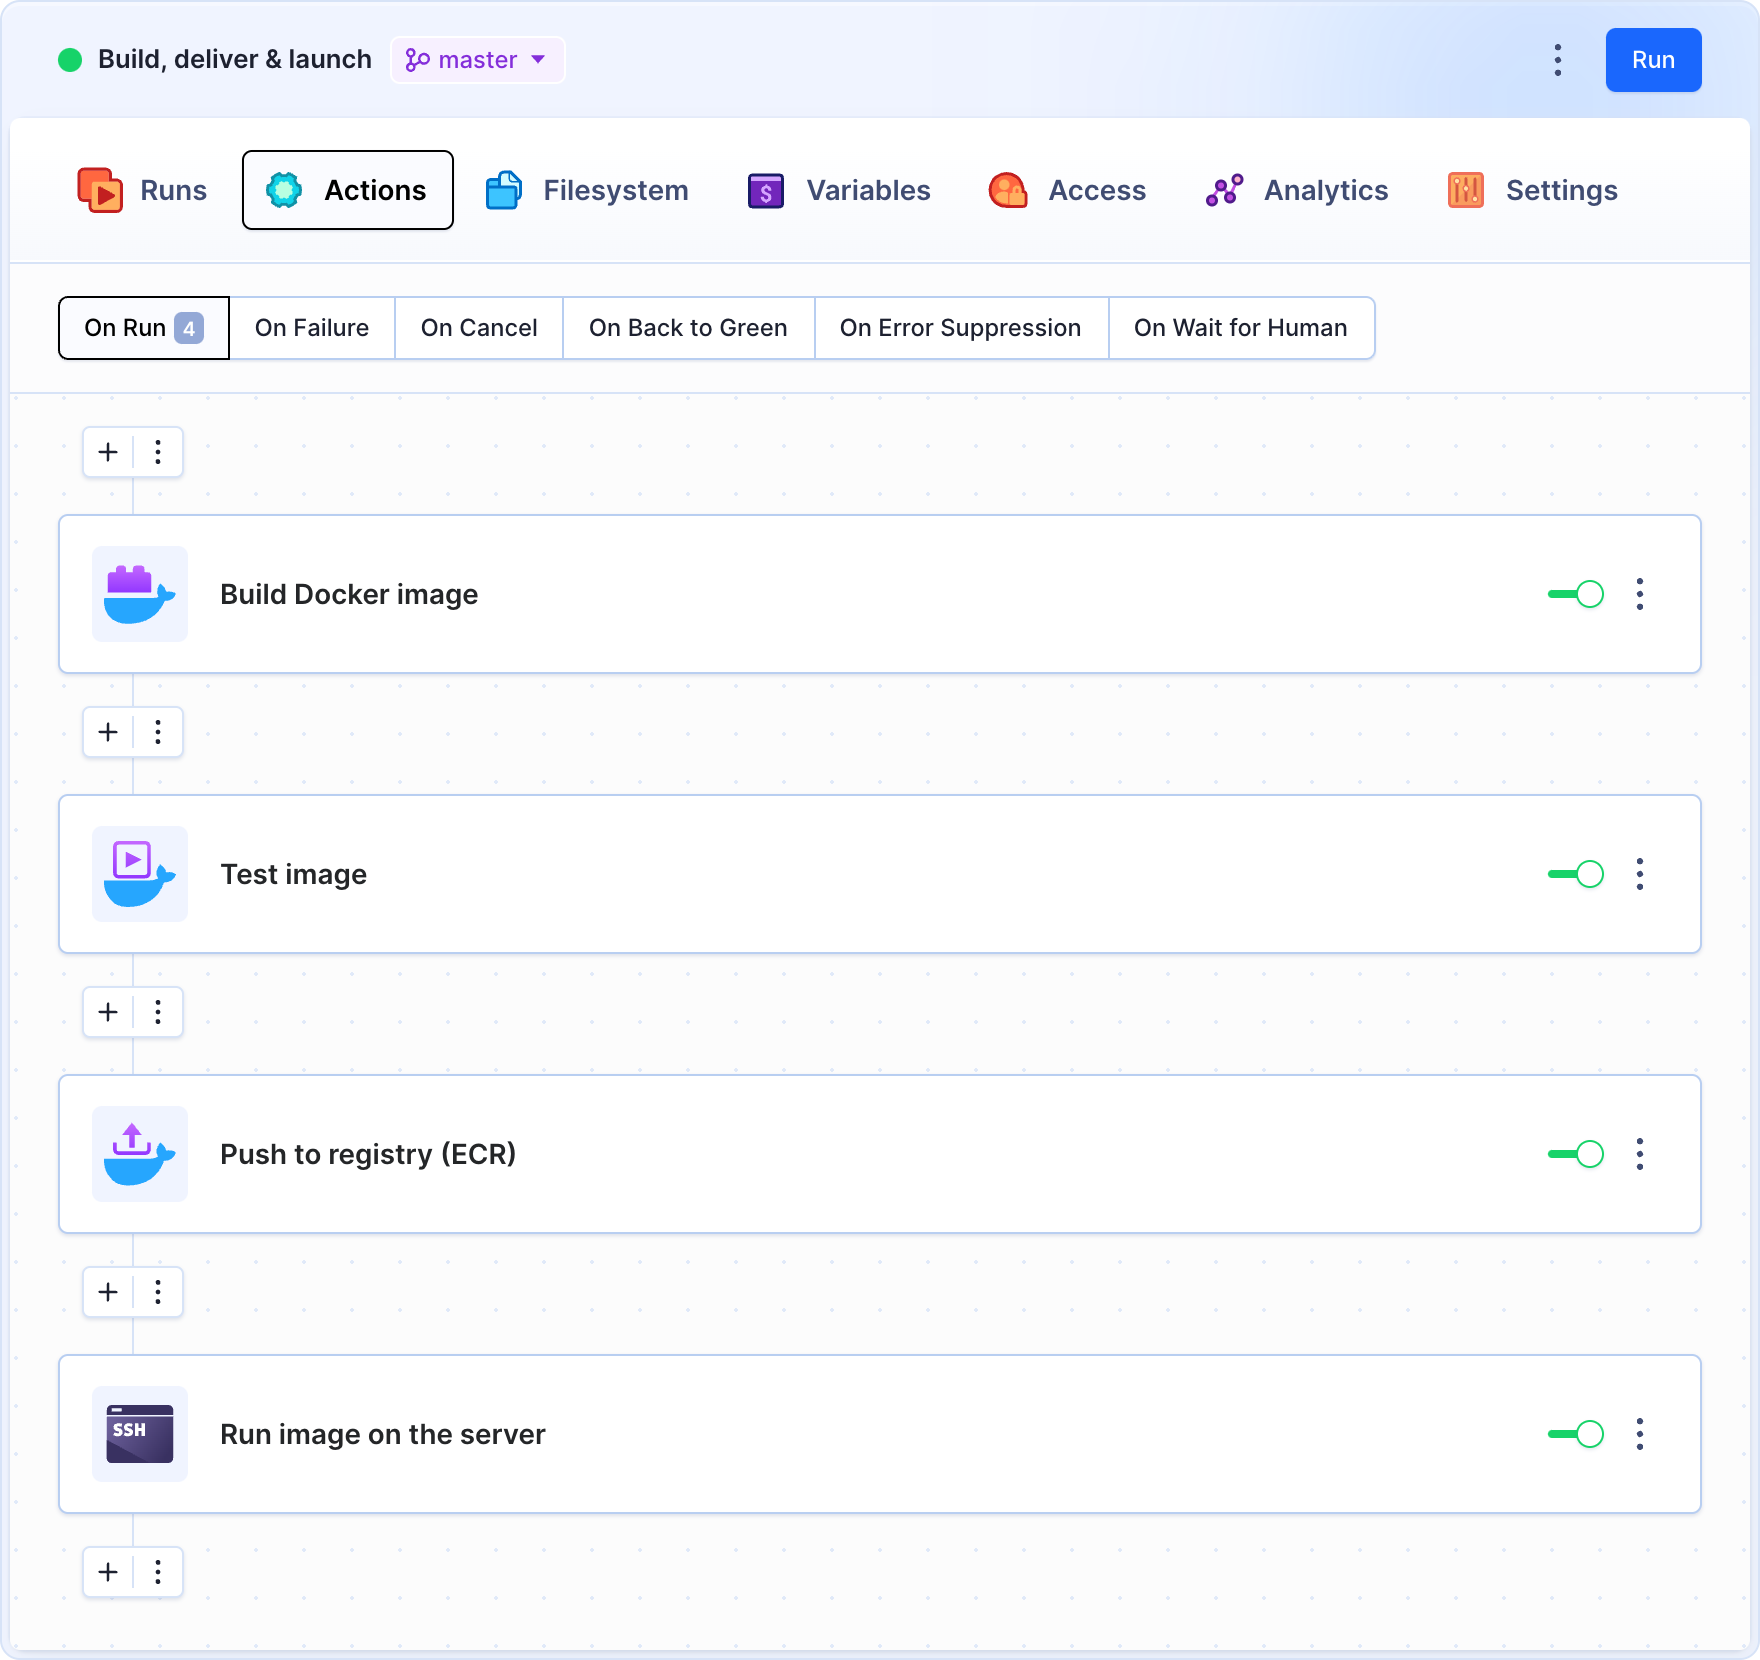
Create a new pipeline and set the trigger mode to On push. This way the pipeline will update the image on every change in the selected branch:
- Add the Build Docker image action and select the Dockerfile with the description of your app:
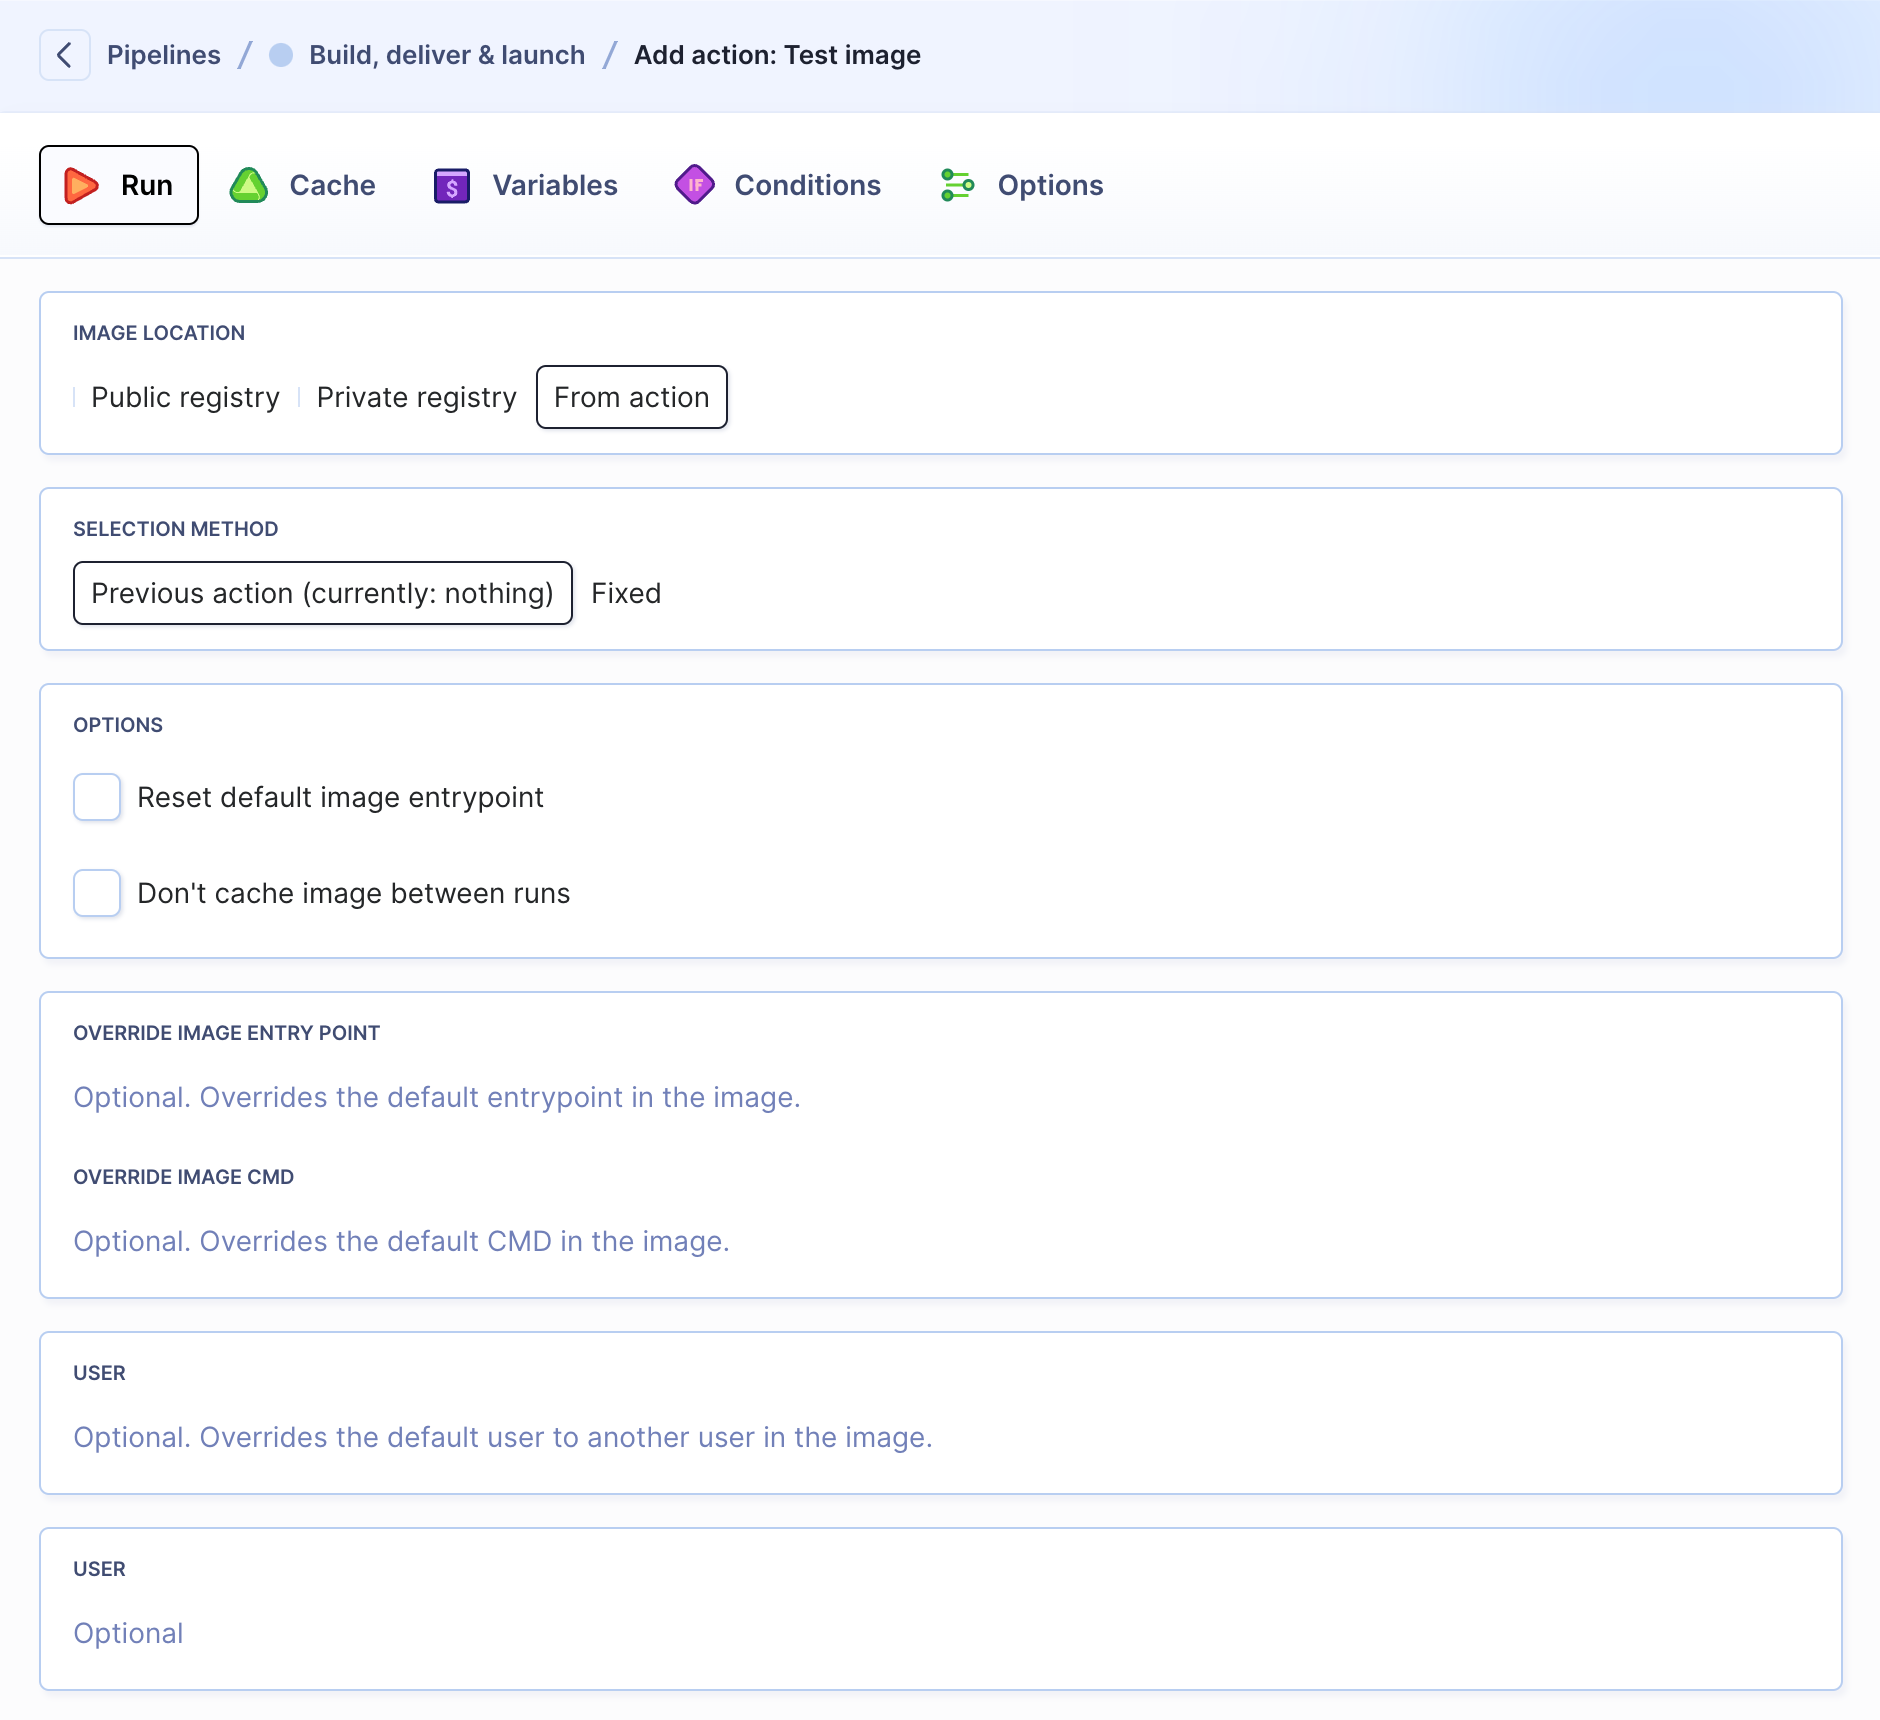
- The next action will test the newly built image before it can be pushed to the registry. Add the Run Docker image action and select Use docker image built in previous action from the dropdown:
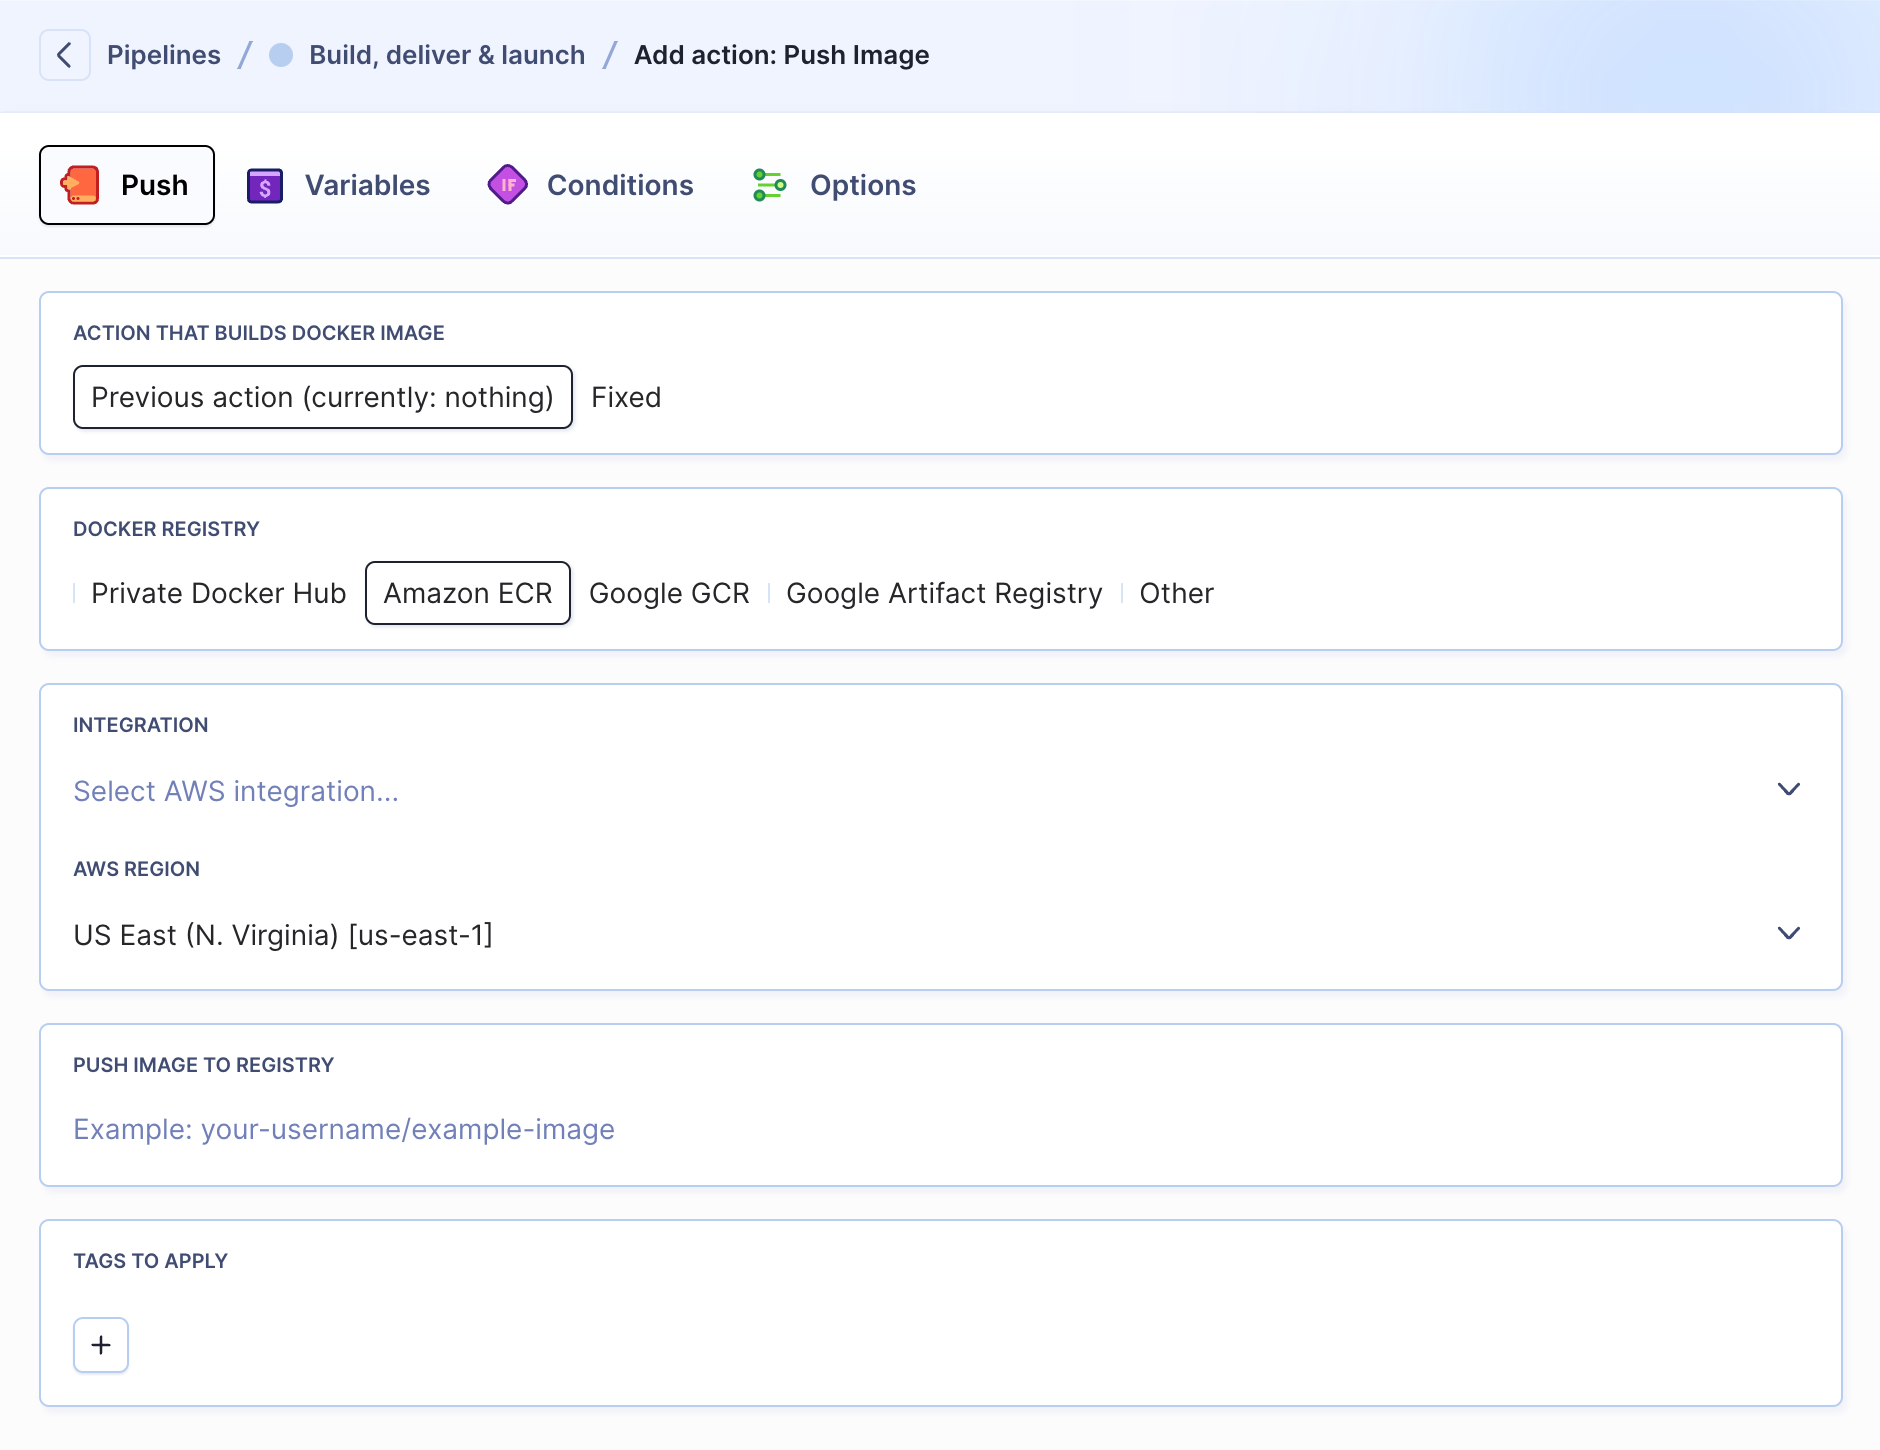
- Once Builds and tests the image, we can push it to the selected Docker registry. In this example, we'll use Amazon ECR:
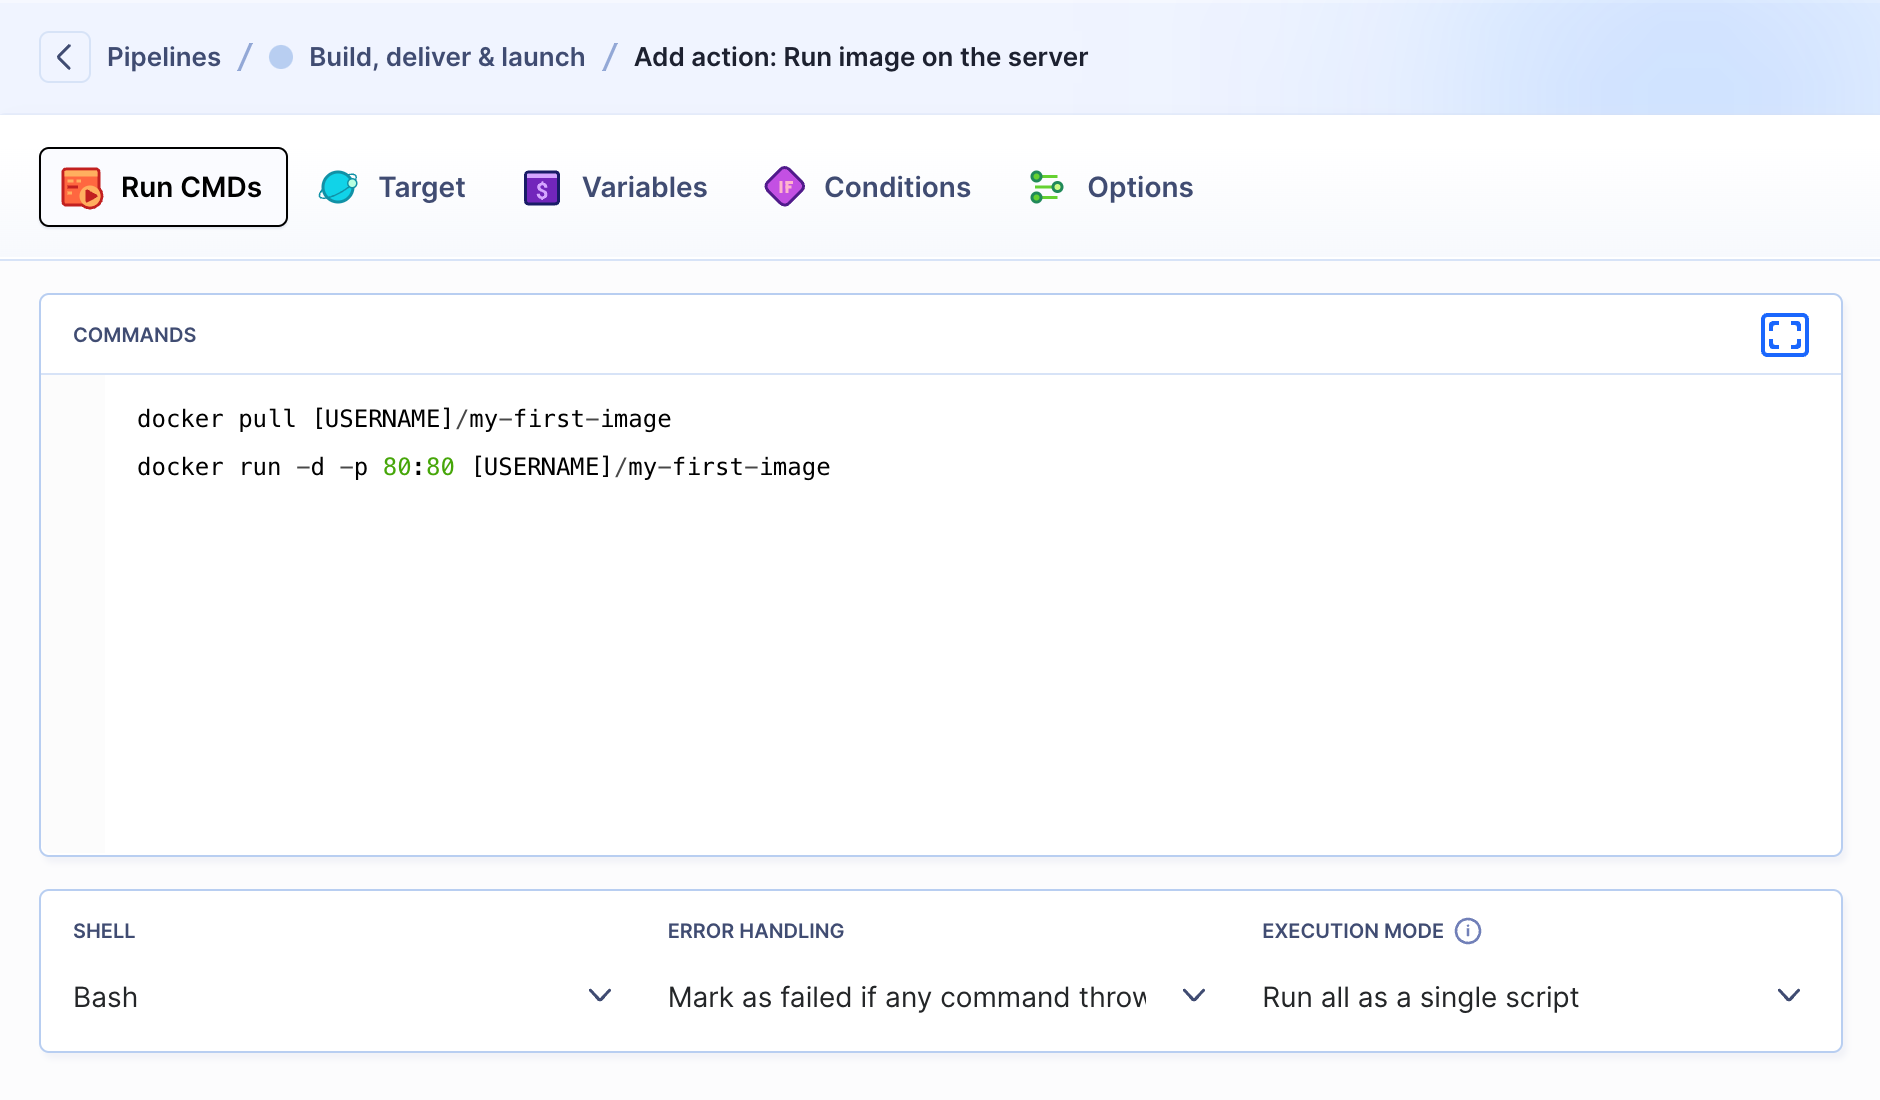
- The last action will run
docker pullanddocker runon the selected remote:
docker pull [USERNAME]/my-first-image
docker run -d -p 80:80 [USERNAME]/my-first-image
Once ready, make a push to the selected branch, and watch Buddy will perform all the tasks on auto-pilot. Sweet!
You can create a separate pipeline for each environment, and automate other common developer tasks, such as deployments, tests, and website monitoring.