使用Git更新和Buddy发布插件并使其可更新
The ability to update plugins with a single mouse click is one of the most useful features in WordPress. Unfortunately, if you want to use it, you must write some additional lines of code. Alternatively, this quick update method works for plugins that live in the official repository.
But uploading your plugin to the offical WP repo isn't always a viable option. The solution we created might be for internal use only or it might custom-created for one of your customers.
Nowadays, an easy way to update plugins in WordPress is essential. If you don't let your users know that there are security vulnerabilities, some real bad things can happen.
Why and how to use Git Updater
Luckily, there's a solution: an Andy Fargen's Git plugin for WordPress designed to simplify the udpate process called Git Updater (formerly known as GitHub Updater). As its name implies, the tool uses Git as its source of truth. It works with GitHub, Bitbucket, Gitlab, and private Git repositories.
Follow the offical guide to install Git Updater.
How to make plugin updatable with Git Updater
Making plugins updateable with Git Updater is really easy.
These are the headers of a plugin that doesn't work with Git Updater:
<?php
/*
Plugin Name: Example plugin
Description: We will demonstrate how to make it git-updater compatible
Version:     1.0.0
Author:      Andy & Maciek
License:     GPL2
*/
Add just 3 lines to make the plugin updateable:
<?php
/*
Plugin Name: Example plugin
Description: We will demonstrate how to make it git-updater compatible
Version:     1.0.0
Author:      Andy & Maciek
License:     GPL2 etc
GitHub Plugin URI: palmiak/git-updater-test-plugin
Primary Branch: main
Release Asset: true
*/
Let's have a look at what's changed:
GitHub Plugin URI: palmiak/git-updater-test-plugin - this is the path to our plugin's repository.
Primary Branch: main - here we define the default branch. The default value here is master, while GitHub now calls its default branch main, so make sure to adjust it accordingly.
Release Asset: true - this means that the plugin will now use Release Assets.
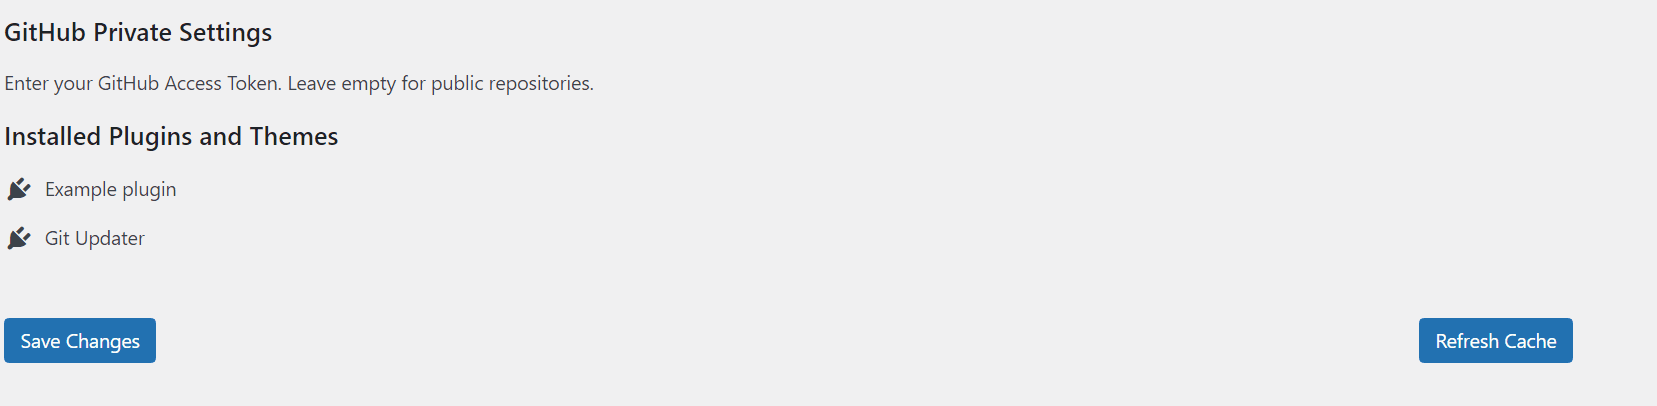
That's it. Nice and easy. After this change, the plugin will be visible in Git Updater's settings:
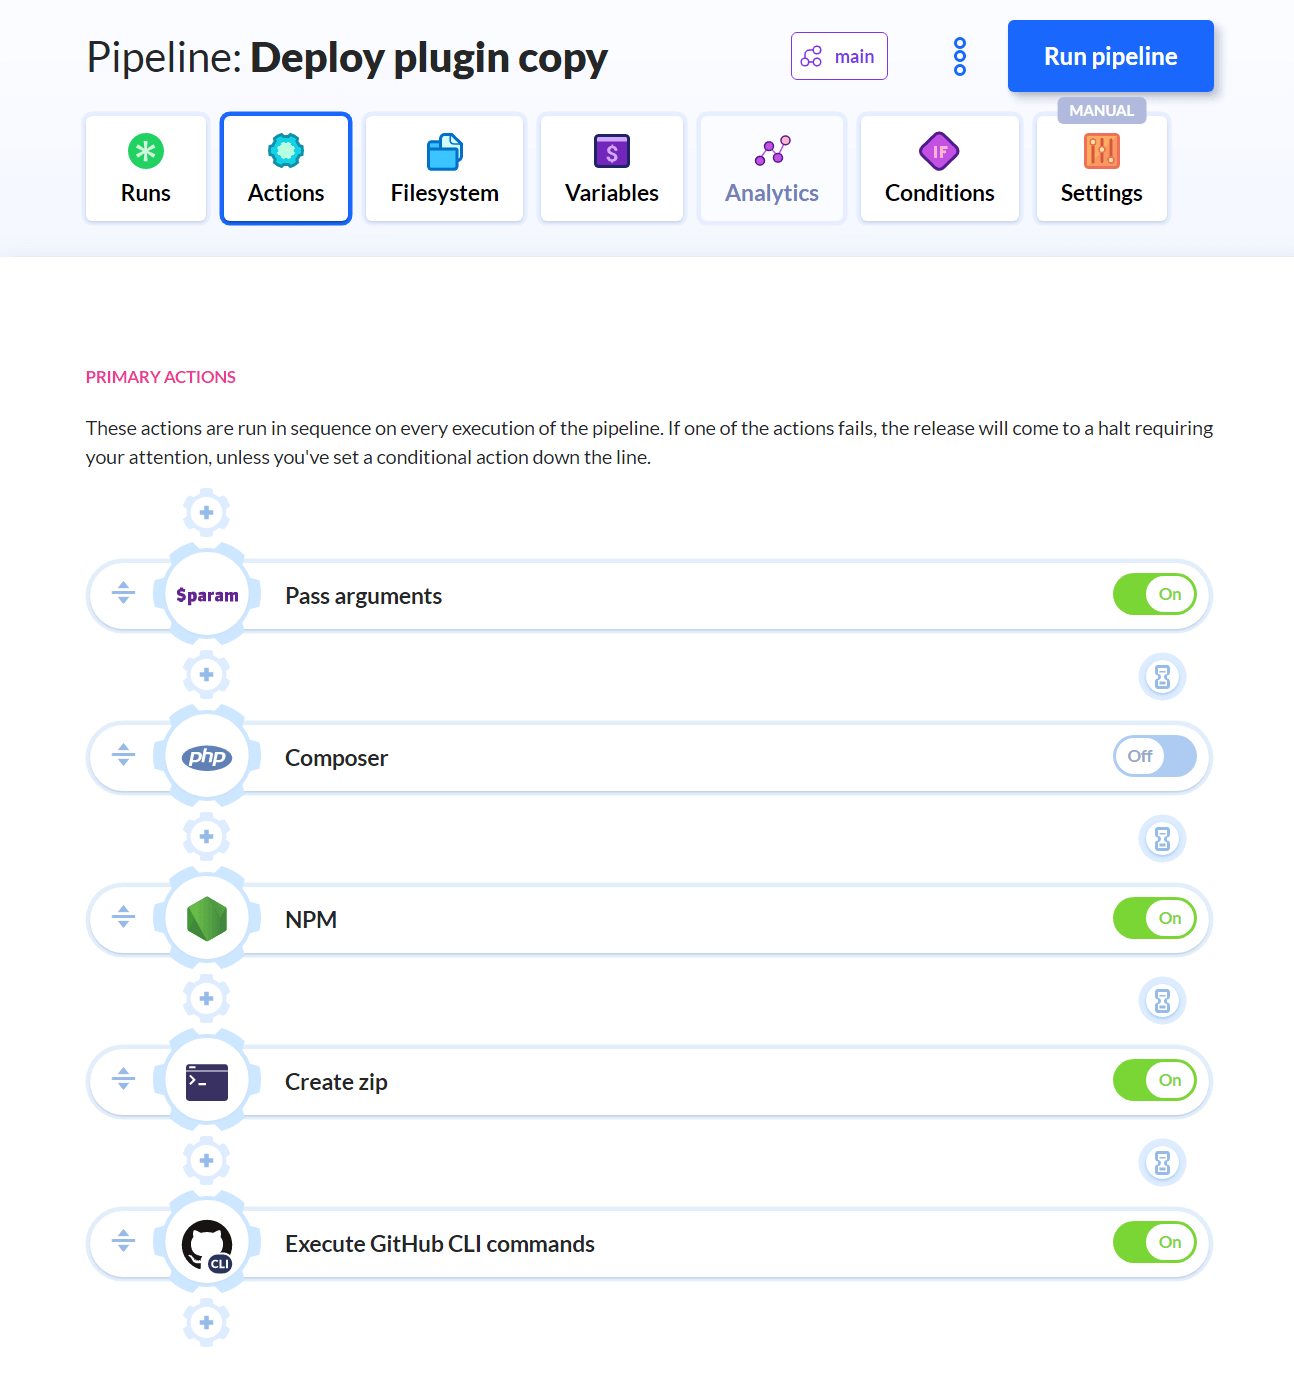
Creating release assets using GitHub CLI and Buddy
Using Release Assets allows us to run some operations and install different dependencies without having to store them directly in the repository.
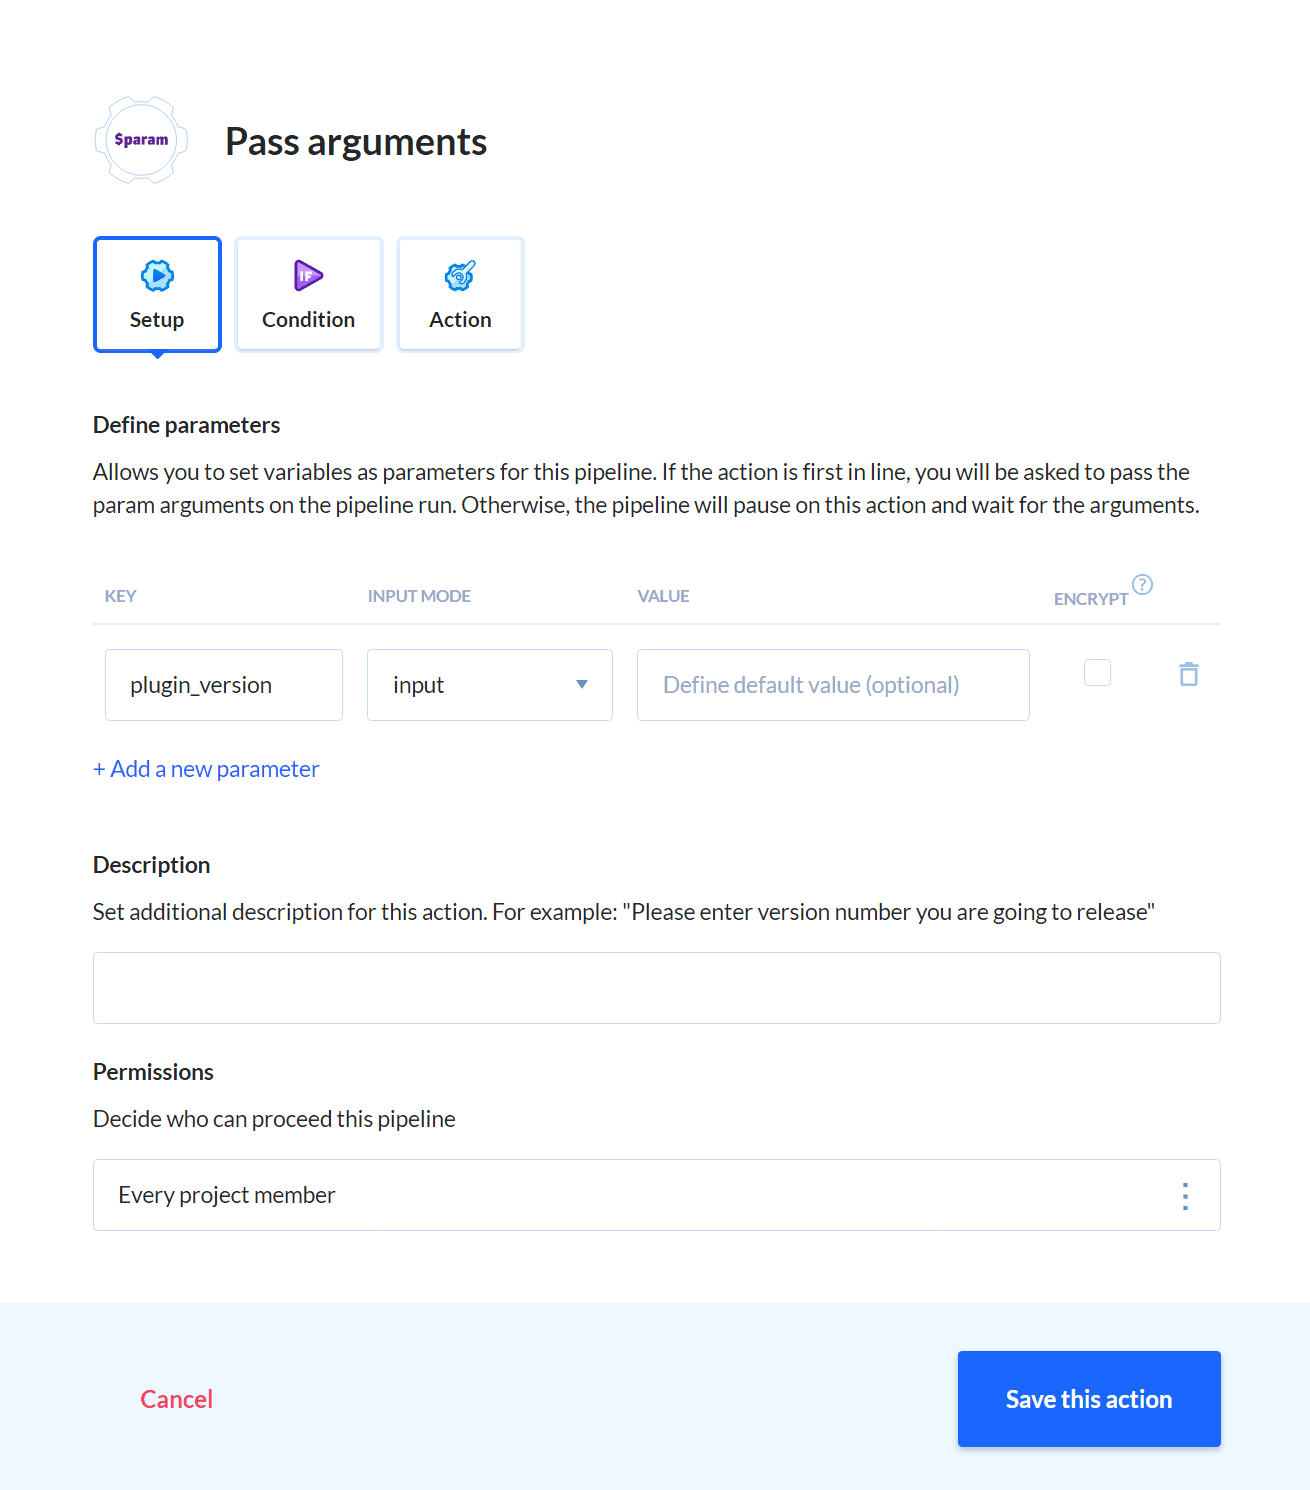
The first step is adding an action which will let us pass the plugin version. Let's use the Pass arguments action for this purpose.
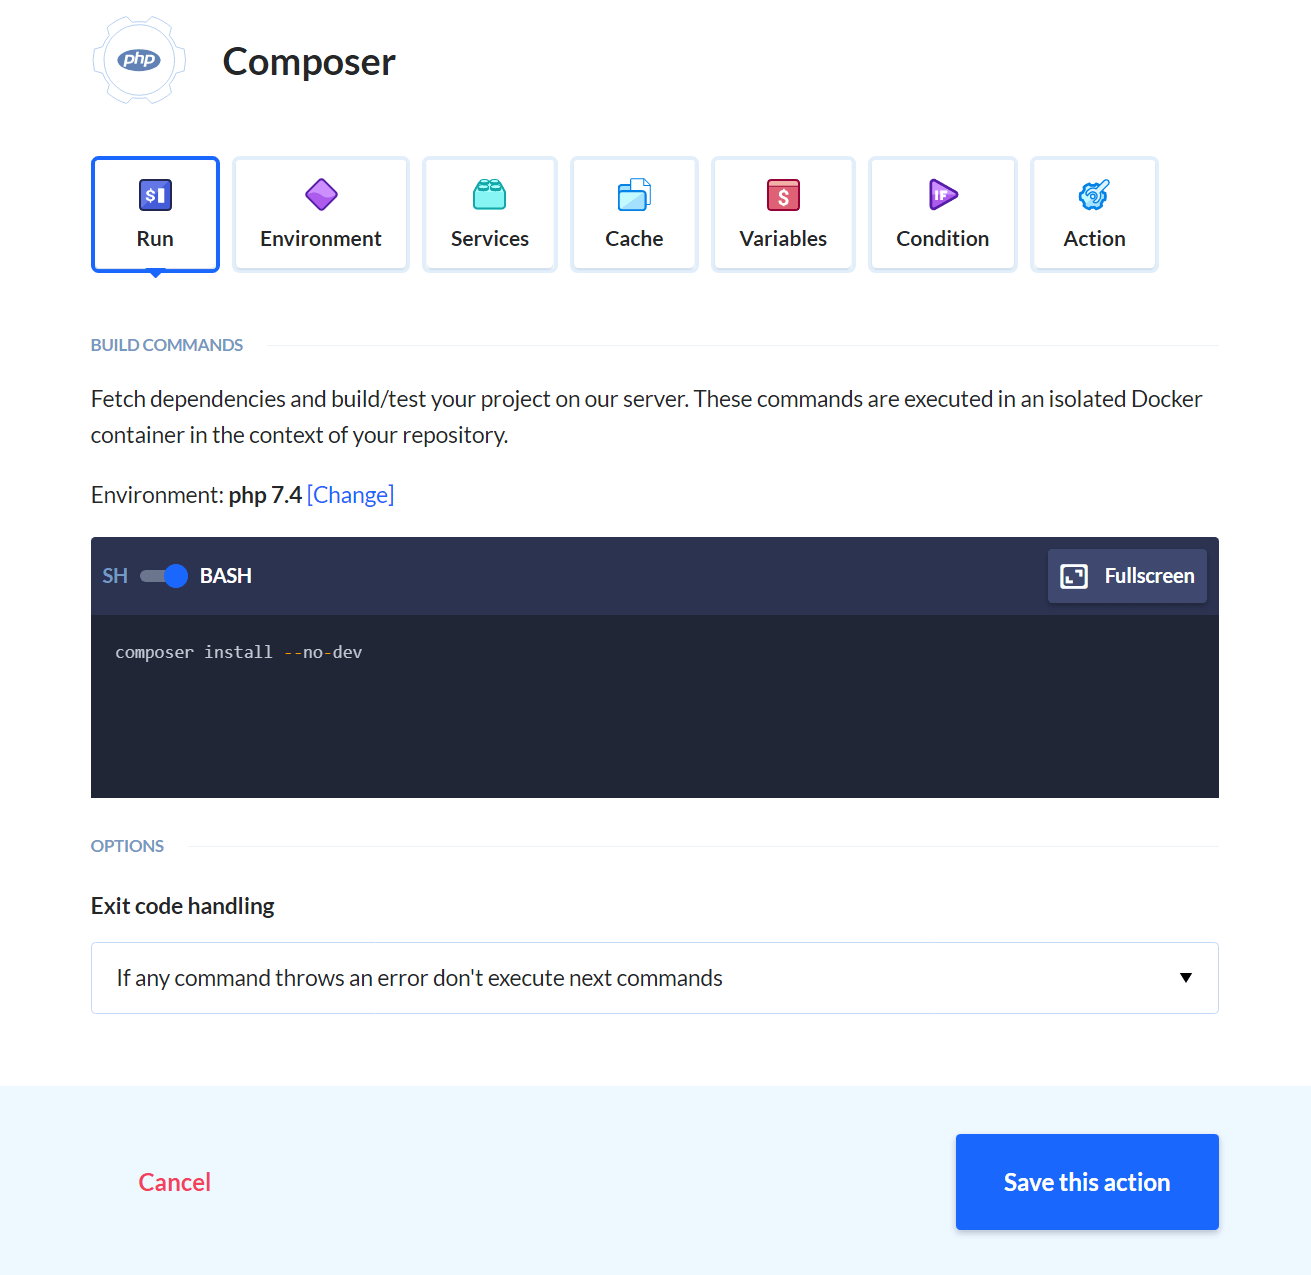
Next, install all dependencies. Let's start with Composer:
When this is done, install and build all frontend assets:

These two steps might look different depending on the version of your specific plugin and the dependencies it uses.
The third step is creating a zip archive with the name plugin_name-version_number.zip. Use the Local Shell action to do that. We need to install zip to be able to do that. Switch to the action's Environment tab and paste this command into the terminal:
apt-get update && apt-get -y install zip
Next, execute the following commands. Replace git-updater-test-plugin with your plugin's actual name!
shopt -s extglob
rm -rf git-updater-test-plugin || true
rm -rf git-updater-test-plugin/*.zip || true
rm -rf git-updater-test-plugin/vendor || true
rm -rf git-updater-test-plugin/tests || true
rm -f *.zip || true
mkdir git-updater-test-plugin
mv !(git-updater-test-plugin) git-updater-test-plugin
zip -r git-updater-test-plugin-${plugin_version}.zip git-updater-test-plugin
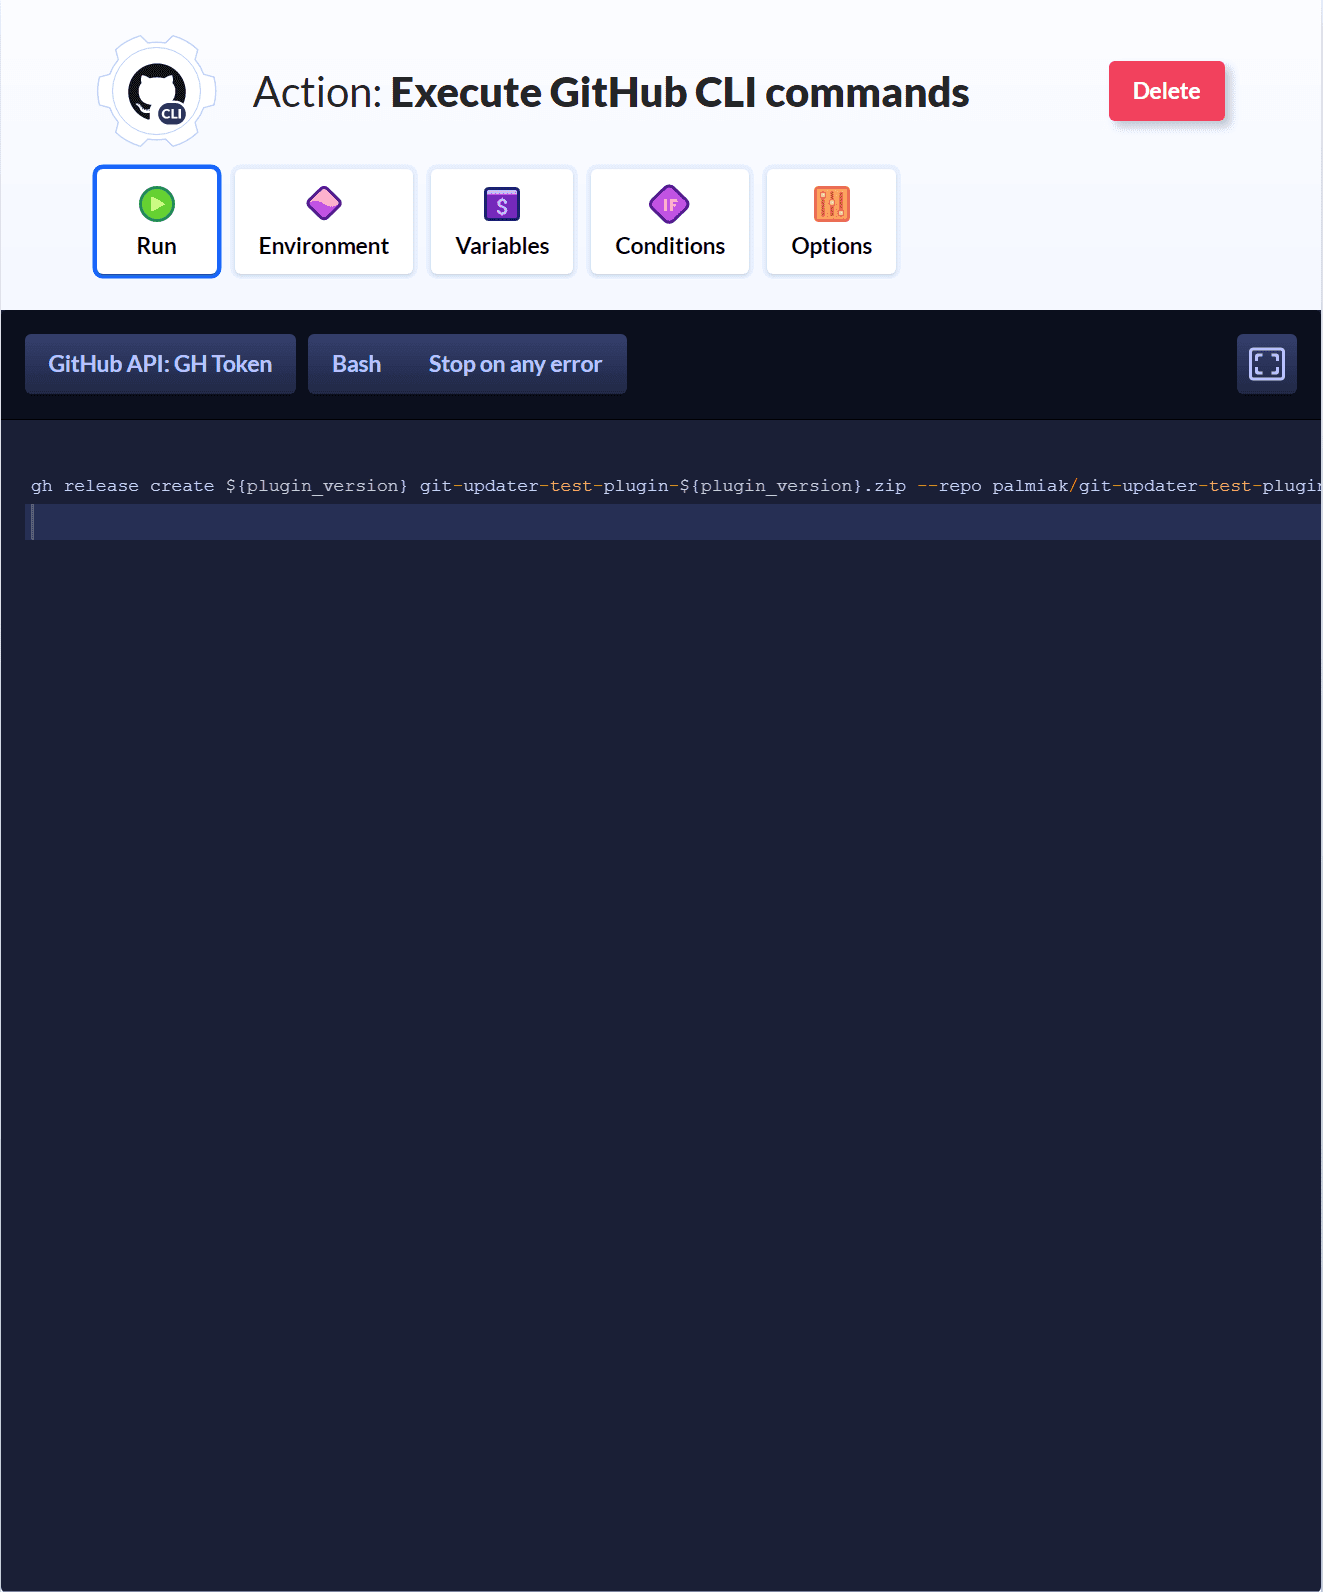
Finally, add the GitHub CLI action. Remember to add the correct token first (follow this guide to learn more).
In the Run tab, enter this command in the terminal:
gh release create ${plugin_version} git-updater-test-plugin-${plugin_version}.zip --repo repository_owner/git-updater-test-plugin
This is what our pipeline looks like when the configuration is complete:
Time to wrap up
As you can see, Git Updater makes it extremely easy to make your plugins updateable with a single mouse click. Thanks to that, all users will get an instant access to the latest version of the plugin.
Additionally, you can expand your release process with steps that will test your code with unit tests or E2E tests.