如何在PHP构建中使用MySQL
Sometimes when running a build or testing your app a database is required for interaction. The most common use case includes PHP and MySQL. In Buddy, you can easily add MySQL to the executed action, along with many other services. Such service is nothing else but a Docker container attached to the main container in which the build is performed.
Actions used in this guide:
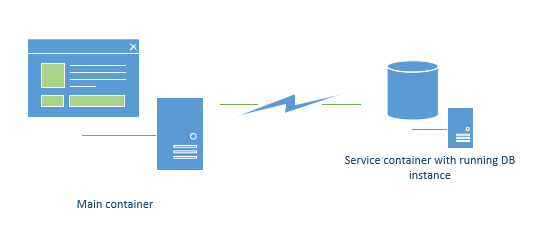
It's like installing an SQL server on the remote host, with connection data available after the installation.
The containers are launched on the basis of preconfigured Docker images to minimize the configuration required. If you're new to Docker, our guide to Docker basics will quickly introduce you to the concept.
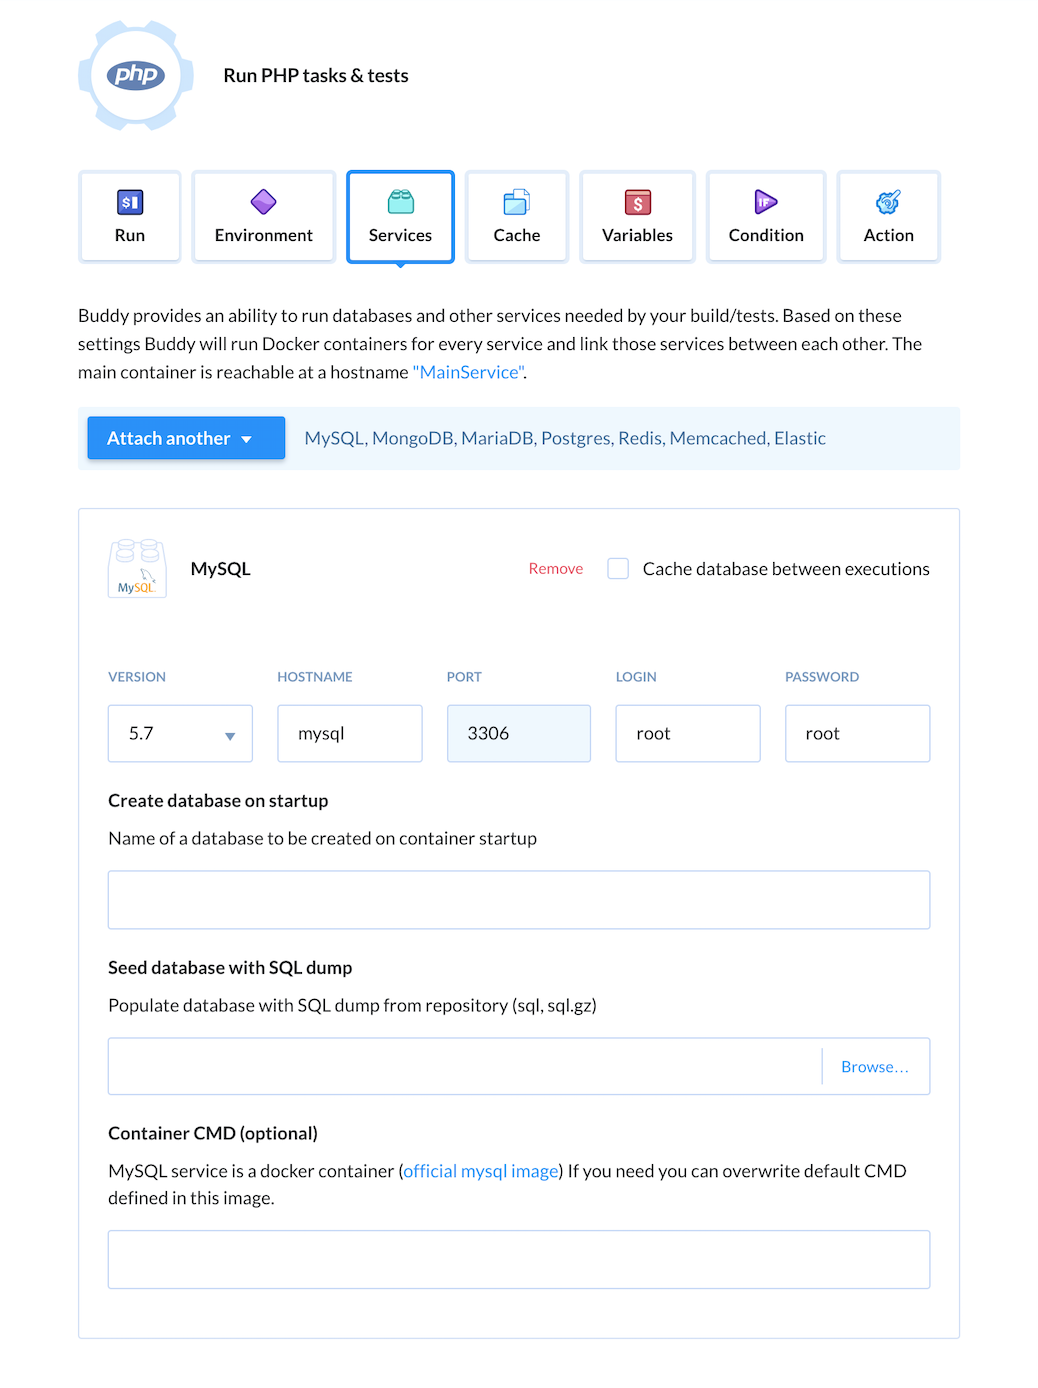
Step 1: Add the service
Go to the PHP and switch to the Services tab. Select MySQL from the dropdown list:
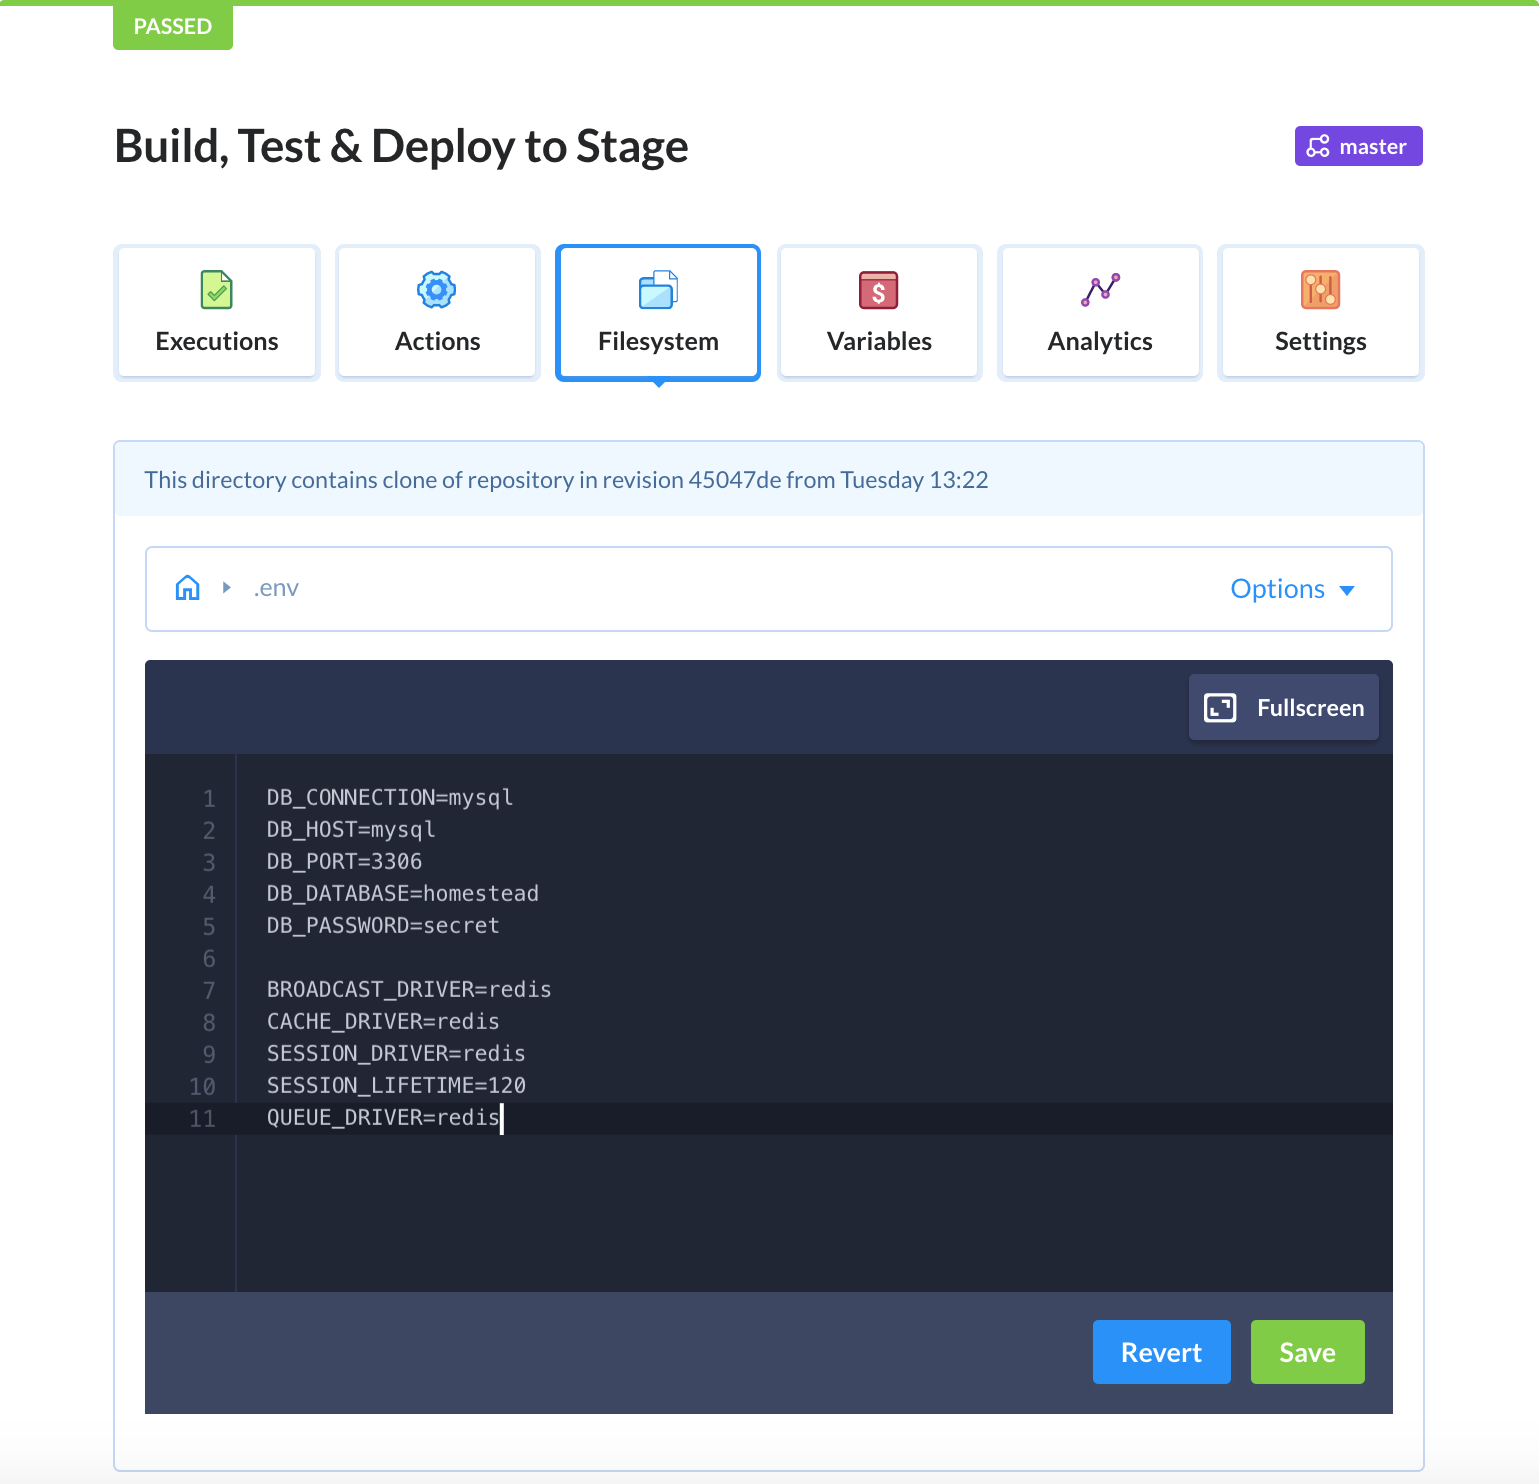
Step 2: Add connection details
Once the database is attached, you will see connection details which should be put in the configuration file of our application. In this example, we'll use an .env file:
Step 3: Prepare PHP container for MySQL
Switch to the Environment tab, click Install PHP extensions under the command window, and select the package for MySQL:
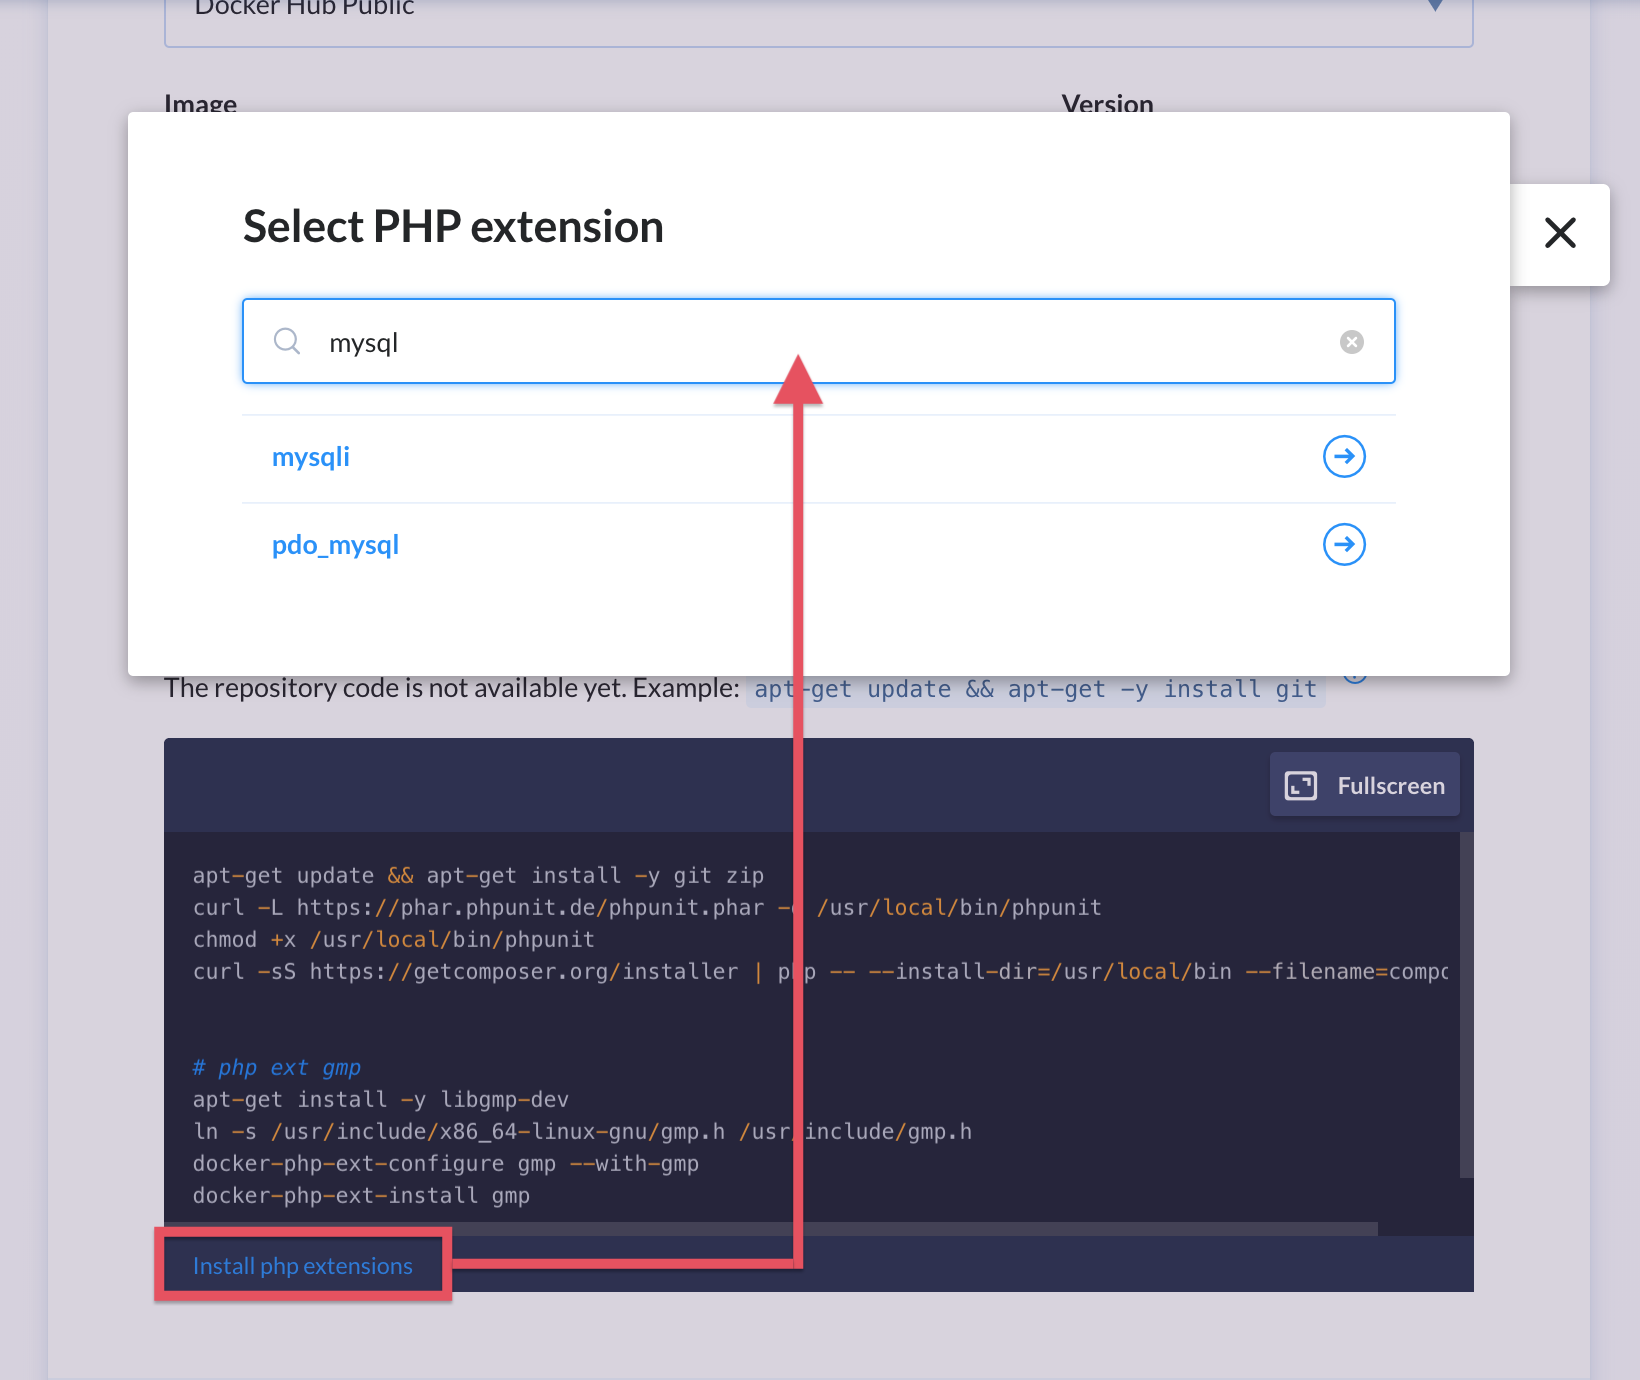
This will add a couple of new lines to the customization window:
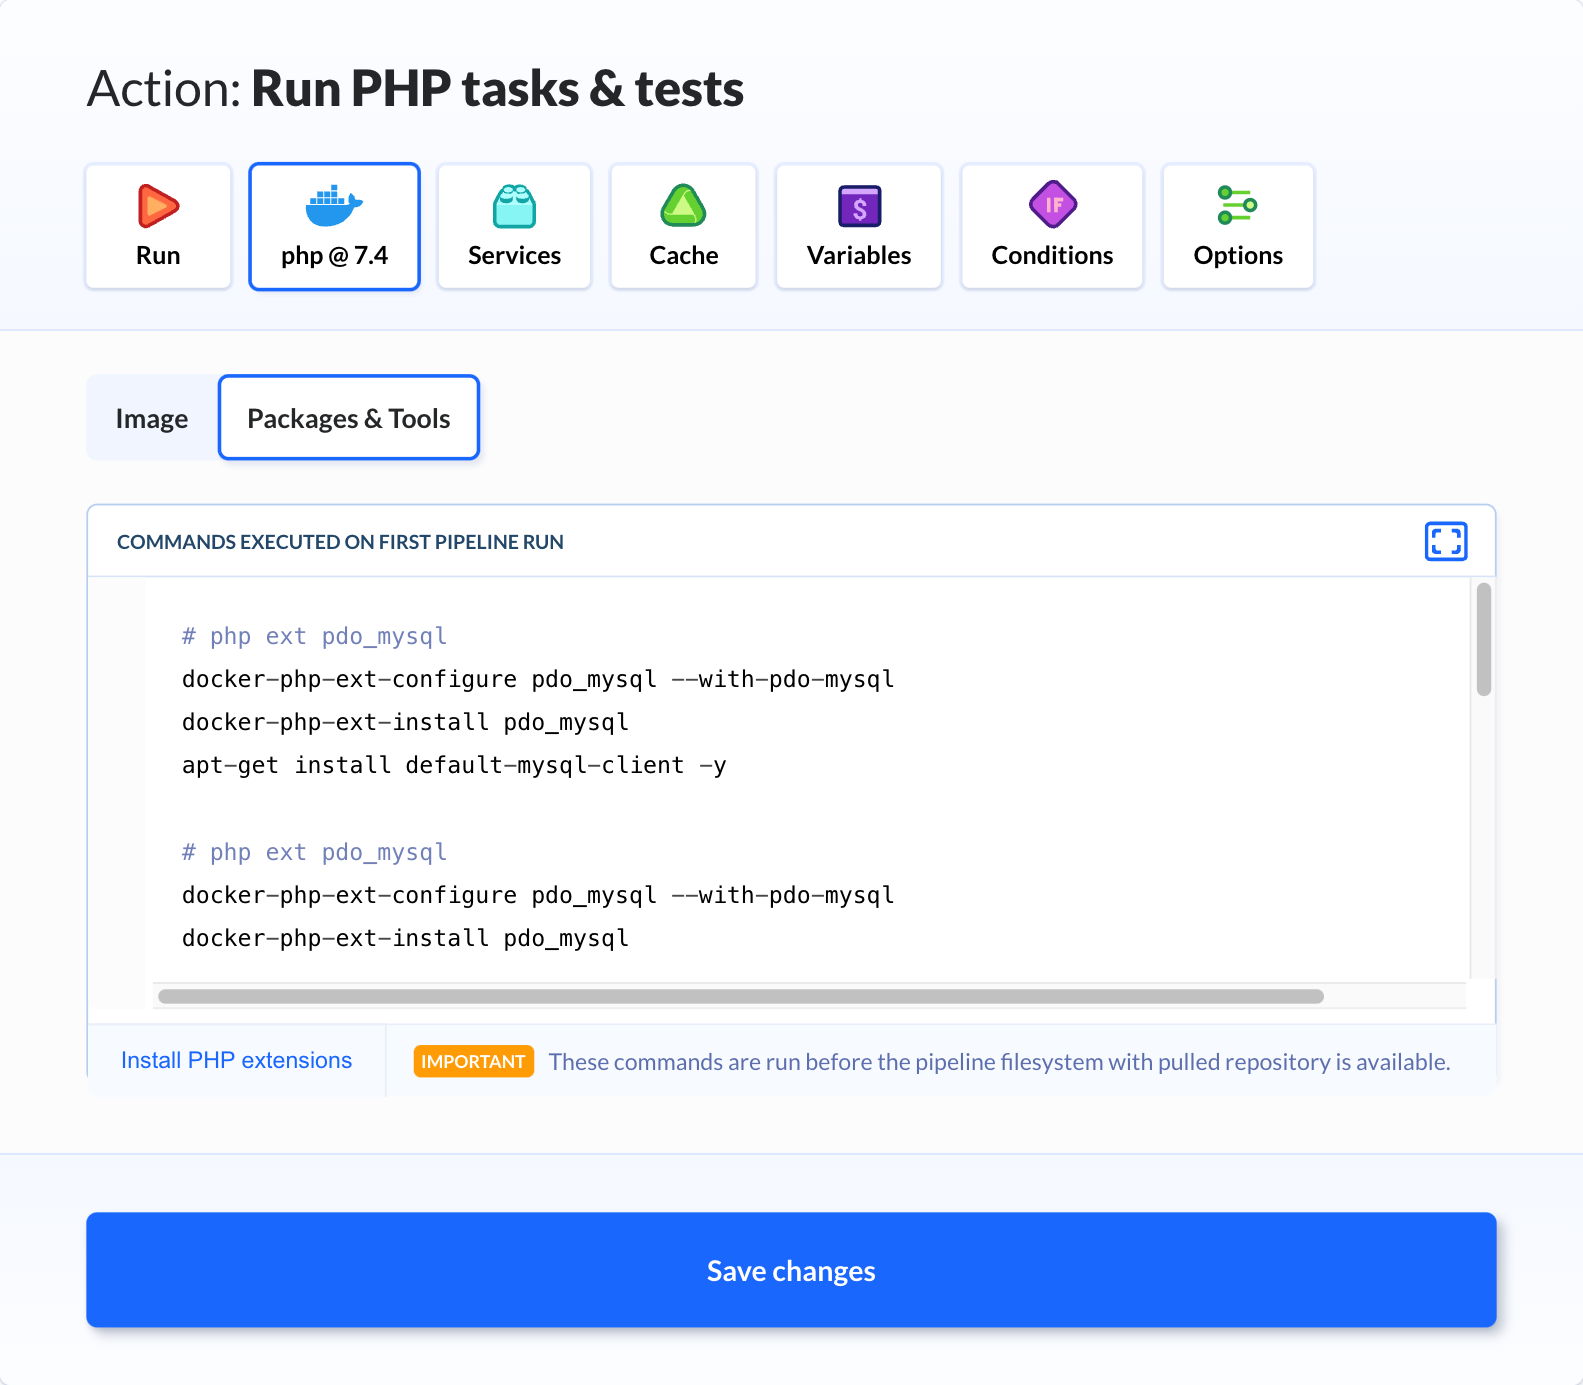
Since we use PHP in Docker, the packages are installed with docker-php-ext-install instead of apt-get.
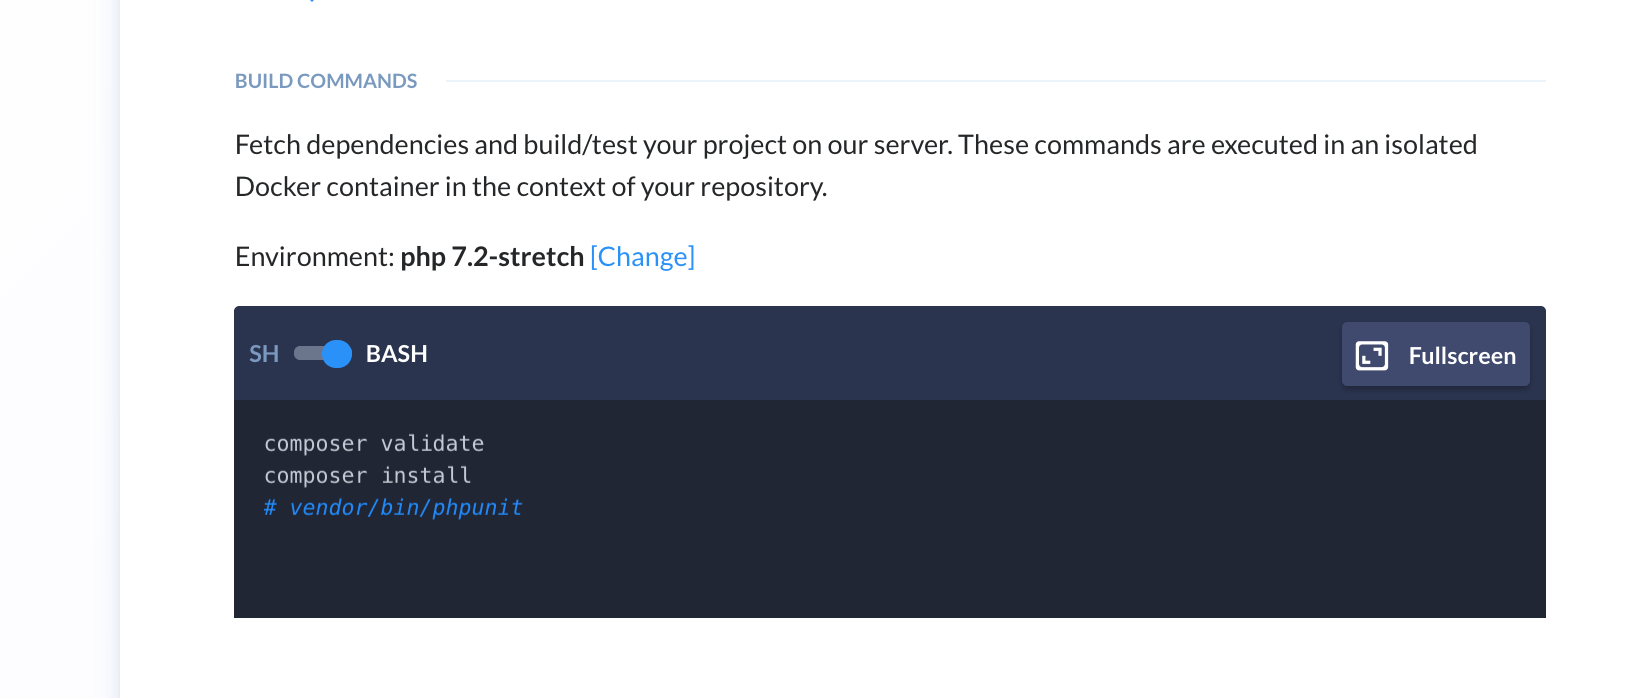
Step 4: Connect to the database
At this moment you should have a fully working environment in which you can interact with your database. The last step is connecting to the database so you can run SQL commands:
mysql -h mysql -u root -proot --execute='CREATE DATABASE IF NOT EXISTS buddy_test;'
The database is not available until the execution of commands. This results from the way the main the Docker container is prepared:
- Pull base image
- Run 'Environment Customization' commands
- Launch new container with the service
Only then you are able to run the commands.