使用k6与Buddy加载测试
Let’s face it: whenever we create a new web app or a website, we dream of making it big. Shared on Facebook, retweeted on Twitter, discussed on Reddit – you know the drill. While attracting many users is the ultimate goal, we often spend all our energy on creating the game plan and then developing our ideas and code to get the attention of the masses.
Going viral can quickly turn from a beautiful dream into a horrible nightmare, however, once it turns out that your server gets trampled by swarms of users and requests in numbers that you haven’t even imagined.
Wanna keep the visitors coming? Turn the development speed up to 11 and keep coming up with new features. But there’s a catch: “Haste makes waste”, goes the old saying, and this is especially true when it comes to coding. Why not make sure that no waste is made and that you’re making your code better instead of hampering the performance? Prepare yourself for success today and start load-testing your app
What is load testing
Load tests are a great dual-purpose weapon: they can indicate how your code performs in high-load events, as well as signal any regression in your code’s performance.
In this guide, we’ll take a look at k6, a modern load-testing framework. We’re also going to show you how to seamlessly integrate k6 load tests into your CI/CD pipelines with Buddy.
Ready to get ready for success? Let’s go!
The load testing landscape
When it comes to load-testing, the dev community can choose from a variety of tools and frameworks.
The most popular one? Apache jMeter, which has been around the block since ‘98 and can be considered an industry standard. What are its main advantages?
- It’s free.
- Has a GUI.
- Supports any protocol you throw at it.
However, many of its features require users to install additional plugins, editing testing scenarios is really cumbersome without the GUI, and the underlying architecture doesn’t have the most horsepower.
In the opposite corner, there's k6, a new kid that joined the party in 2017. It offers two tiers: free & open-source, or paid & cloud-based. The open-source package is great for smaller and medium projects and really packs a punch.
Here's a list of k6's main selling points, which make it perfect for the modern-day developer:
- Free & paid tiers – choose the one that suits your needs best
- Easy installation
- "Batteries included" – no need to install any plugins
- Powerful engine running on Go
- Collaboration-friendly – write tests with just a text editor and JavaScript knowledge
Prerequisites
The first thing is a testing environment where you deploy the application and where the test is performed. Nowadays, you can choose from a plethora of providers that offer servers more than capable of hosting your application and running the tests.
A good match for the operations described in this guide is DigitalOcean, which lets you provision Droplets, virtual machines that run Linux alongside other selected operating systems. With minimal setup, you can provision a VM, and have it serve the app.
The other prerequisite is a deployment tool like Buddy that will connect to the VPS, transfer your files, and run commands on the server.

Let’s see how to put together a setup that builds your application on a push to your repo, deploys your app to a staging environment on a DO Droplet, and then runs a k6 load test.
Configuration
Step 1: Connect repository to Buddy
Let’s start with the basics. Sign up to Buddy with your Git provider to provide access to your codebase:
Step 2: Create a k6 load test
Creating k6 tests is extremely easy and can be done in a few different ways: by writing the test in JS from scratch, converting a recorded HAR session to a k6 test script, or using the paid GUI – it’s all up to you.
If you want to start simple, here’s a straightforward yet useful test to use:
import http from "k6/http";

export let options = {
   thresholds: {
     "http_req_duration": ["p(95)<1000"],
     "http_req_failed": ["rate<0.01"]
    },
   stages: [
       { duration: '15s', target: 50 },
       { duration: '30s', target: 50 },
       { duration: '15s', target: 0 },
     ],
};

export default function() {
   http.get('{YOUR_STAGING_ENV_URL}')
 };
If you're using this sample test, remember to replace the placeholder in the function with your app's URL.
The test purpose is to put an equivalent of a 50-user load on your application.
Look at the stages array: first, the test gradually ramps up the virtual user count to 50 over a period of 15 seconds. Then, this number is sustained for 30 seconds. In the final stage, the test gradually reduces the user count back to zero.
Additionally, the test includes two thresholds: one for the 95th percentile of request duration which has to be less than the specified number (in milliseconds), the other for the rate of failed requests.
If any of these thresholds are not met, the test fails which gives a clear signal that the application’s performance doesn’t meet the set standards.
Simple, isn’t it? Good! Create a .js file with your test and upload it to the repository with your code.
Step 3: Set up a test environment
Now let’s prepare a staging environment ready to serve the app. As I mentioned above, a DigitalOcean droplet doesn’t require extensive configuration which makes it a perfect match. All I need is the Node Live-Server that will expose the application on port 80:

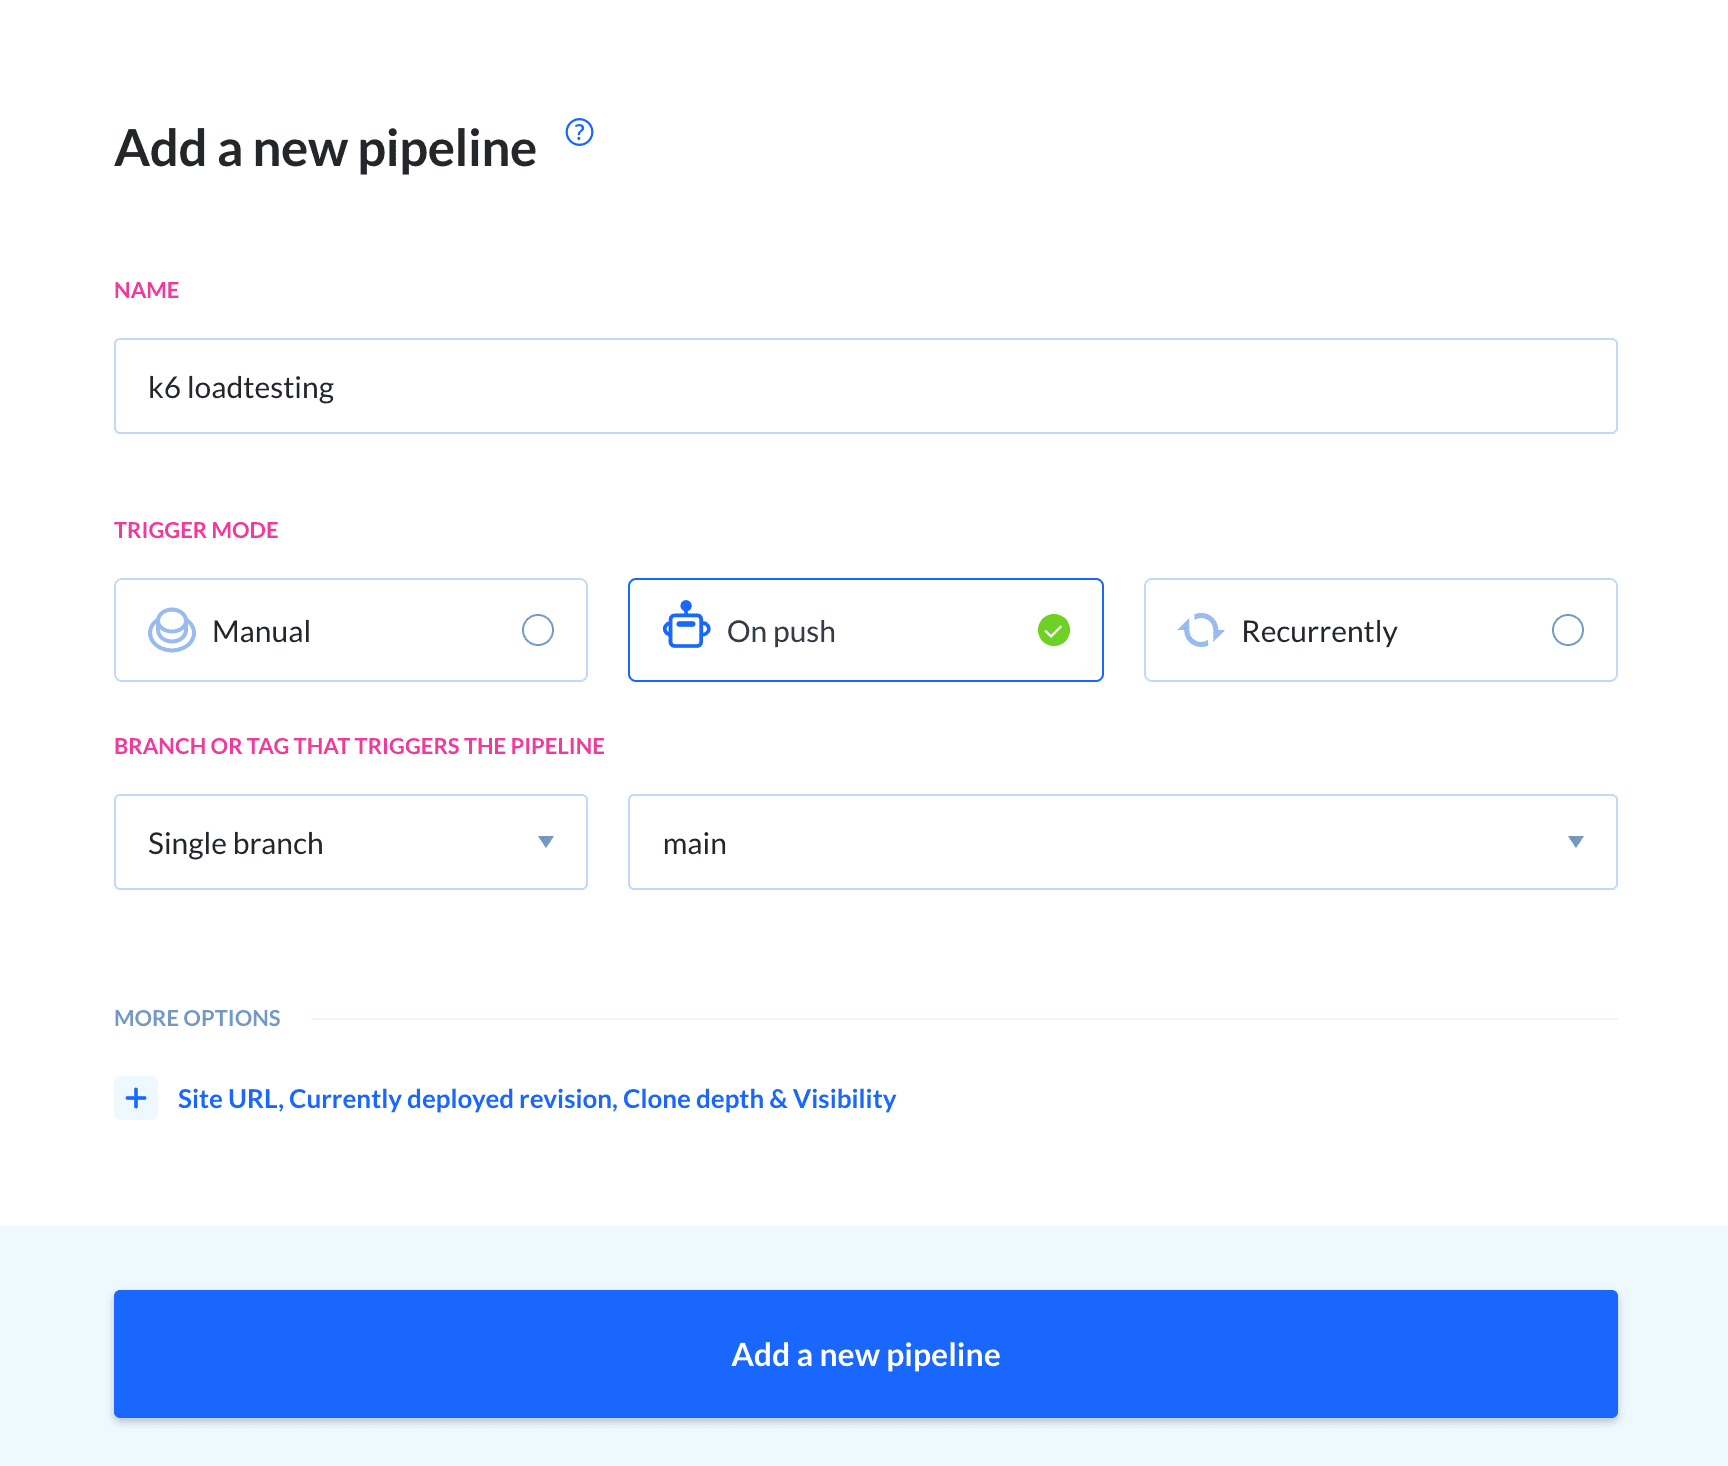
Step 4: Set up a pipeline
With everything prepared, it’s time to put all the puzzle pieces together. Create a new pipeline in Buddy and decide when the pipeline runs by choosing the trigger mode.
- If you want the application to be deployed to the staging environment automatically every time you push new code to your repo, choose the On push trigger mode.
- Alternatively, you can trigger your pipeline at specific time intervals by using the Recurrent trigger, or choose the Manual mode, which requires you to start every execution manually.
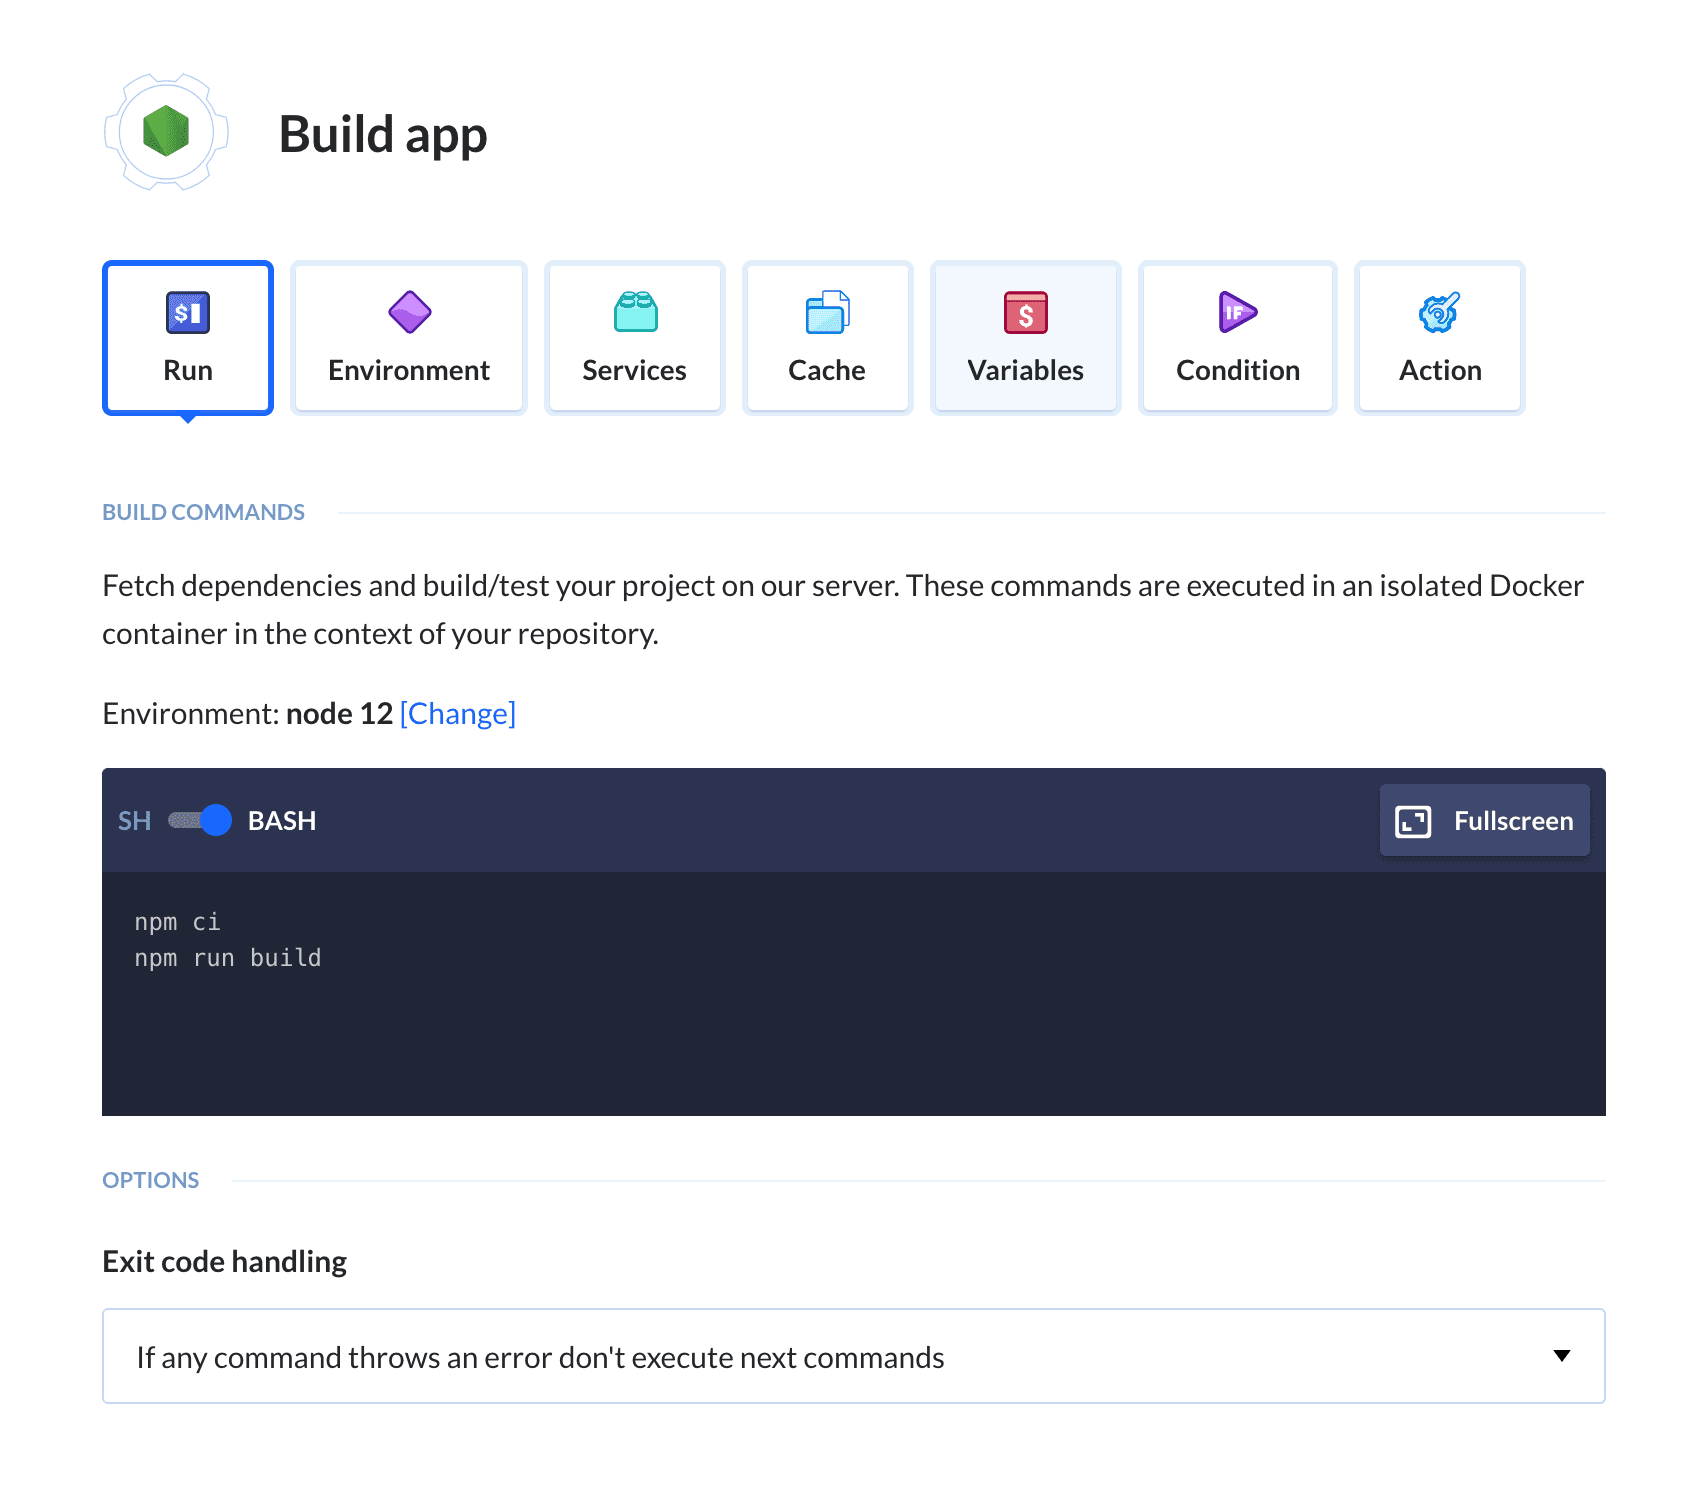
Now, it's time for some action(s). In this case, I'm working with a React app, so I’ll have the Node.js action to handle the build.
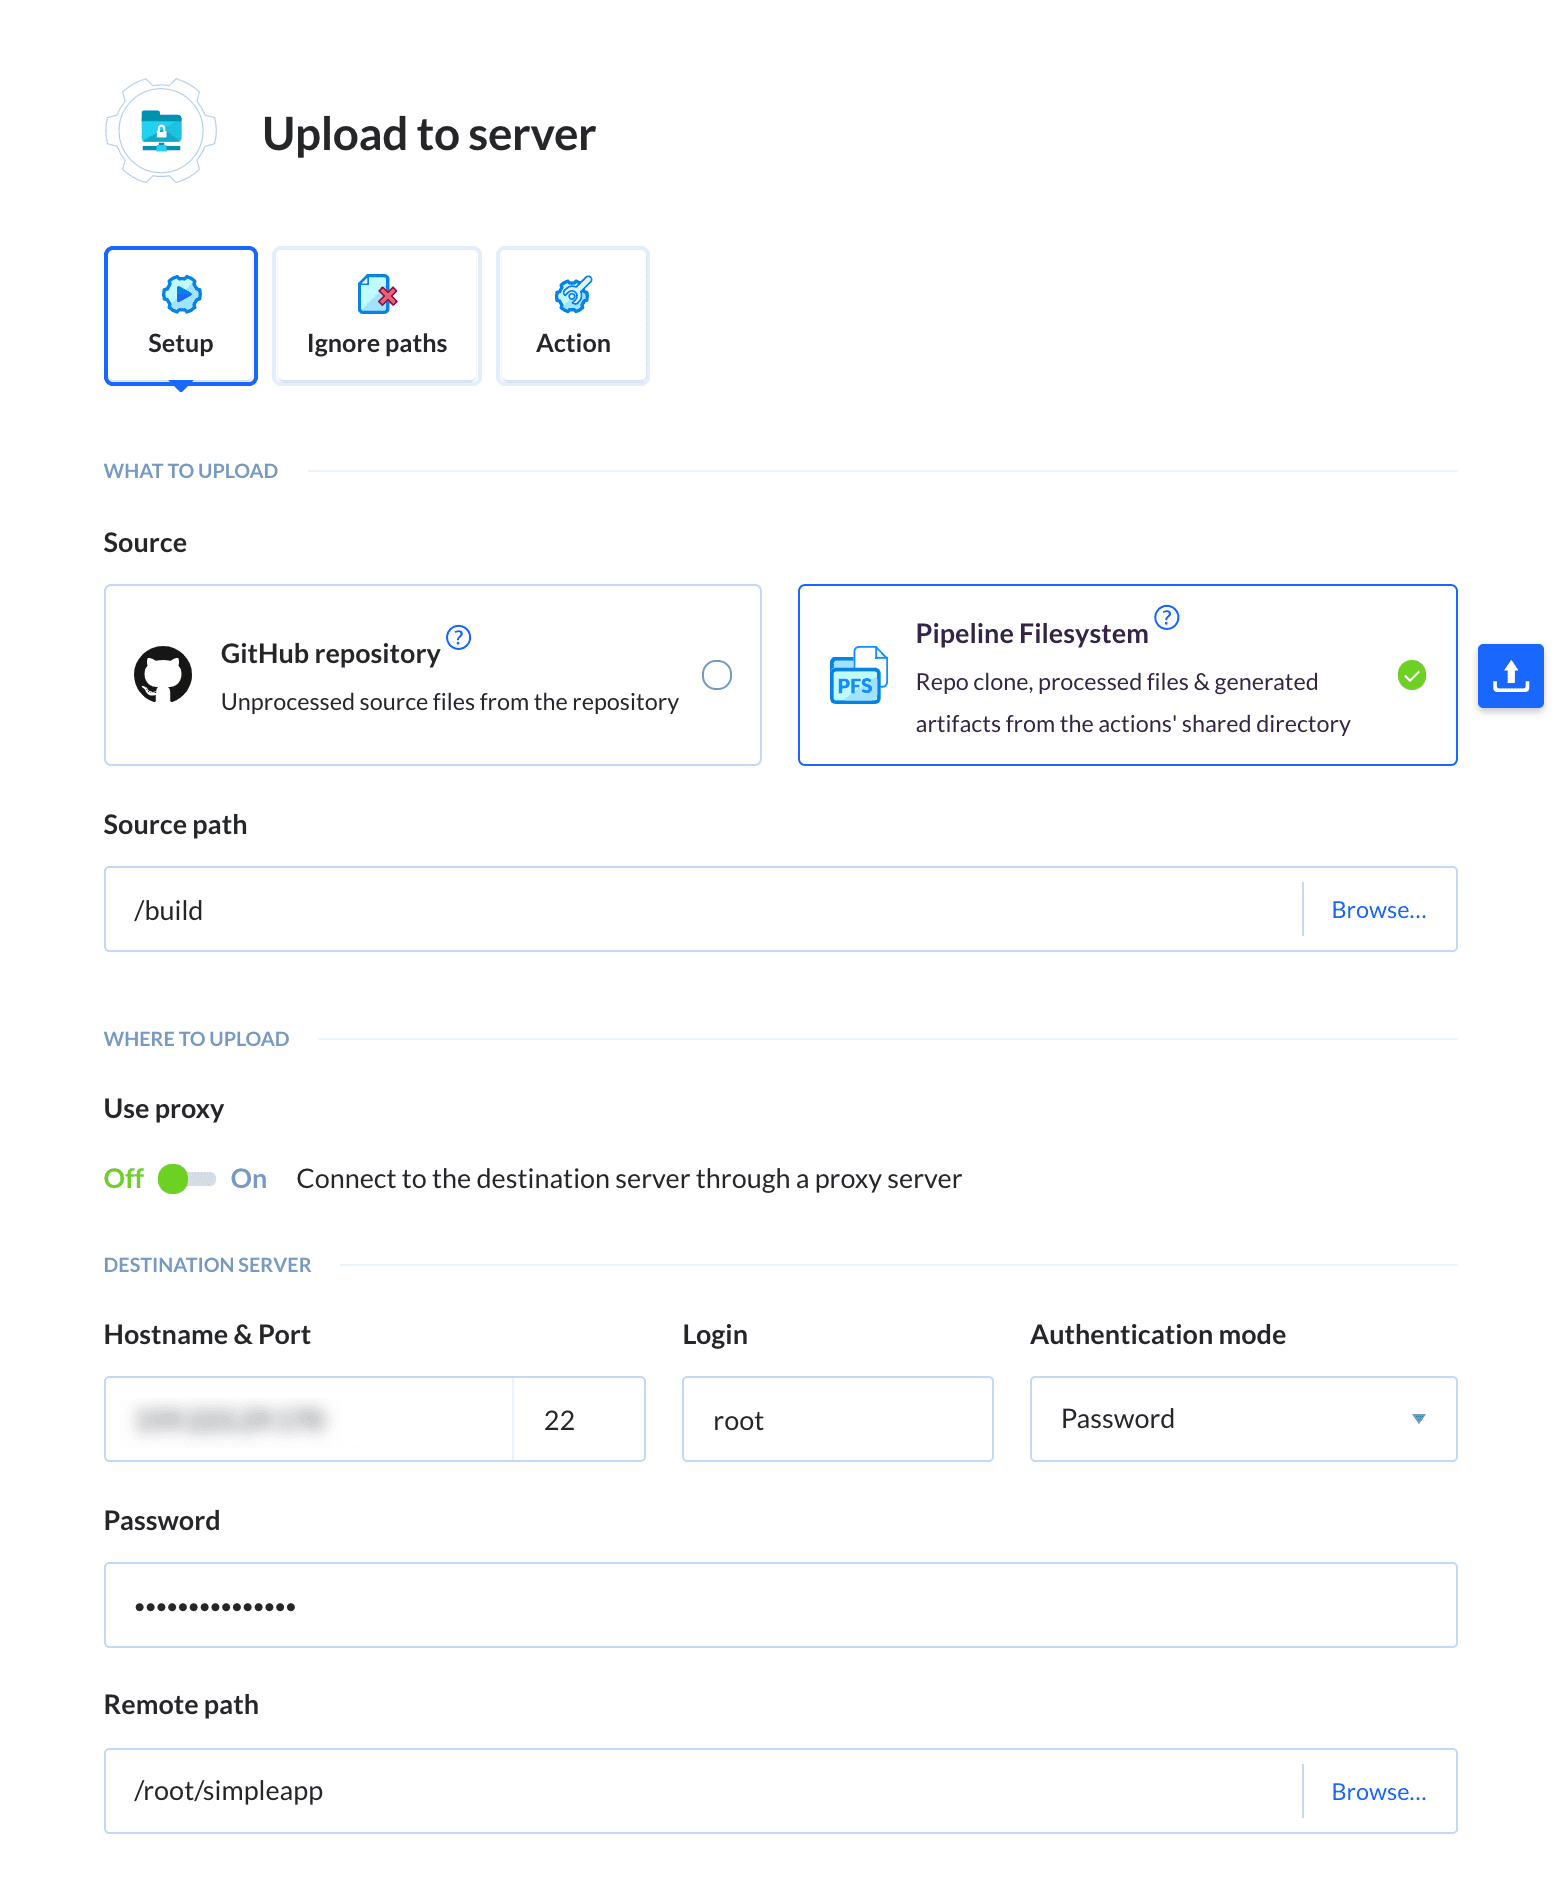
Once the application is built, we upload it to the server straight from the pipeline’s filesystem. Choose the SFTP action, set the source path to point to your build, and fill in the server details:
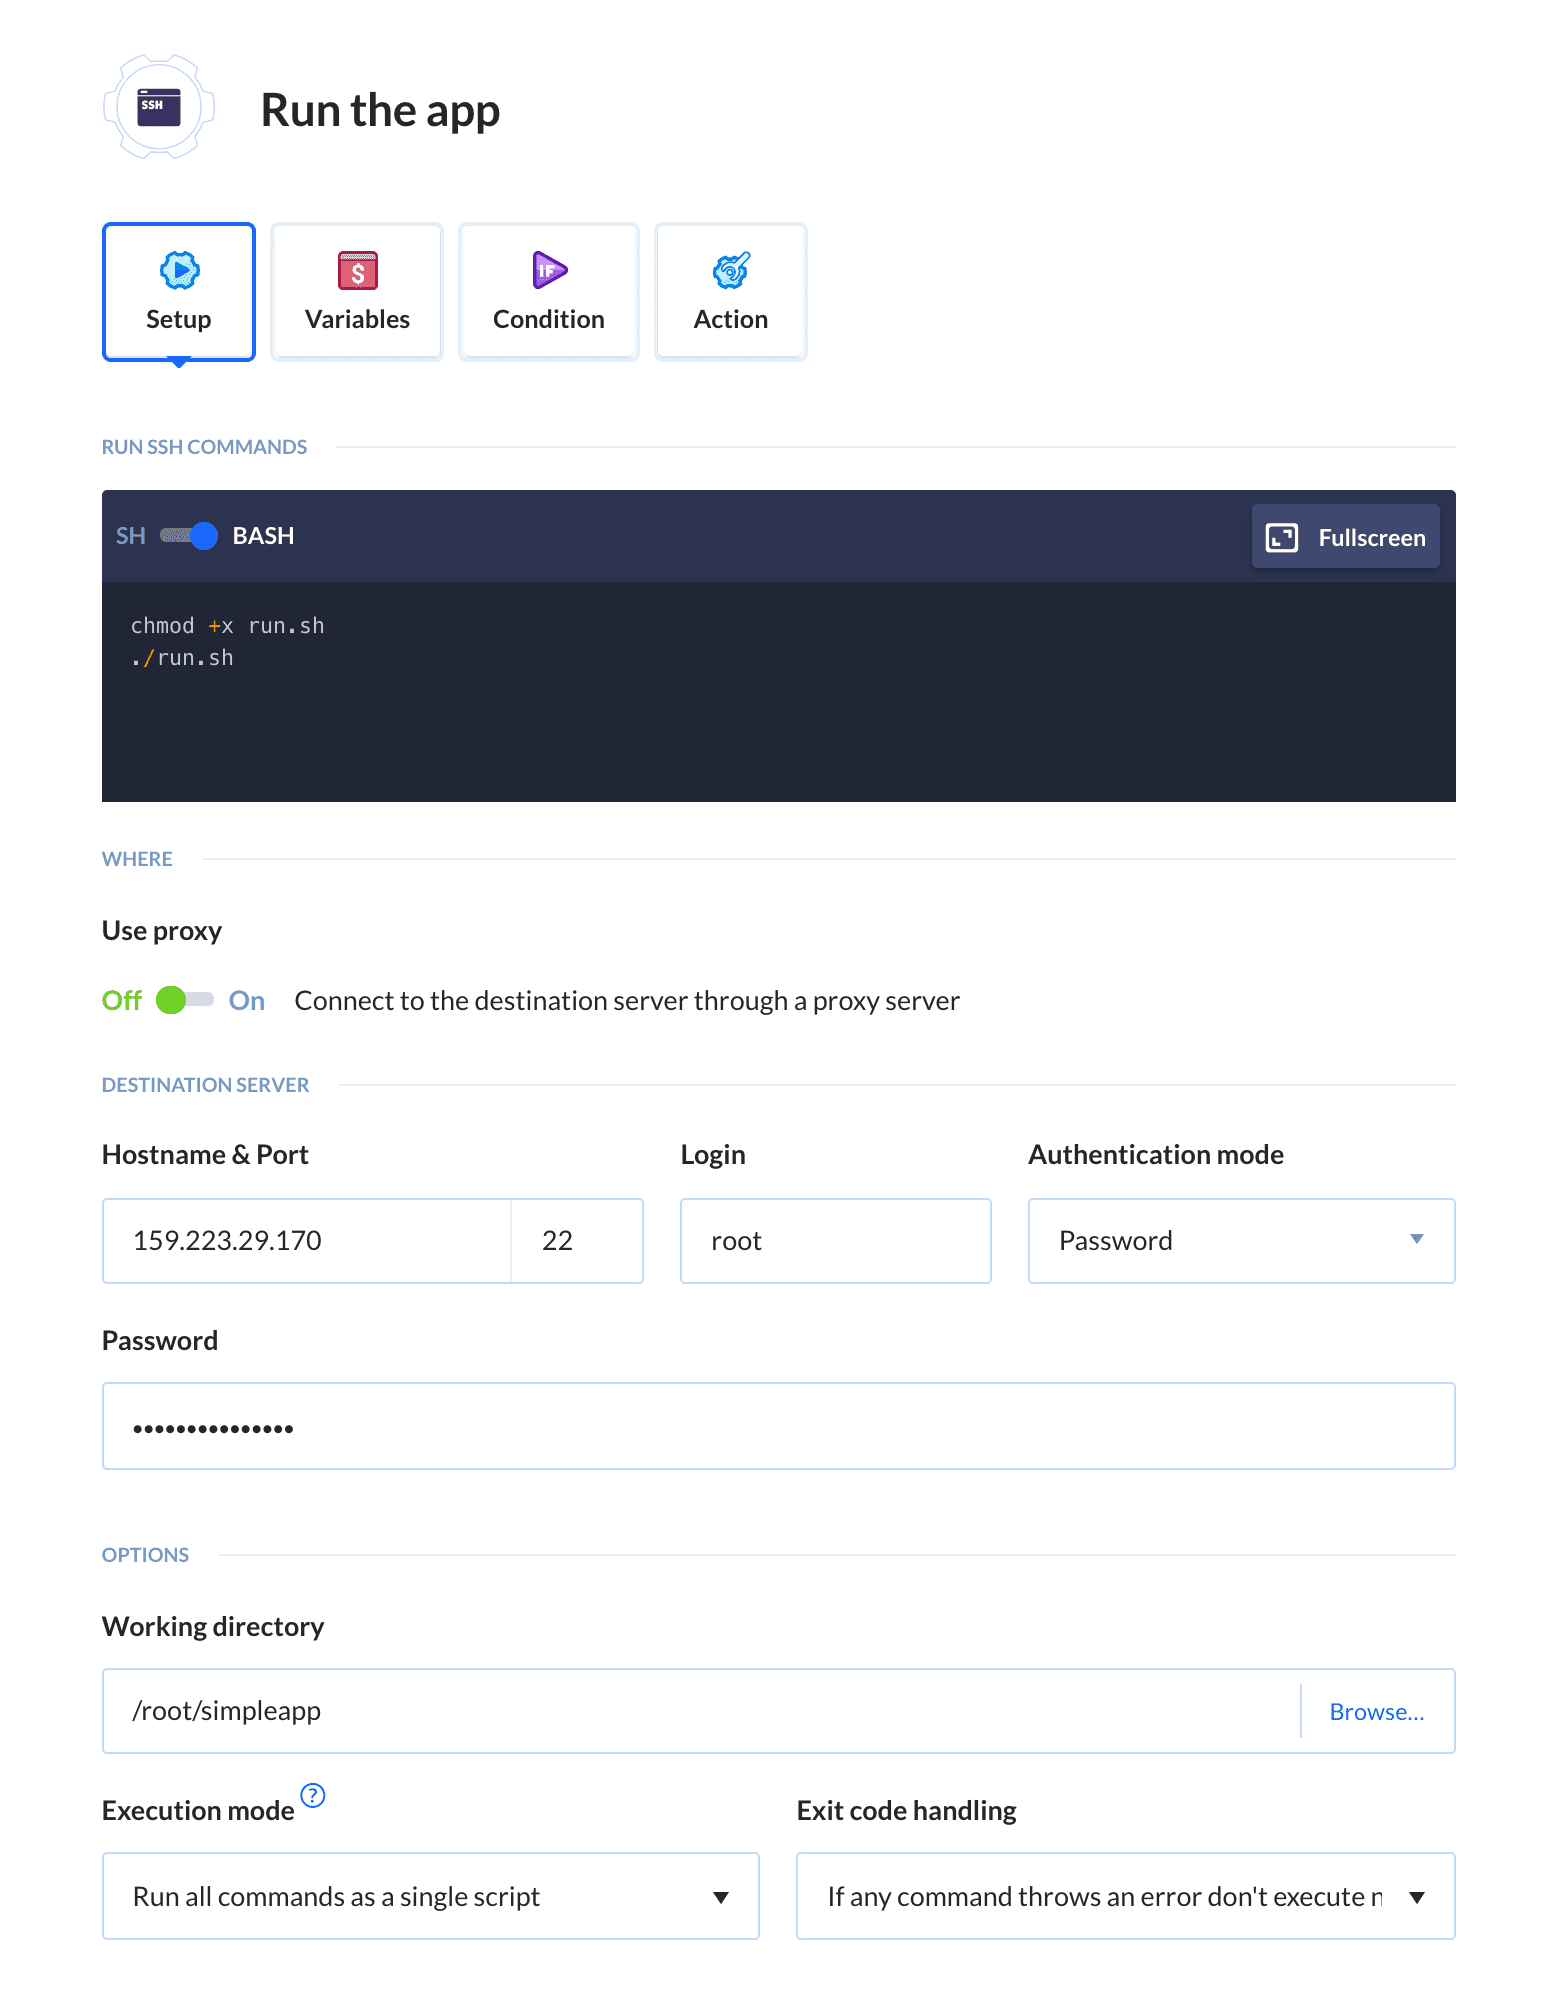
Next, add the SSH action. This one connects to the test environment and runs any command entered in the terminal. As you can guess, this is where you can run your application.
In my case, the app comes with a run.sh script as one of its build artifacts. This script serves the app on port 80 using none other than the venerable Node Live-Server. What I need to do is to make the script executable and run it:
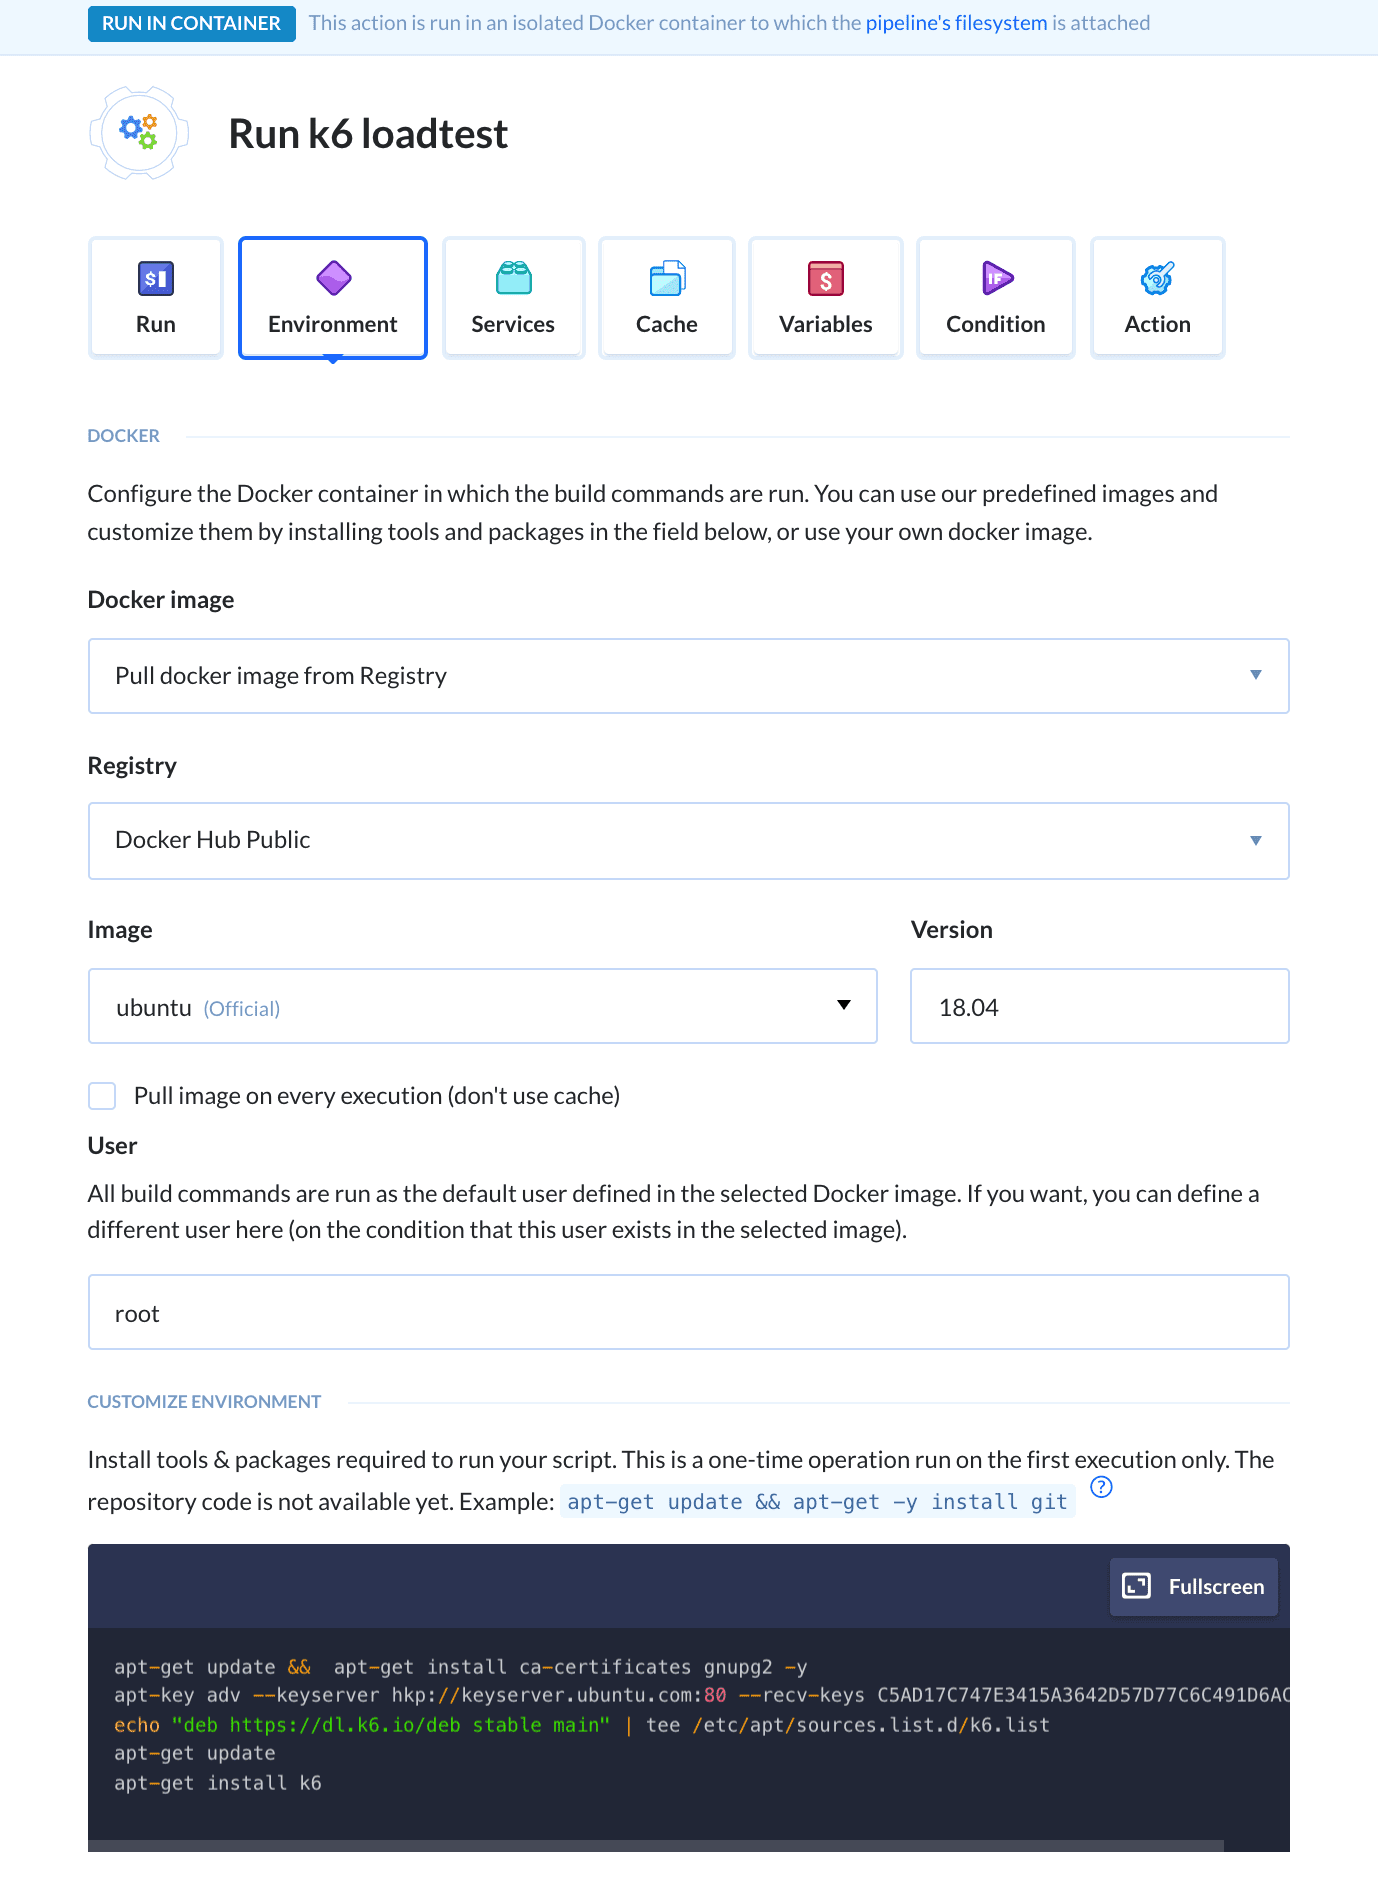
Now, for the main course – running the k6 load test. The test execution can be performed using Buddy’s Custom Build action, which runs a clean installation of Ubuntu in an isolated Docker container, allowing you to run any commands you need.
Add the action and switch to the Environment tab. There, you configure the environment of the Ubuntu container. Whatever software you install is cached, so the installation happens only on the action’s first run, which significantly cuts the execution time.
Paste all k6 installation commands into the terminal:
apt-get update &&  apt-get install ca-certificates gnupg2 -y
apt-key adv --keyserver hkp://keyserver.ubuntu.com:80 --recv-keys C5AD17C747E3415A3642D57D77C6C491D6AC1D69
echo "deb https://dl.k6.io/deb stable main" | tee /etc/apt/sources.list.d/k6.list
apt-get update
apt-get install k6
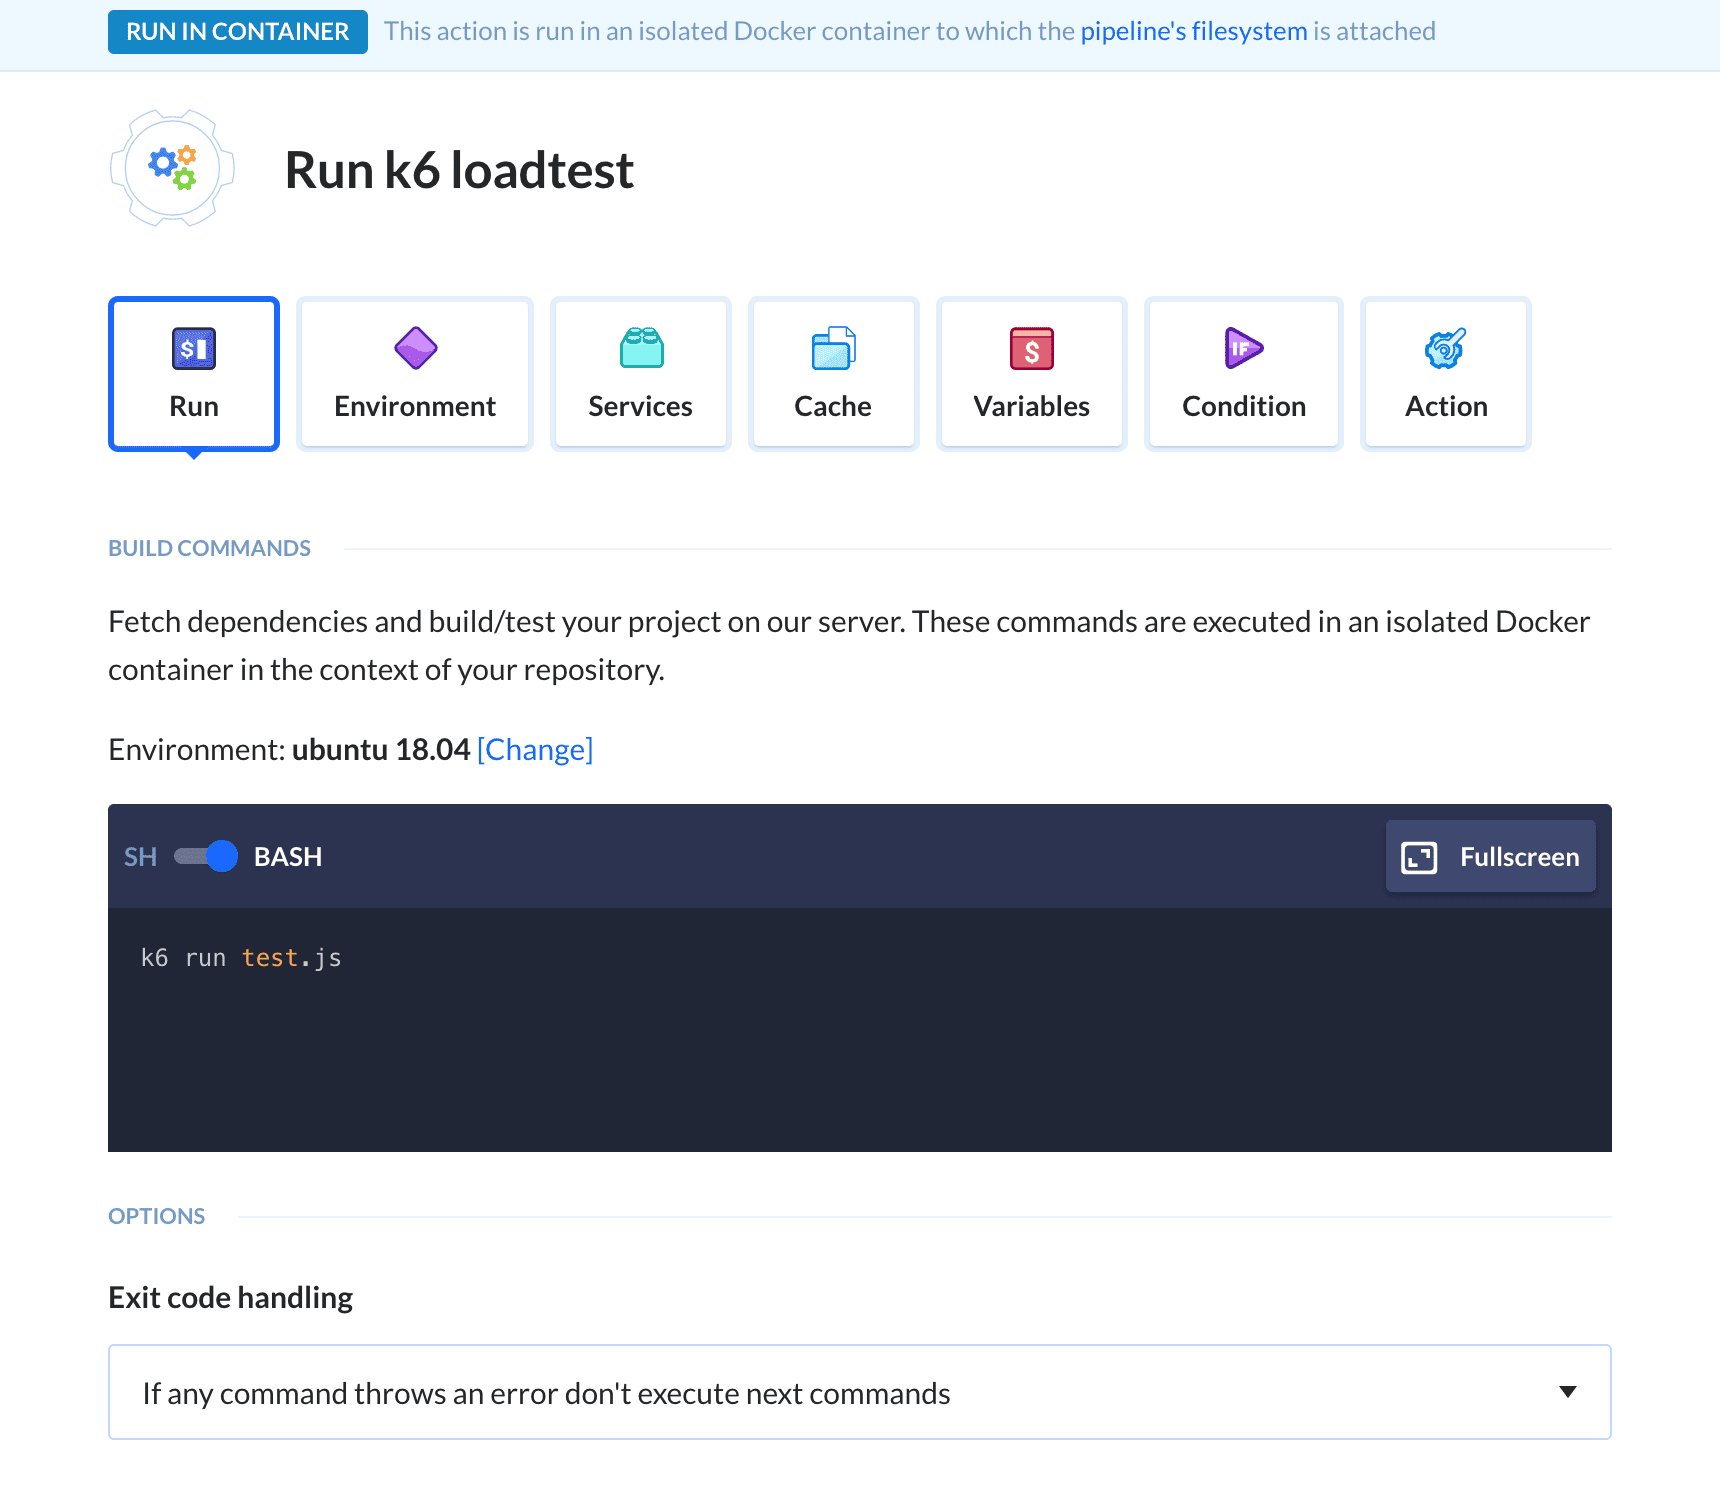
With the container’s environment prepared, switch to the Run tab and add the k6 run {TEST_SCRIPT_LOCATION} command.
Remember that the container works in the context of your repository (which is cloned to the pipeline's filesystem), so point the command to the path where you uploaded the script. In my case, the script lives on the repo’s main level:
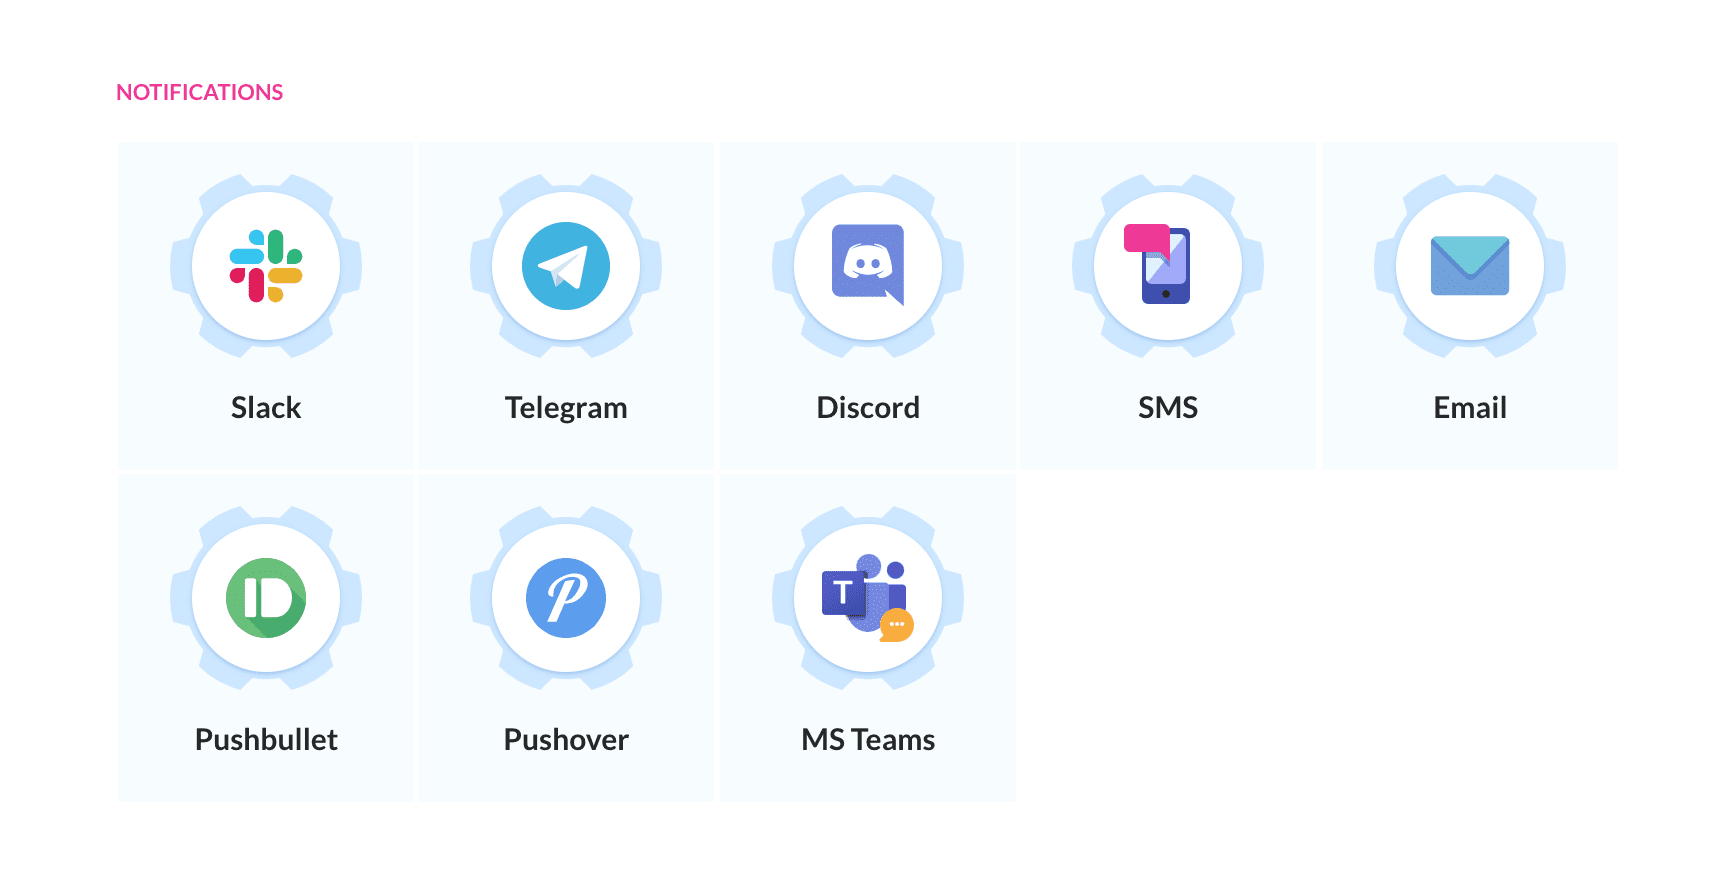
To add a cherry on top, let's define a notification that will let us know of the results. Buddy allows you to integrate with many popular messaging apps, including Slack, Telegram, and MS Teams.
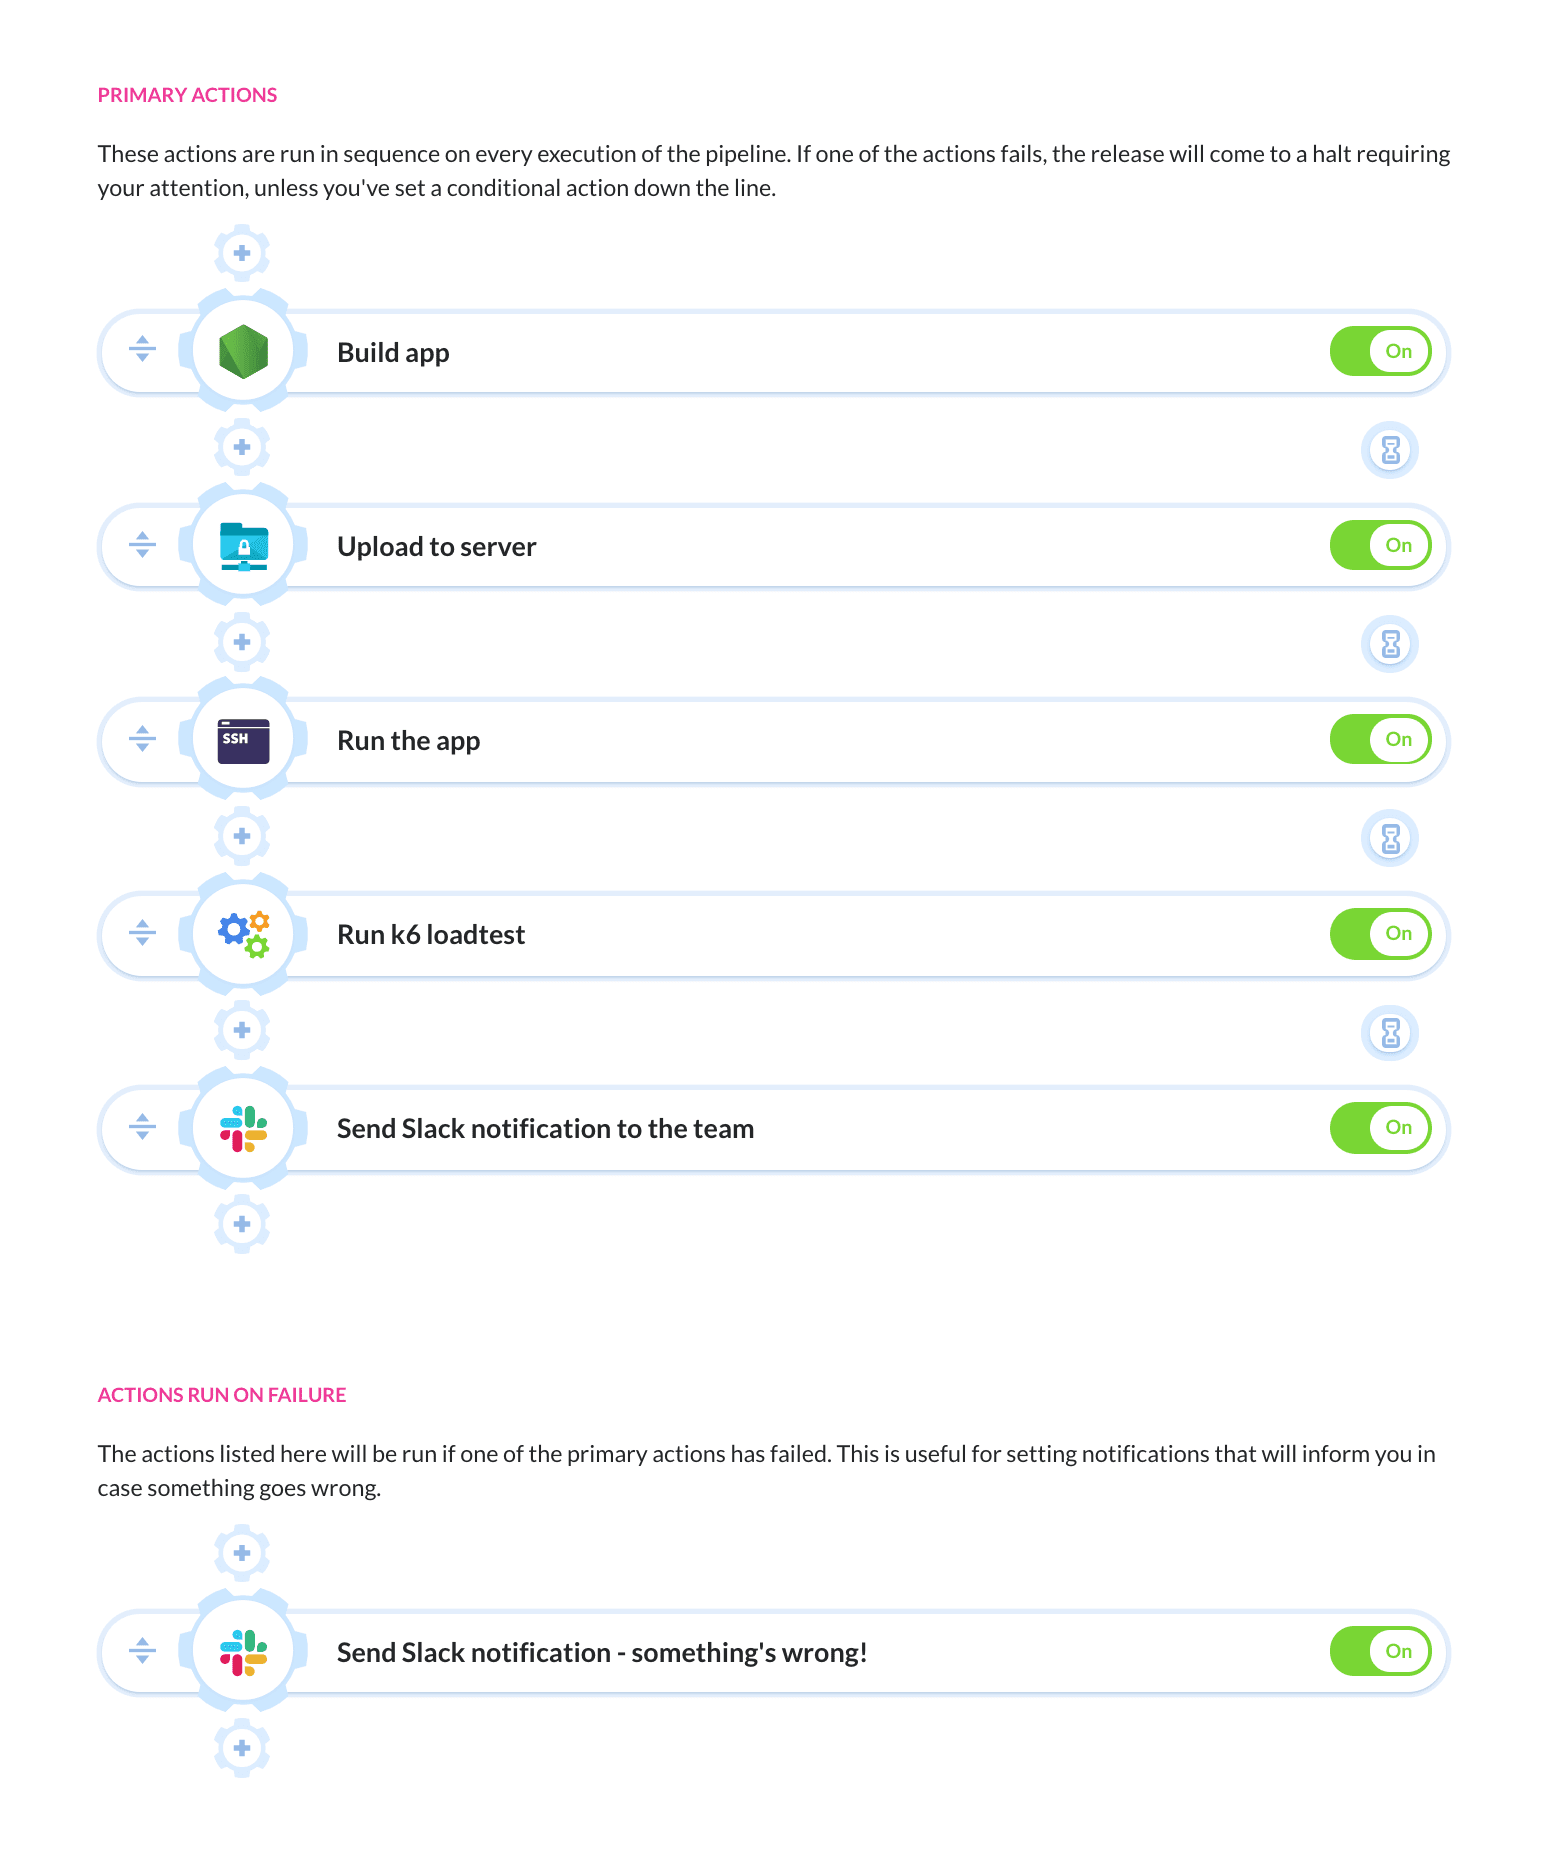
A good practice is to keep everyone involved in the development process informed by adding separate notifications for successful and failed executions in the appropriate sections in the pipeline:

This way you and your team can celebrate when the tests show no regression, or step in and start debugging when thresholds are not met and the test fails.
Step 5: Test it!
With everything ready, your pipeline should look something like this:
You can trigger it by pushing some changes to your app’s repository or by simply clicking the Run pipeline button. If everything works the way it’s supposed to, the logs of the final action will contain the k6 test results:
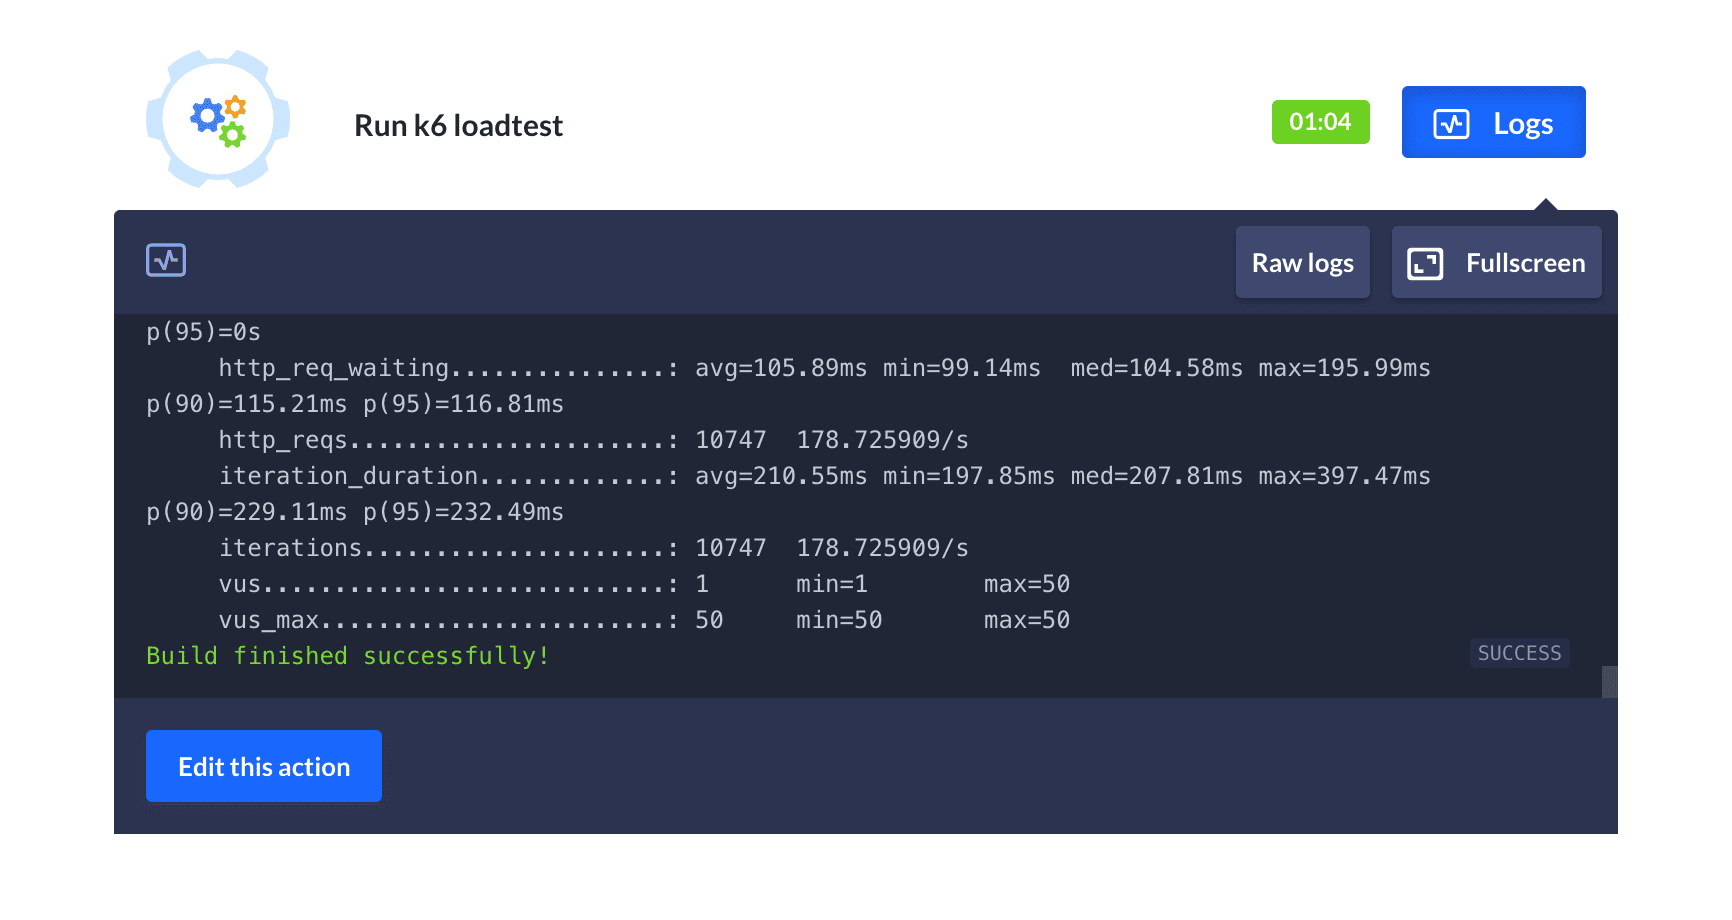
As the test included thresholds, the pipeline becomes a safeguard of the quality of your code. If the results don’t stay above the set threshold, you know that the introduced changes have caused regression and have a negative impact on your app’s performance.
If the test indicates that the performance has dropped, it’s better to take a few steps back and do some debugging instead of deploying to production.
As you can see, load testing with modern solutions such as k6 and Buddy is a piece of cake. You can set up a testing environment and write tests in a matter of minutes, so don’t hesitate and prepare yourself for the success you anticipate. It's never too late to dream big.