如何自动化部署Firebase
It might be easy to build and deploy POC apps yourself, but delivering production-ready apps is another story – you want to test them before rolling out new versions to the users. A popular solution to this is Firebase, a Google service that allows to quickly build apps without writing the backend from scratch and provides an emulator suite for testing on local machines. However, at the time of writing, it doesn't simulate every service (for example cloud storage). Also, what if you want to test the app with other people in your company without setting up emulators on their machines?
In this article, we will set up a Continuous Delivery pipeline for an example React to-do app that uses Firebase as its backend. We will create both live and testing environments.
Prerequisities
- Git version control
- An application written in React. To make sure that everything works as it should, we recommend forking our sample to-do list application from our GitHub account
- Firebase:
- Auth – user authentication
- Cloud Firestore – user data storage
- Hosting – used to serve apps to users
- Buddy: CI/CD tool that automates builds and deployments to Firebase
Preparing the project
Setting up React application
Our application will be served from Firebase Hosting. We will store user tasks in the Cloud Firestore database, and use Firebase Authentication to allow sharing between devices. This is the final look:
- Begin with forking the application and cloning it to your local environment.
- In this example, we'll use yarn to build the application. Go to the folder with your application and type the following:
yarn
yarn start
Alternatively, if you prefer npm type this:
npm install
npm run start
This will start your application at http://localhost:3000.
Creating a Firebase project
Follow the steps below and repeat them to create two environments: one for testing, and one for live environment.
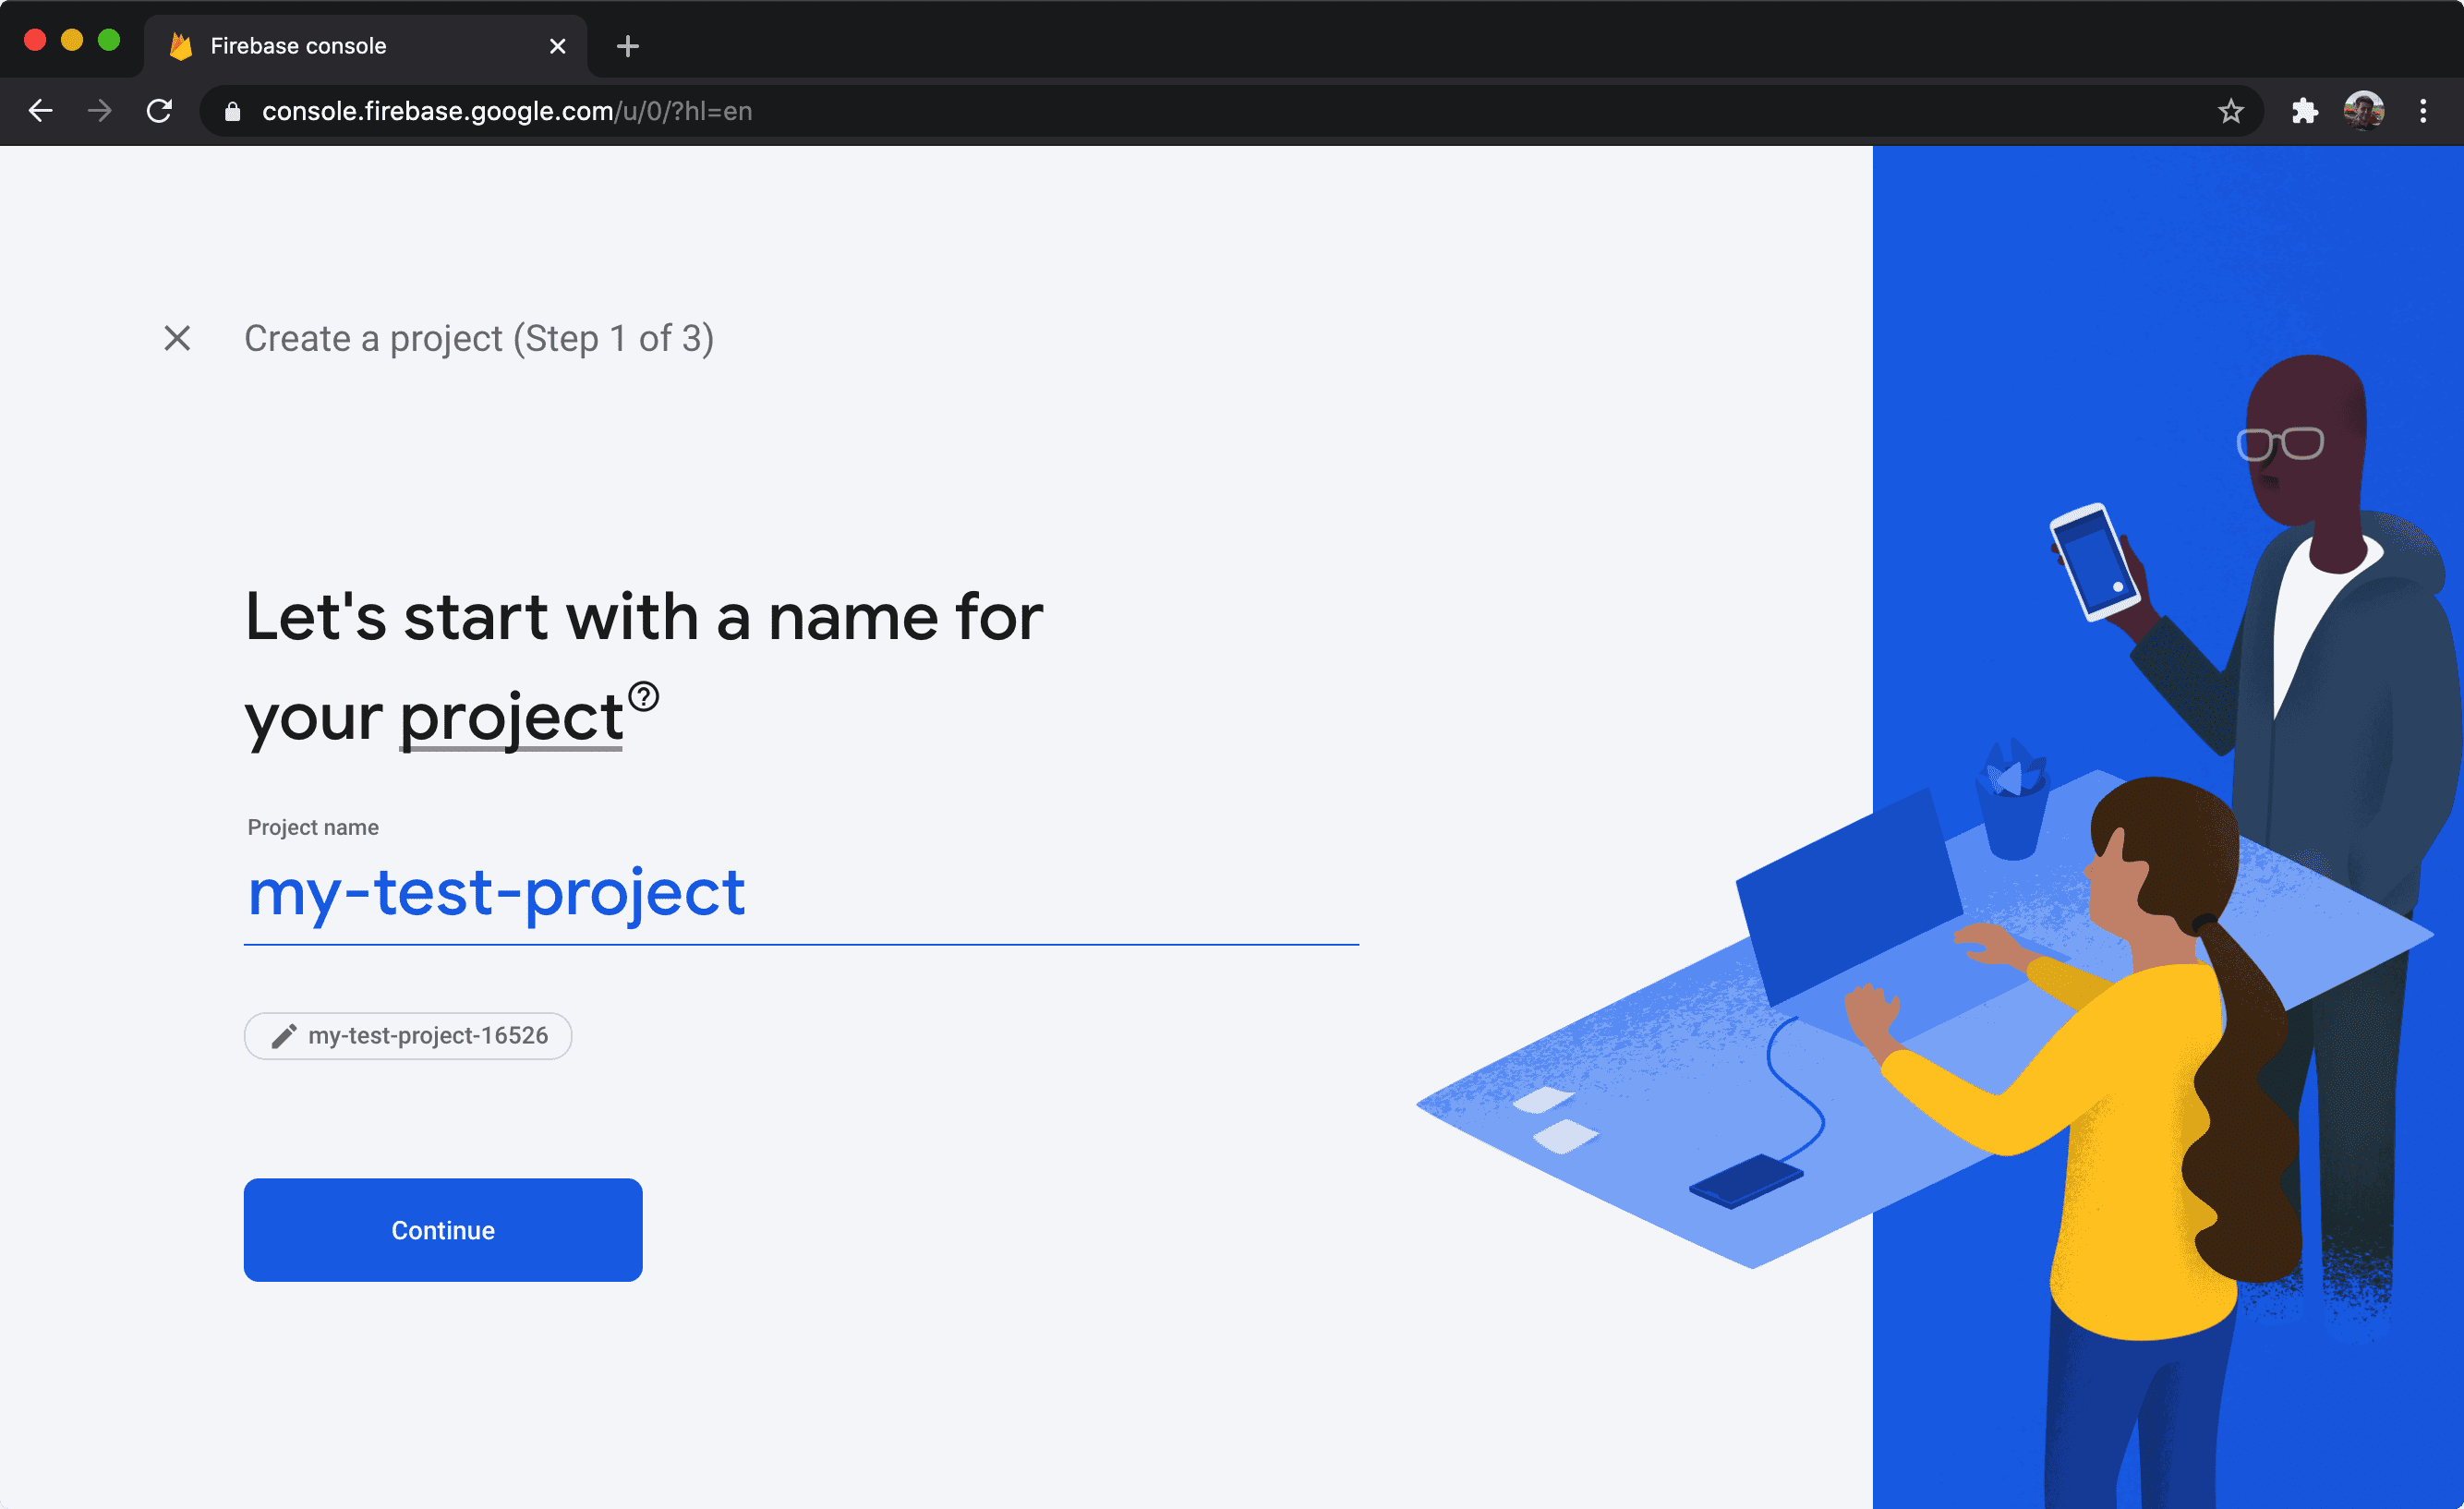
- Go to the Firebase console and create a new project:
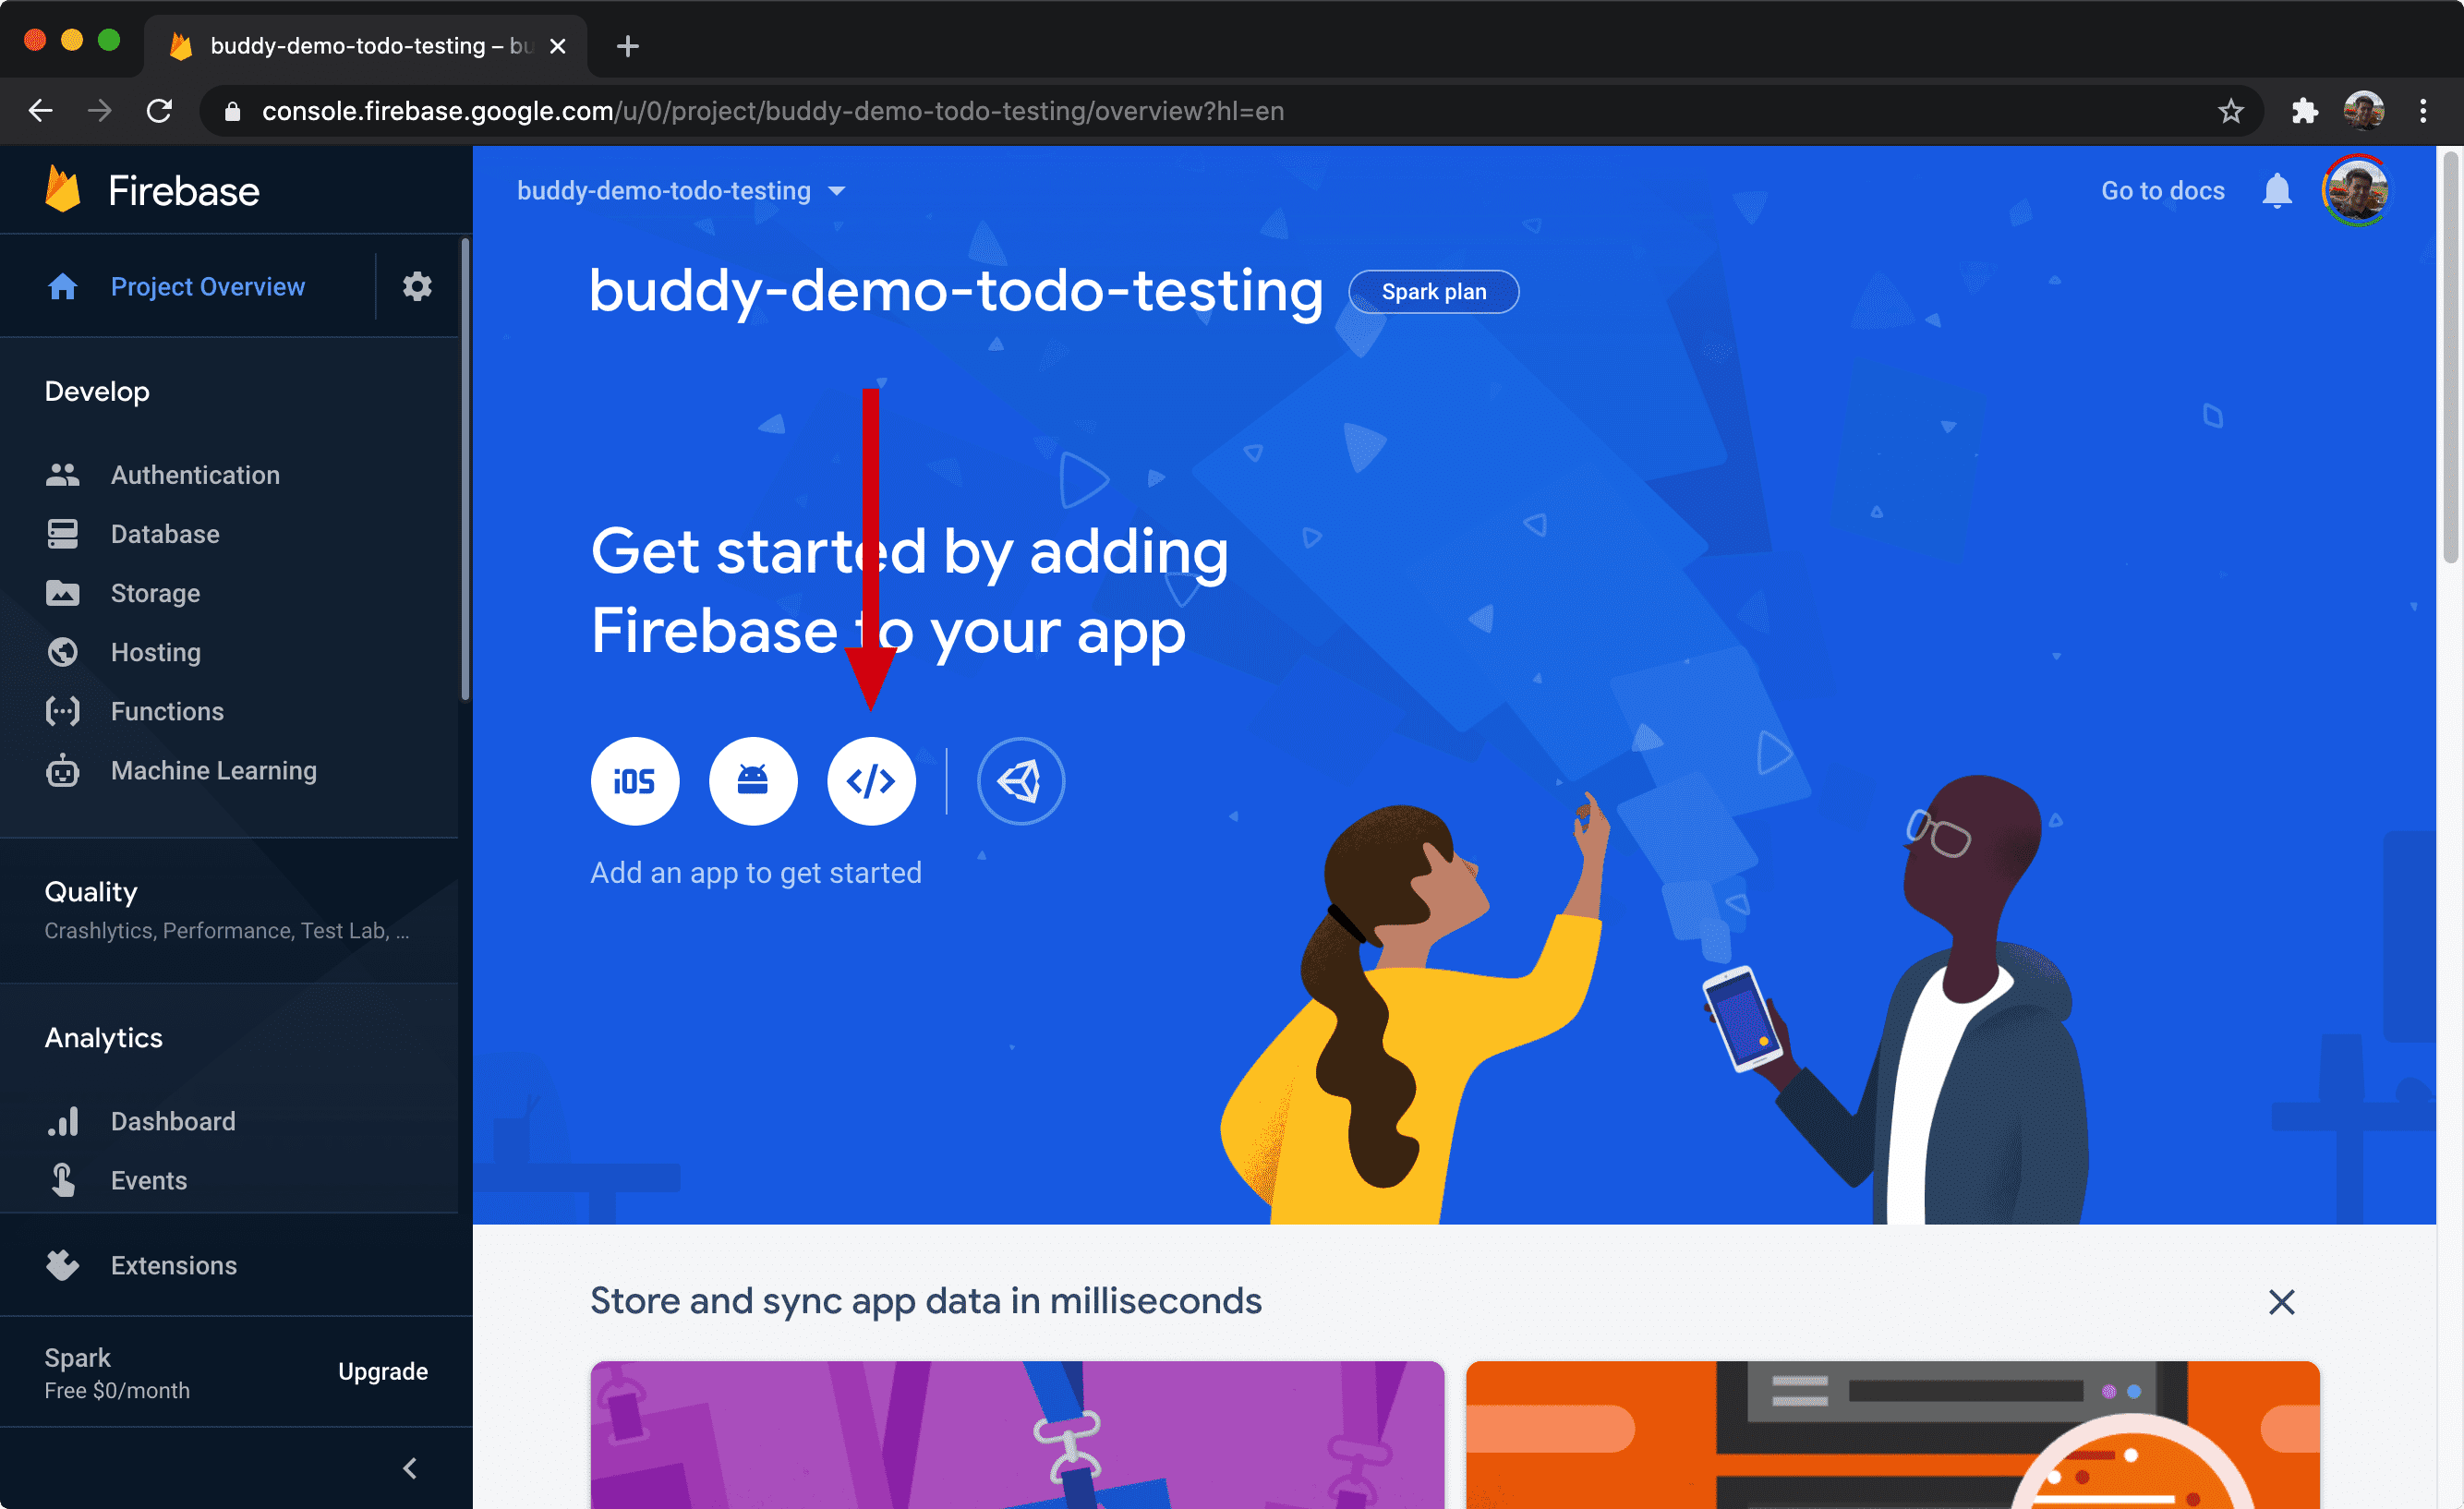
- Then add a web app to the project:
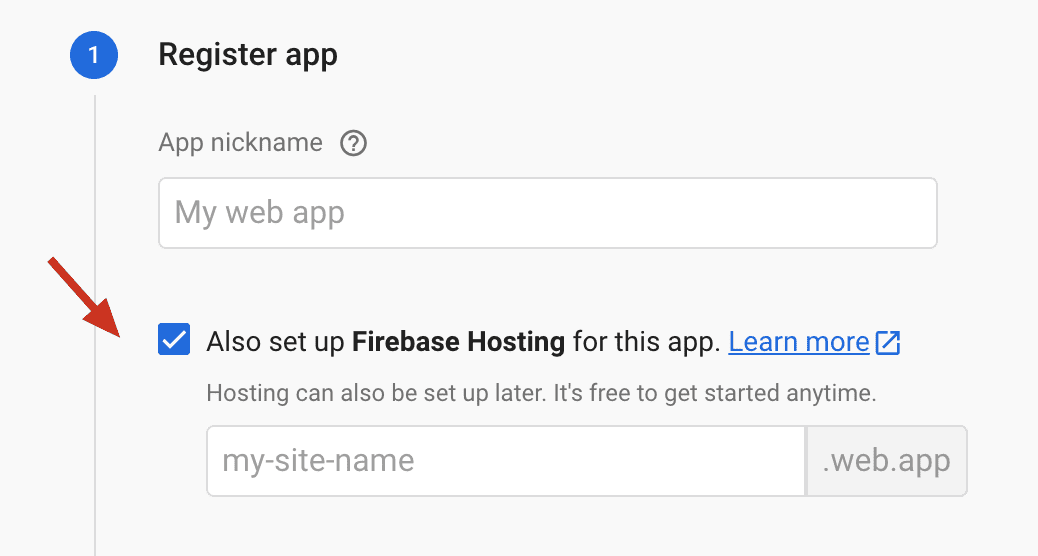
- Check the option
Also set up Firebase Hosting for this app:
- Once the app is registered, create a new Cloud Firestore database:

- Lastly, we need a configuration file that we'll use to initialize Firebase in our application. The config can be found in the settings of the newly created web app:
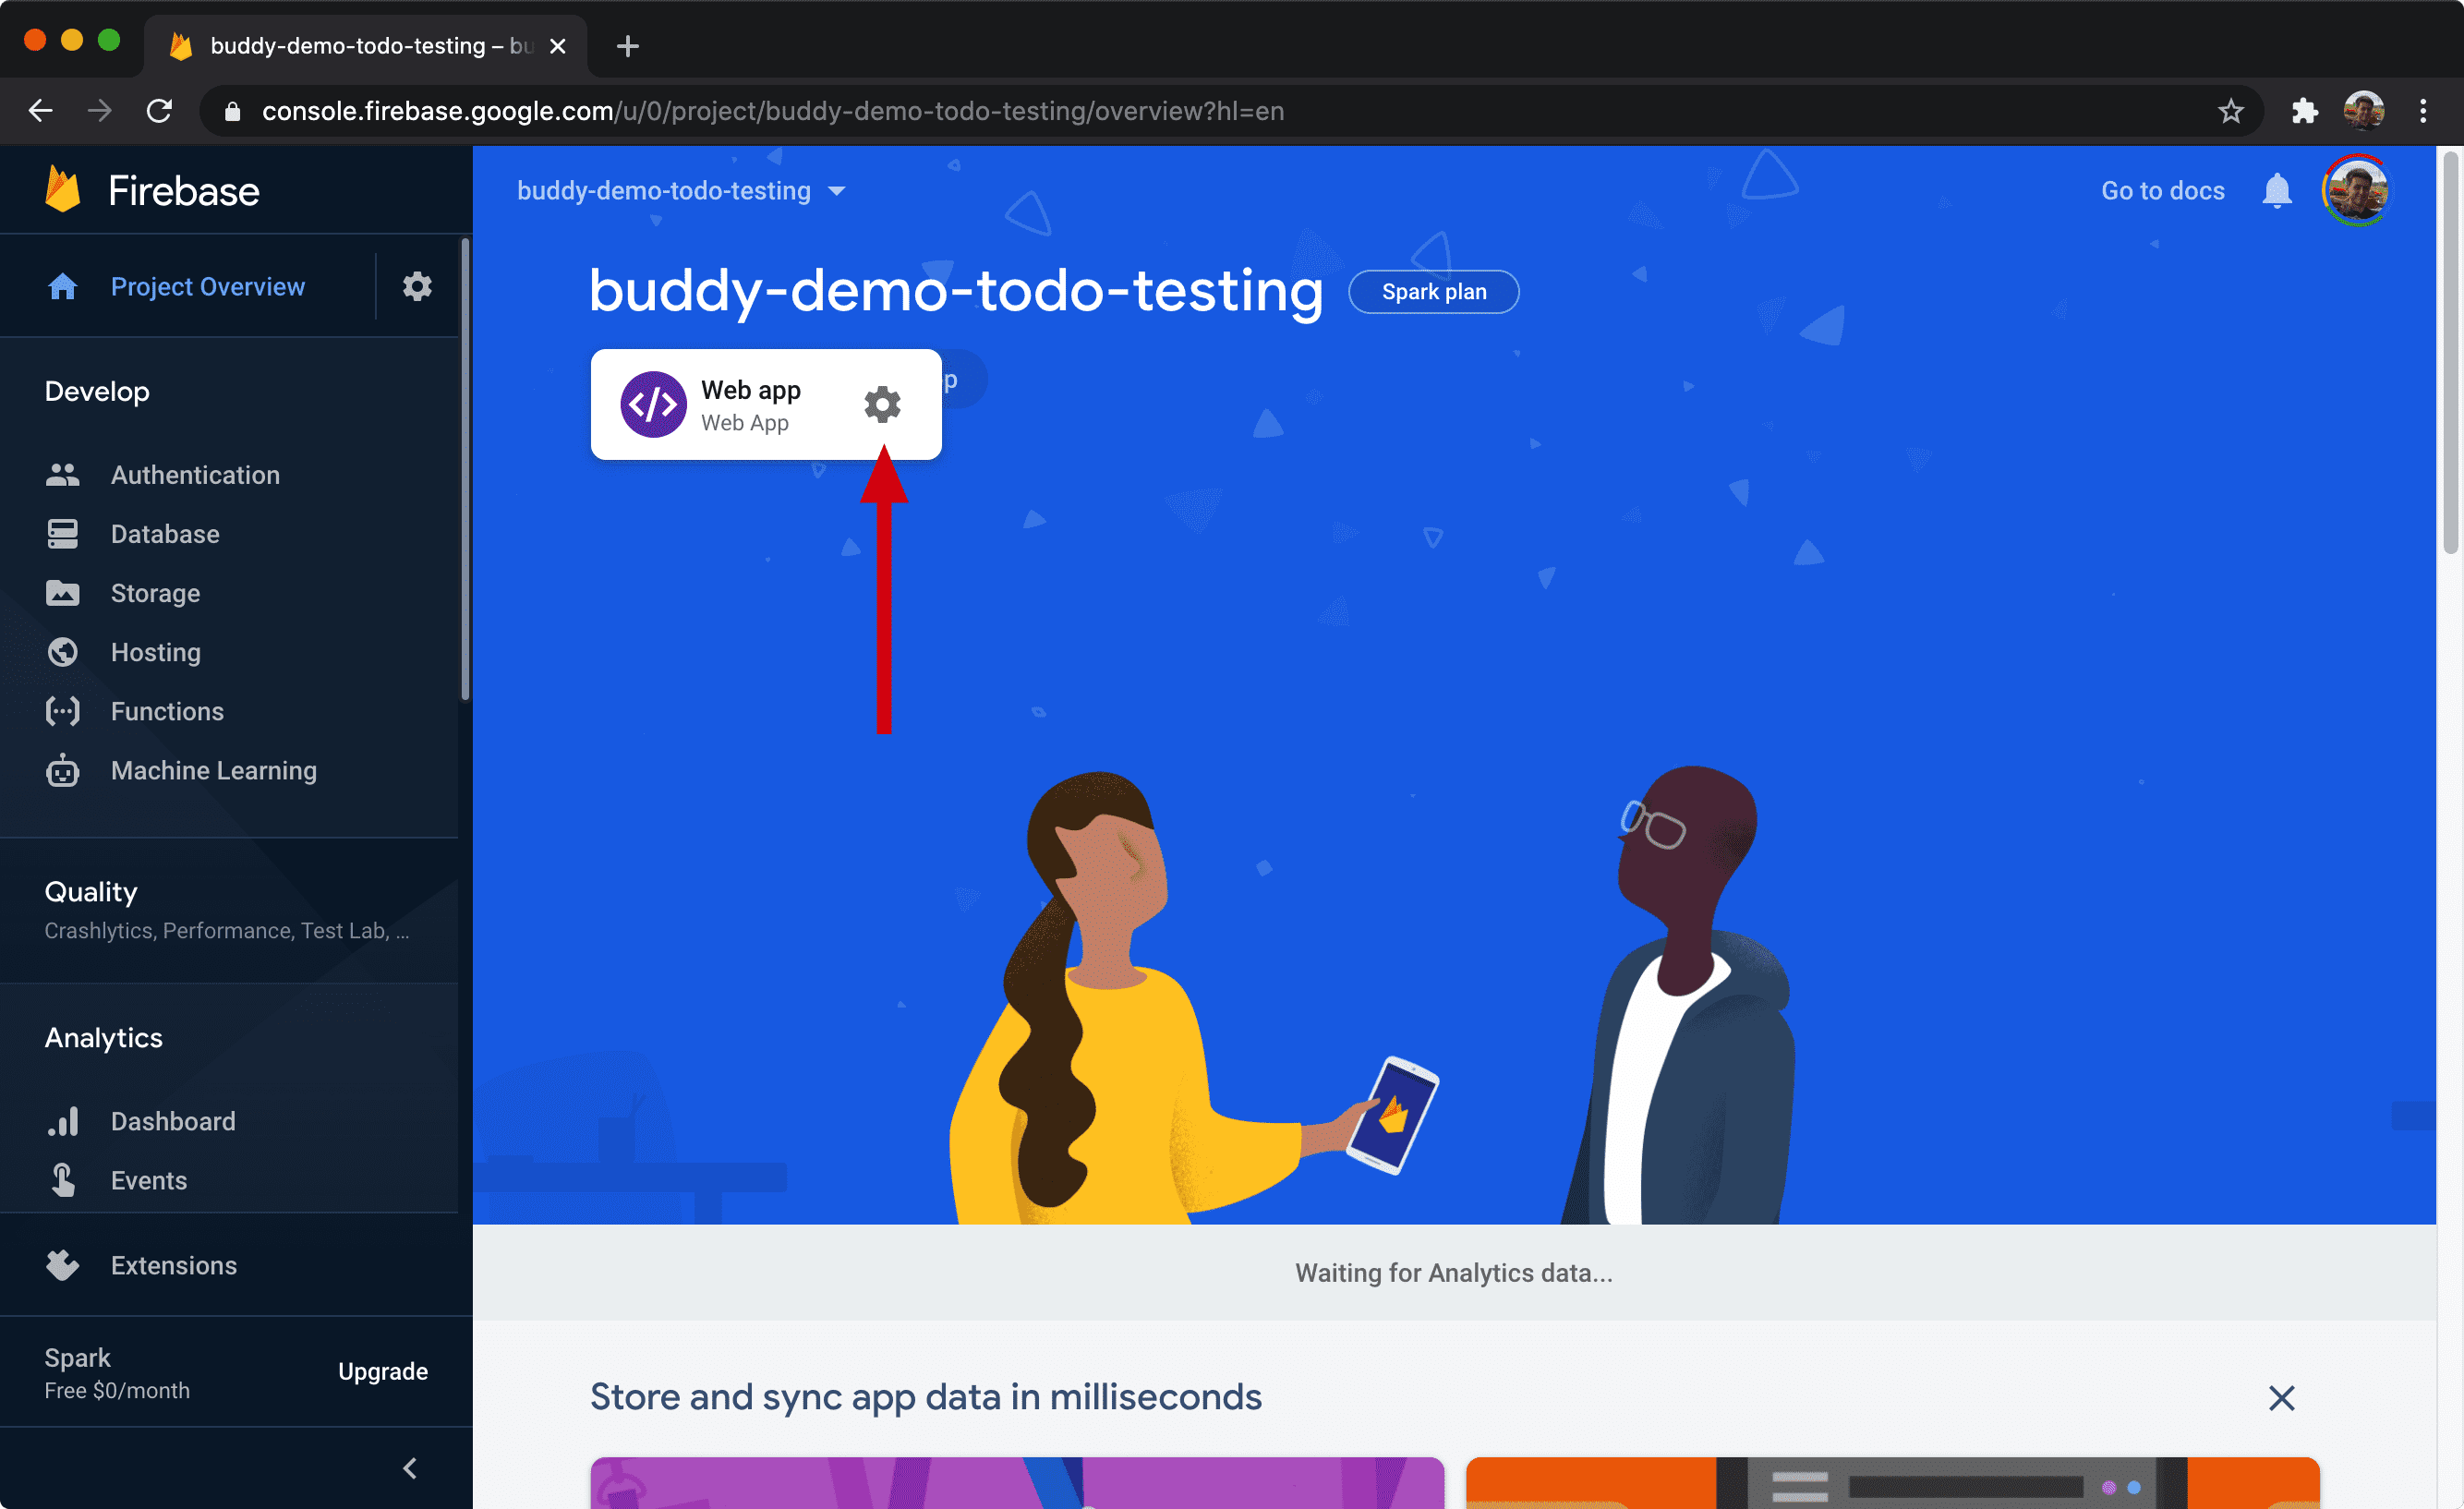
At the bottom of the page in the Firebase SDK snippet section, switch to Config and copy the configuration:

Make sure to repeat all the steps and create a second environment so that you have both testing and live environment covered.
Initializing Firebase in the app
Running Firebase commands requires Firebase CLI installed on your machine.
- Login to your Firebase account from the CLI:
firebase login
- Initialize the project in the folder with your application:
firebase init
- Select Firestore and Hosting options when asked:
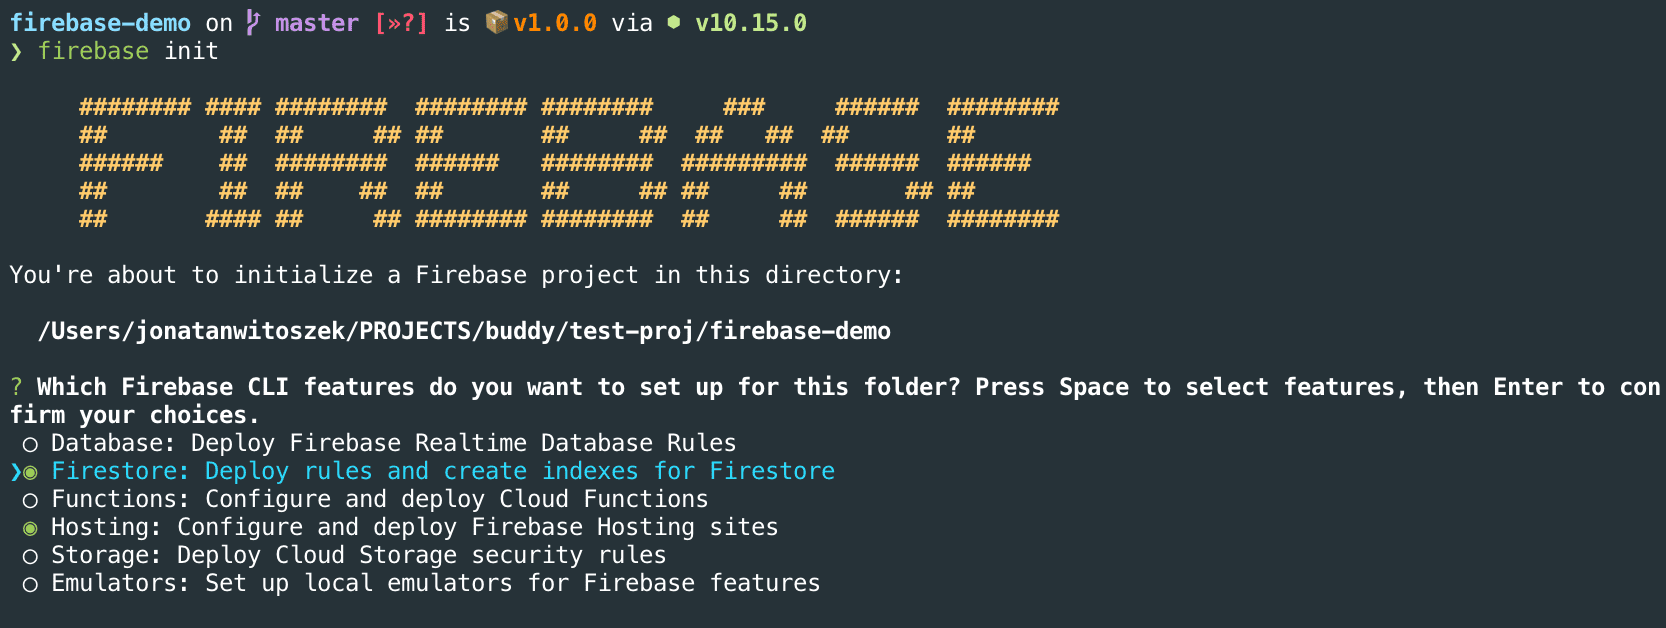
You will be asked to either create a new project or use an existing one. Select Use an existing project.
In the next prompts, accept the default settings by hitting Enter. The only exception are these:
What do you want to use as your public directory?
> dist
Configure as a single-page app (rewrite all urls to /index.html)? (y/N)
> y
- The last step is adding the second testing project that we have created earlier:
firebase use --add
Configure Firebase in React app
- To use Firebase in React, we need to install Firebase as a dependency:
yarn add firebase
-- OR --
npm install firebase
- Now, we need to initialize the Firebase SDK in the app's entry point. In case of JavaScript, usually it's the
index.jsfile.
In our example app we have prepared the firebase.js file to contain all necessary configuration. Copy and paste firebaseConfig object that you have obtained earlier for both live and testing environment.
Here's firebase.js with both environments configured:
const firebaseConfig = {
  apiKey: "AIzaSyB8Ed3c-gtNgqOKMJfEJ3YfgYwzm-7lPQY",
  authDomain: "buddy-demo-todo.firebaseapp.com",
  databaseURL: "https://buddy-demo-todo.firebaseio.com",
  projectId: "buddy-demo-todo",
  storageBucket: "buddy-demo-todo.appspot.com",
  messagingSenderId: "175580667377",
  appId: "1:175580667377:web:a27920a275fbb0a0f57850",
  measurementId: "G-V6G5YNGEPF",
};

const testFirebaseConfig = {
  apiKey: "AIzaSyBG9qTppLObed94KUFHEZ9nH-38hv4Jtuc",
  authDomain: "buddy-demo-todo-testing.firebaseapp.com",
  databaseURL: "https://buddy-demo-todo-testing.firebaseio.com",
  projectId: "buddy-demo-todo-testing",
  storageBucket: "buddy-demo-todo-testing.appspot.com",
  messagingSenderId: "634356635376",
  appId: "1:634356635376:web:0cfe23444a54385a9a5435",
  measurementId: "G-G8DCPFKPQY",
};
- After pasting the settings, we need to initialize the SDK in
package.jsonaccording to the environment in which it's run. In our project, we use the--envWebpack flag when running the testing environment.
Add the following to package.json:
{
  "scripts": {
    "build": "webpack --mode production",
    "build:testing": "webpack --env.TESTING --mode production"
  }
}
- Now, we can go back to the
firebase.jsfile and run thefirebase.initializeApp()method with the config based on the environment variable:
if (process.env.TESTING) {
  firebase.initializeApp(testFirebaseConfig);
} else {
  firebase.initializeApp(firebaseConfig);
}
The complete firebase.js file should look like this:
import * as firebase from "firebase/app";
import "firebase/auth";

const firebaseConfig = {
  apiKey: "AIzaSyB8Ed3c-gtNgqOKMJfEJ3YfgYwzm-7lPQY",
  authDomain: "buddy-demo-todo.firebaseapp.com",
  databaseURL: "https://buddy-demo-todo.firebaseio.com",
  projectId: "buddy-demo-todo",
  storageBucket: "buddy-demo-todo.appspot.com",
  messagingSenderId: "175580667377",
  appId: "1:175580667377:web:a27920a275fbb0a0f57850",
  measurementId: "G-V6G5YNGEPF",
};

const testFirebaseConfig = {
  apiKey: "AIzaSyBG9qTppLObed94KUFHEZ9nH-38hv4Jtuc",
  authDomain: "buddy-demo-todo-testing.firebaseapp.com",
  databaseURL: "https://buddy-demo-todo-testing.firebaseio.com",
  projectId: "buddy-demo-todo-testing",
  storageBucket: "buddy-demo-todo-testing.appspot.com",
  messagingSenderId: "634356635376",
  appId: "1:634356635376:web:0cfe23444a54385a9a5435",
  measurementId: "G-G8DCPFKPQY",
};

if (process.env.TESTING) {
  firebase.initializeApp(testFirebaseConfig);
} else {
  firebase.initializeApp(firebaseConfig);
}

export const uiConfig = {
  signInSuccessUrl: "/",
  signInFlow: "popup",
  signInOptions: [
    firebase.auth.EmailAuthProvider.PROVIDER_ID,
    firebase.auth.GoogleAuthProvider.PROVIDER_ID,
  ],
  tosUrl: "/terms-of-service",
};
If you want to learn more about setting Webpack environment variables, check out this guide and Webpack documentation.
Congratulations – our project is configured and ready! Commit your changes and push them to your repository. Now we'll move to setting up deployment.
Pipeline 1: Deployment to Production
Synchronizing project
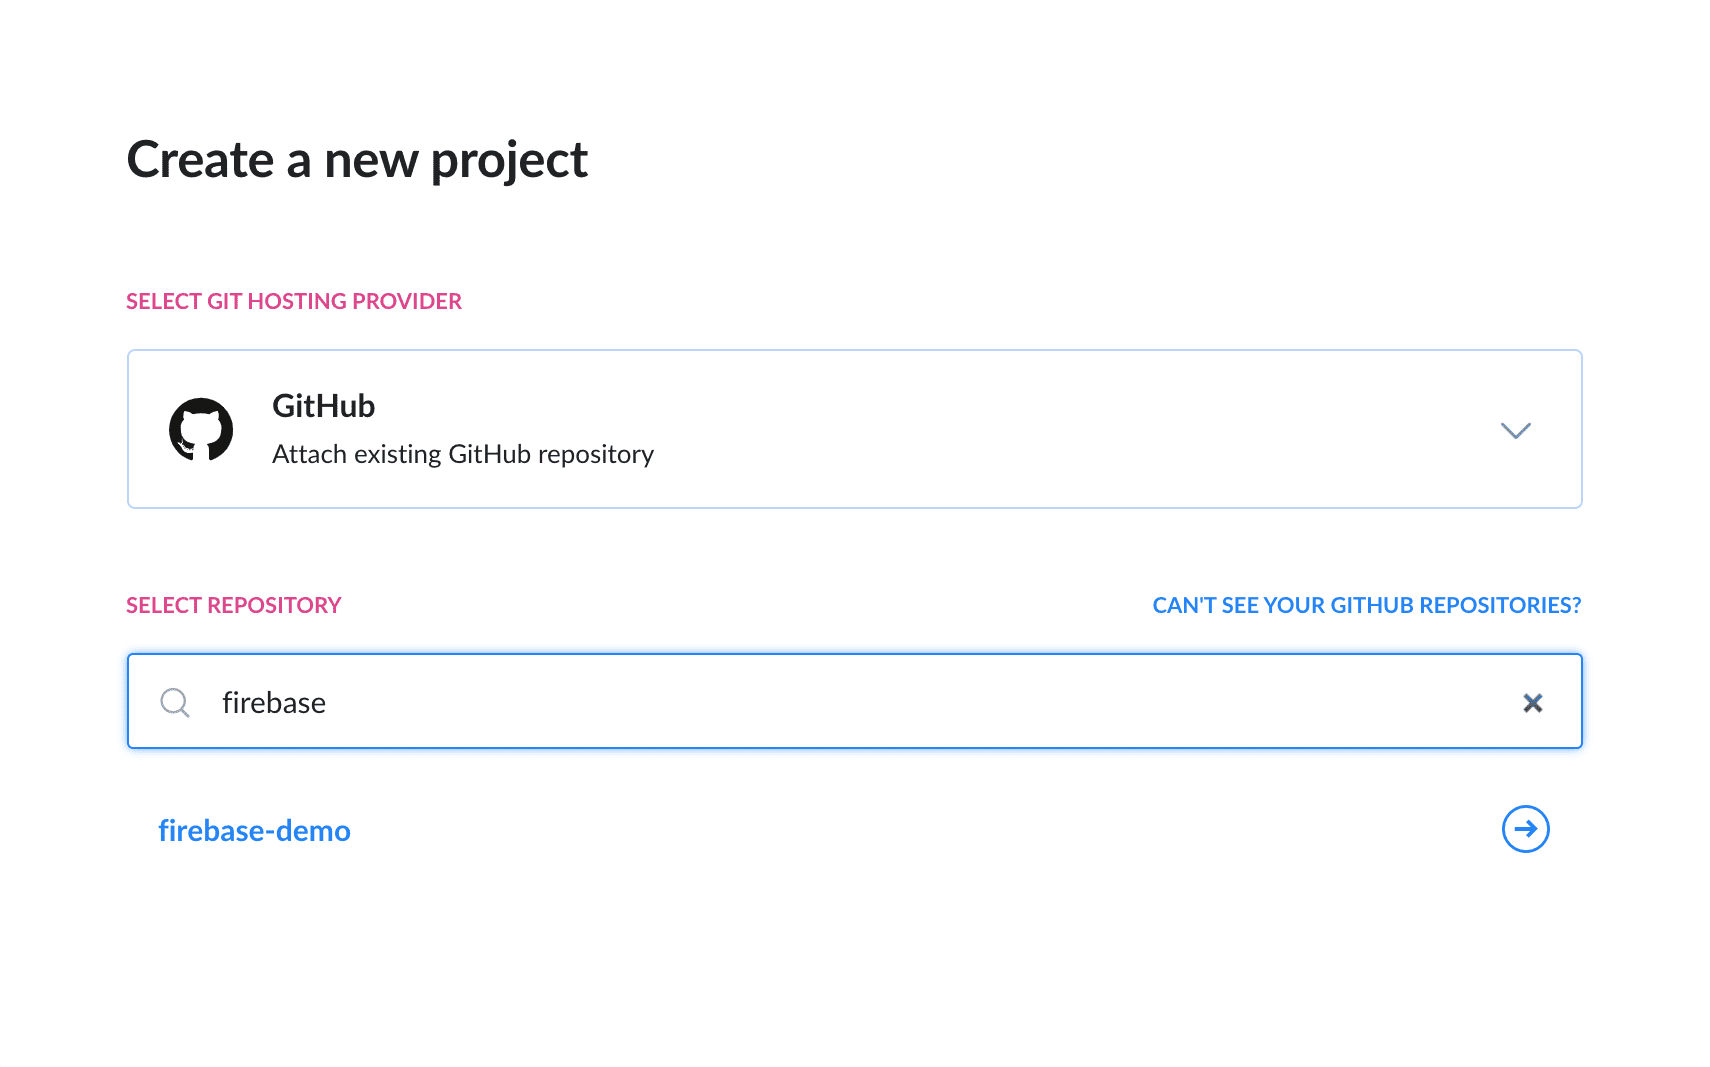
- Log in to your Buddy account and create a new project. Select your Git provider and the repository with your application:
- Once the project is synchronized, click the button add a new delivery pipeline. We'll use it to deploy changes to Production from the master branch. To do this, set the Trigger mode to On push select 'master' as the triggering branch:
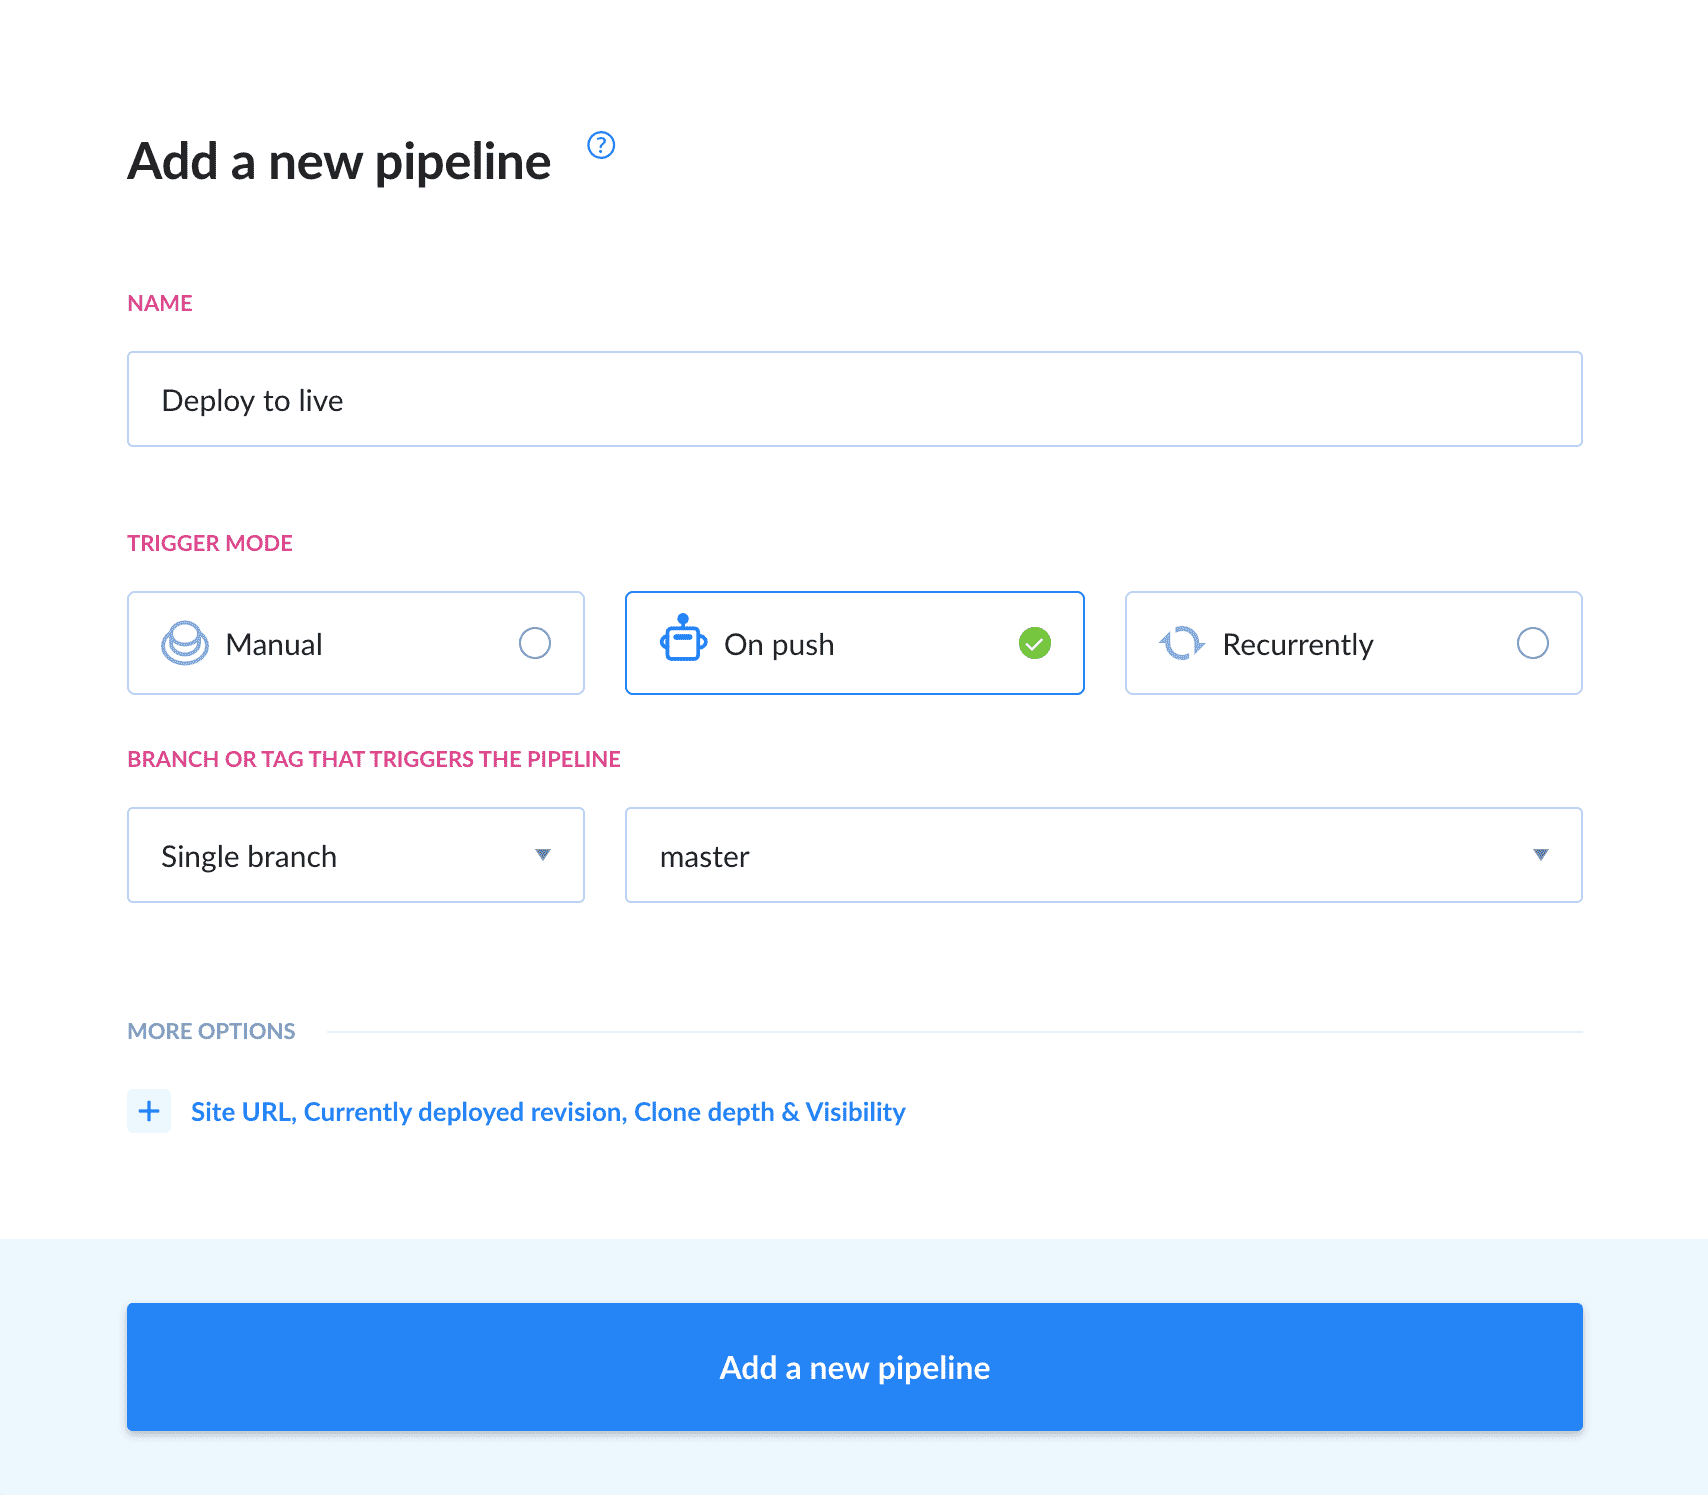
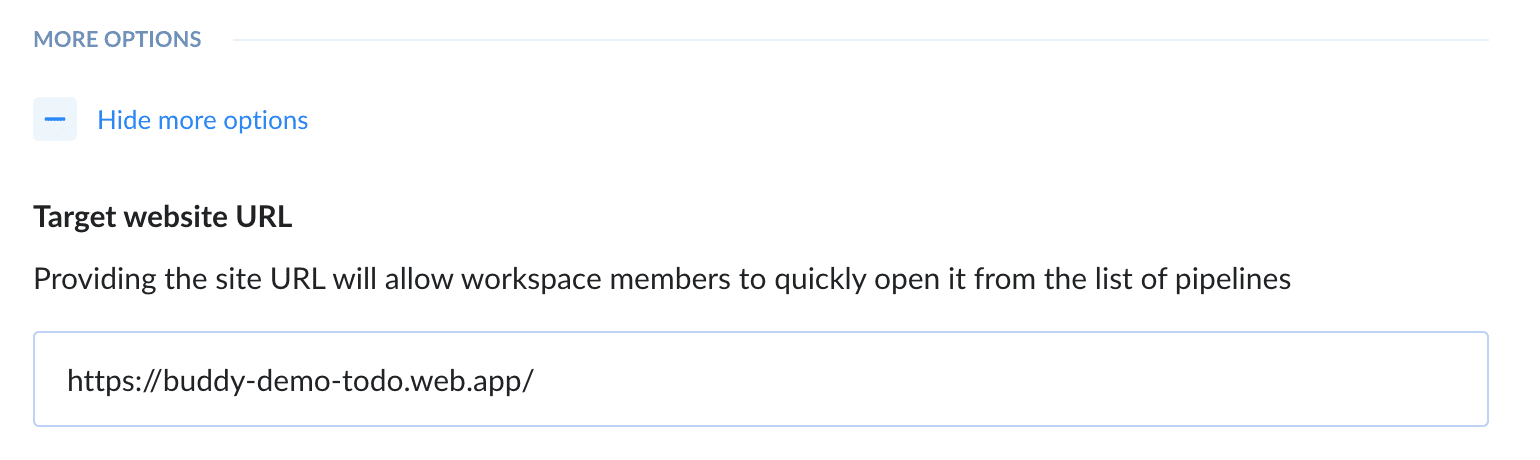
You can also provide the URL to your website URL to add a link for quick access on the pipeline list:
- In the pipeline, we need to add two actions:
- Node.js – for building React app using Webpack
- Firebase – for deploying the app to Firebase
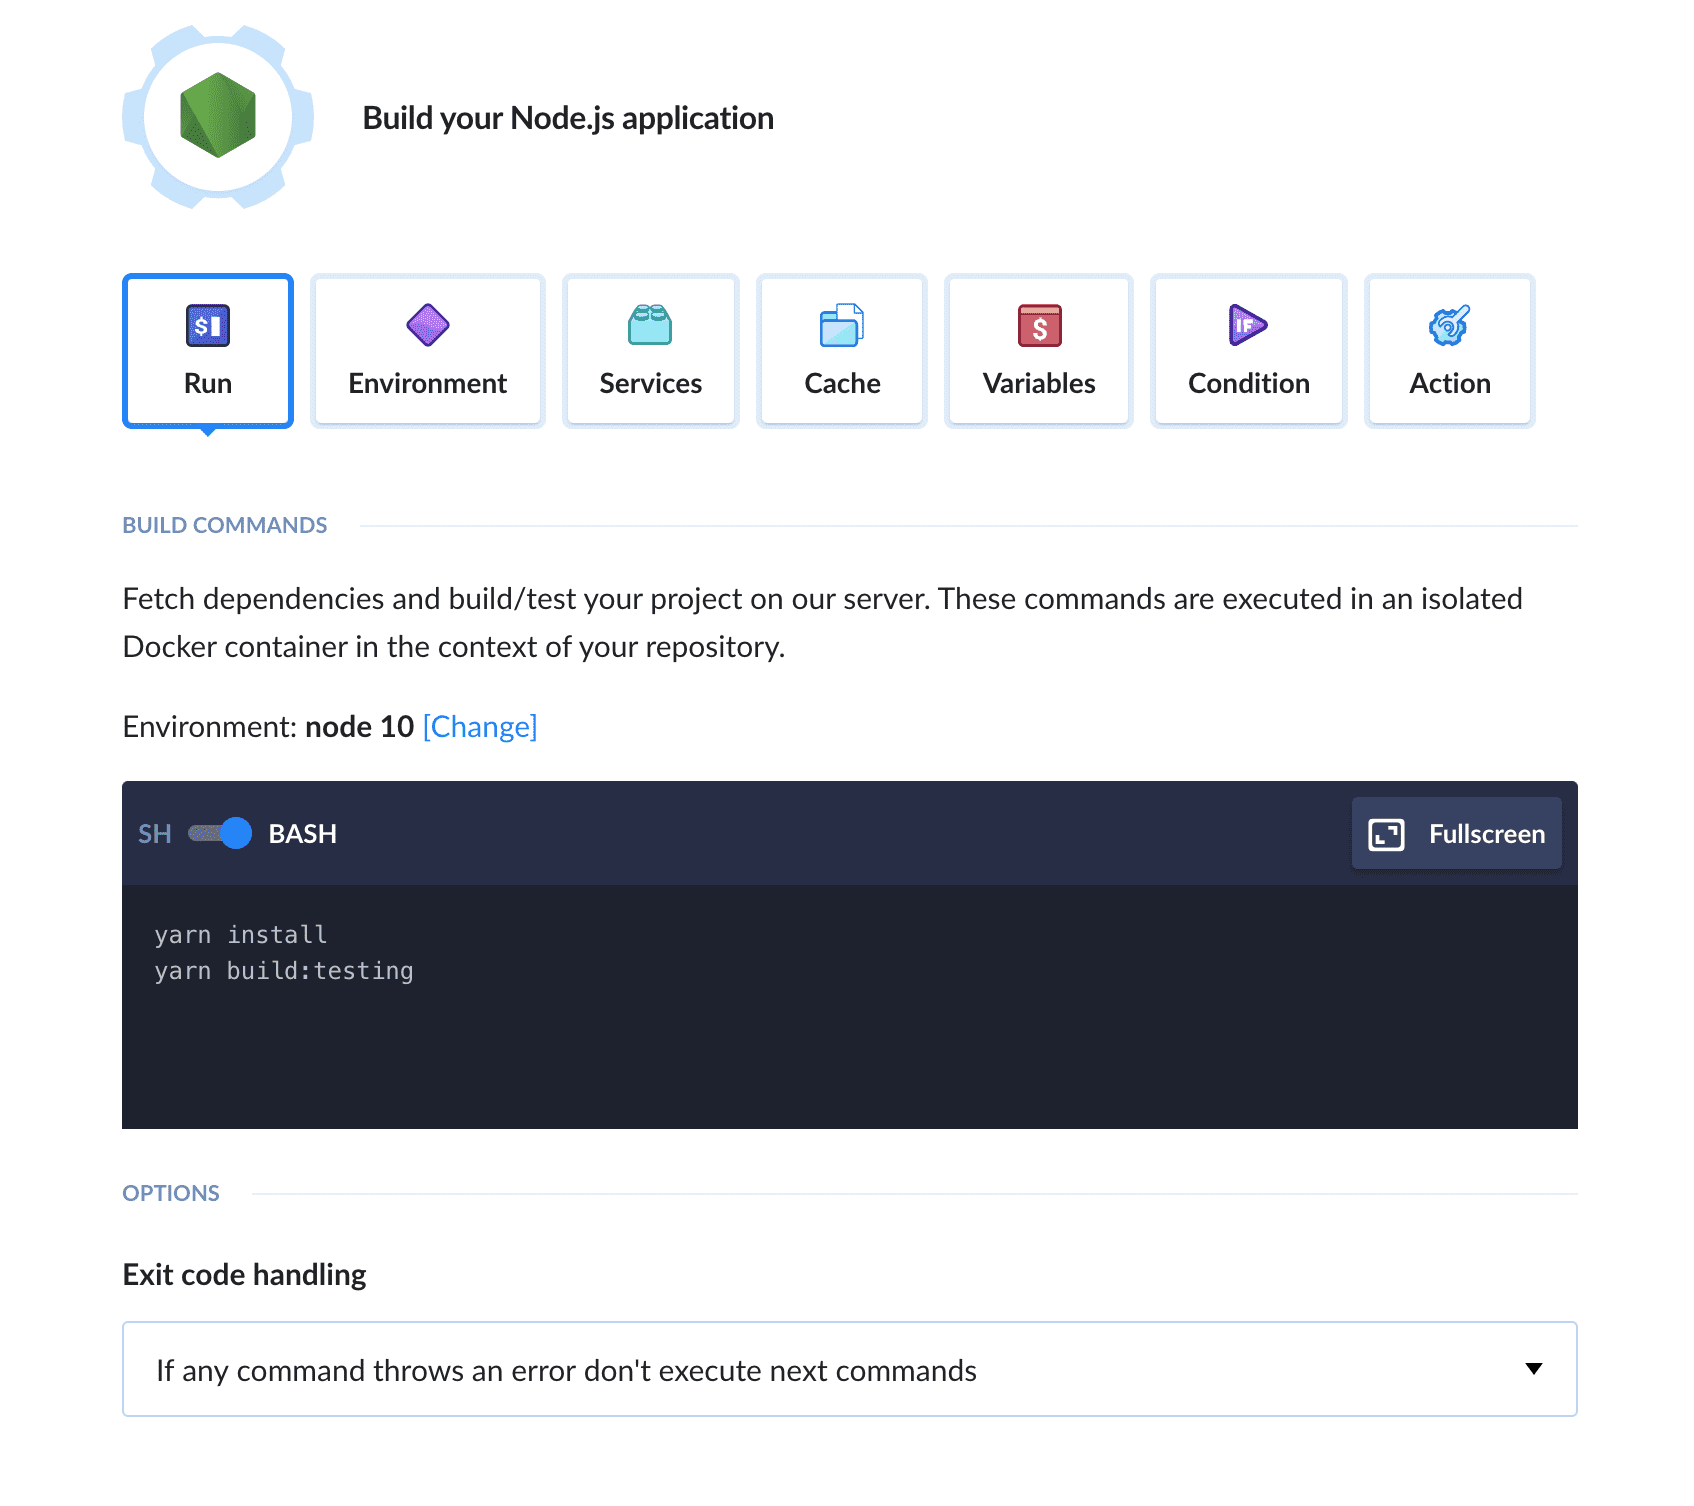
React build action
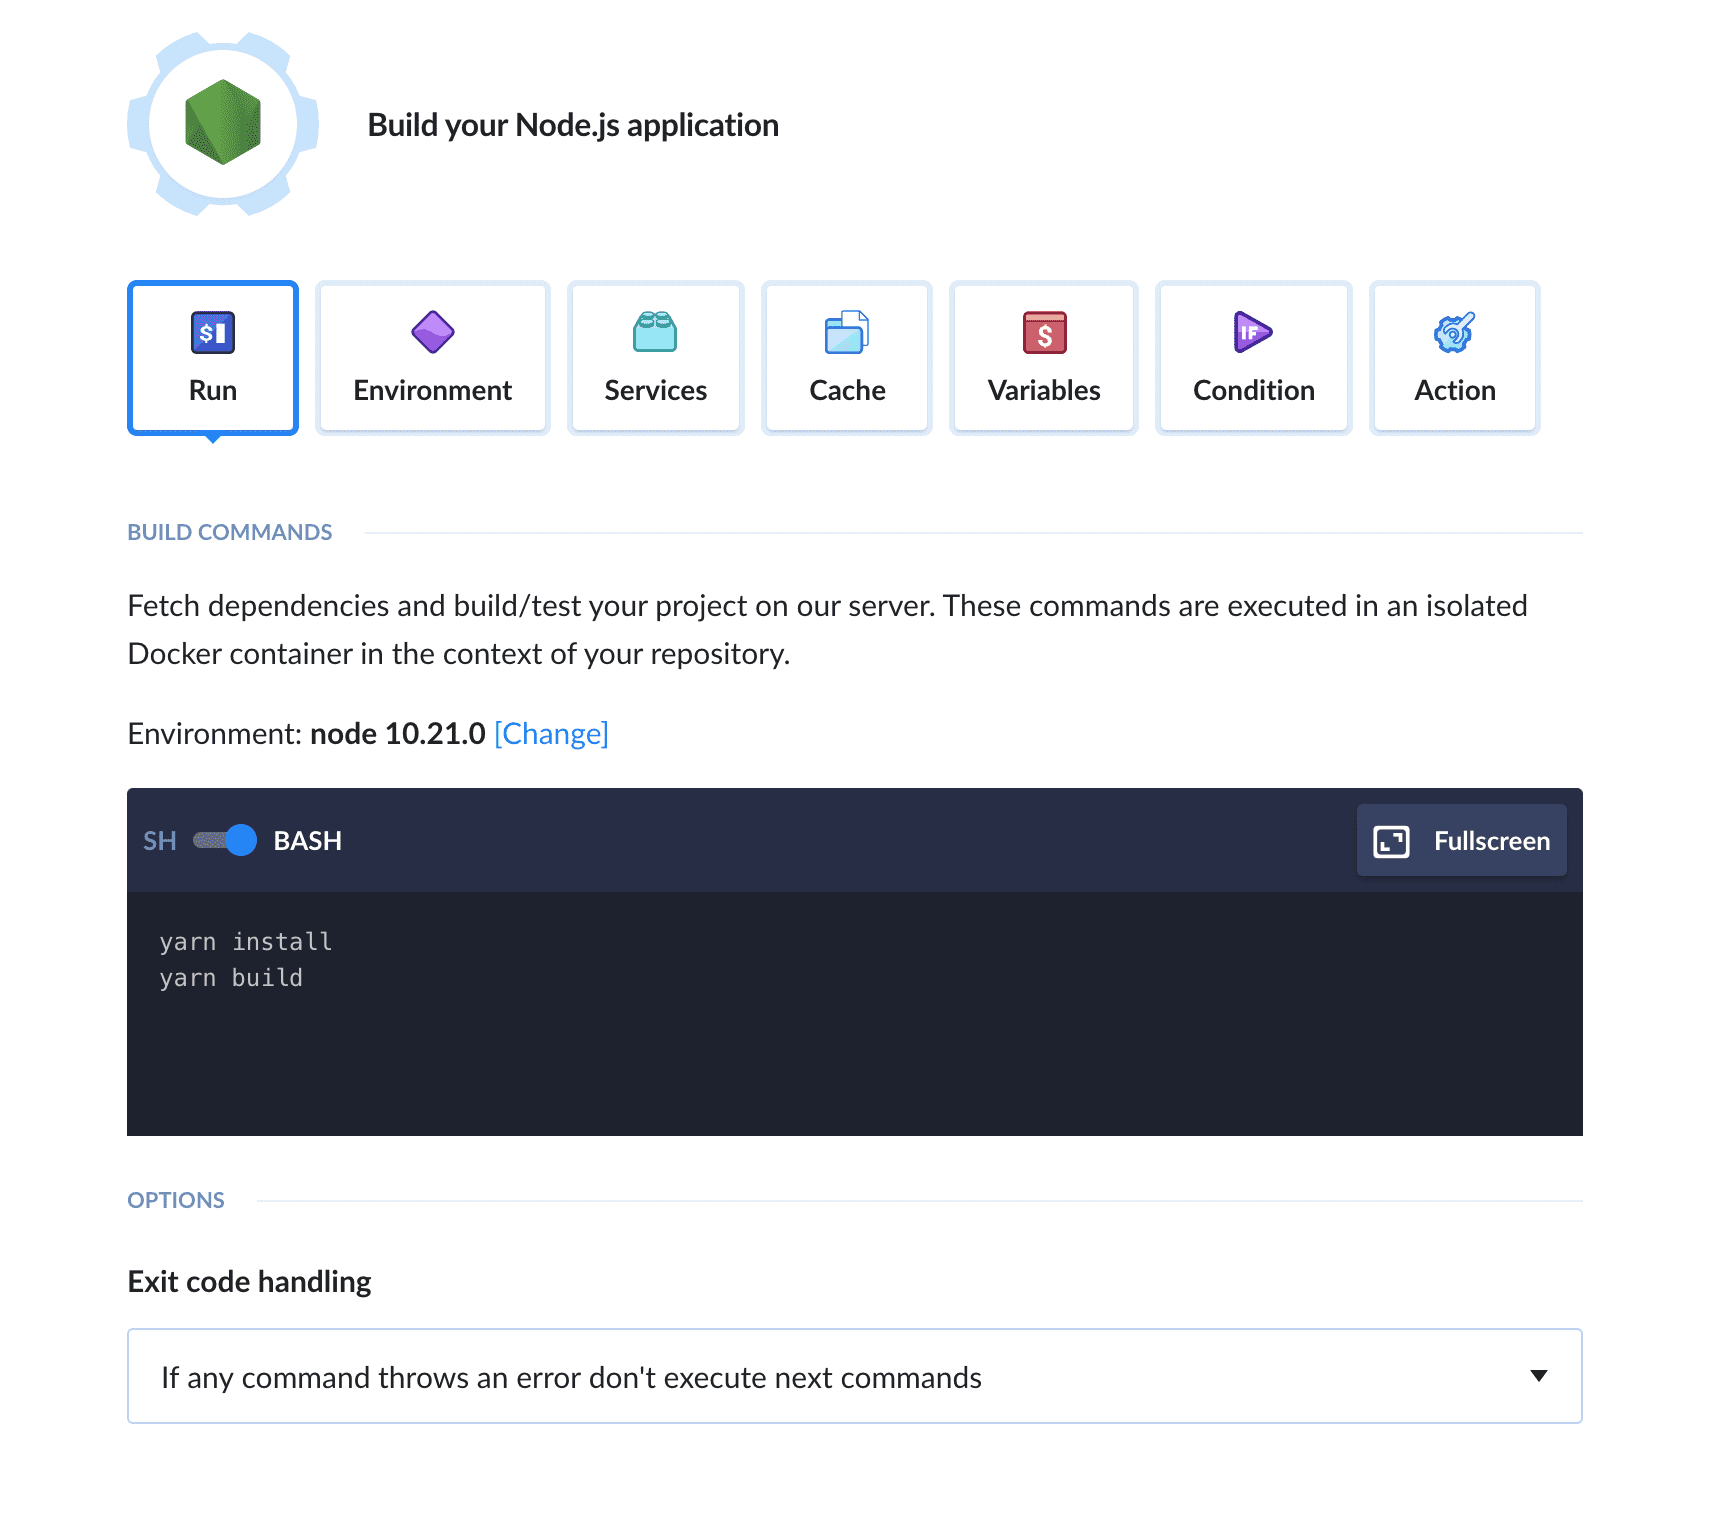
Select the Node action and enter the following commands to build the application.:
yarn install
yarn build
-- OR --
npm install
npm run build
If you're using Firebase Cloud Functions in your project, make sure to change the Node version to 10 or 12. To check which versions of Node are currently supported, refer to this article.
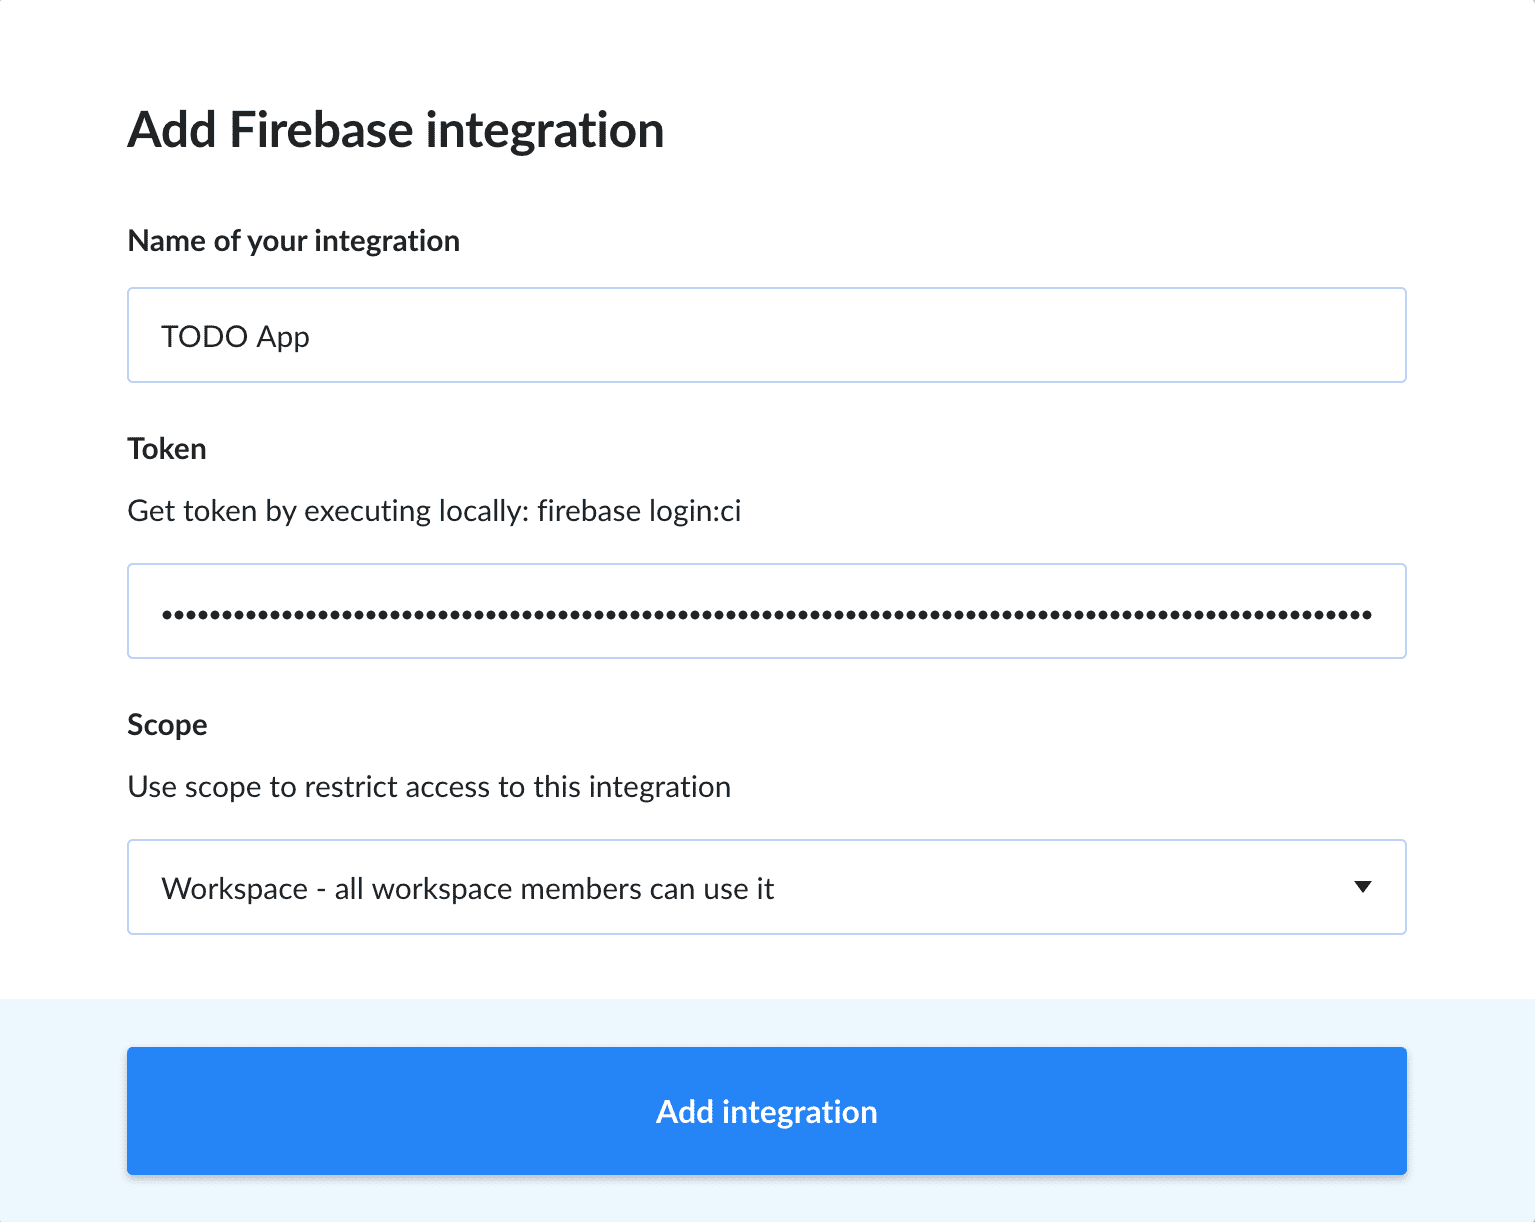
Firebase deployment
The second action in the pipeline will be Firebase. Upon clicking the action, you will be prompted to configure the integration. Run this command in your terminal to receive the token required to proceed:
firebase login:ci
Copy and paste the token into your Buddy integration configuration. It should look like this:
In the action, provide the Firebase Project ID. If you're not sure what it is, check your config in the Firebase console:
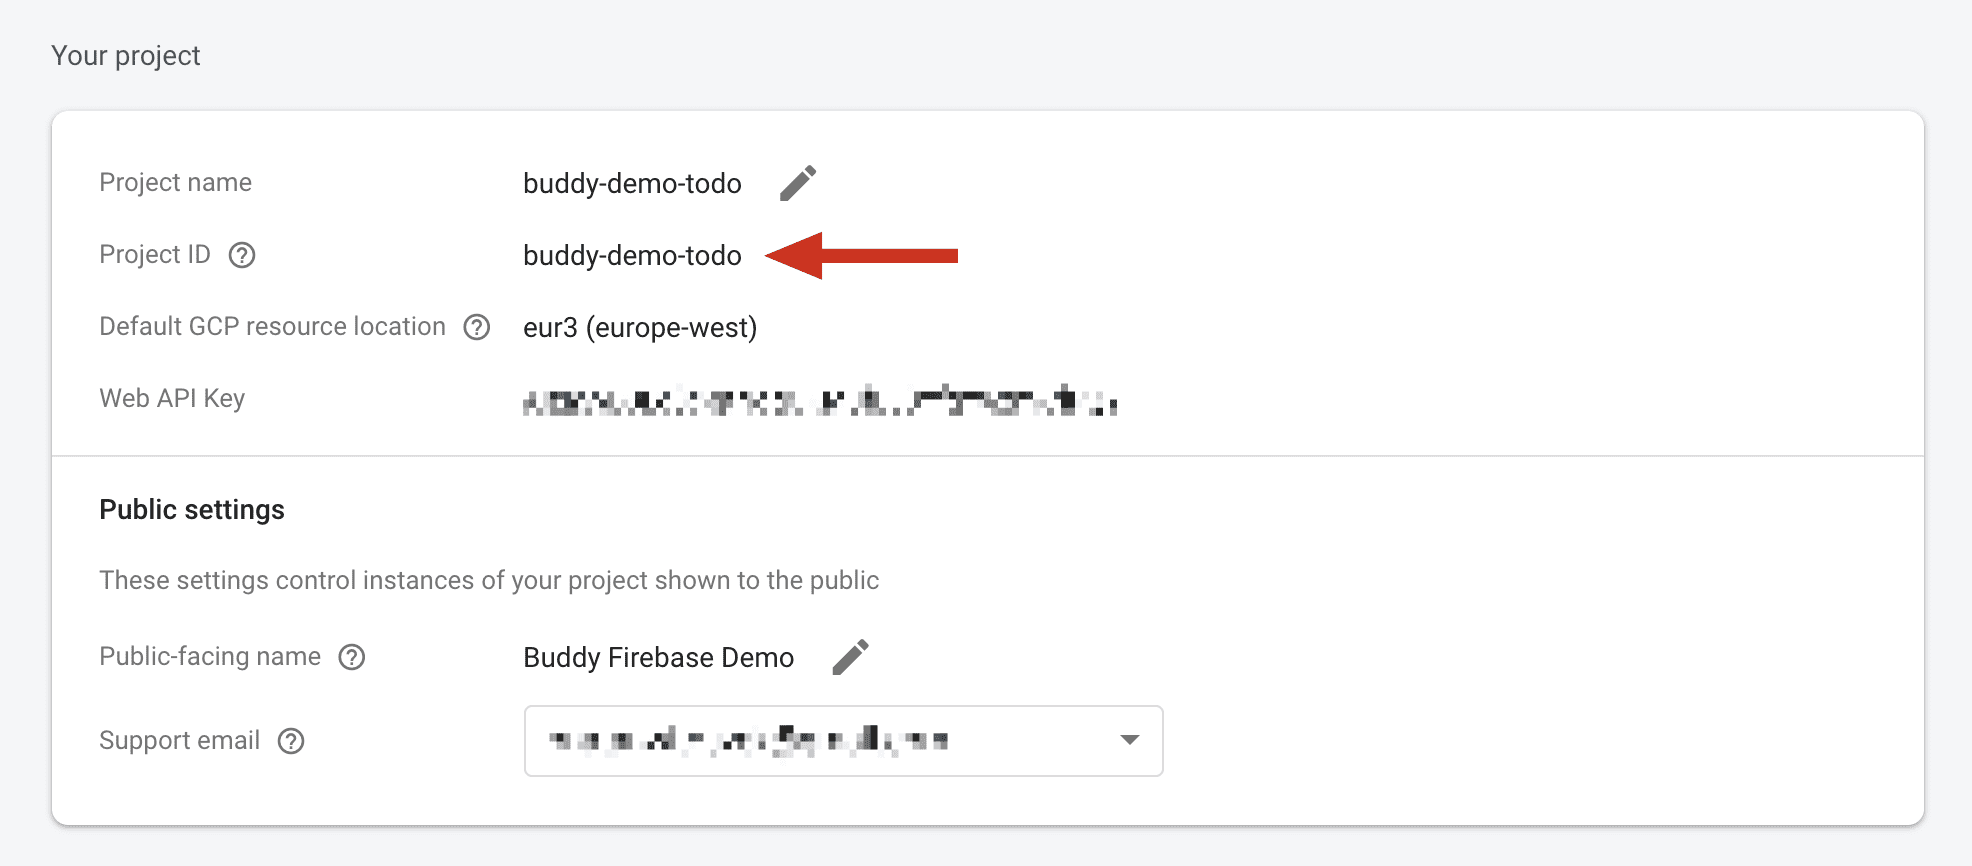
Your action should look like this:
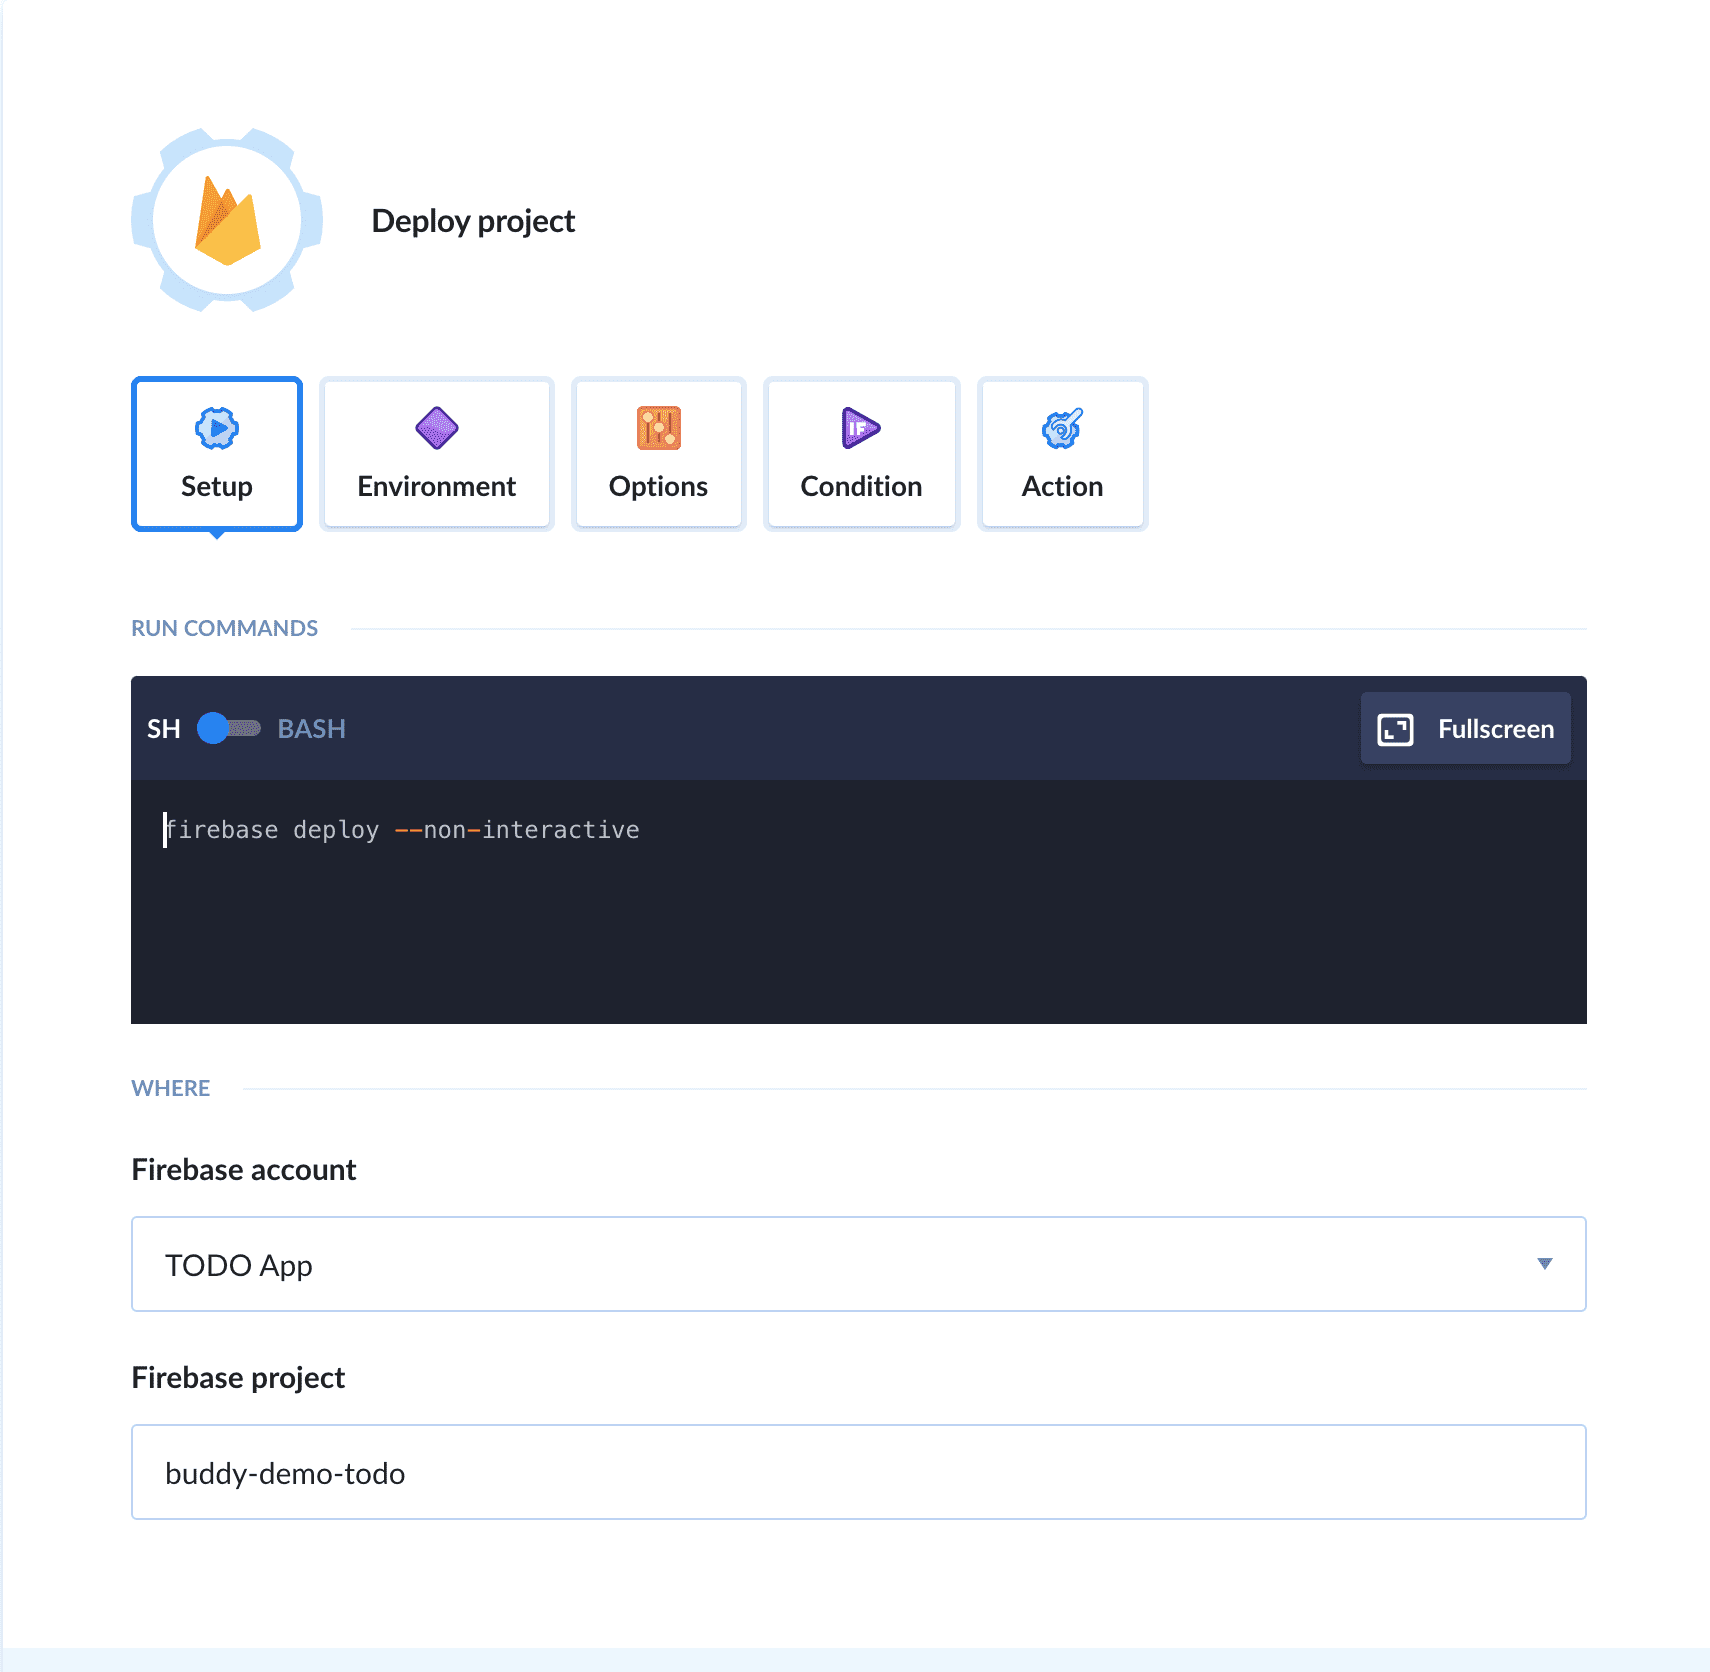
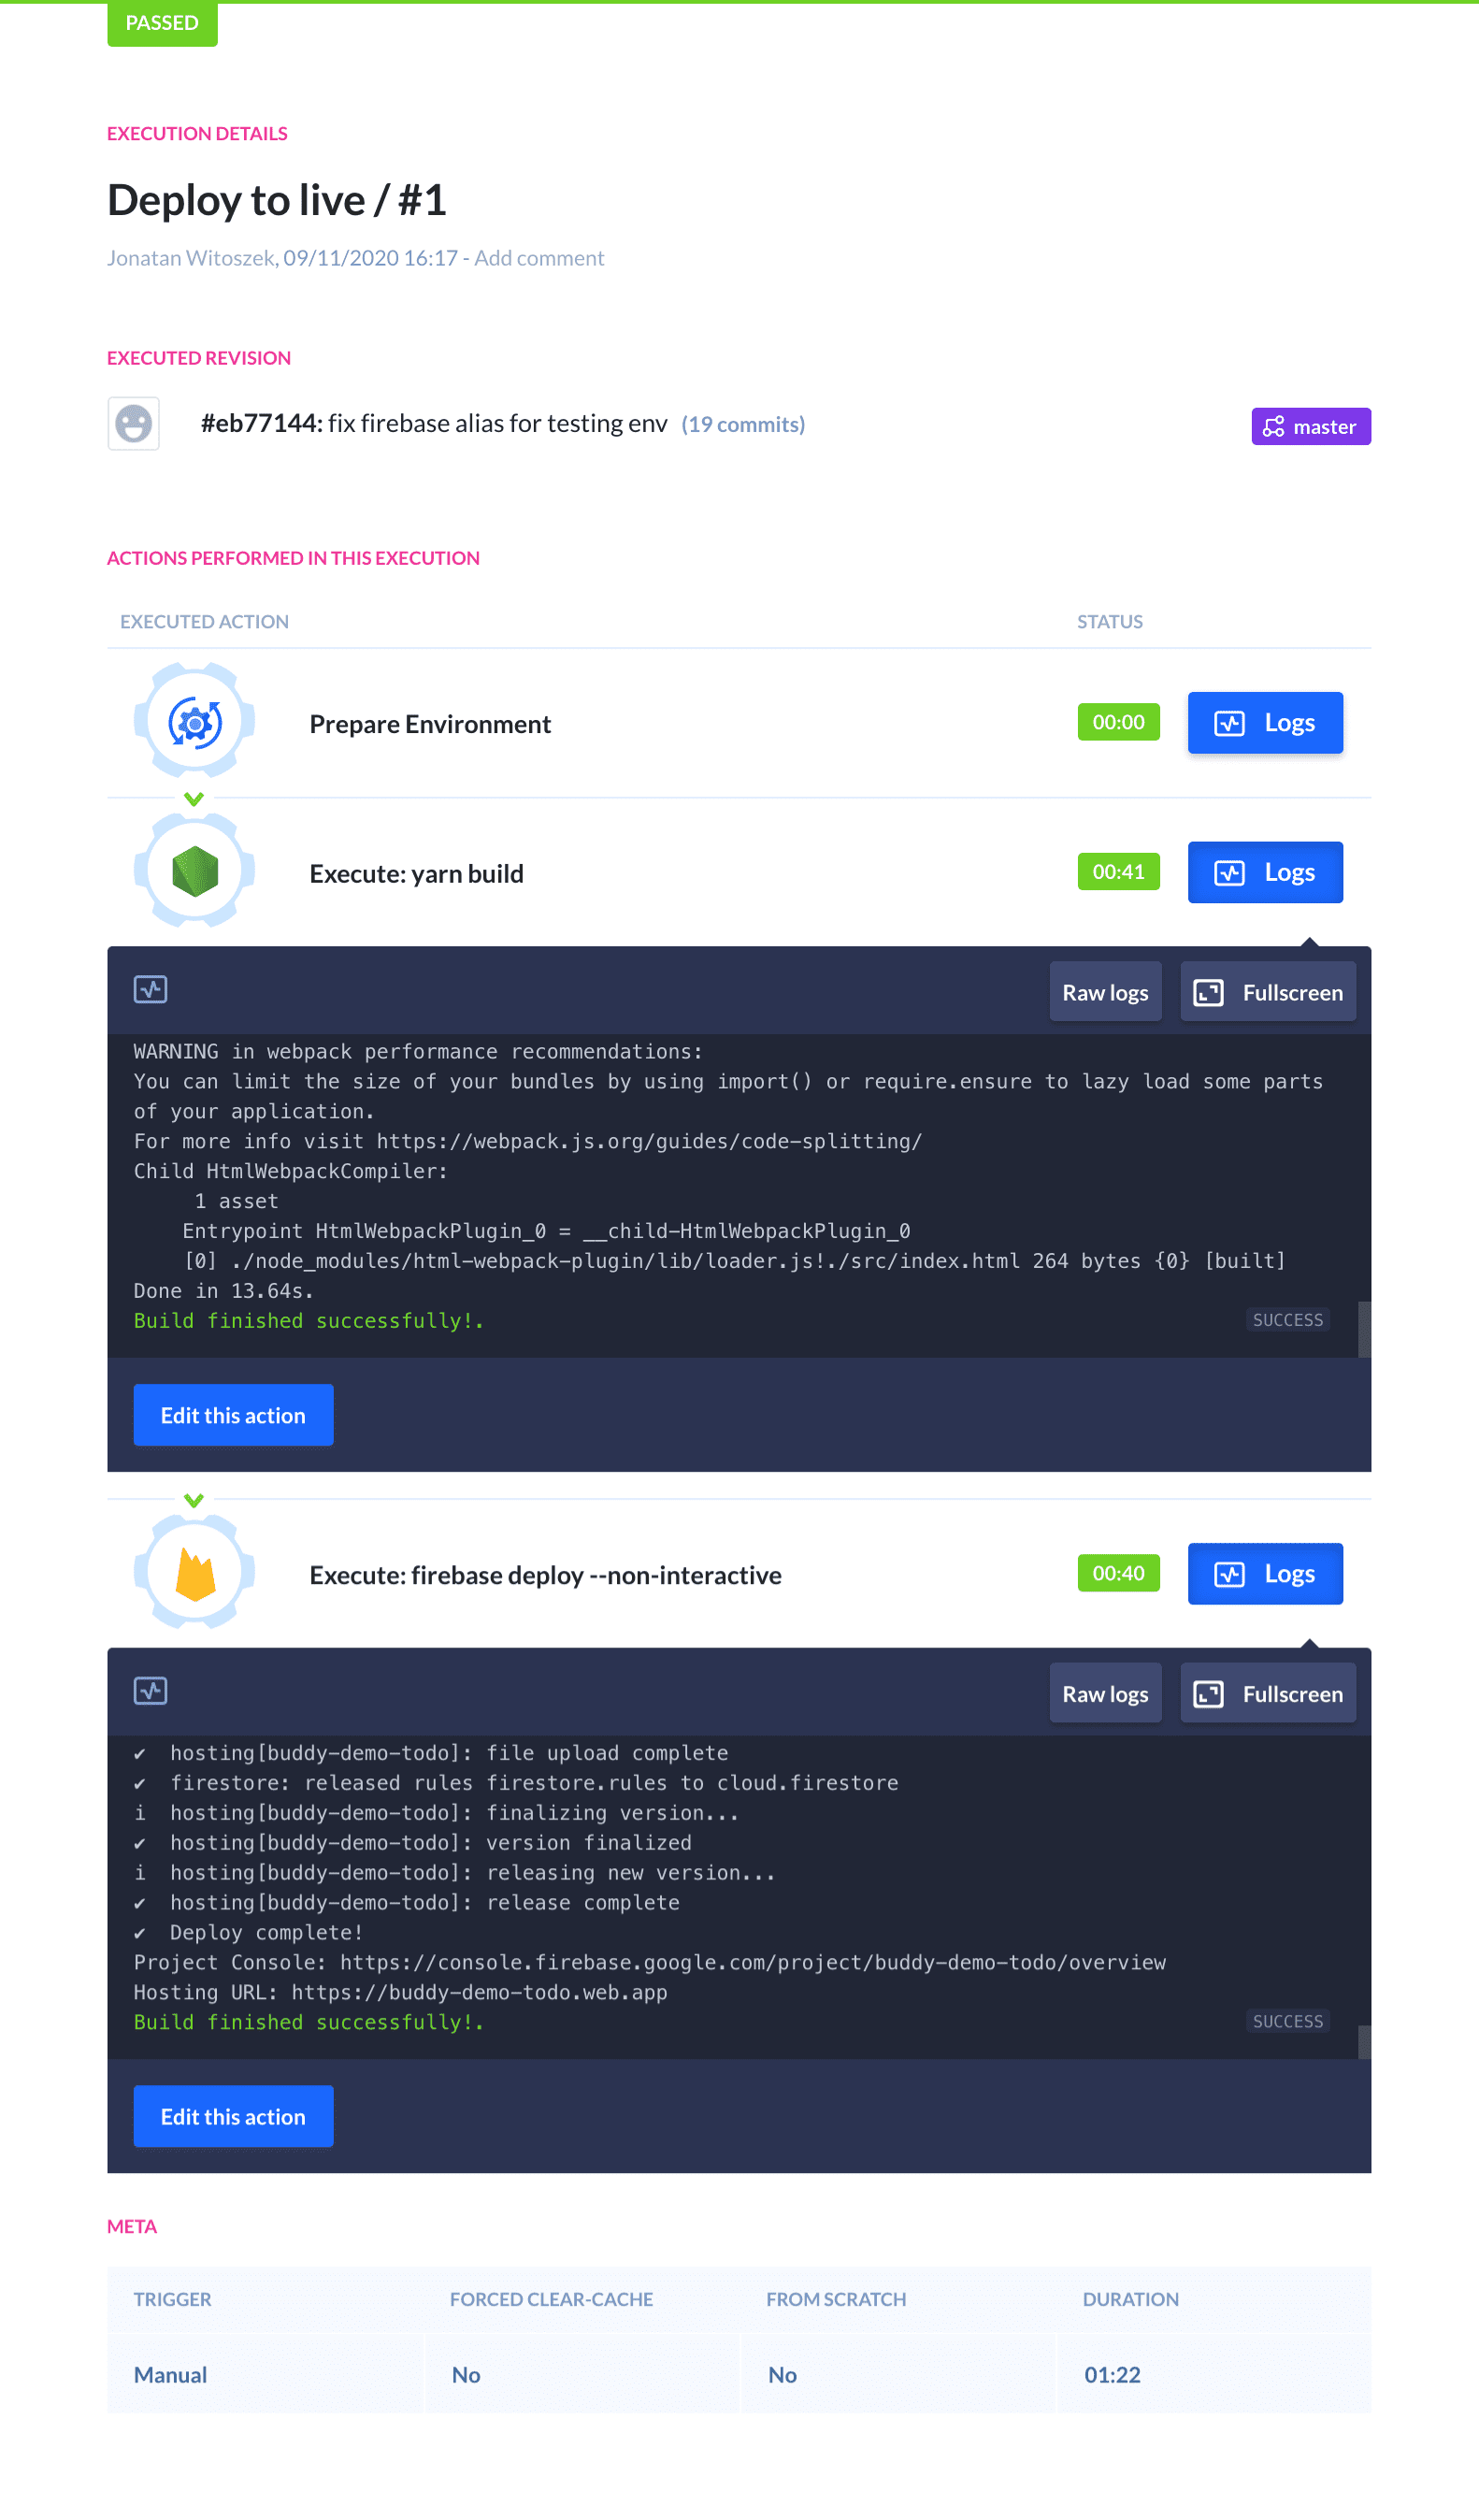
We now have two actions in the pipeline: one that builds the application, and another one deploying it to Firebase. Make a push to the master branch or click the 'Run pipeline' button to test if everything works fine. The logs will be available in the Execution tab:
Pipeline 2: Application Testing
Configuration
Now, we will add another pipeline that will deploy changes from the testing branch.
- First, let's create that branch and push it to our remote GitHub repository:
git checkout -b testing
git push origin testing
- Next, add another pipeline in Buddy with the Trigger mode set to On push and branch testing:
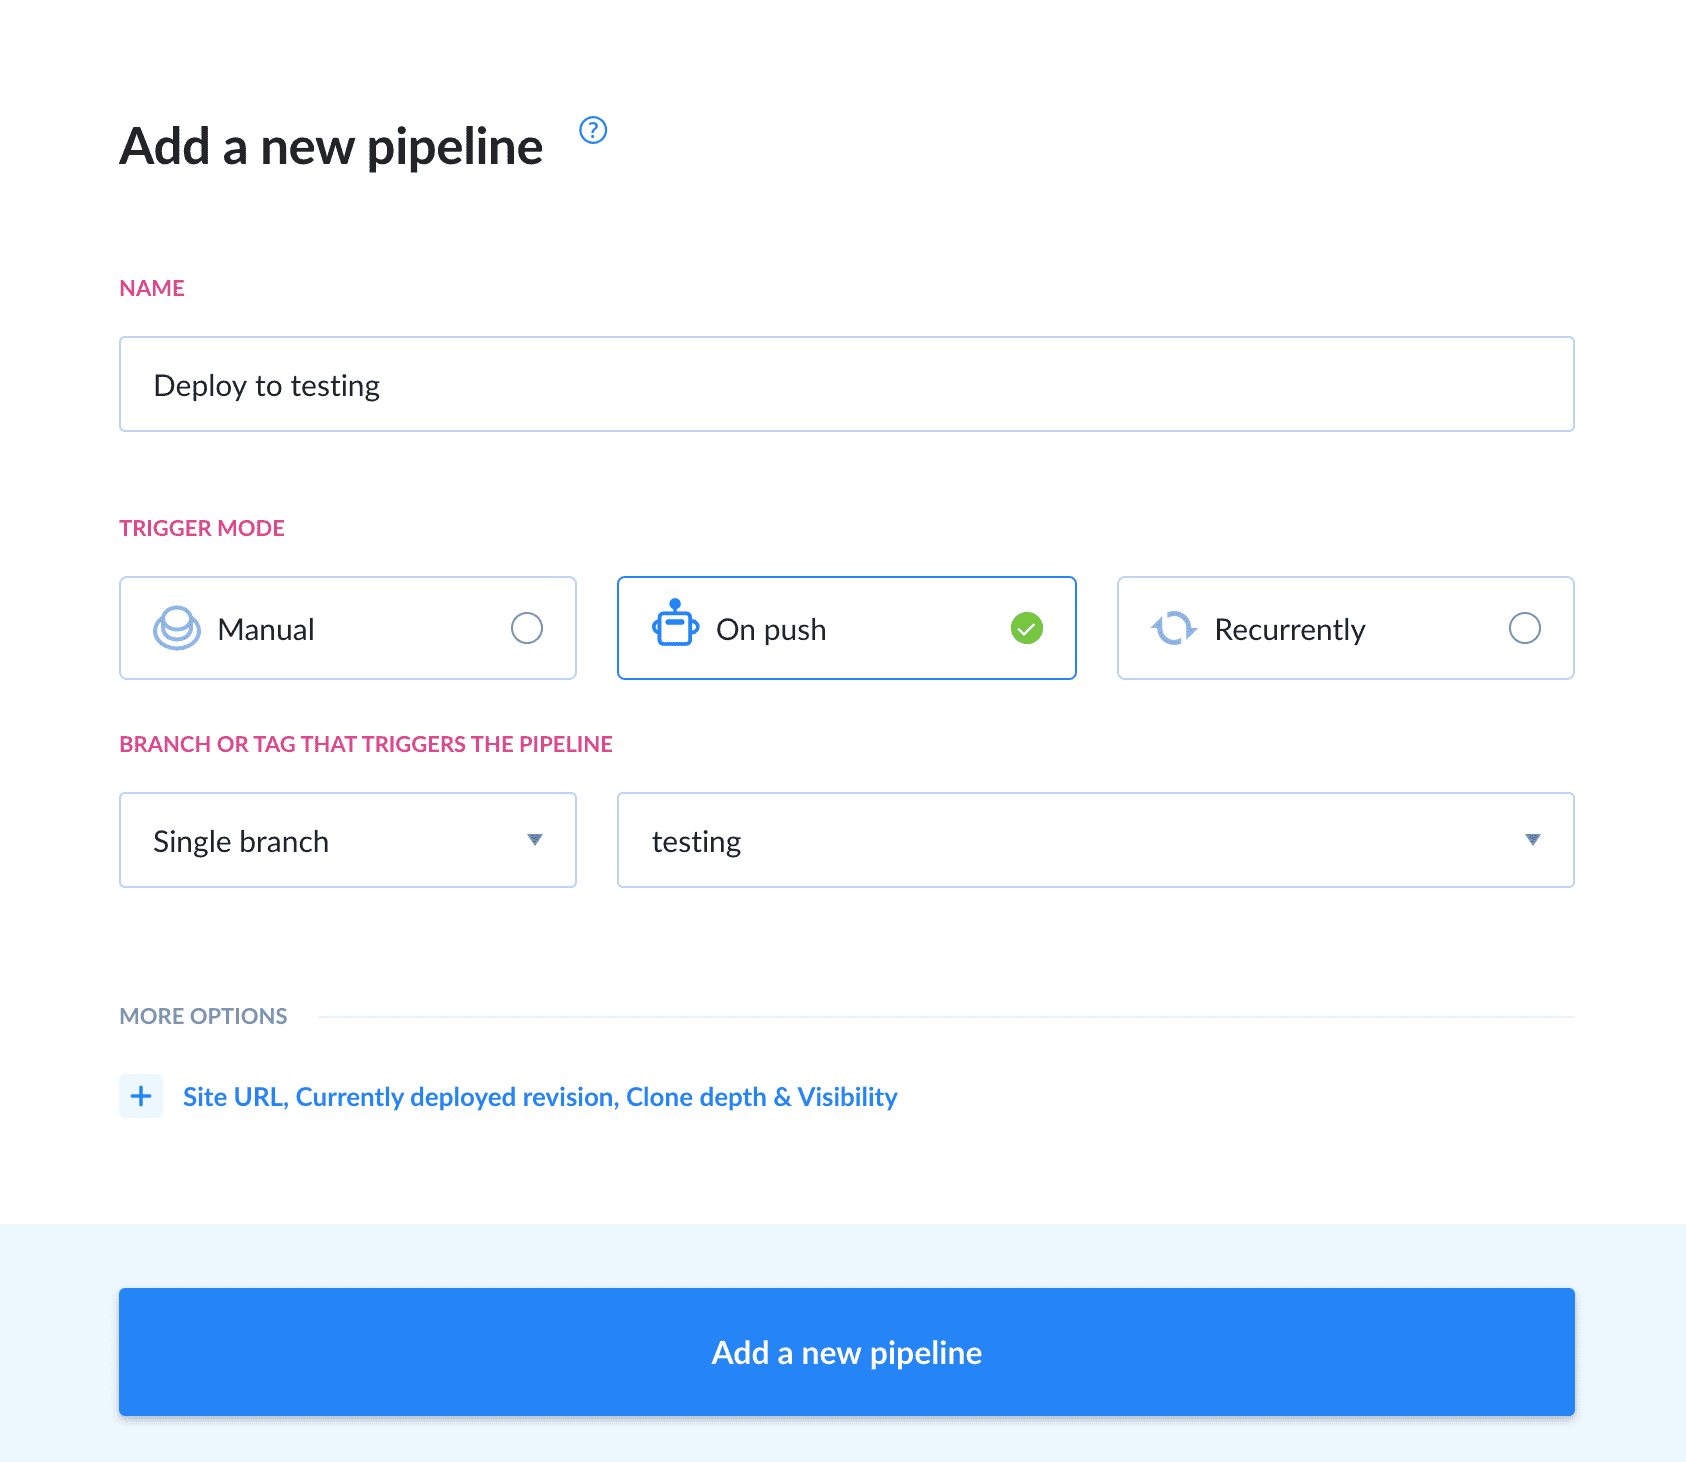
You can also use the clone option to copy the existing pipeline and update the actions later.
- With the pipeline settings configured, add the Node action with a separate build script that uses the environment variables that we set up earlier
yarn install
yarn build:testing
-- OR --
npm install
npm run build:testing
If you're using Firebase Cloud Functions, remember to change the version of Node to 10 or 12.
- Next, add the Firebase action and switch the project to the one meant for testing:
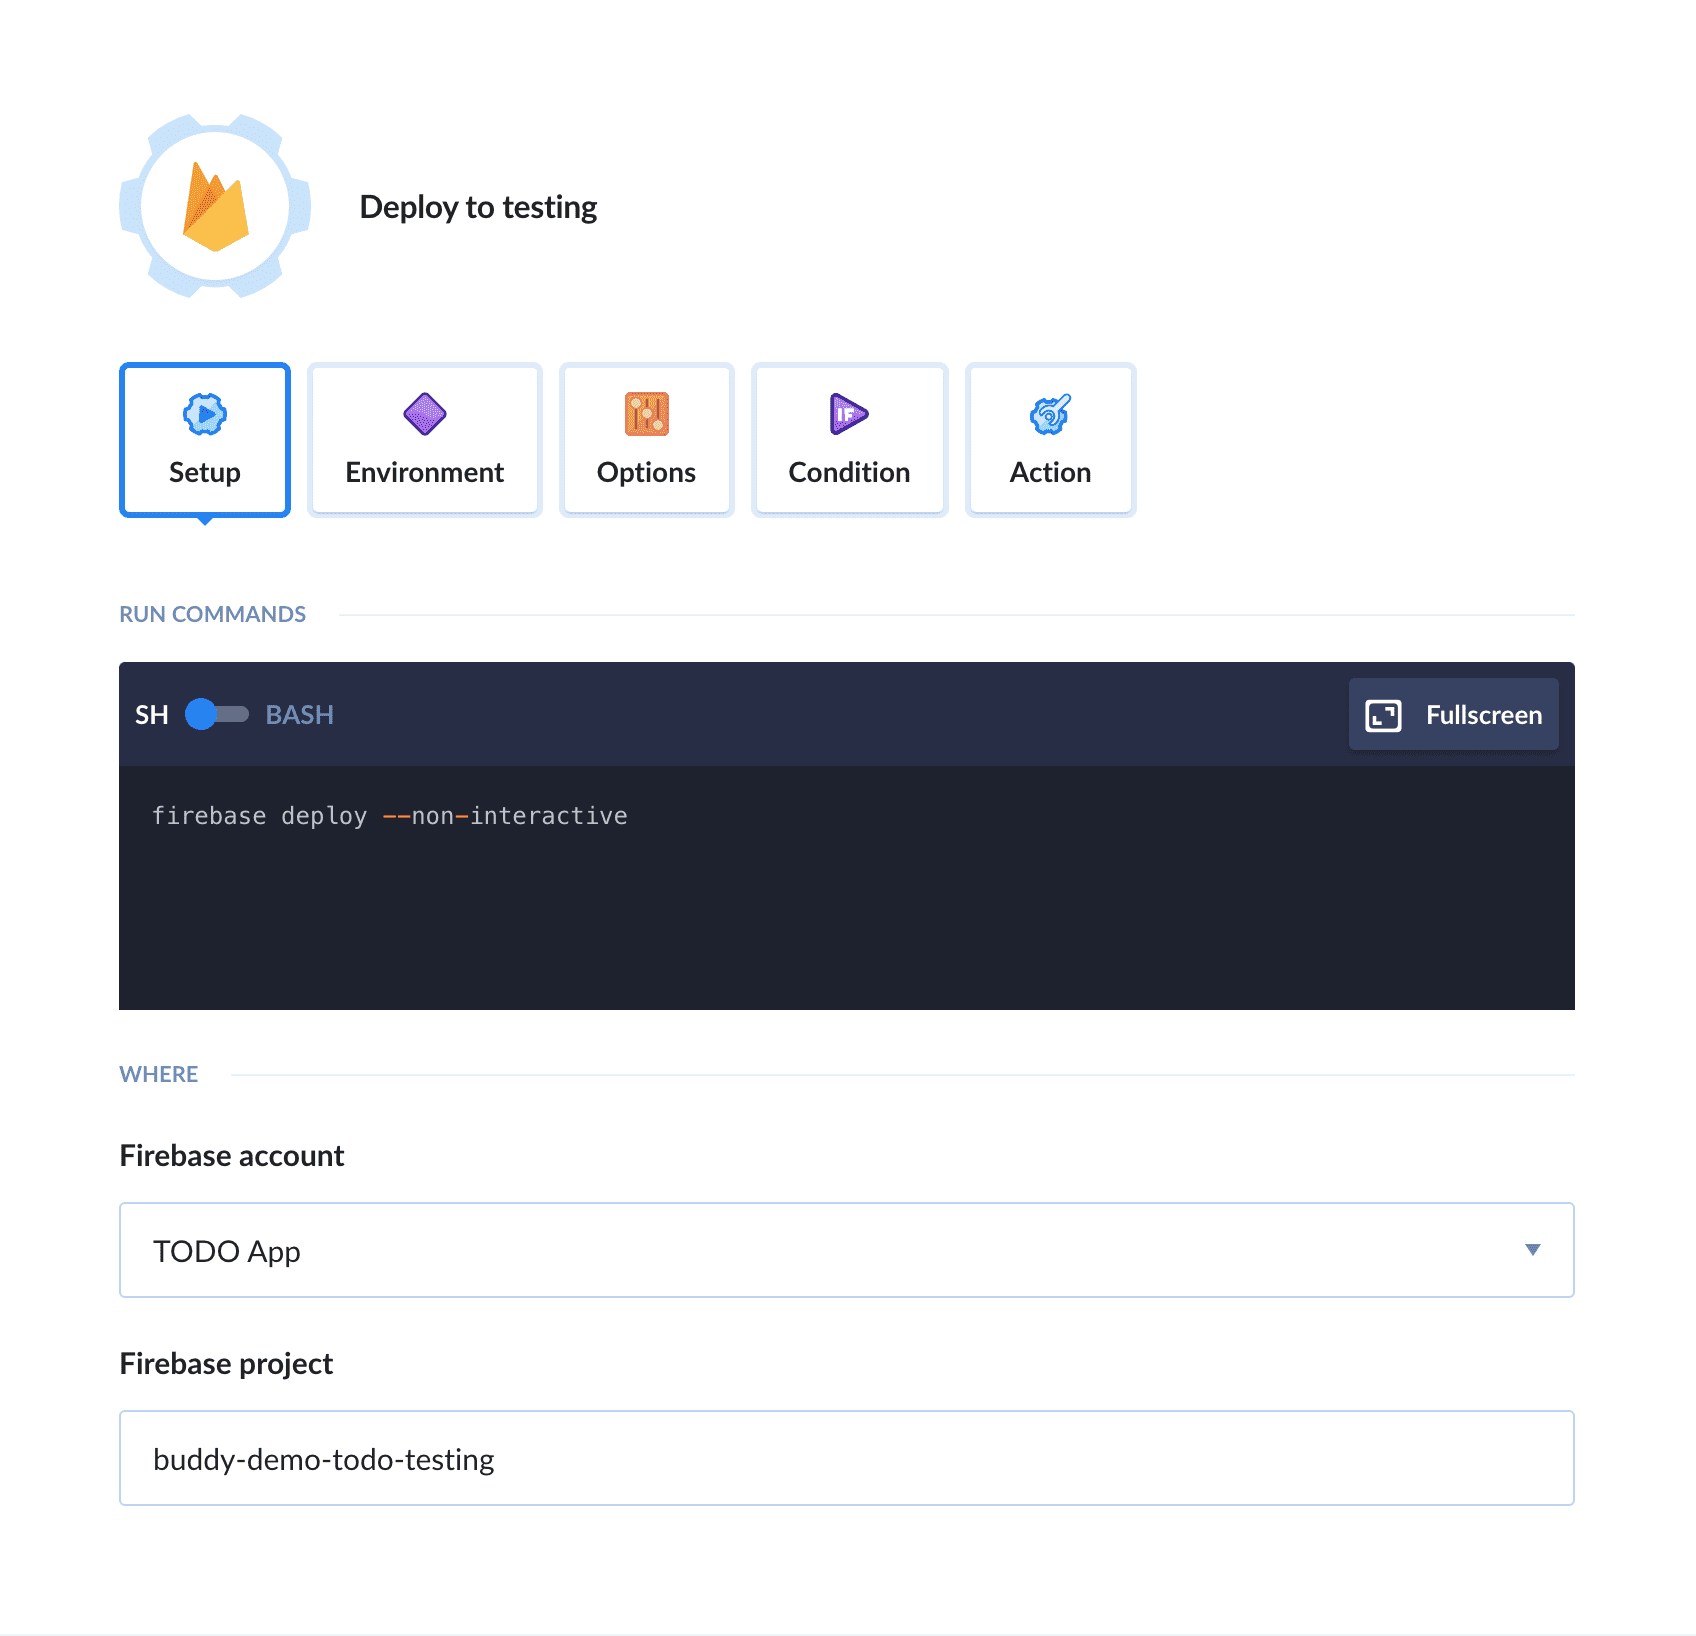
The pipeline should now look like this:
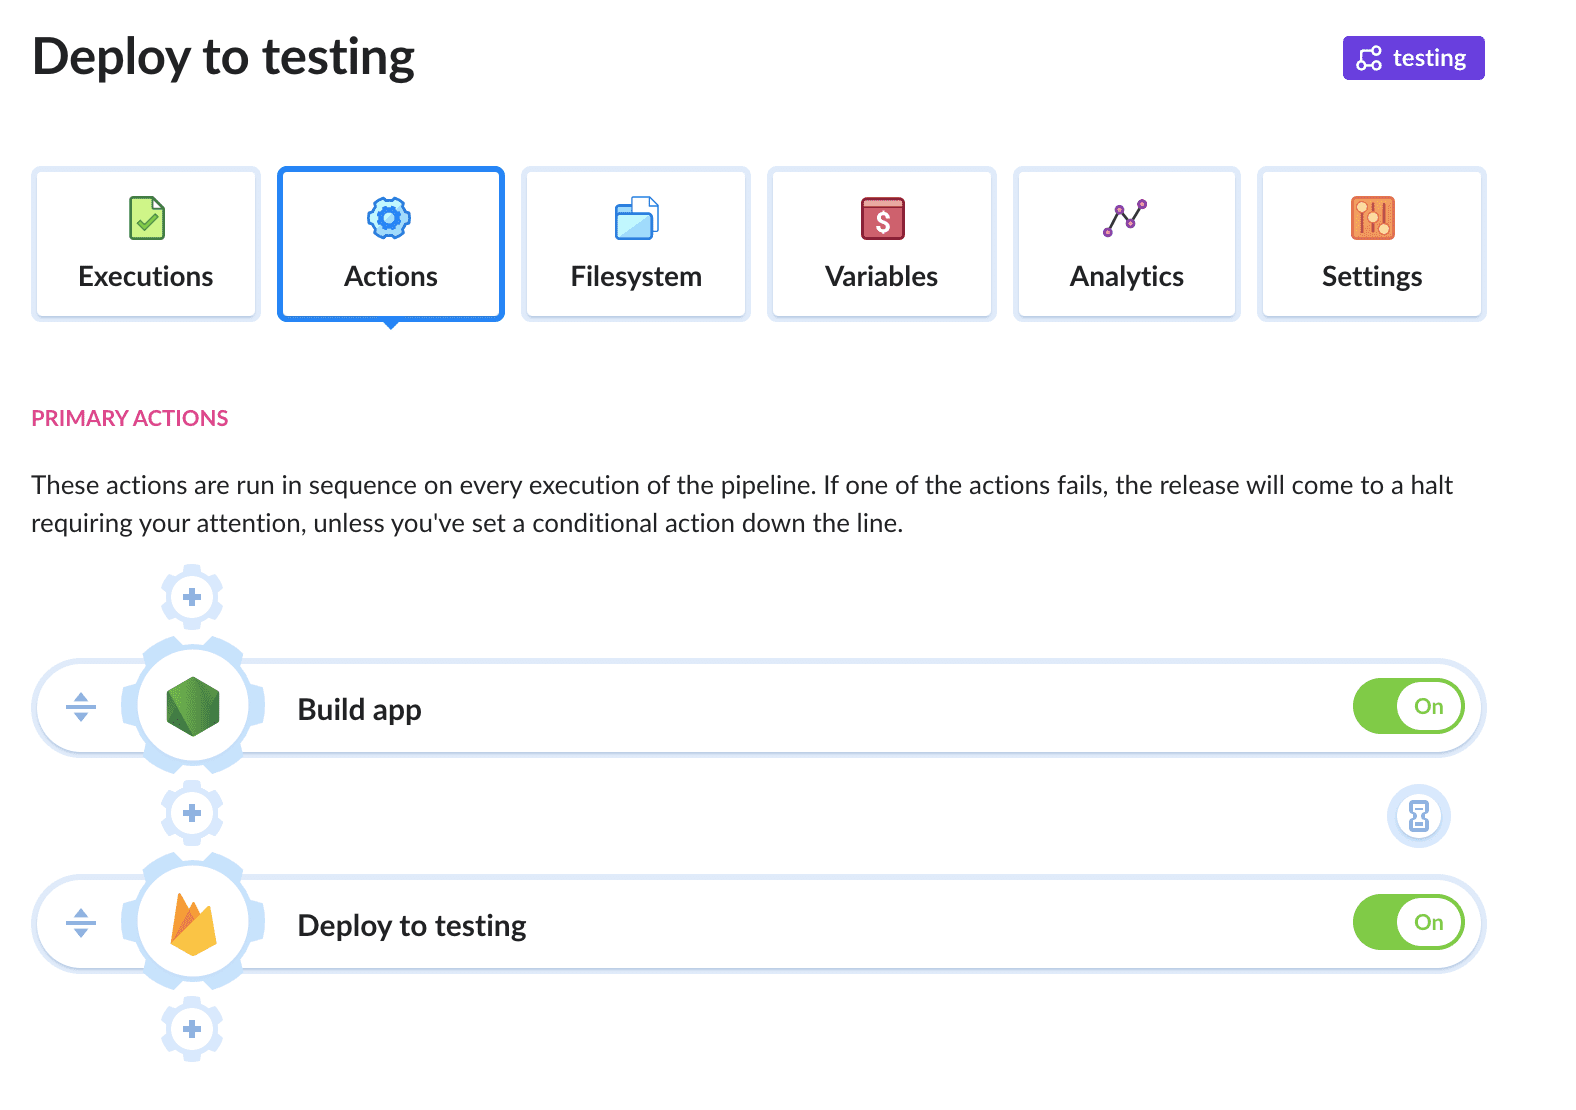
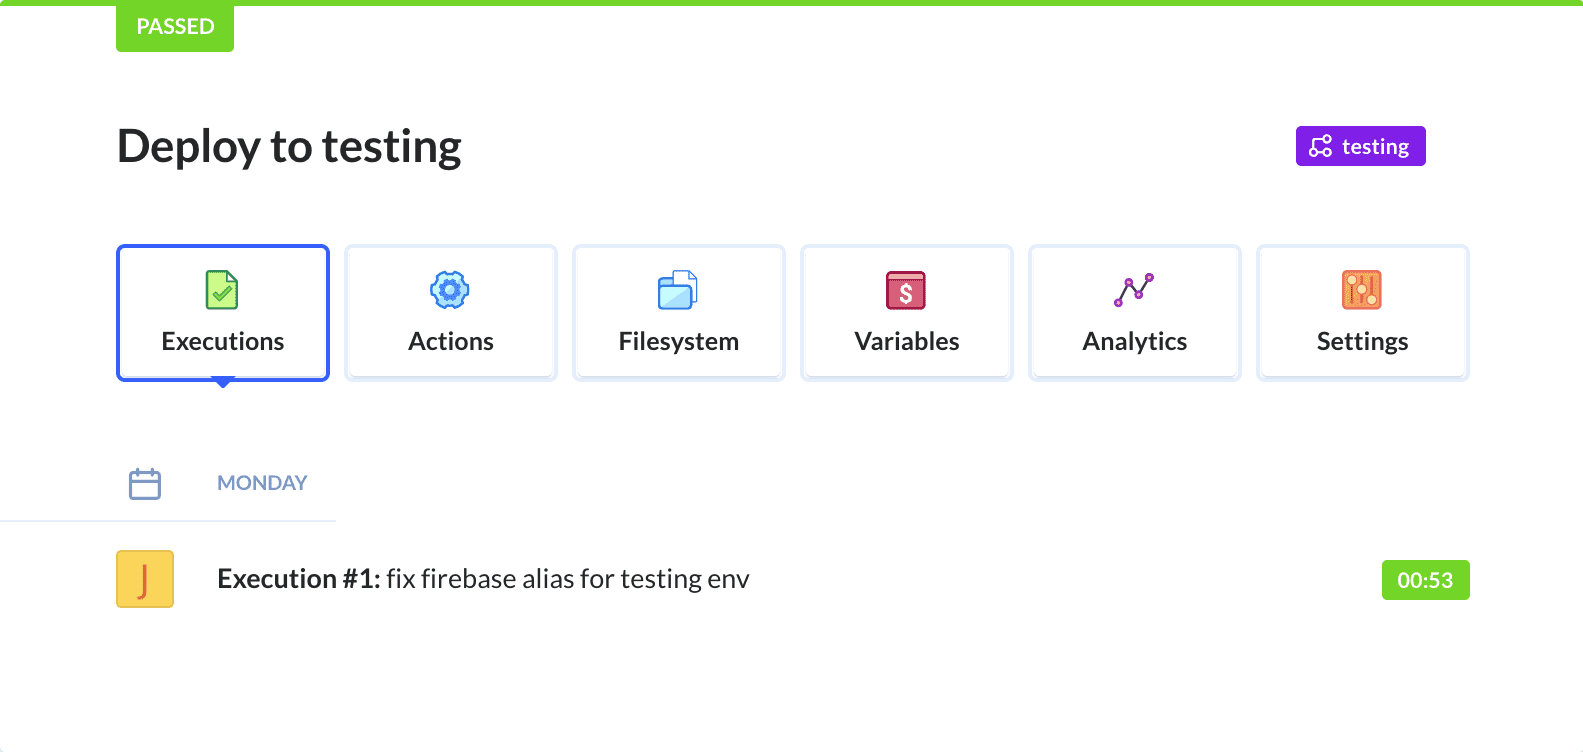
When done, push something to the testing branch or run the pipeline manually to ensure everything works properly. Remember you can check the results in the Execution tab:
Summary
And there you have it! A Firebase project with working CD pipeline and two separate environments:
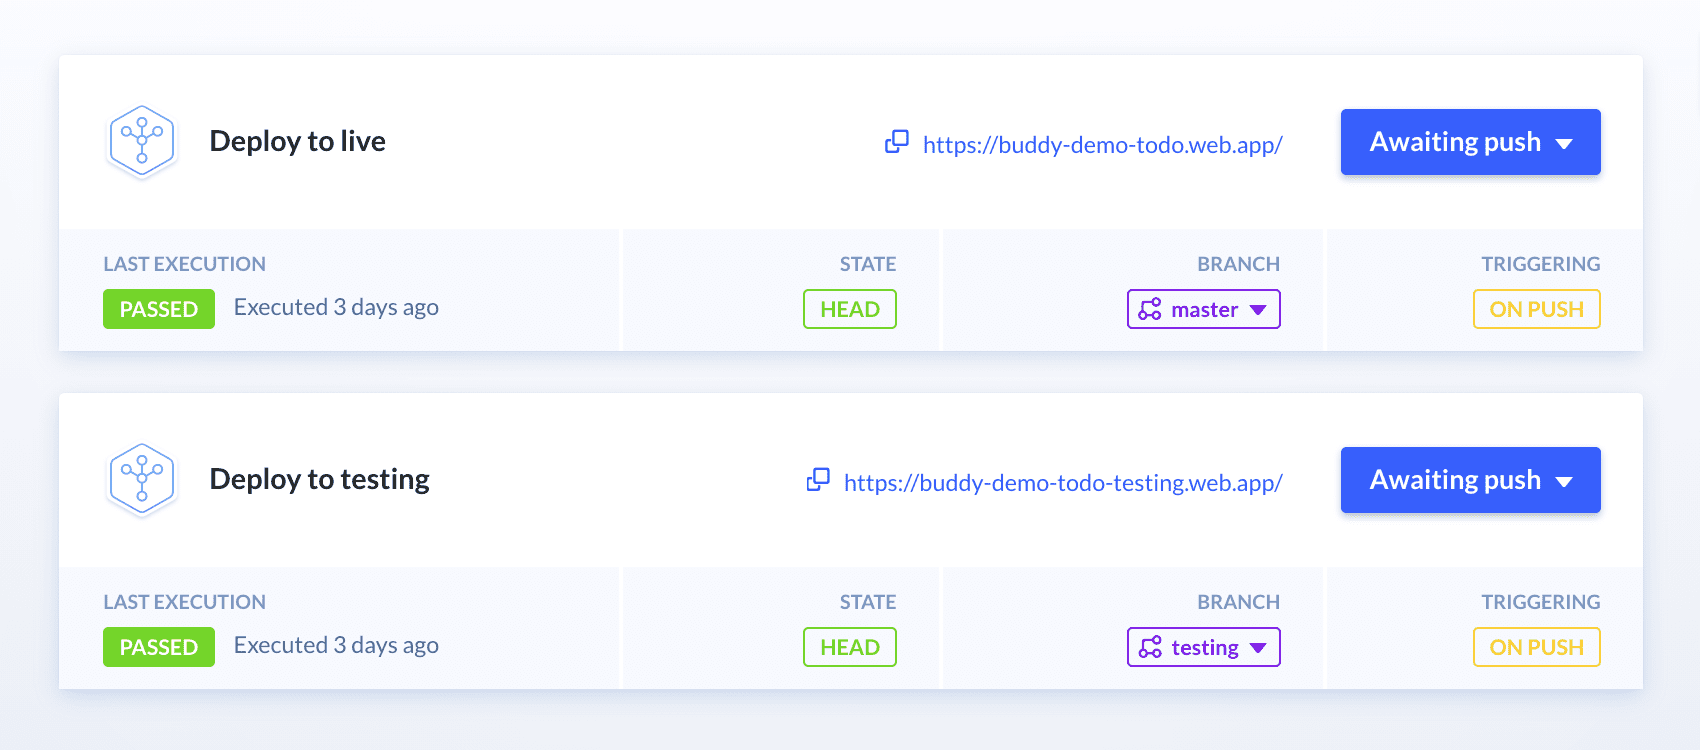
Now you can test your app and deploy it to your users with confidence that everything's working smooth and stable. Remember that depending on your needs, you can add more actions to the pipeline, for example, notifications that will keep you updated of errors or problems with deployment. Good luck!