Git、持续部署与您的WordPress主题
This entry-level guide will help you introduce Git and Continuous Deployment to your WordPress themes development.
If you are already familiar with Git, skip the first part and move right on to the Continuous Deployment section.
Objectives of this Guide
With this guide you’ll be able to:x
- Set up your WordPress theme development workflow with both Git and best practices in place
- Design your first delivery pipeline for Continuous Deployments of your WP themes
- Employ industry standards and best practices for your new development strategy
Why should you care about Git?
By now, Git has become an industry standard. If you are wondering why, here's a bunch of telling reasons.
Advantages of the Git distributed Version Control system
- Keeps track of who changed what and when
- Prevents overwriting changes and files getting lost
- Enables quick and easy rollbacks of changes when necessary
- Streamlines parallel development of new features
- Facilitates collaboration with other developers
The perks above should be enough to employ VCS for any self-respectable web developer. However, the real fun starts with Continuous Deployments and Buddy.
Advantages of Continuous Deployments with Buddy
- Faster delivery of new features and fixes
- Automation of the delivery process – predictable results with reduced effort
- Less of everything you dislike: mistakes, pasting and copying, connecting, uploading, memorizing settings, wasting time
- More of everything you love: progress, momentum, getting things done
- Sharing project status with everyone around
- Less complicated development environment – a boost to productivity
- Higher quality of your software and your life – less bugs, less stress
Bringing Git Version Control to your WordPress theme development
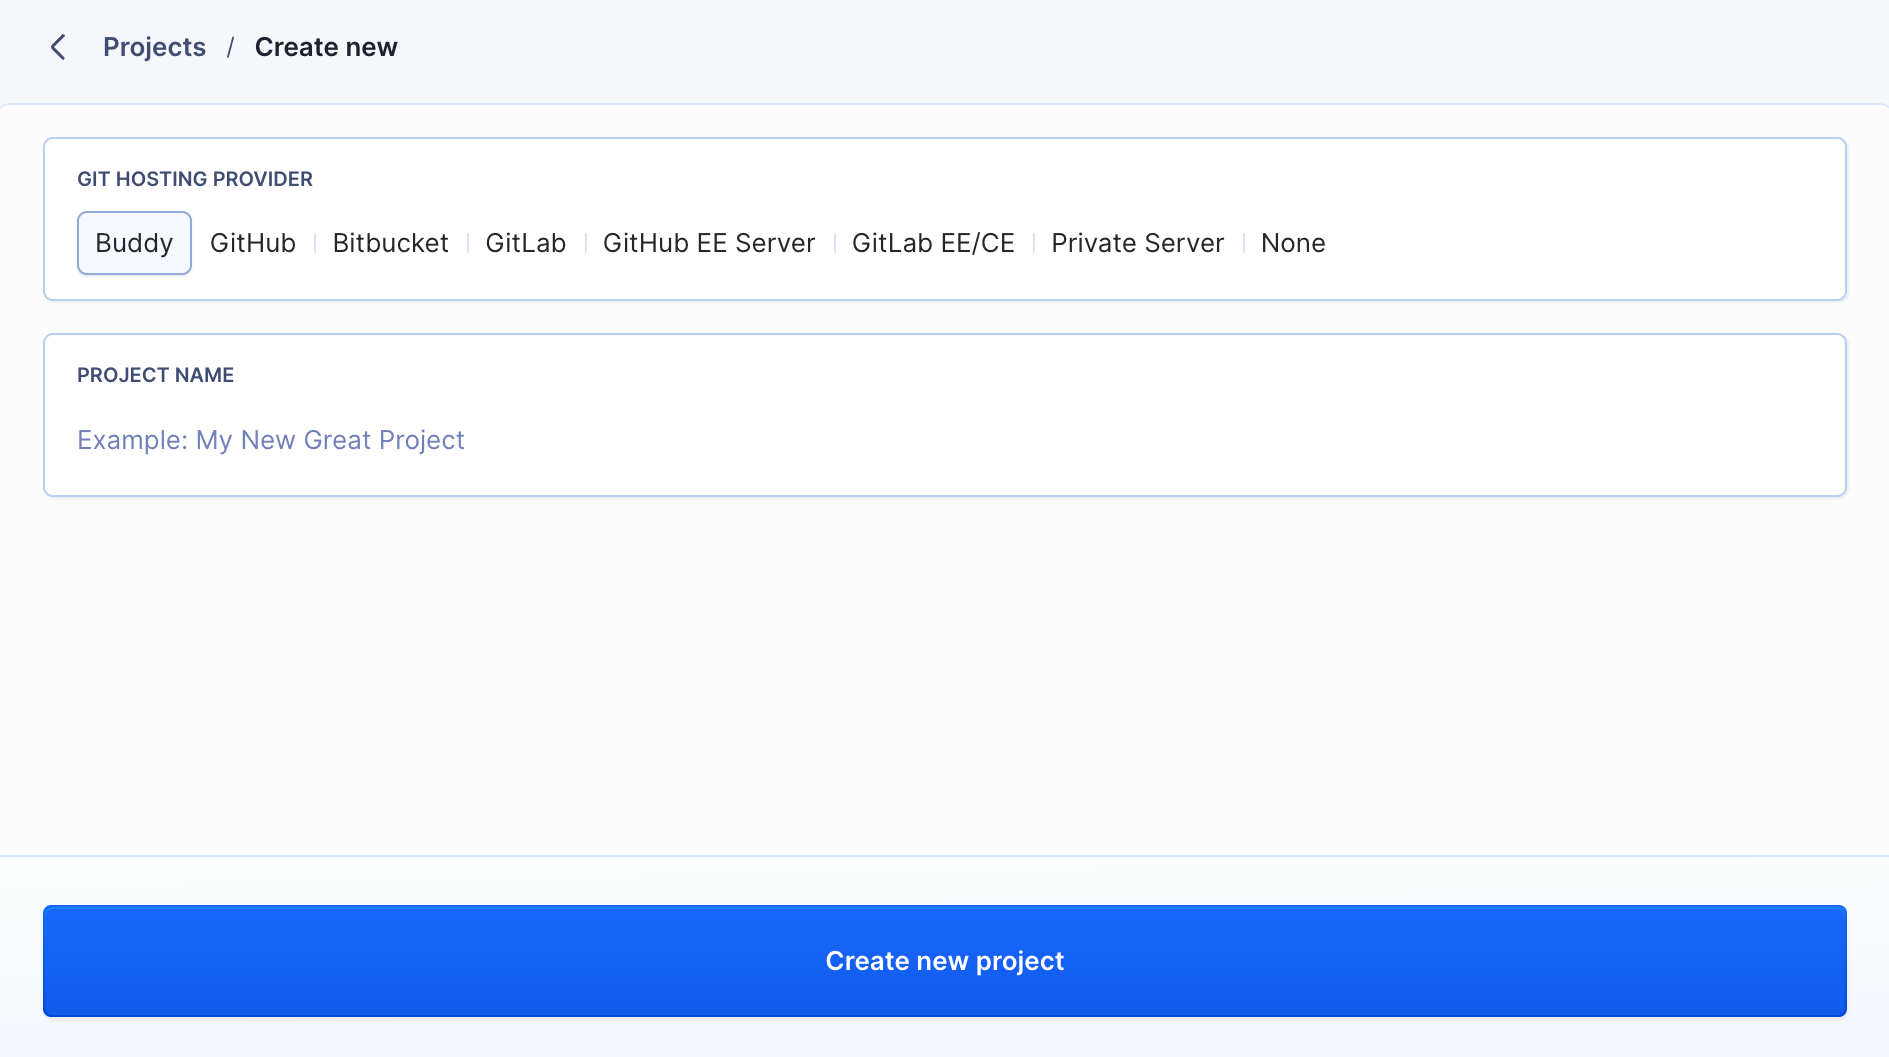
If you are convinced you might give Git a try, let’s move on to Buddy. Create a new project and select Buddy as your Git provider:
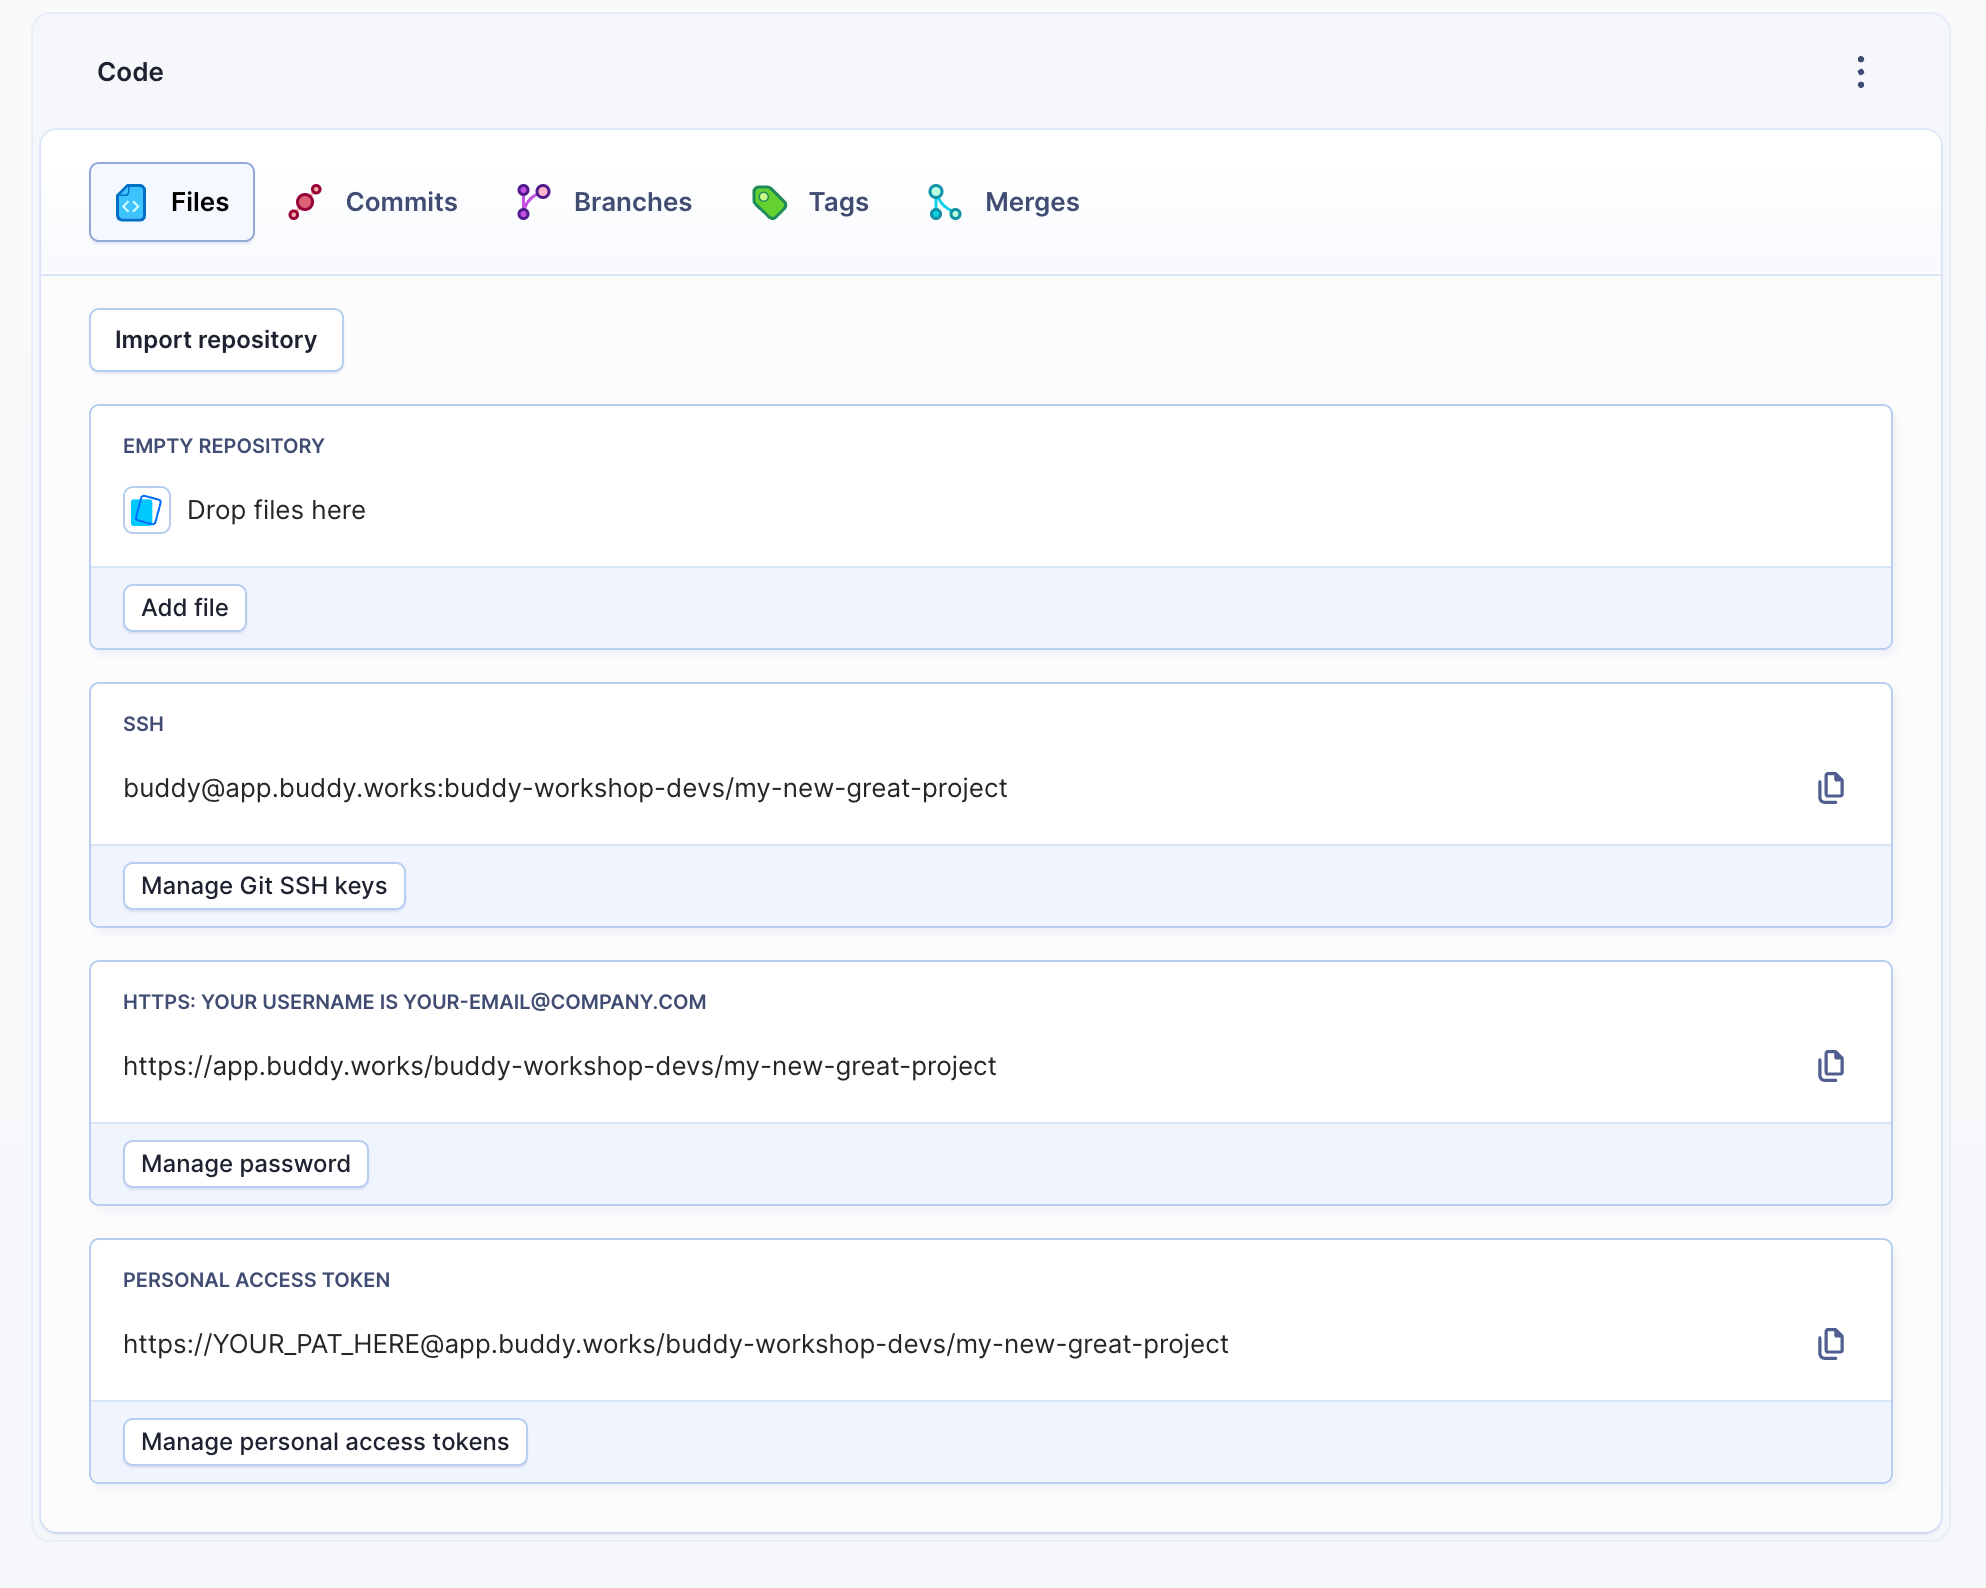
Buddy will create an empty repository in which we'll store your WP themes:
Make sure to copy the URL to the repository as we'll need it in the next step.
Create Git Repository on your local machine
Git is a distributed version control system. It means that everyone has their own copy of the project. This copy is just another Git repository stored on your local machine, from which you can push your code to the remote one created on Buddy. The repository is shared among all developers, who can push and pull their changes at any time without the risk of overwriting or losing progress. Now, we're going to create such local repository on your machine.
For the purpose of this guide, we'll be working with a theme named myAmazingTheme. You can either create a new theme with this name or duplicate an existing theme and rename it.
Go the directory with the theme on your computer and initialize Git:
cd wordpress/wp-content/themes/myAmazingTheme
git init
Next, you need to add the files that you want to keep under version control. The command below will add all files from myAmazingTheme to version control:
git add *
The next step is adding the repository that you created in Buddy as a remote for the local repository you’ve just initialized. You are going to need the repository URL you copied while creating new project:
git remote add origin the-buddy-repository-url
With Git, most operations are performed locally. Remotes are used to communicate with the outside world, i.e. repositories other than the one on your local drive. You can push your changes into the remote (so that the other developers can see them) or perform a pull from it (so that you can get others changes).
Push your theme files to Buddy
Once the above steps are completed, you can push your custom theme files to Buddy. First, commit them locally:
git commit -m ‘hey’
Then, push them to Buddy.
git push origin master
Here's the whole process getting it all together:
Bringing Continuous Deployments to your WordPress theme development
It’s time to learn how to use Buddy’s pipelines to speed up your theme development.
Continuous Deployment plan
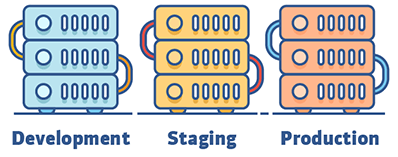
First, let’s assume that you have one production server, one staging server and one development server. They don’t need to be separate physical servers – you can just use different directories.
- Development server is the server where you deploy most often. It’s perfect for sharing work in progress with someone who doesn’t necessarily have their local instance of WordPress, for example with a web designer that designed the WordPress theme but isn’t actually developing it.
- Staging server is perfect for reviews involving customers or QA team. You deploy there as soon as things get into shape and are ready for internal or acceptance testing.
- Production server is the machine where the page for the actual users is hosted. Deployments here are not very frequent and often require prior approvals.
The above approach (employing three servers with different roles) fits projects of any scope – large and small. However, keep in mind that if you decide to organize your work that way, you need to automate certain tasks. And here is where Buddy pipelines come in handy.
To accommodate all the above roles of WordPress instances, we’ll create the following pipelines in Buddy:
- The Development pipeline will update the development server automatically on every push, so it will always host the most current version. You won’t need to do anything besides pushing your code to Buddy to show someone your current work in progress.
- The Staging pipeline will be triggered by Buddy recurrently once a day to update the staging server for your customers. It will keep the customers involved in the development process and allow you to follow their feedback since you’ll know which remarks concern a given version.
- The Production pipeline will be triggered only when you decide so by pushing a button. It will update your production server with the version of the theme you choose.
For the purpose of this guide, let’s assume that all three WordPress instances are located on the same server, but in different directories to which different (sub)domains are pointing. We’ll use Apache virtual hosts for our scenario.
Creating the pipelines
Preparations
On your server, create the required visual hosts for all three instances. Let’s assume that you ended up with something like this:
production/public_html/
staging/public_html/
development/public_html/
In all public_html directories you should have a copy of your WordPress installation.
Now, in each folder create a directory for your custom theme to which you'll be deploying it. You should now have something like this:
production/public_html/wp-content/themes/myAmazingTheme
staging/public_html/wp-content/themes/myAmazingTheme
development/public_html/wp-content/themes/myAmazingTheme
This is all you need to do on your server. Let’s create your first pipeline in Buddy.
Development pipeline
This pipeline will update the development server on every push.
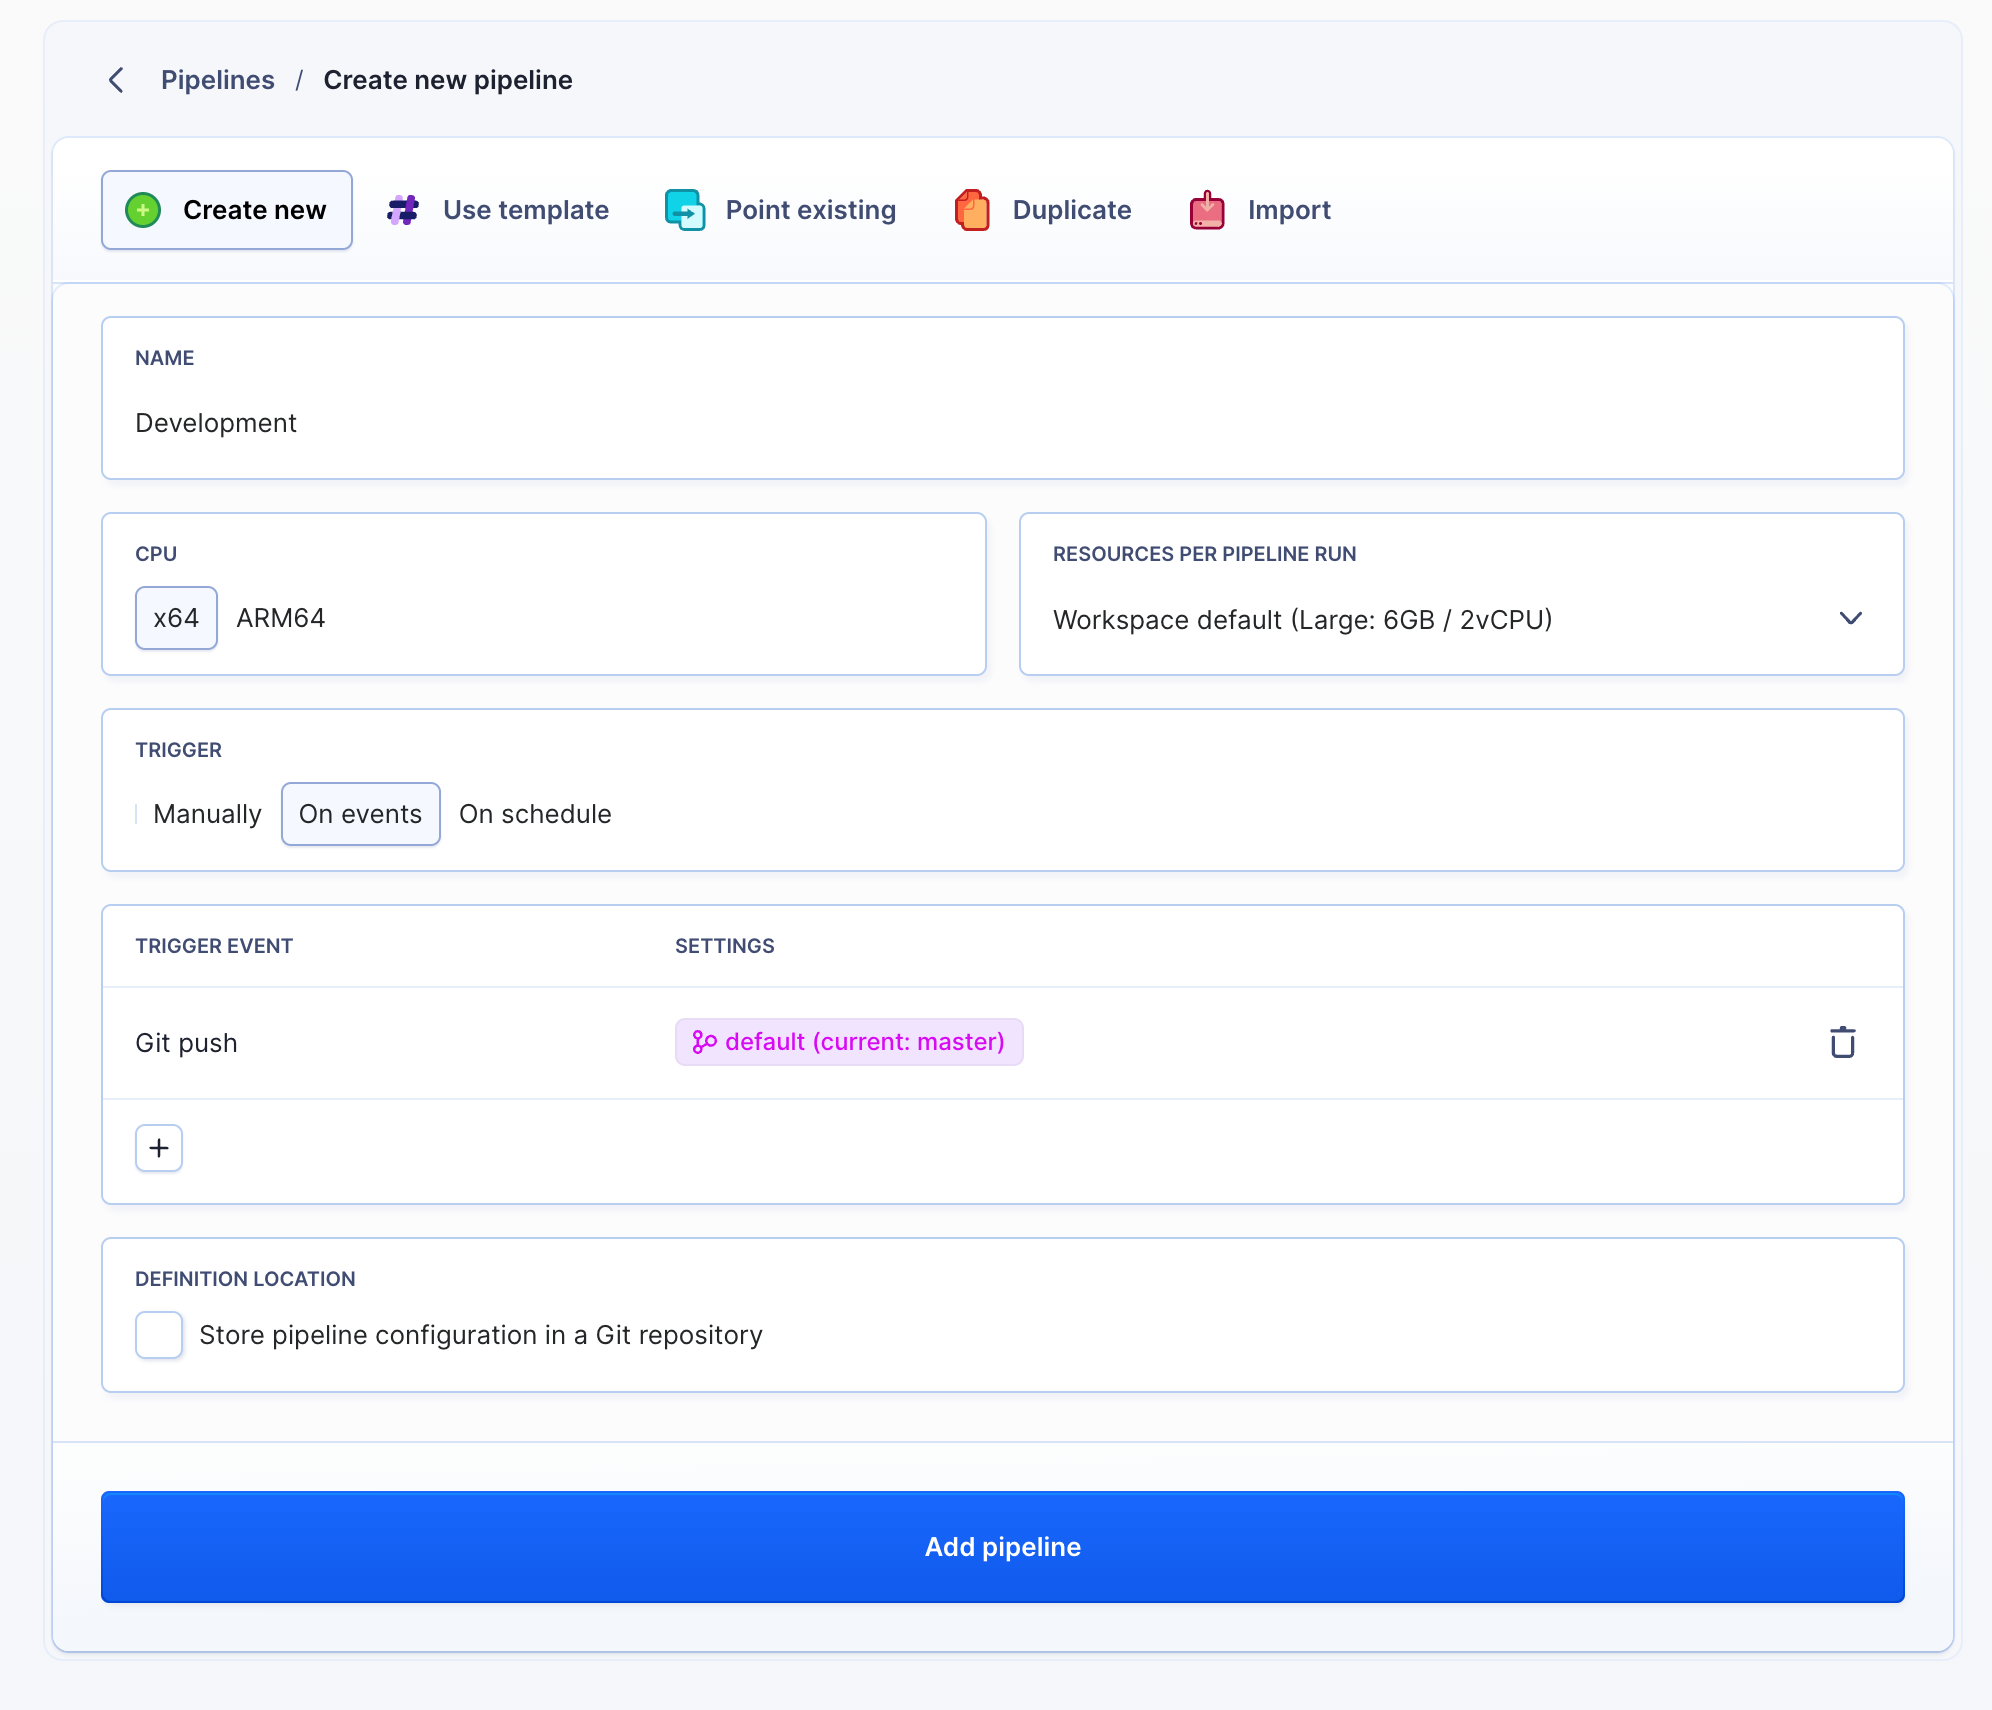
Open the project that you created for your theme. Since you don’t have any pipelines yet, you will see a placeholder with the button Add a new pipeline.
Name the pipeline Development, select the trigger mode On every push, and click the button to confirm.
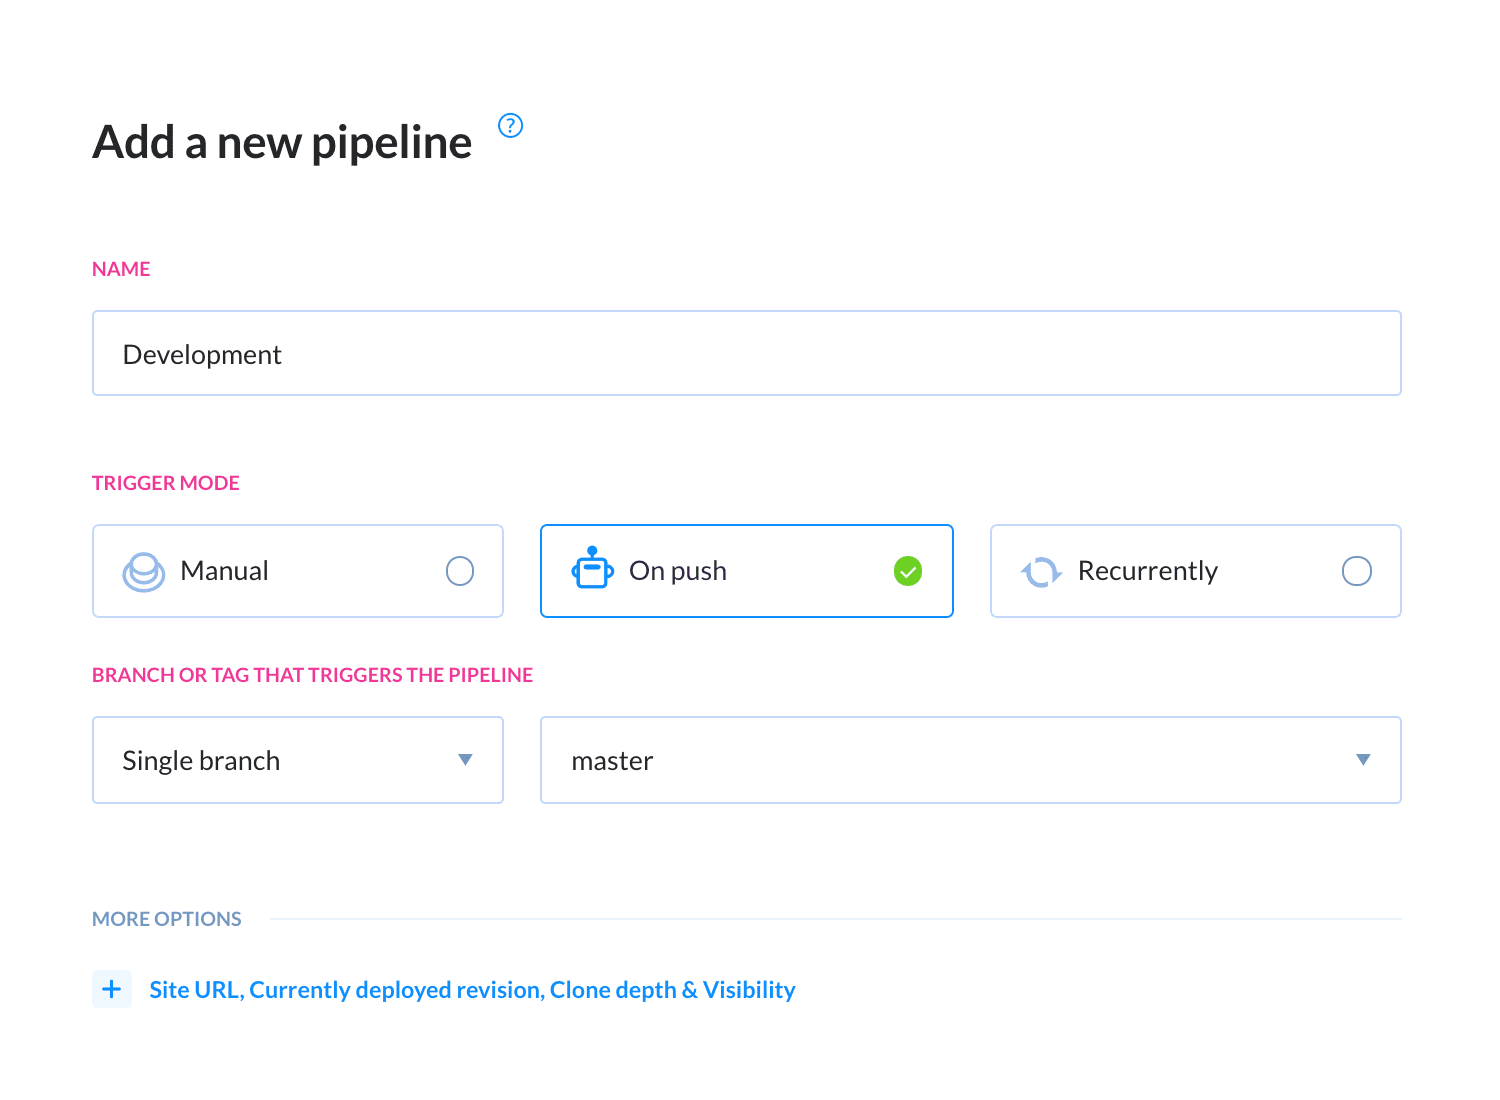
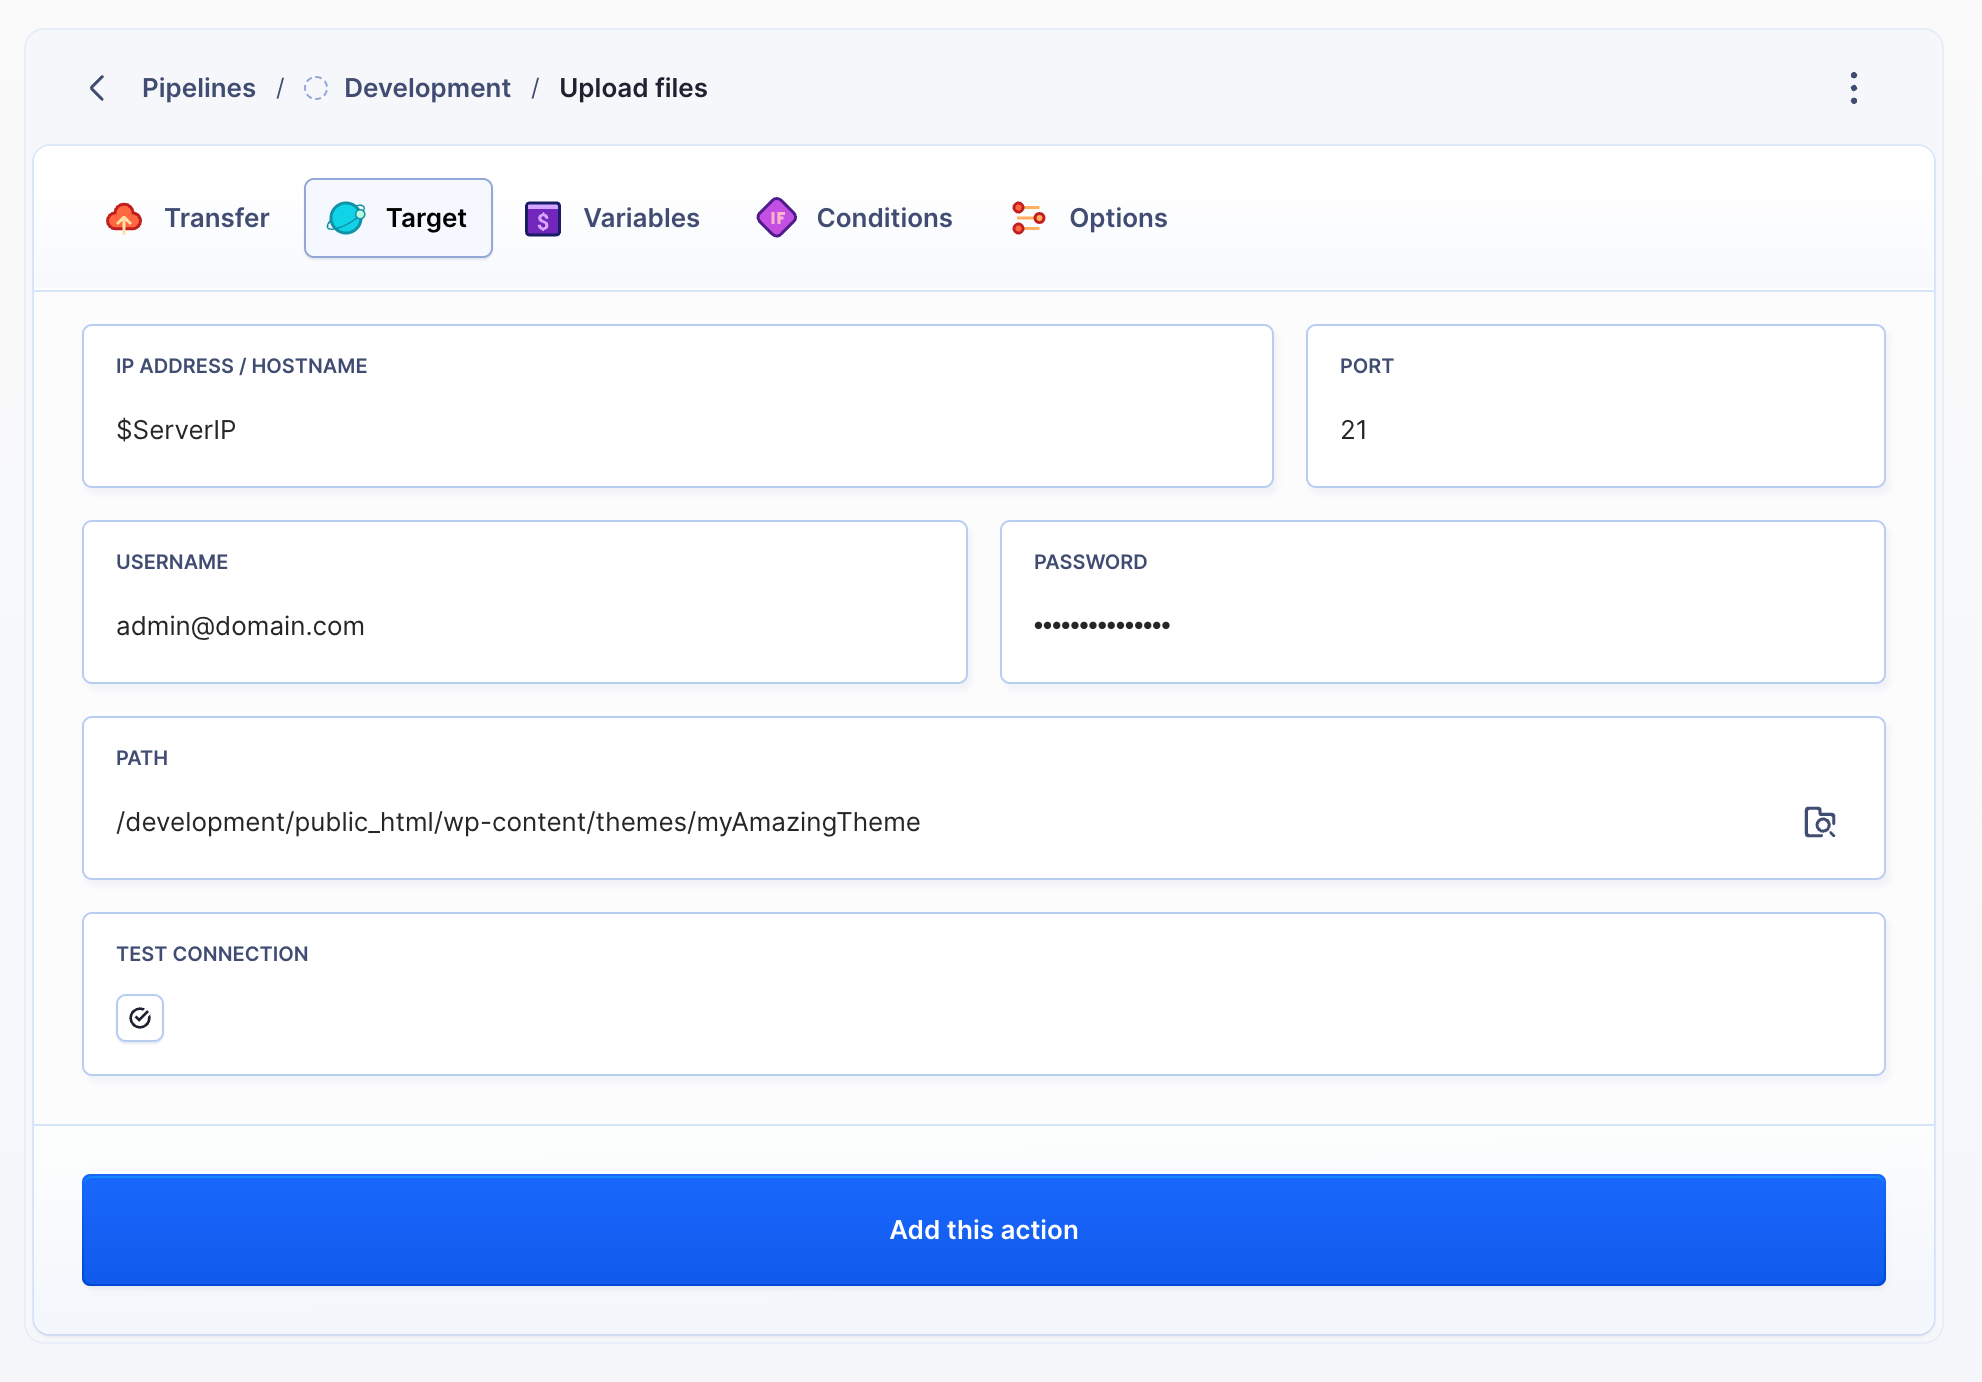
A list of actions will appear. Select the upload action that corresponds with your server type (FTP/SFTP, gcloud, AWS, etc.).
Provide your login details and the path to the theme folder on the server – the remote path. In our case it’ll be:
development/public_html/wp-content/themes/myAmazingTheme
Click the Test button to verify connection to your server before saving the action. Buddy will send a test file to your server to check if everything works fine.
- Once ready, click Add this action button.
Now, as soon as you make a push, Buddy will trigger the pipeline and deploy your theme from scratch. On every next push it’ll only deploy the files that changed.
Since we’ve just made a push and have nothing new to commit, we shall trigger the newly created pipeline manually. To do this, hit the Run button:
Upon a successful deployment you can log in to your WordPress administration panel and set the new template as active.
Staging pipeline
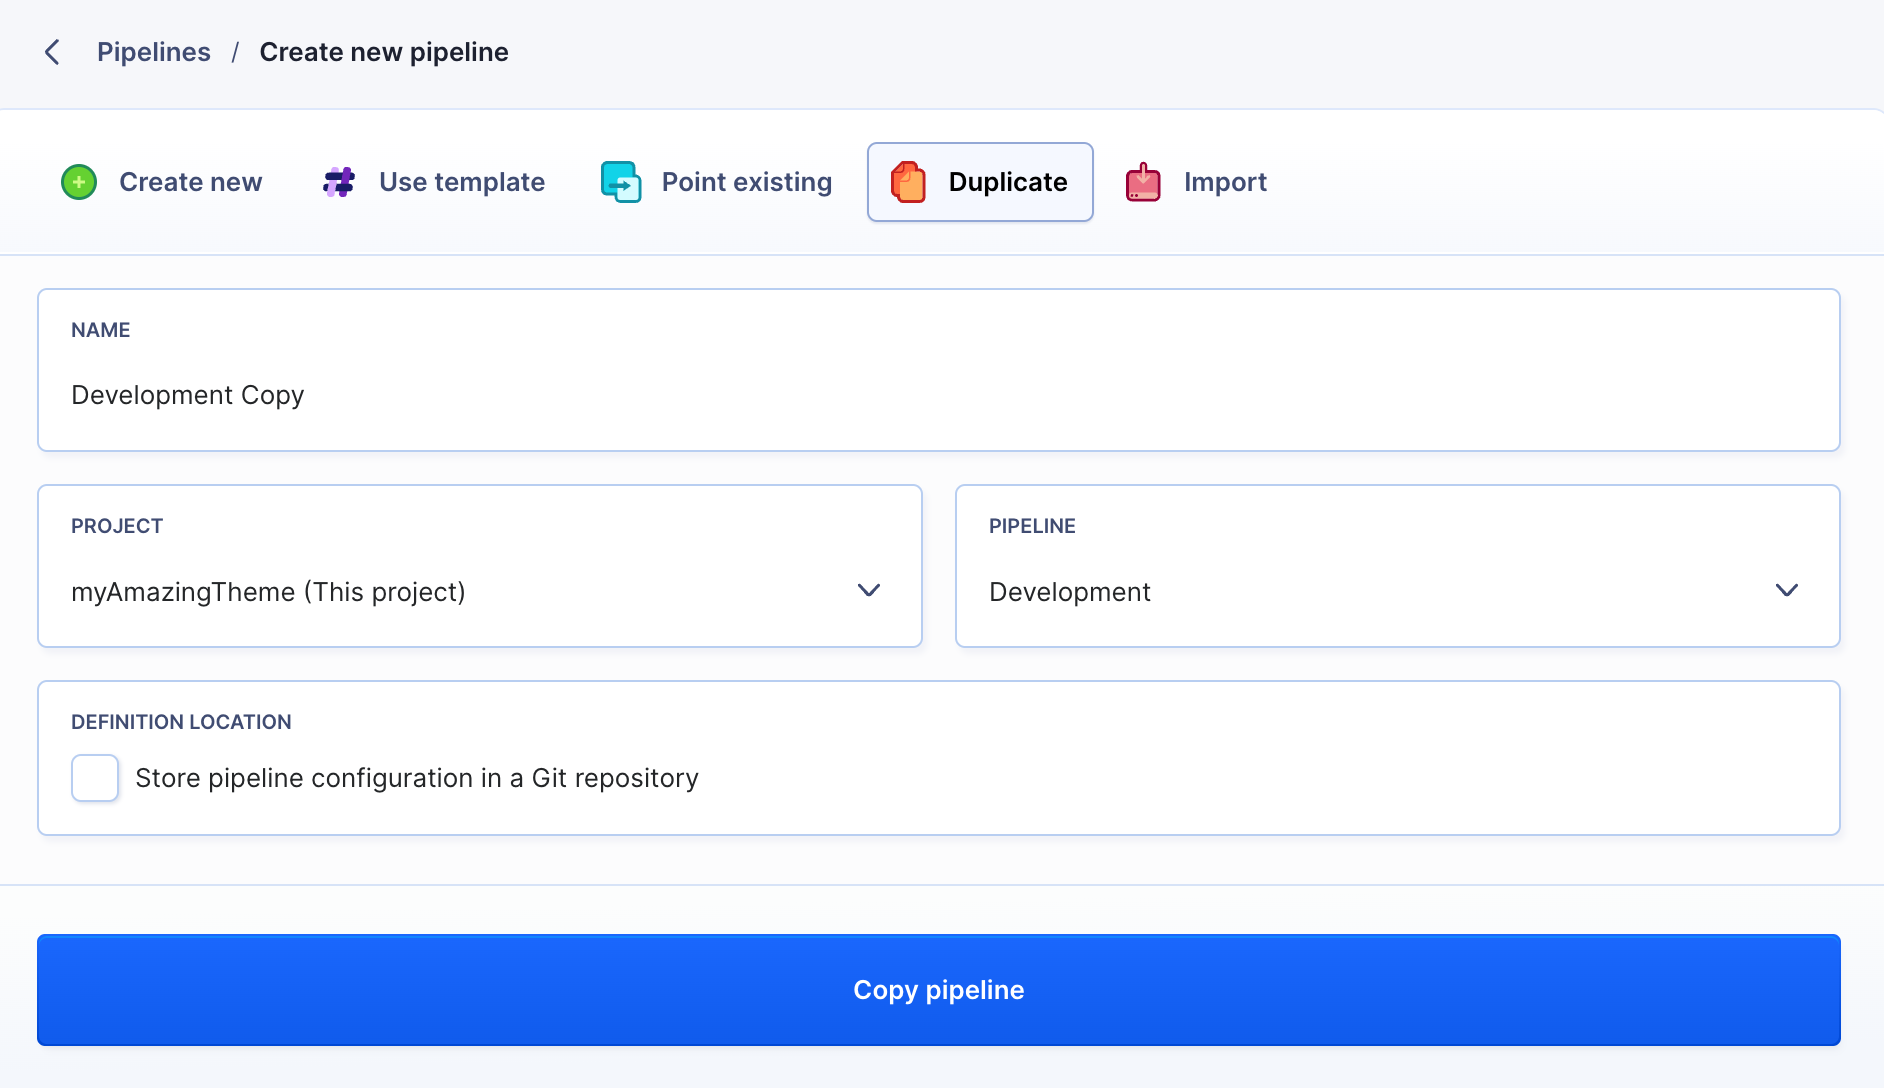
Now let’s create a pipeline that will update the staging instance according to the schedule, e.g. once a day at 5 pm. Since we’ve already created the Development pipeline, we can use the cloning feature that will save us some time.
- Again, let's add a new pipeline but this time select the Clone existing pipeline option from the right menu:
Choose the project and the pipeline that you want to clone. Since the default values are perfectly fine, click the Clone all actions from this pipeline button. Buddy will create a copy of the selected pipeline.
Now we have to adjust the settings to fit the staging role of the pipeline. Click the pipeline to open it and switch to the Settings tab.
On the edit screen, change the pipeline name to
Stagingand switch the mode to Recurrently. This will expand more settings. Select1 dayas the interval and set the start date to whichever hour suits you fine:
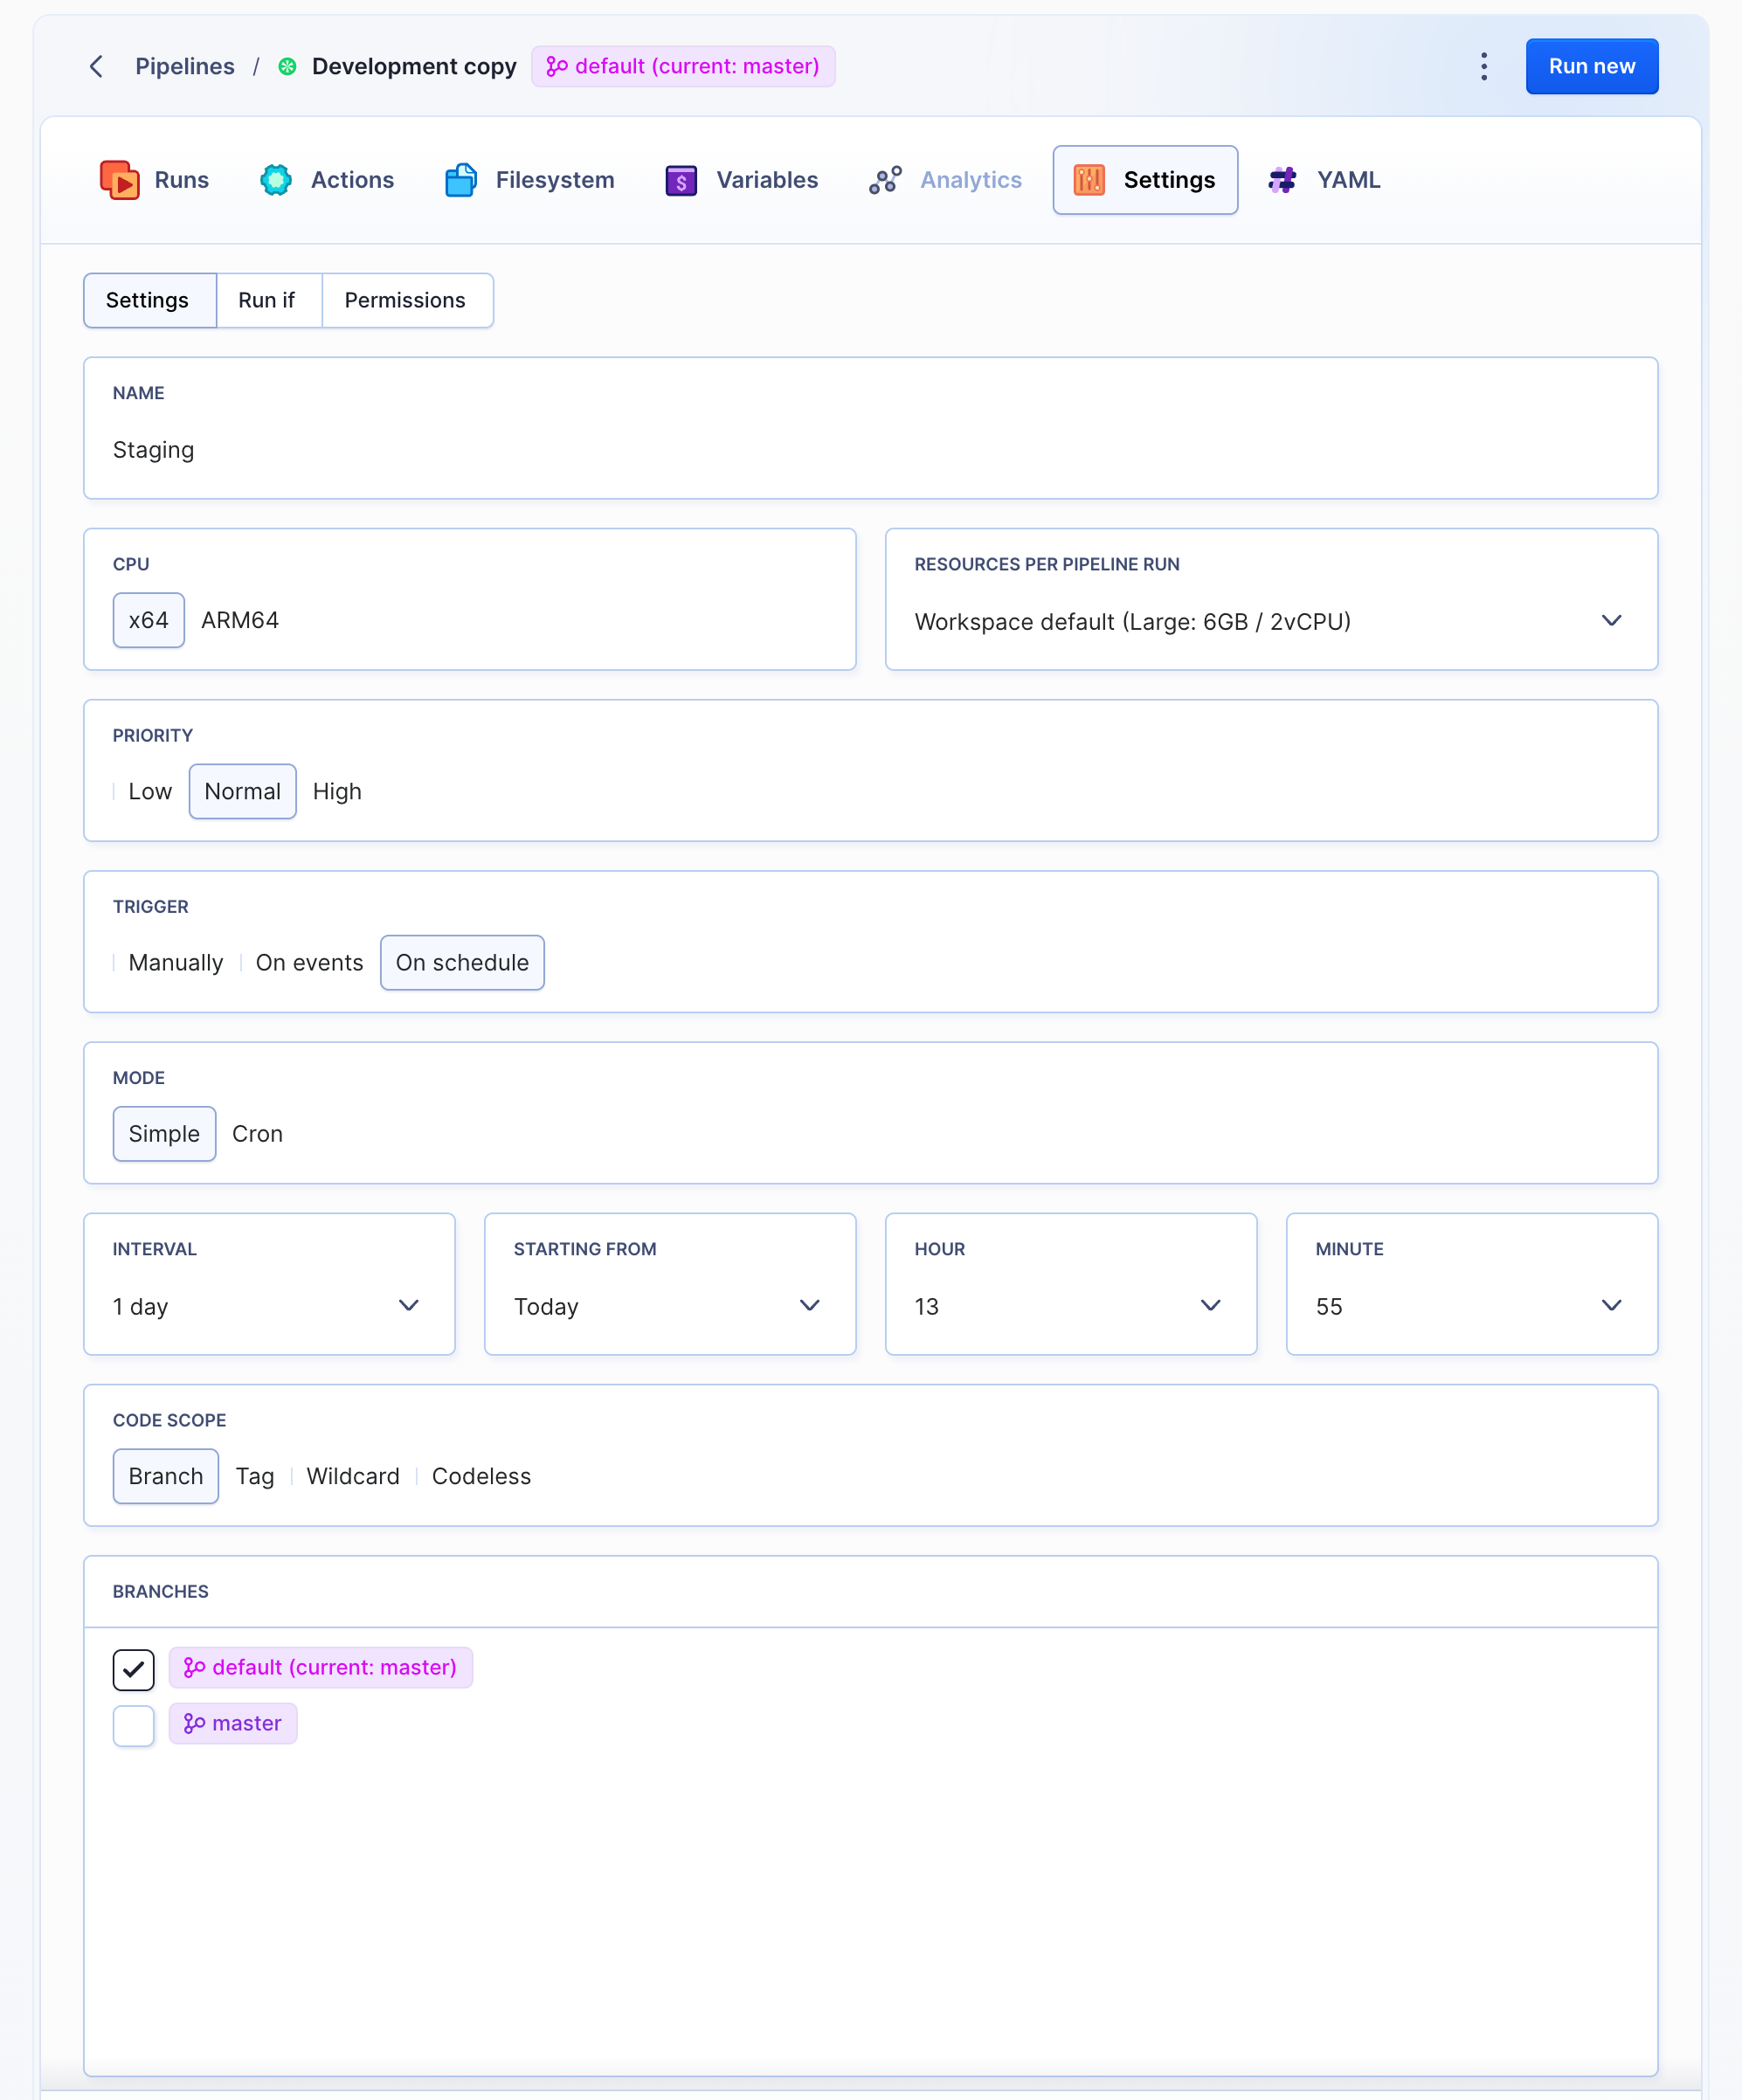
Click Save settings to update the pipeline.
Since you cloned the pipeline, it has the same actions settings as the Development pipeline. This is why we have to change the remote path to the folder to which the Staging pipeline will deploy. With the Staging pipeline open, go to the deployment action and change the remote path to:
staging/public_html/wp-content/themes/myAmazingTheme
Production pipeline
Finally we need to deal with the production pipeline, responsible for updating the site for the end users.
Let’s repeat the steps we followed in case of the Staging pipeline:
- Clone the Development pipeline
- Rename it to Production
- Switch its trigger mode to manual
Then change the remote path setting in the deployment action to:
production/public_html/wp-content/themes/myAmazingTheme
Results
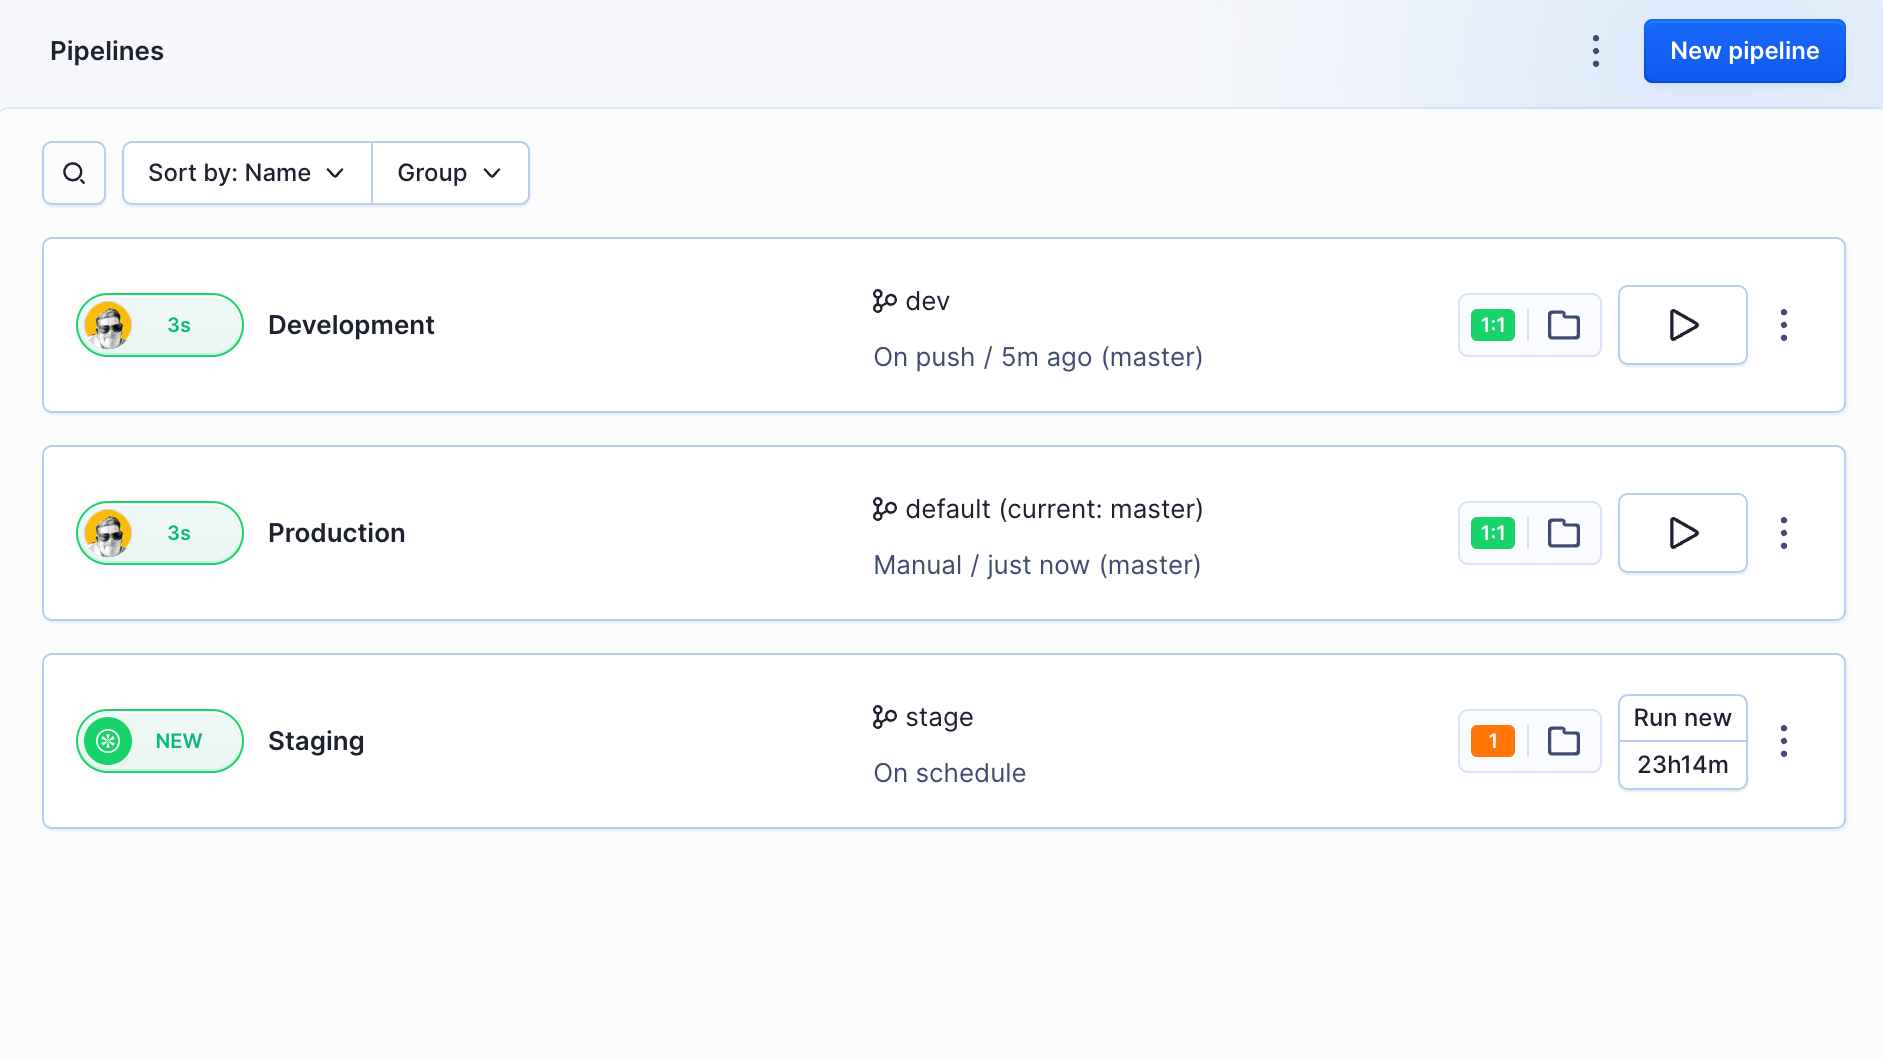
You should have three pipelines on the Pipelines screen now:

Summary
We are done – we created a new project and placed the theme files under development under Git version control. This distributed version control system will now help us keep the work ordered: it will track changes, support automation and collaboration between the developers.
Later, in Buddy, we created three pipelines that will allow the Continuous Deployment approach with development, staging and production server. Of course this is not the only possible way to employ pipelines – you can configure this flexible tool any way you like.
WordPress themes are just an example of Buddy’s abilities. The above best practices can also be employed while working on WordPress plugins or any other web project.