PHP Composer应用
This guide will explain you how to deal with PHP libraries and their dependencies using Composer and how to combine this tool with Buddy’s features to set up a continuous delivery pipeline for your PHP-based projects.
Objectives of this guide
This guide will:
- Explain you the core features of Composer.
- Outline the development process with Composer and indicate possible benefits.
- Describe the delivery automation with Buddy and Composer.
Why Composer?
PHP applications are getting more and more complex. To complete projects in reasonable time, you often need to rely on third-party libraries. But it comes at a price:
- The external libraries you’re using are added to the project repository and pump up its volume, which causes maintenance problems.
- Updating the libraries is extremely time-consuming, as it requires downloading up-to-date versions to the repository and committing all the files.
- You need to set up an autoloader for each library manually.
Composer solves all the above problems with one configuration file, storing the list of libraries and their versions. Upon issuing the composer install command all the libraries are downloaded in adequate versions and Composer automatically creates an autoloader that links them.
Thanks to this:
- You keep only one configuration file in the repository, instead of all the libraries.
- Updating libraries to its new version requires a change in the configuration file and calling a method composer install.
- Every new library added to the configuration file is ready to use after executing the composer install command.
Composer in the development process
Let’s take a look at the development process with Composer in place.
Set up a new PHP project
For this project create a new folder sample_project.
Add index.php file to this folder. This is a simple file that displays the text hello world:
<?php

echo("Hello world!");

?>
Get Composer running
Now we’ll add our first library to the project. This library will log the IP number of a person opening the website to an external file.
If you’re using Composer for the first time, install it on your machine.
Open the terminal, go to sample_project folder and execute the following commands:
$ composer init
This command creates composer.json file that stores project configuration with libraries’ names and their versions. The file is located in sample_project folder.
$ composer require monolog/monolog
This command adds a new entry with the information that the application is using monolog/monolog library to composer.json file.
Composer refers to packages repository. The default repository is https://packagist.org/ where you’ll find all the popular PHP libraries.
composer install
This command downloads the libraries in adequate versions according to the instructions in composer.json file to vendor folder and generates autoloader—/vendor/autoload.php.
Use the library installed by Composer
To employ the library defined with Composer simply declare its use. The code below presents the way monolog class is declared and used in the index.php file (hello world site).
<?php

require __DIR__ . '/vendor/autoload.php';

use Monolog\Logger;
use Monolog\Handler\StreamHandler;

echo("Hello world!");

$logger = new Logger('app');
$logger->pushHandler(new StreamHandler('logs/app.log', Logger::INFO));
$logger->info('[Request] IP: '.$_SERVER['REMOTE_ADDR']);

?>
The Composer.json file should be placed in the repository, and vendor folder, where the libraries are installed, in .gitignore. With such configuration all the libraries will be installed in correct versions on the local machine for everyone who checks the repository out and executes composer install command. There’s no need to keep the libraries in the repository.
Composer and Production Servers
Till now we worked on the local machine, but we can handle the production servers with a little help from Composer as well. In this case our tasks include:
- Uploading application files to the server via FTP.
- Running the composer install command on the server via SSH.
Completing these steps manually is time consuming and—what is typical for manual processing—very error-prone. Fortunately there’s a way to automate the tasks with Buddy and its pipelines.
Set Up a Buddy Project for Delivery Automation
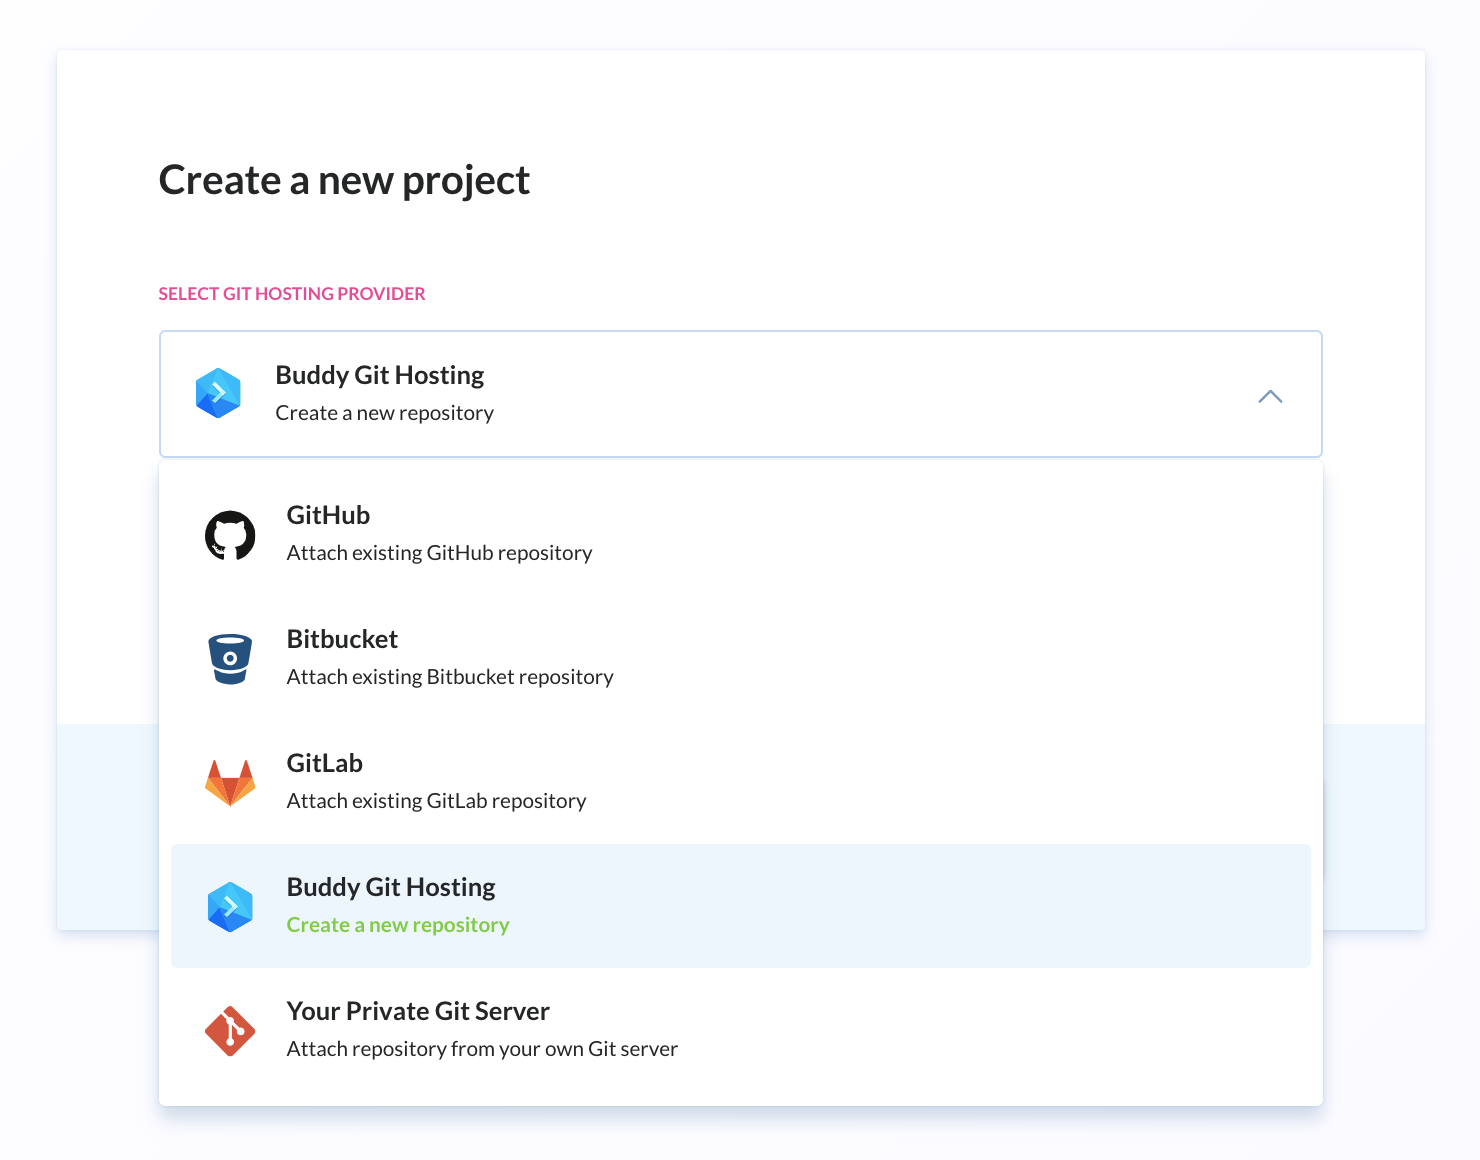
First you need to register in Buddy and set up a new project. Complete the following tasks:
- Click Add a new project
- Pick Buddy as your Git hosting provider
- Push the files from the example above (index.php, composer.json) to the repository:
Time for Continuous Delivery Pipeline
Now we’ll take care of the pipeline—a tool that defines steps to be performed automatically by Buddy.
Add your Pipeline
First, add a pipeline that will deploy changes introduced to the repository to the production server whenever you trigger it:

On-Click Deployment
Add two actions to your pipeline—they will deploy the application when you run the pipeline:
- One that will upload the source files of your application to the server. In Buddy you can choose from numerous uploading options, like FTP, FTPS or SCP. In this example we’ll use FTP. We need to enter the authorization data and the upload path.
- Another one (the SSH action) that will run the
composer installcommand on our server. This command downloads the libraries to the production server and generates autoloader, just like in case of the local machine (see the explanations above):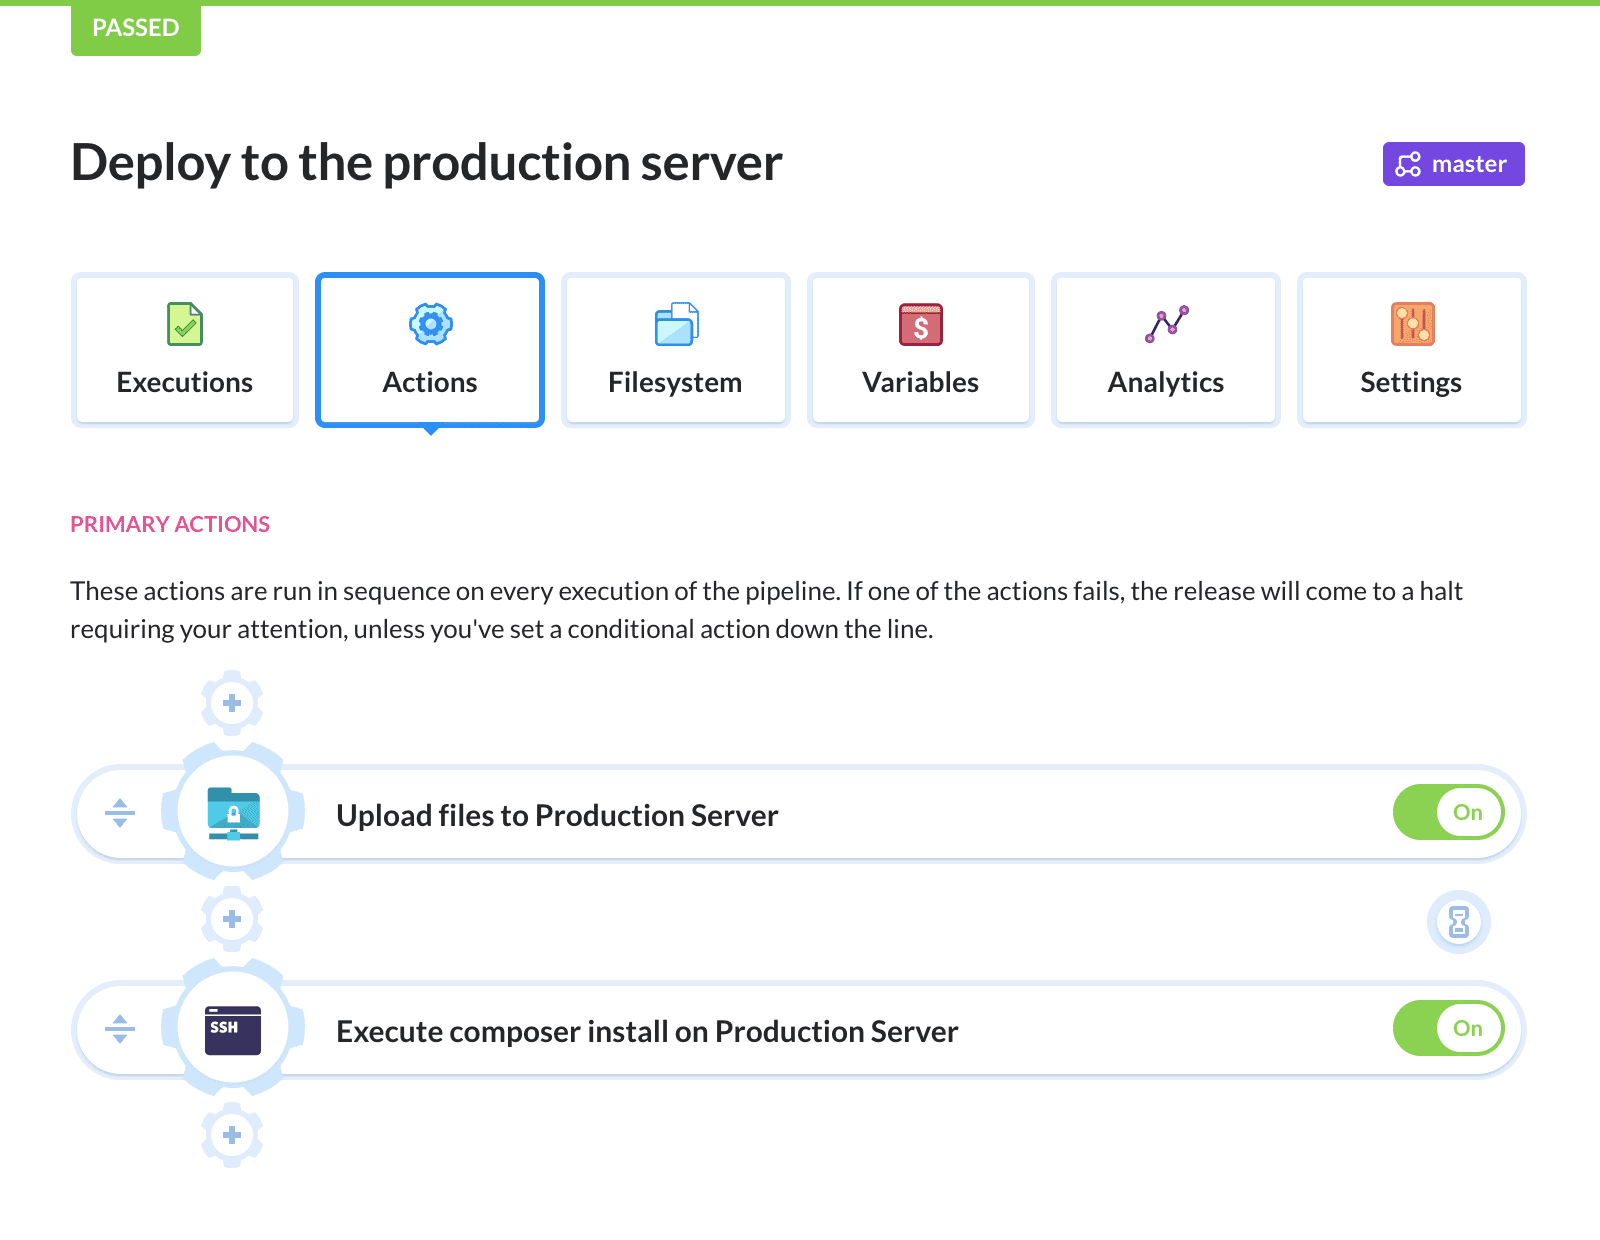
And we’re done—the pipeline will deploy the application when you run it with one click and run the composer install command on the production server—you don’t have to do it manually.
You can also employ pipelines to deploy to other servers, like development or staging server.