如何部署Wordpress主题至DigitalOcean
This article will guide you through the basics of CI/CD and how you can use it to improve your WordPress workflow.
Continuous Integration and Continuous Delivery (CI/CD for short) is basically a set of rules that helps to streamline bsasically every IT process. It allows developers to deliver reviewed and tested code changes more often.
Buddy is a CI/CD tool with intuitive GUI and over 140 preconfigured and ready-to-use actions that helps you implement this process into your everyday operations. Unlike other tools, you don’t need a dedicated DevOps team to set up a basic pipeline, and the entire process will take you a couple of minutes to complete, leaving more room for actual work.
So, how can CI/CD improve your WordPress deliveries? This guide will teach you how to automate creation of WP themes and their deployment to DigitalOcean. We will also show you how to create a simple app monitoring pipeline that will optimize your images and review your internal links.
Prerequisites
Before we get started, here are some things that you'll need:
- Git environment, you can follow our guide to set one up: https://buddy.works/guides/first-steps-with-git
- Node.js - https://nodejs.org/en/
- CMD / Terminal
- Code editor like Visual Studio Code, SublimeText or Notepad++
Creating a WordPress droplet on DigitalOcean
We will begin by creating a droplet for our WordPress project. Don't worry, if you don't have a domain yet but want to test out how this works, you can always add the domain later.
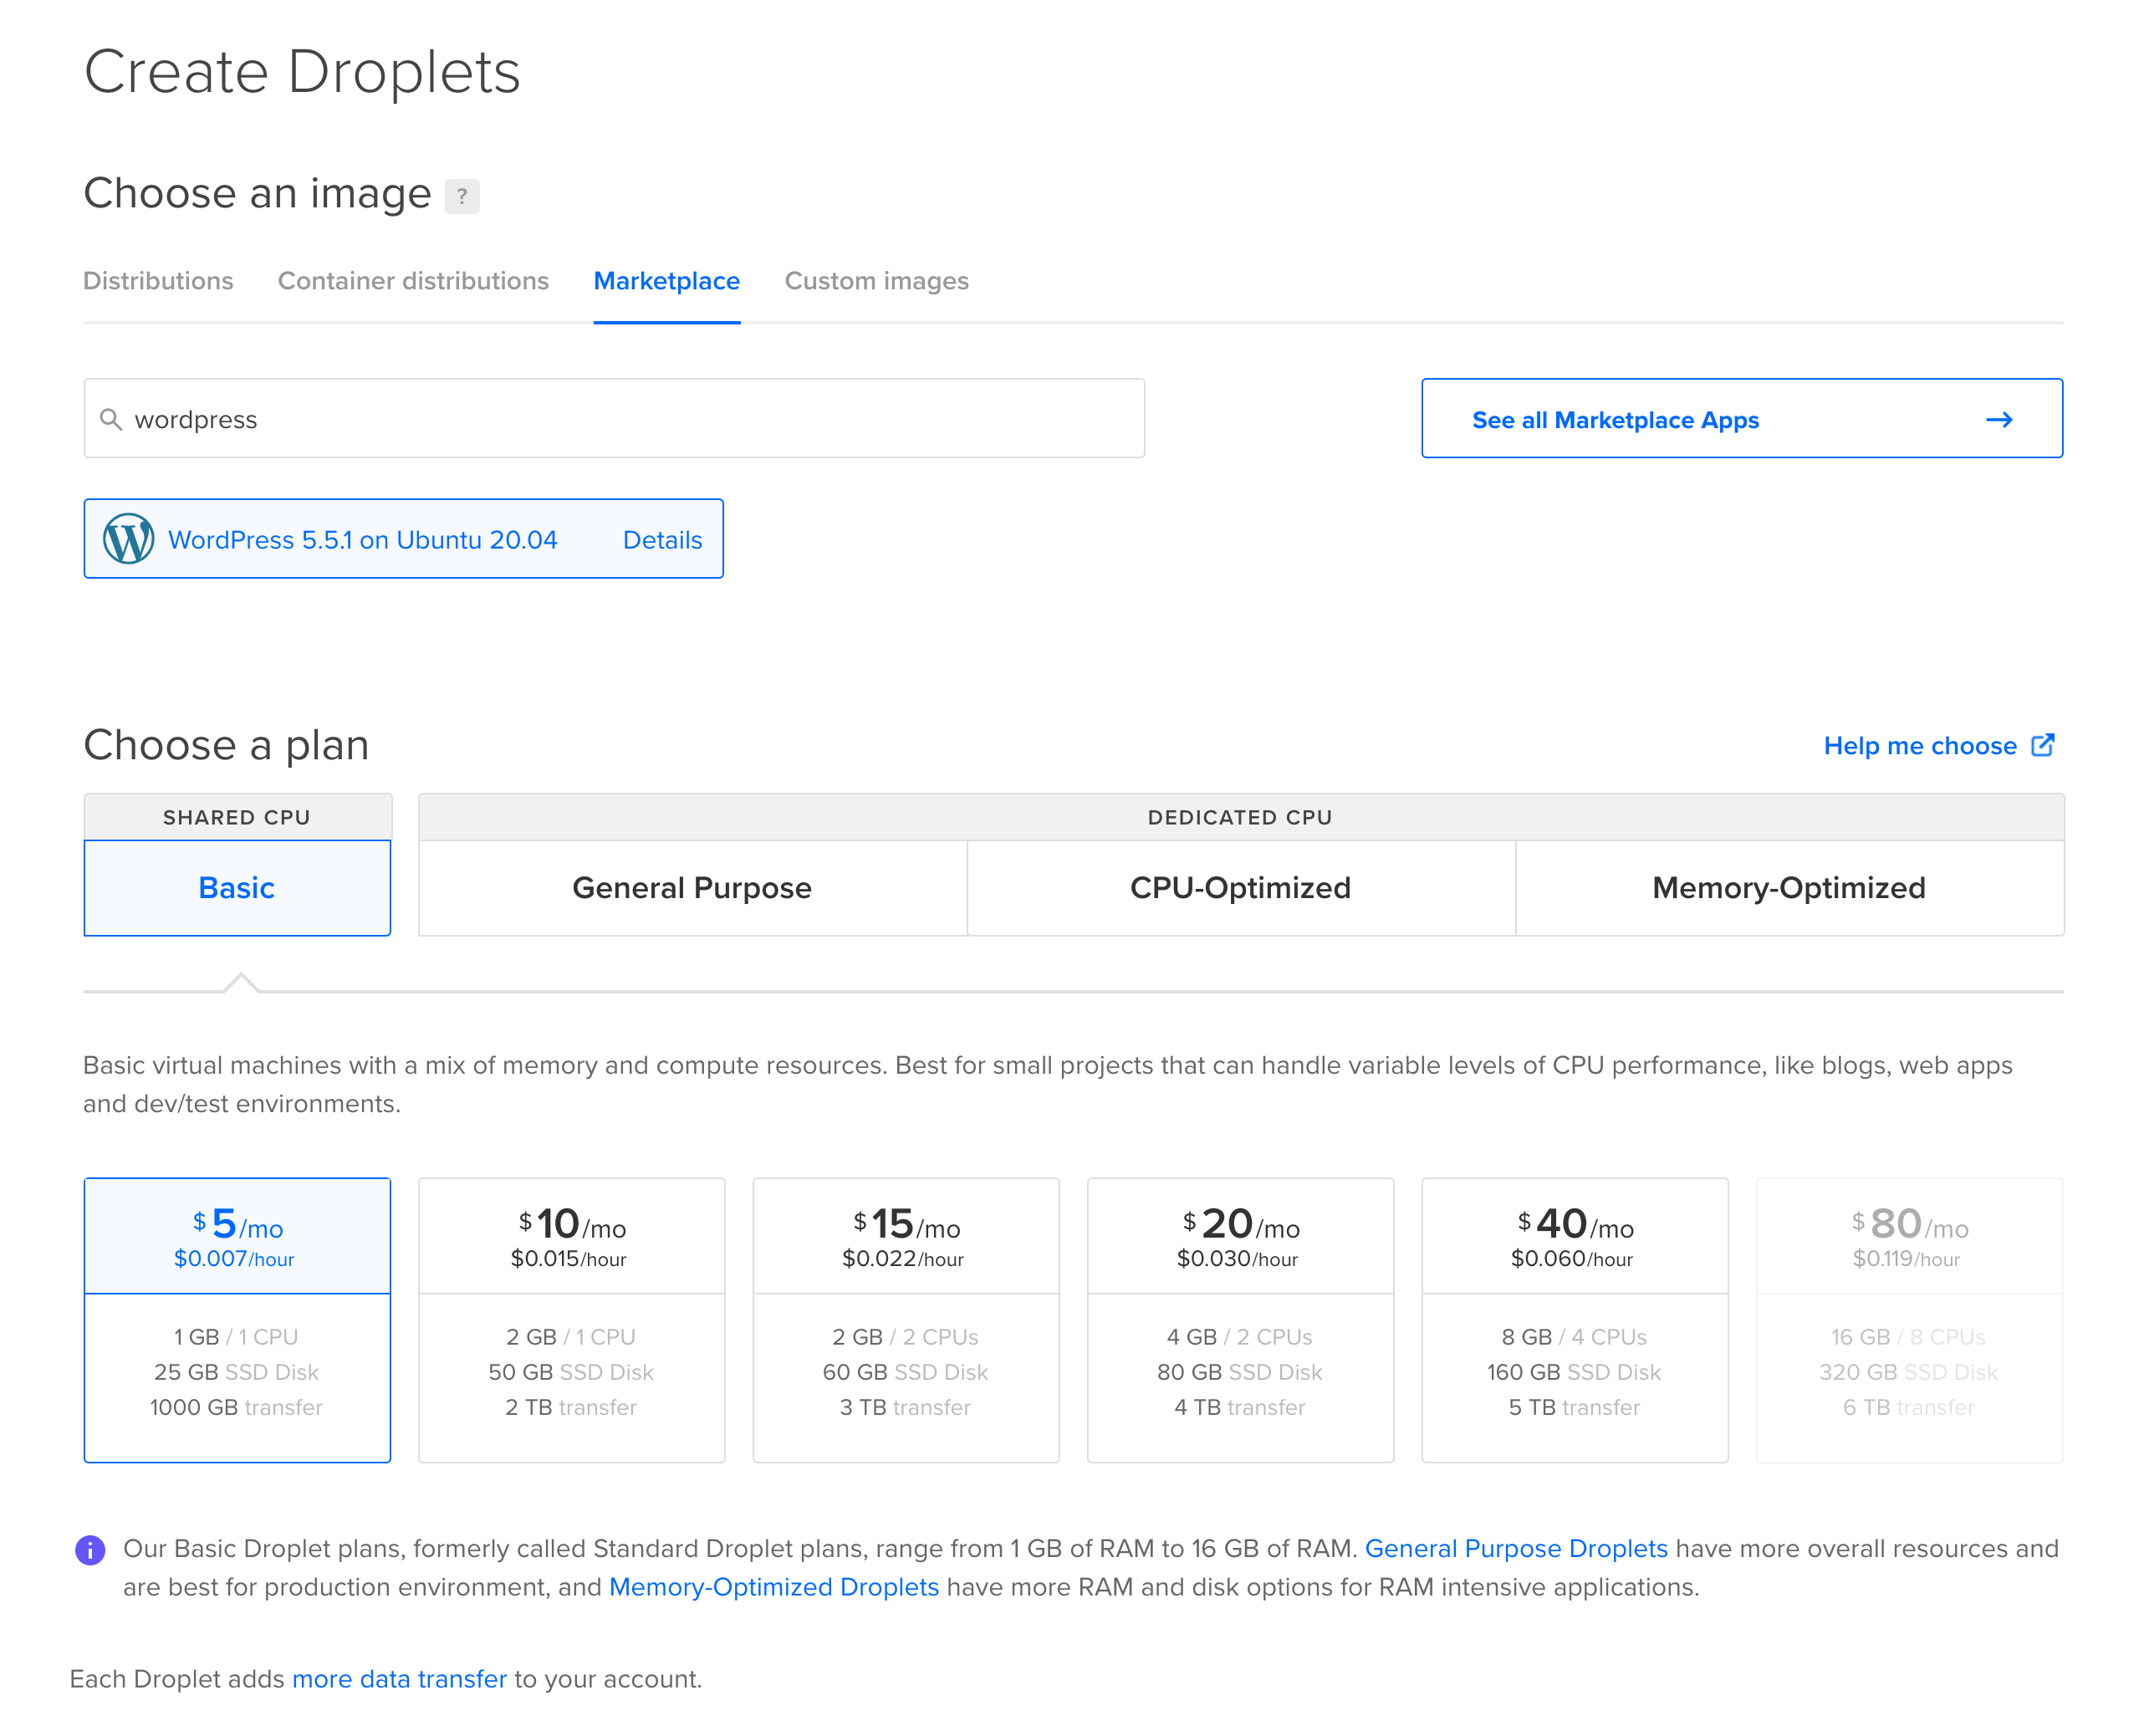
In the droplet creation menu, navigate to the 'Marketplace' tab and seek out the 'WordPress' app. Then, select the plan and technical specification. In the next step, select the type of authorization on the droplet server - you can choose between login and password, or the SSH key.
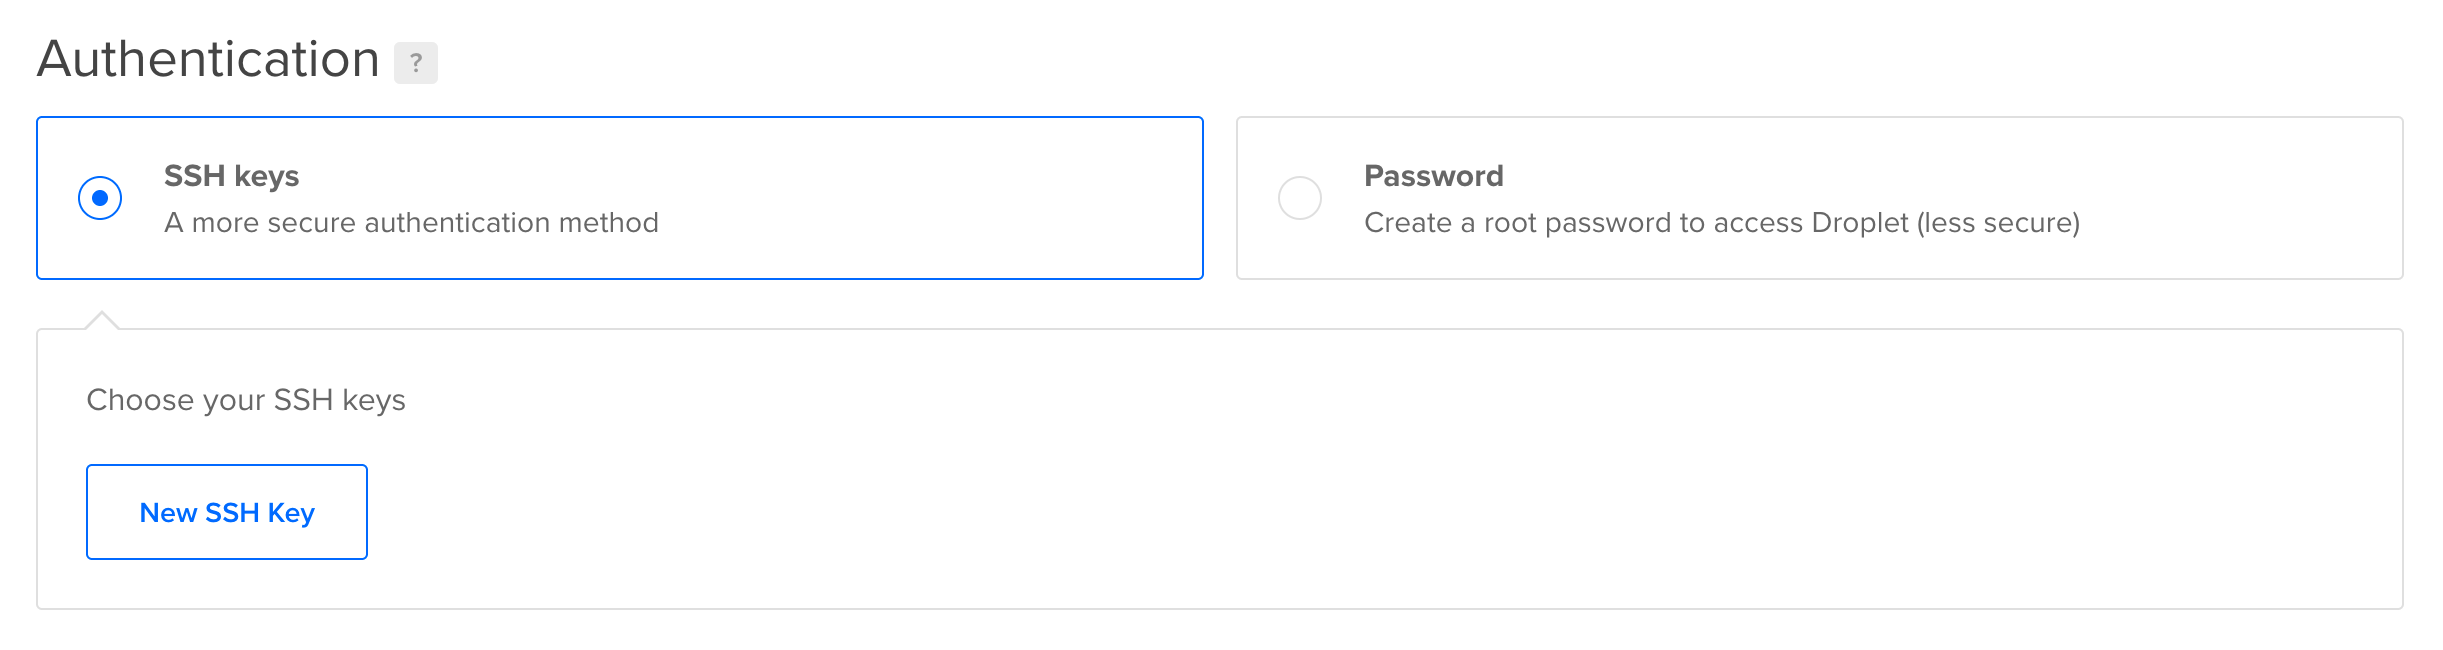
Login and password authorization may seem easier, but for security reasons we highly recommend using SSH keys. Read more about SSH key management in Buddy
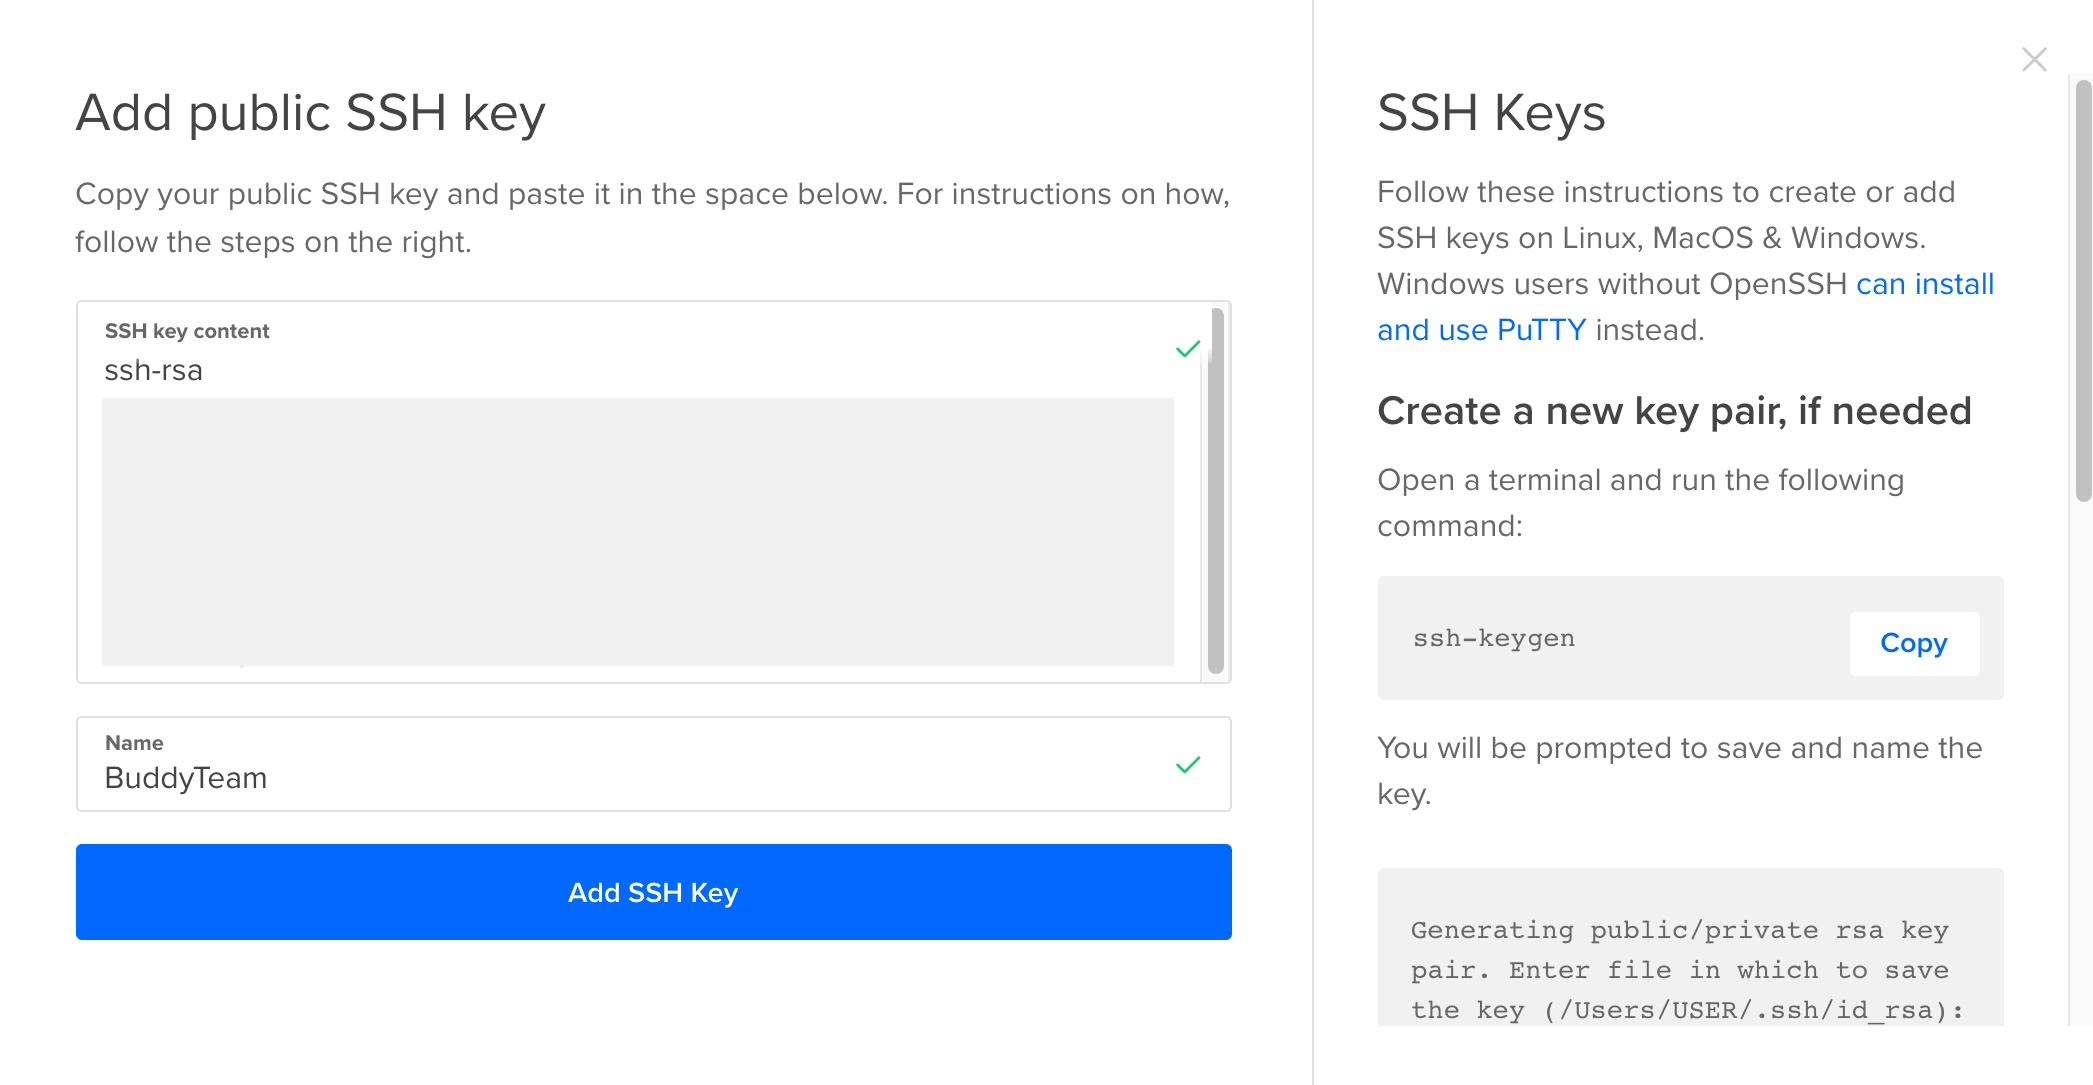
Creating a new key on Linux or MacOS is pretty straightforward, simply run ssh-keygen command in your terminal. On Windows, however, it's a little bit more complicated. If you are a Windows user, follow this guide.
A pop-up will guide you through the entire process of creating and activating the SSH key:
With the new SSH key added, you can create a new droplet. It can take some time for the droplet to show up:
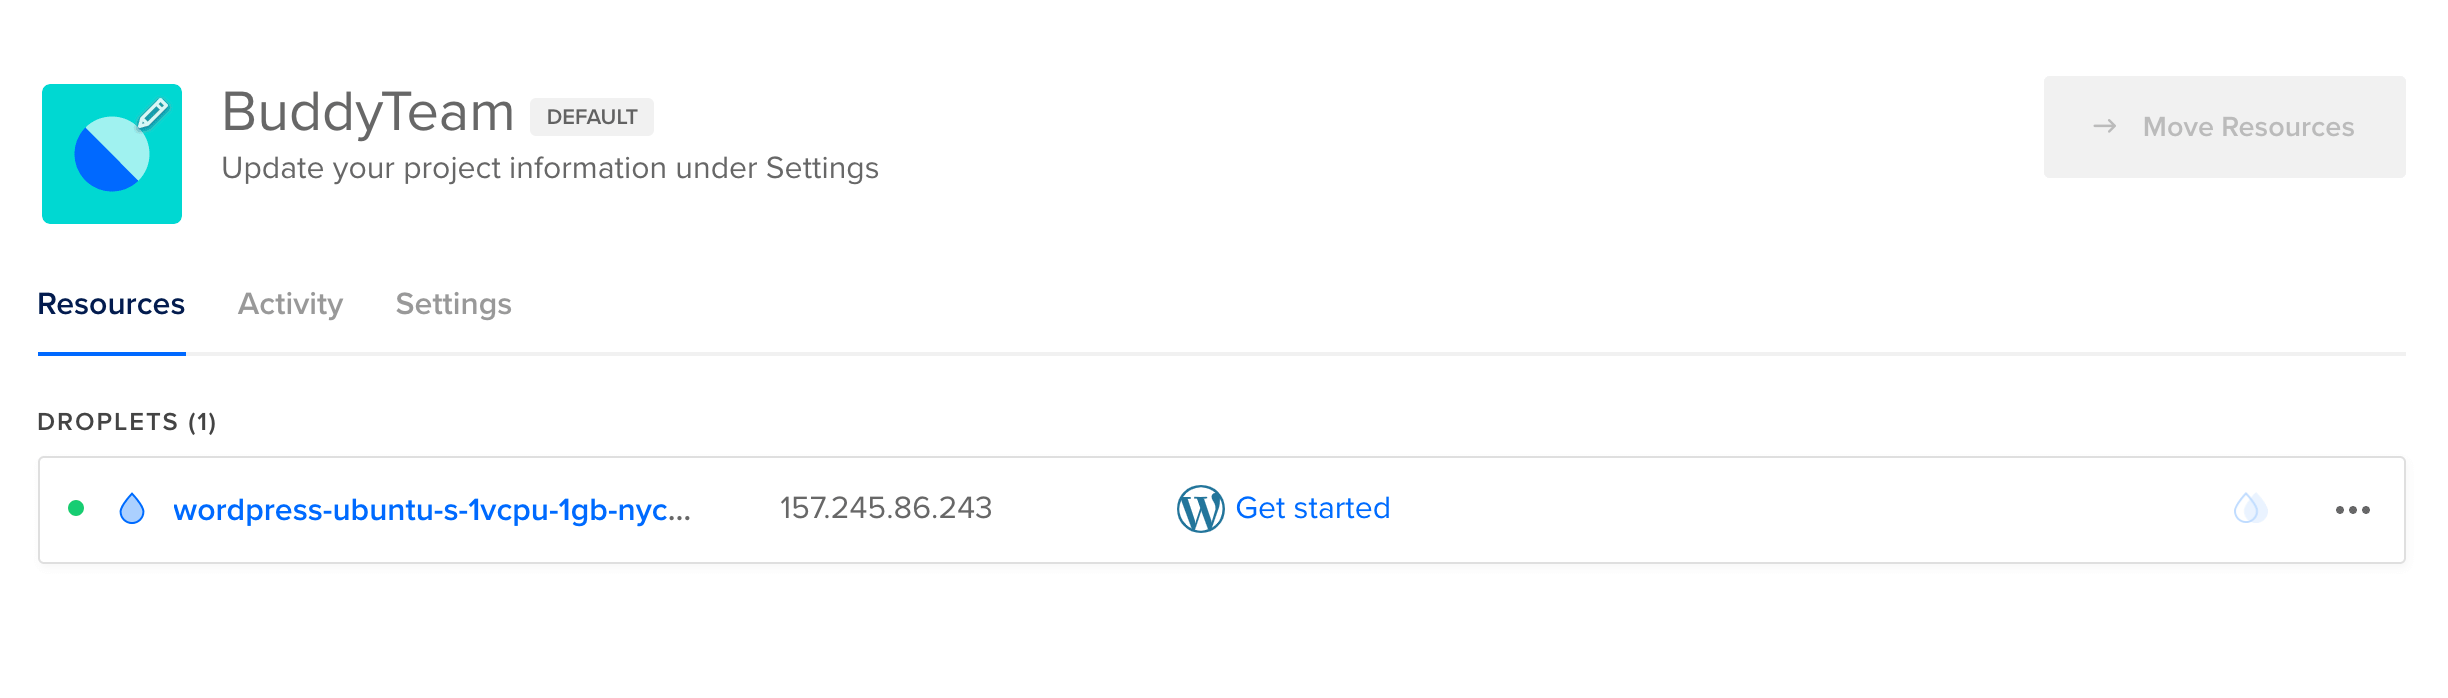
As you can see, the droplet is there but it still doesn't have WordPress configured. Begin by copying the IP address of your droplet. In our case it's 157.245.86.243 – we will use it as the placeholder in the commands.
Open up the terminal and use the ssh-add command to add the previously generated SSH key to the authentication agent:
ssh-add ~/.ssh/id_buddy_wordpress_guide
Next, connect to your droplet using its IP address:
ssh root@157.245.86.243
If you've done everything correctly, you should be now logged into your droplet and the WordPress configuration window should show up. Here's a brief rundown of the options:
- Domain/Subdomain name: enter the domain or droplet IP
- Email address: your email address
- Username: login name for the admin panel
- Blog title: the title of your website
Double-check all information that you provided and proceed with the installation. You should receive the following message:
Installation complete. Access your new WordPress site in a browser to continue.
Upon entering the domain or the droplet IP, you should see the following screen:
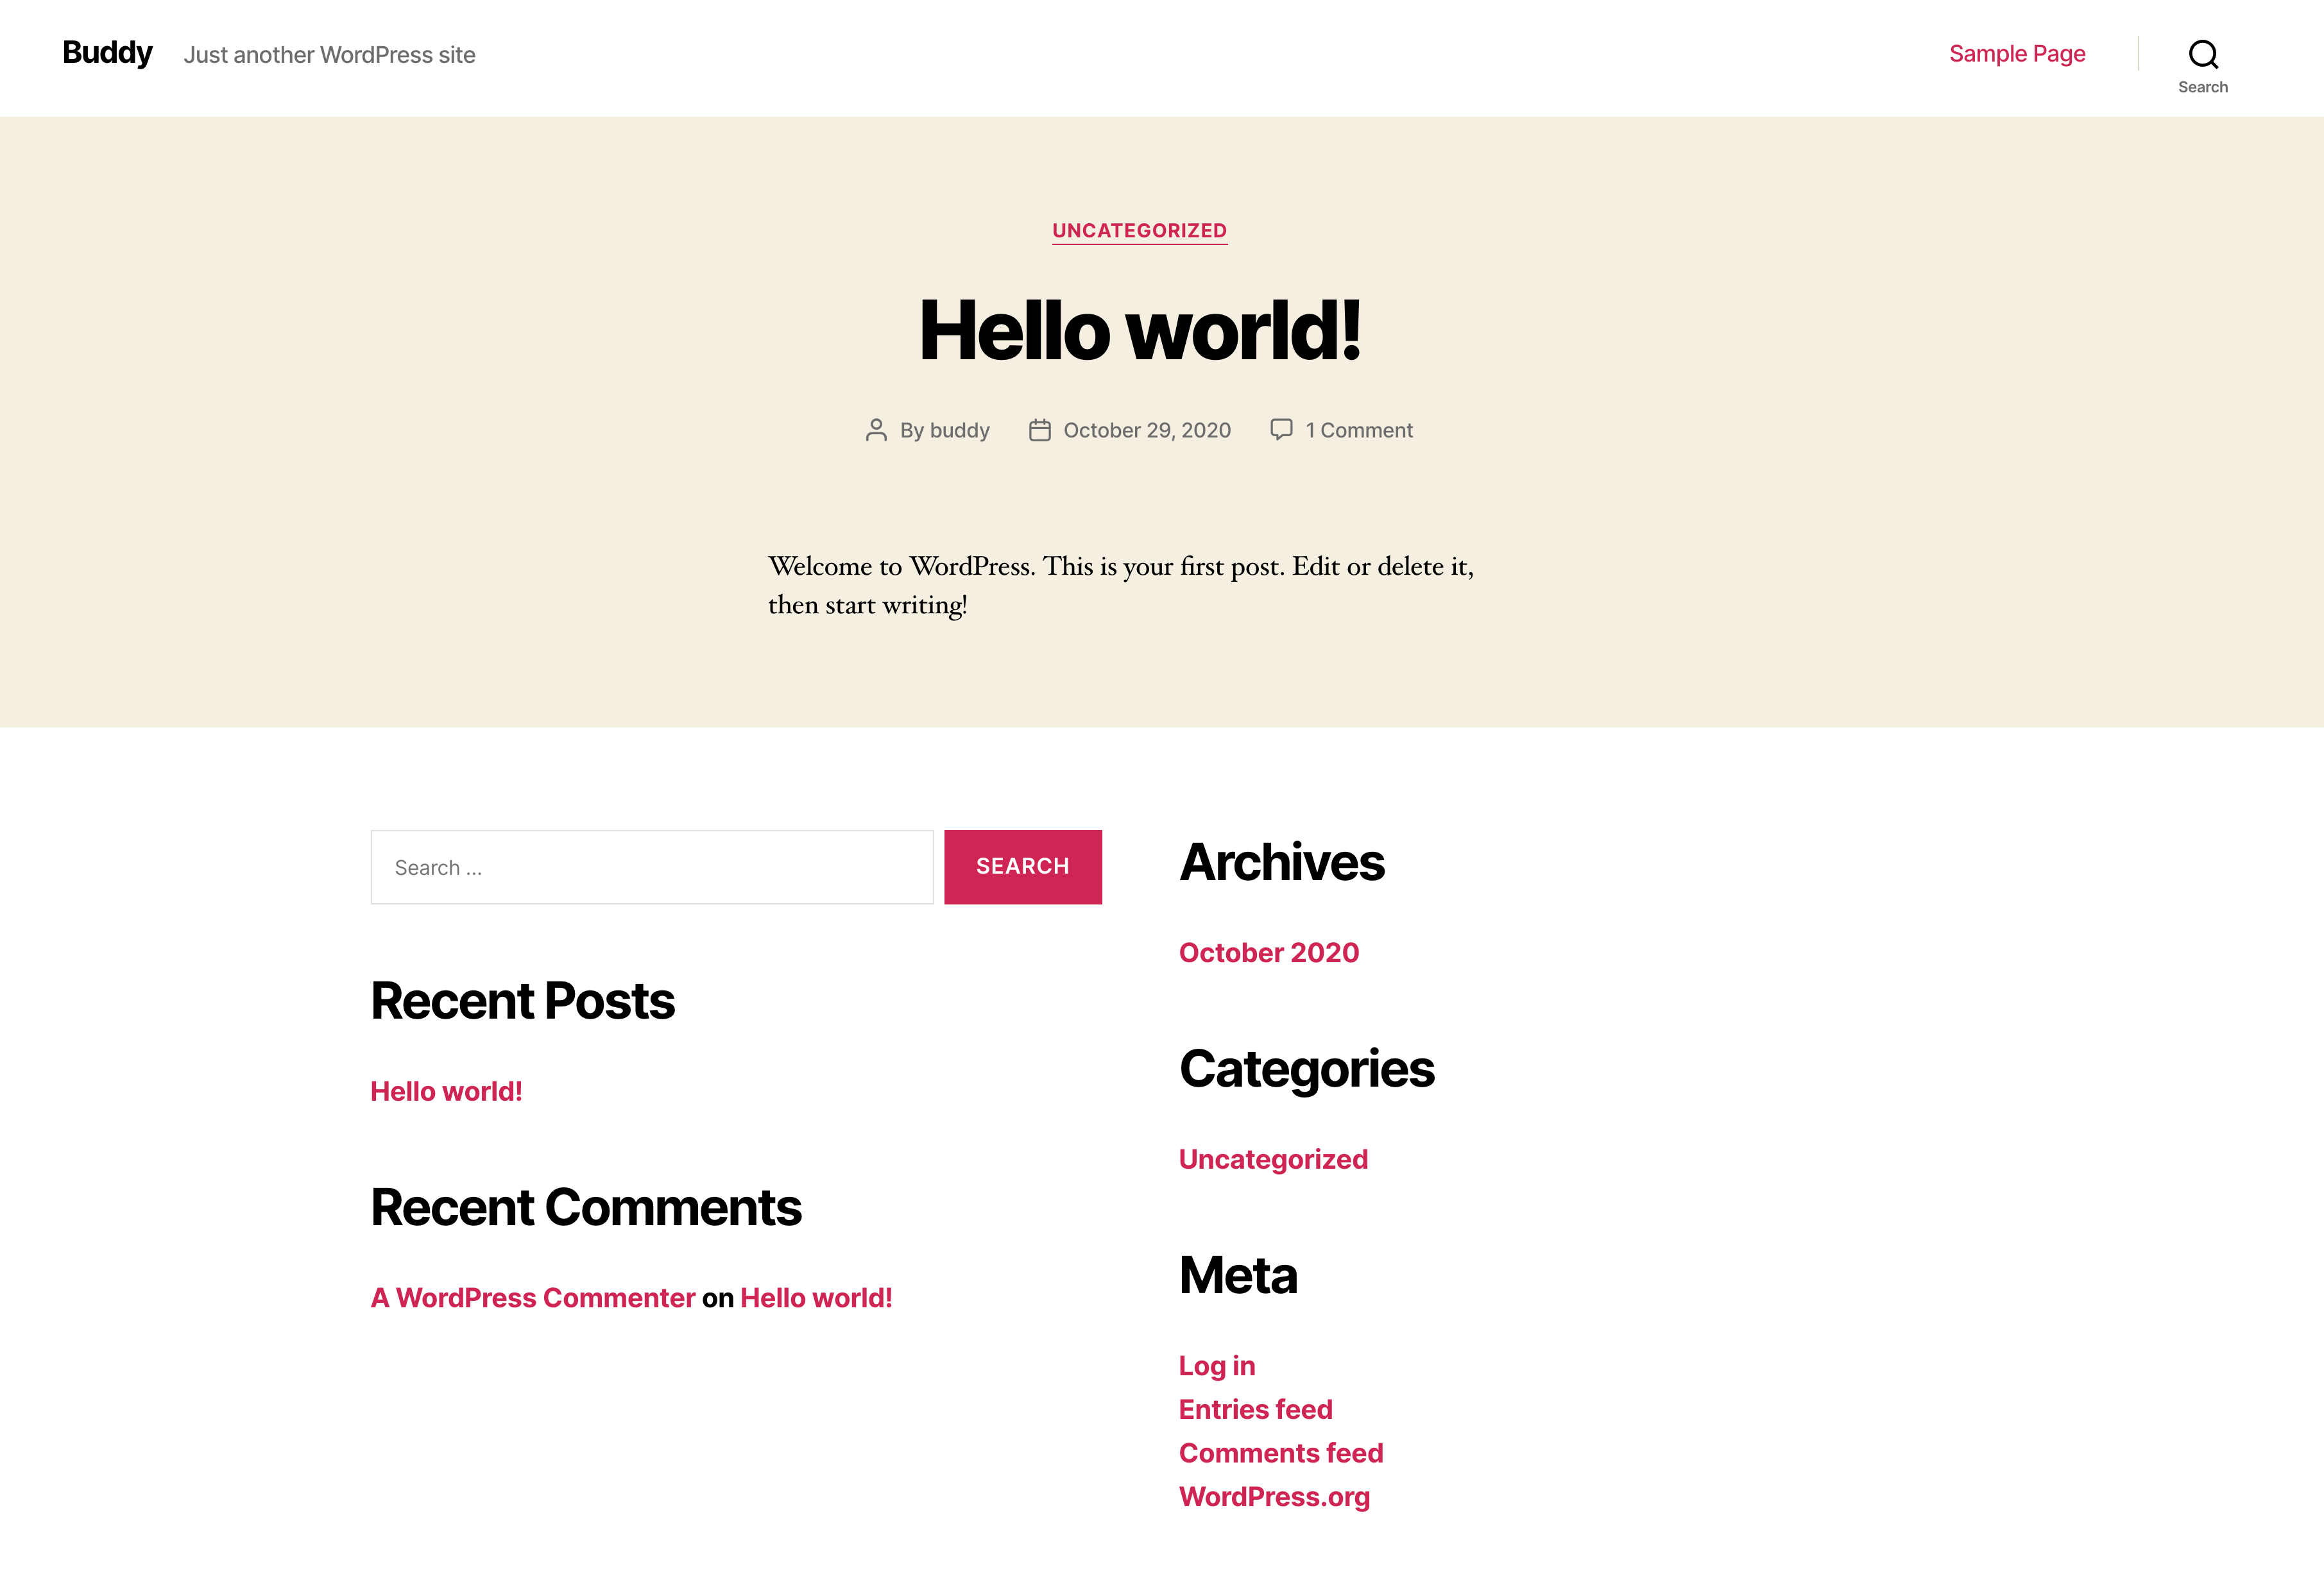
Your droplet now has WordPress installed. Keep your terminal open as you will still need it to add the SSH key to Buddy.
Creating a new project in Buddy
Now it's time to create and populate your repository. You can use your own template, or choose an example one. For the purposes of this guide, we will use the official WordPress template shared on their public GitHub profile: https://github.com/WordPress/twentytwentyone
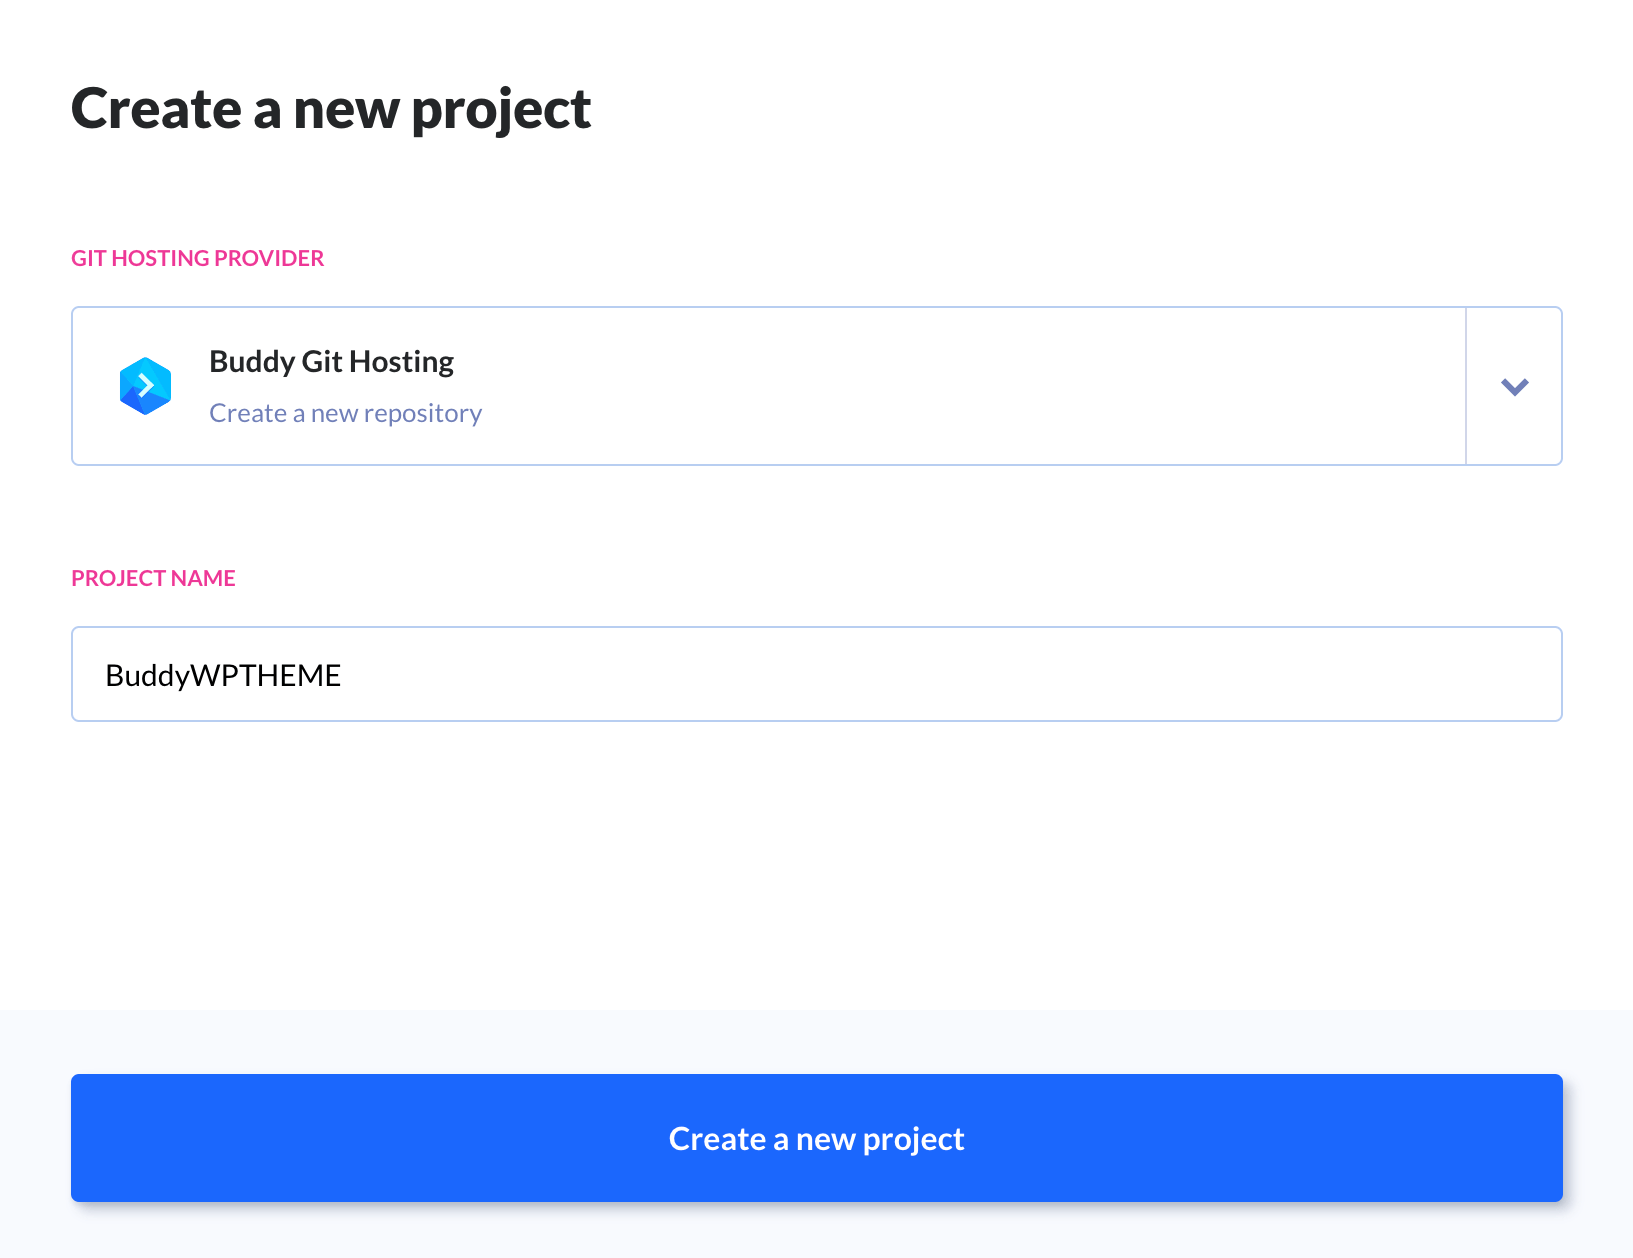
Create a new project in Buddy and select our platform as your Git hosting provider.
As the next step, we will clone the previously mentioned WordPress theme to your new Buddy repository using the following commands:
git clone --bare https://github.com/WordPress/twentytwentyone.git
cd twentytwentyone.git
git remote add buddy https://app.buddy.works/buddyTeam/buddywptheme
git push buddy --mirror
Congratulations - you have successfully configured your workspace and repository!
Git
Git is the most popular distributed version control system that became the golden standard in project management in the past decade.
Thanks to this technology, we can follow all the changes that were made to the project (and easily revert them should something go wrong). It's also a great way for teams to monitor changes made by your co-workers. In our case, we are using Buddy as the Git hosting provider. We already have cloned a repository, but to make any changes, we need to copy that repository locally to our machine. This is also the time when you need Node.js installed on your computer to proceed.
With Node.js ready, open up your terminal and enter the following command to copy the repository:
git clone https://app.buddy.works/buddyTeam/buddywptheme
But that's not all. Now we need to create a .gitignore file that will ignore the files that we want to exclude from our repository. In our case we would like to exclude the /node_modules/ path since it will be installed anyway when installing dependencies through NPM.
Every exclusion path in .gitignore has to be in a separate line. If you want to see how to properly configure your gitignore file for different programming languages, check the guide provided by GitHub.
Once the file is ready locally, you can add it to your repository using the following commands:
git add .gitignore
git commit -m “add gitignore”
git push origin master
With that out of the way, go to your repository directory and install NPM packages:
cd buddywptheme
npm install
With everything installed properly, you can use the npm run watch command and begin modifying your template locally. Whenever you change anything in your template, simply commit your changes and push them to the repository.
Creating your first pipeline
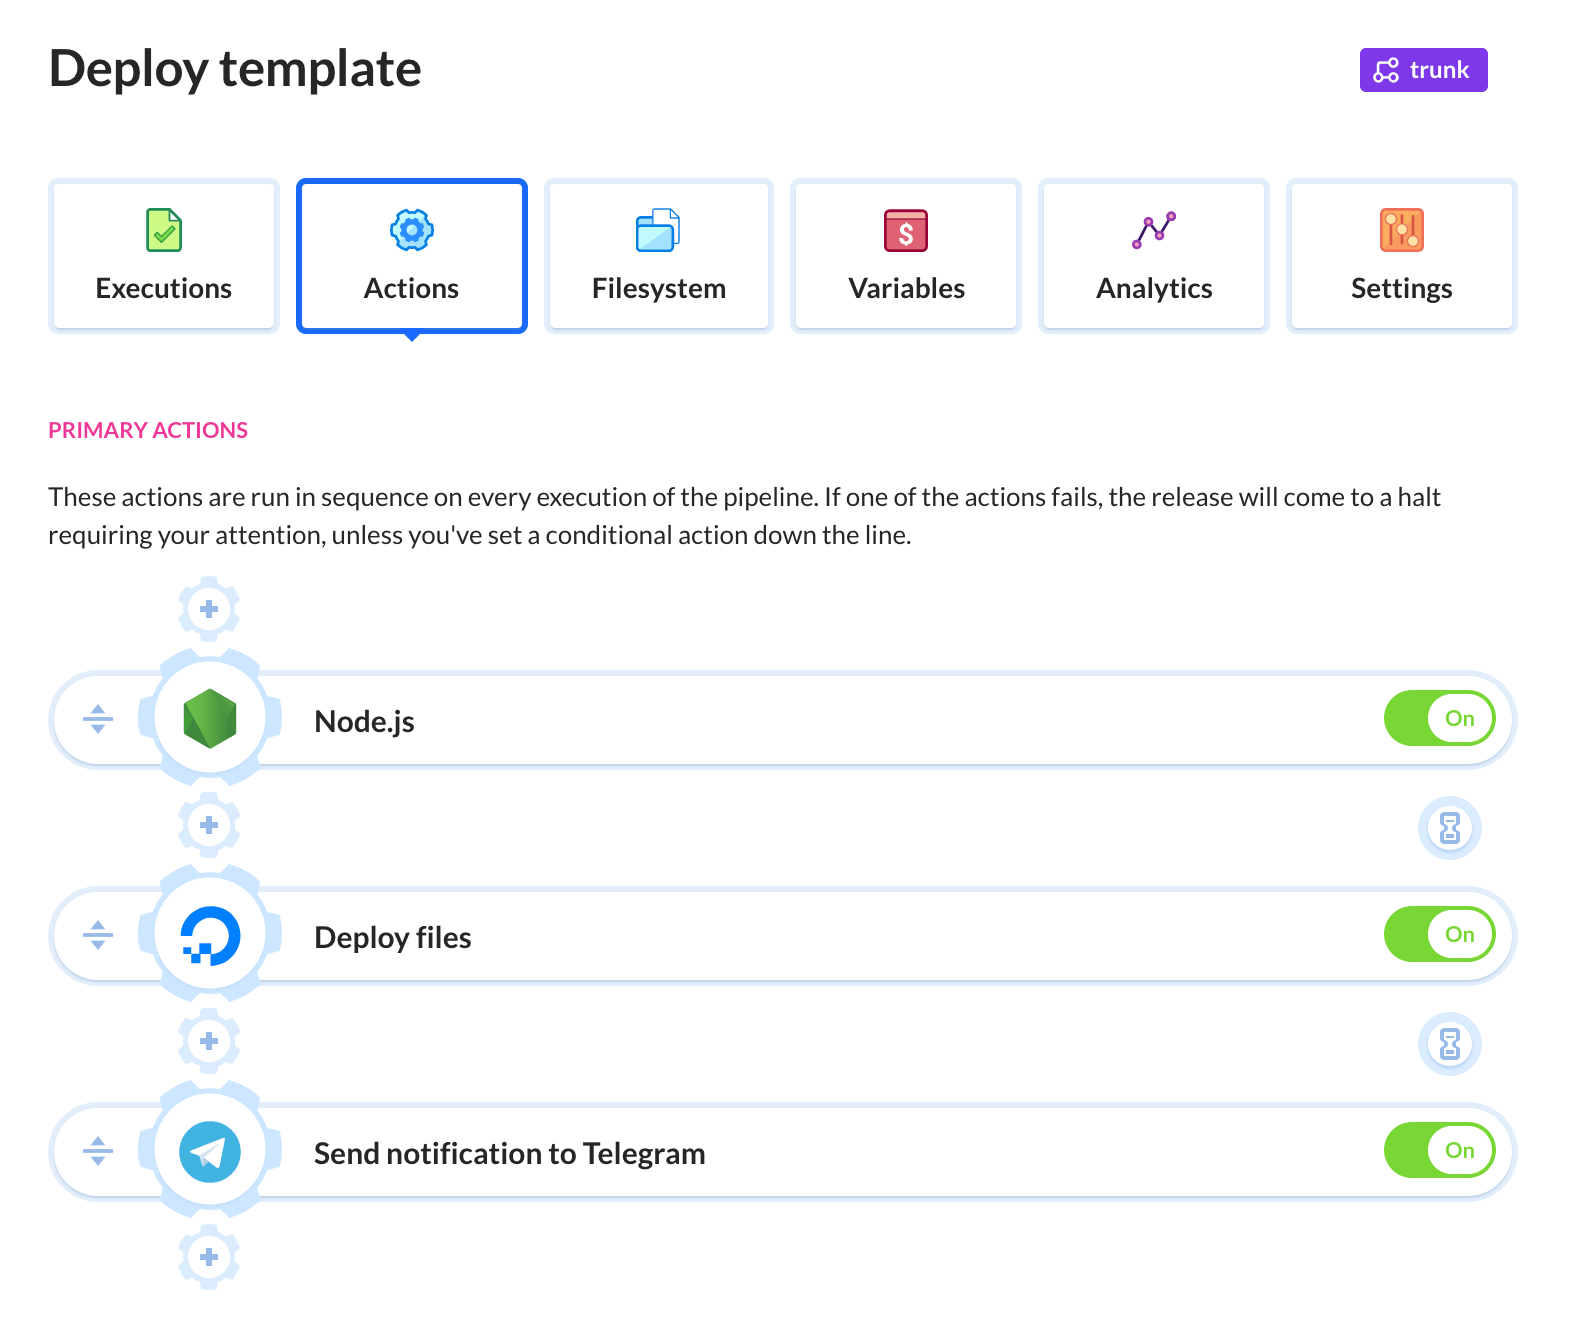
Pipelines are the bloodline of CI/CD. It's what makes the entire process tick. Thanks to our GUI approach, you can easily create a complete delivery proves with over 140 preconfigured actions. An example pipeline can look like this:
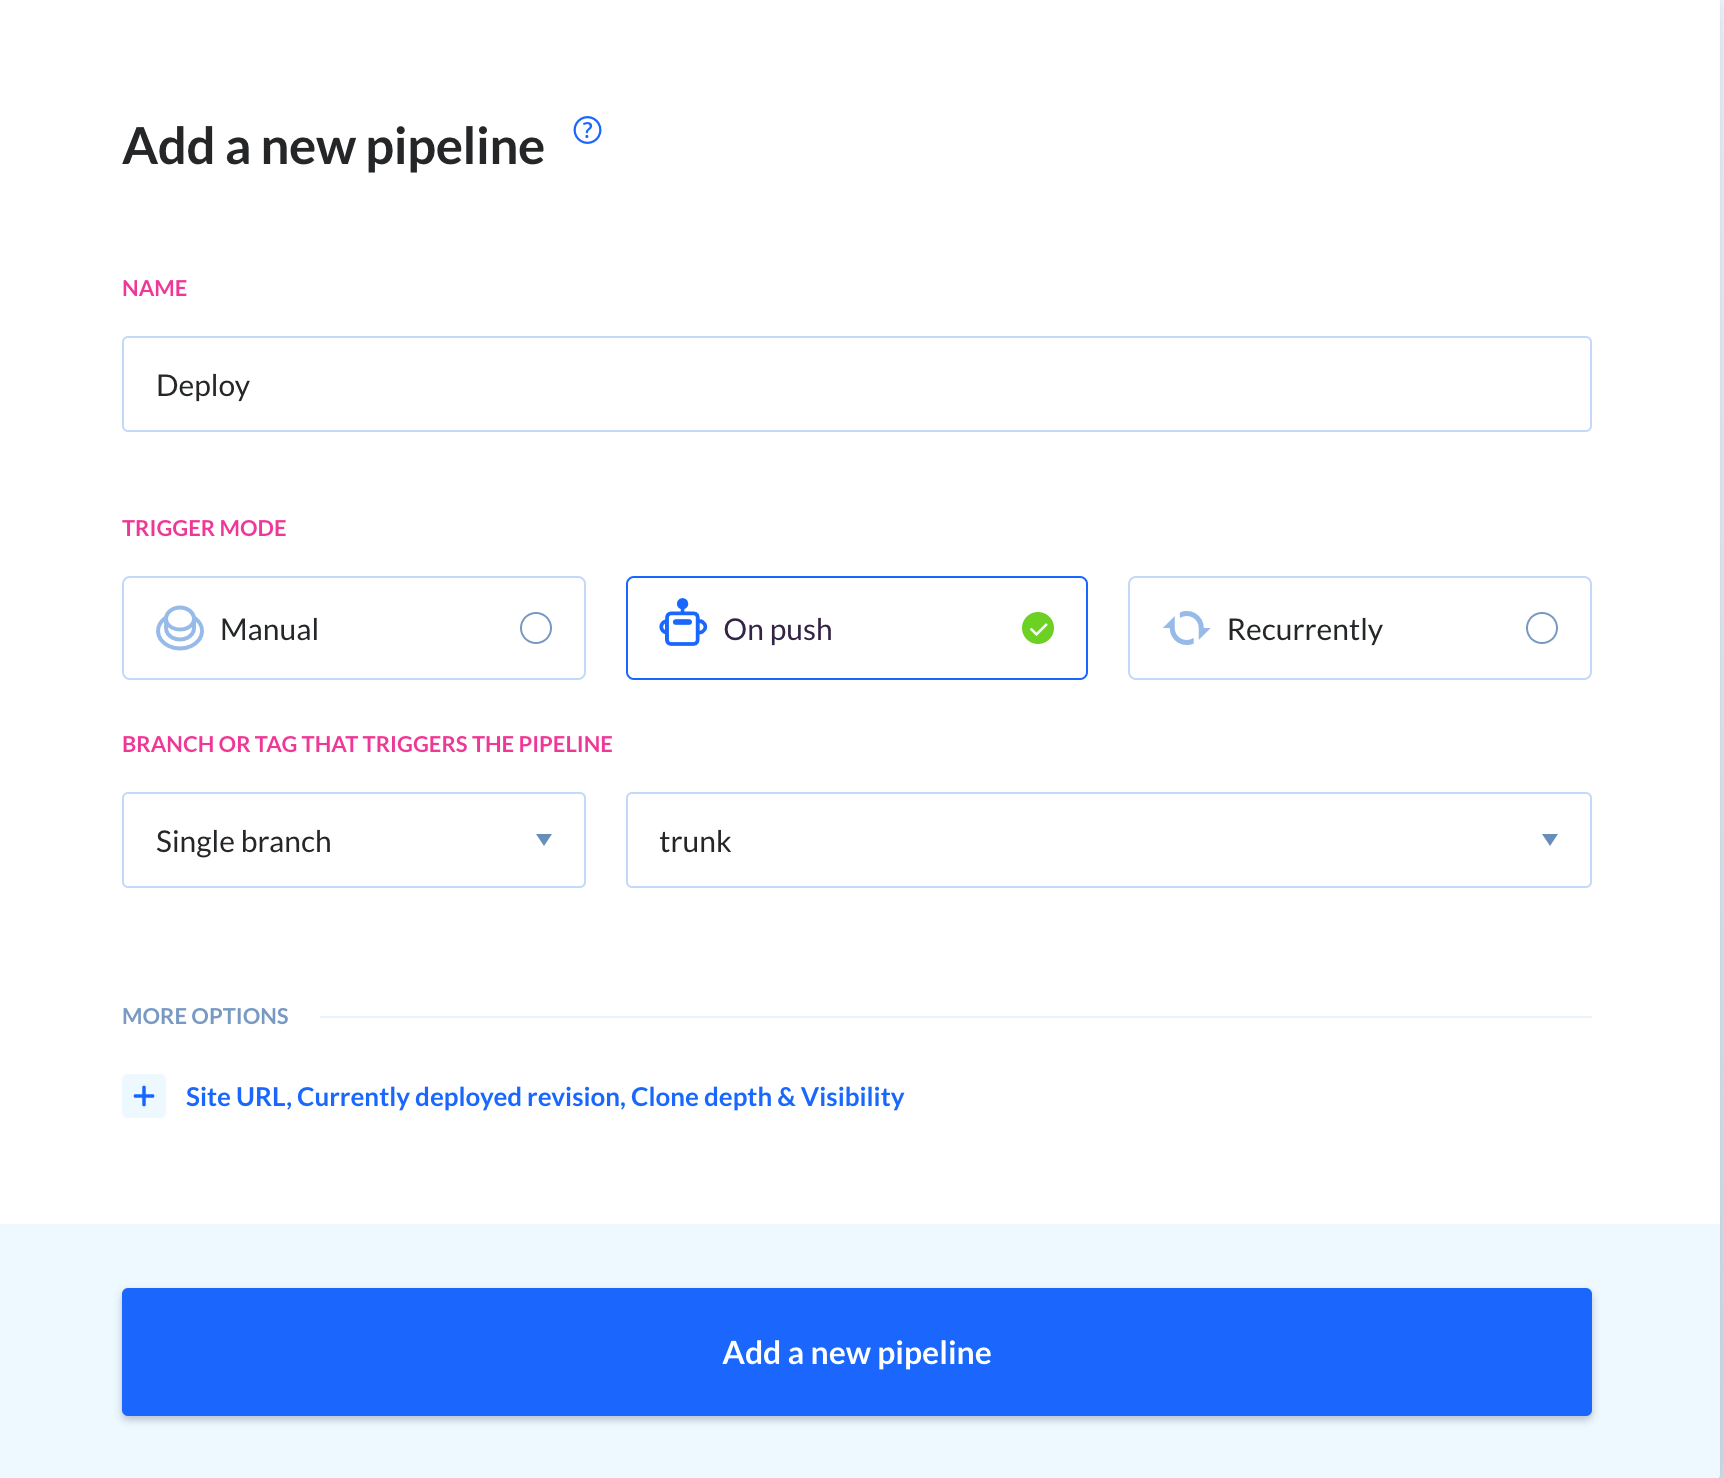
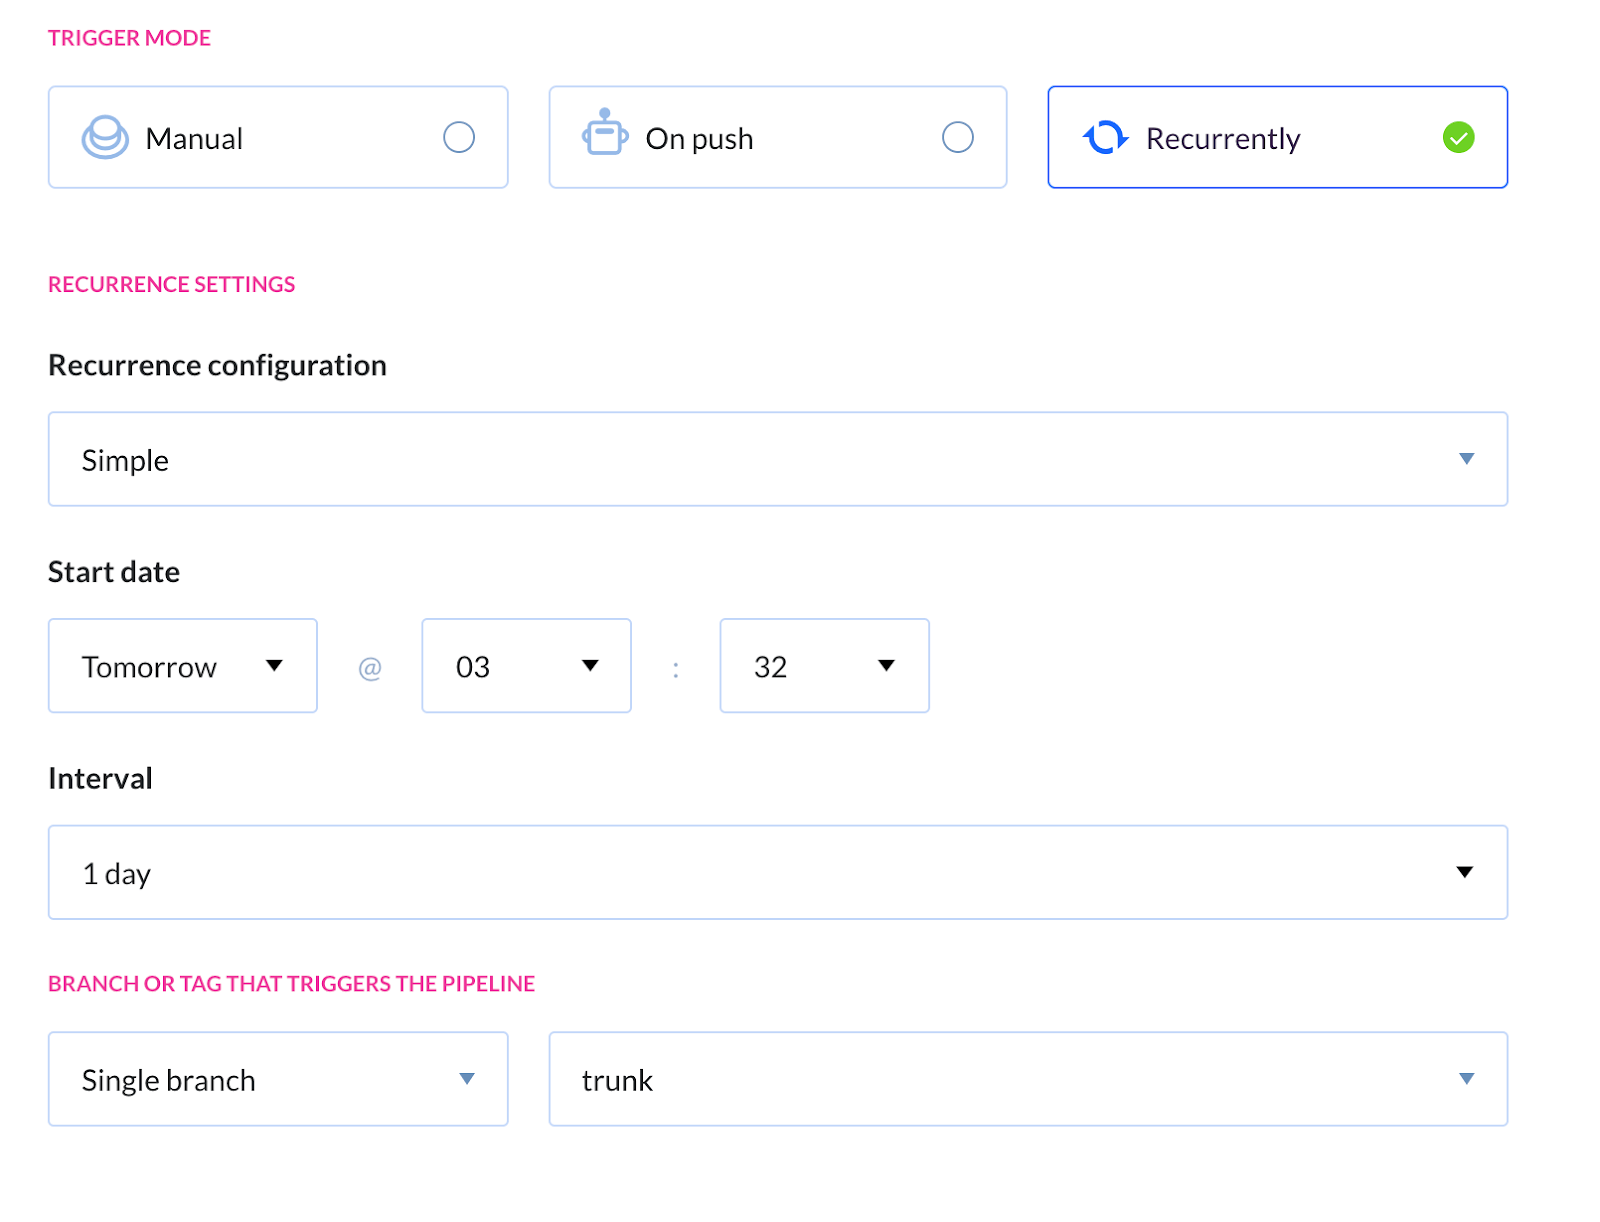
When creating a new pipeline, you need to define its name, trigger condition, and the branch to deploy. You can have a pipeline that has to be run manually, or one that will run automatically after every push to the repository. In this guide, we have selected On push as the trigger condition, and trunk as our branch:
The next screen will move you to action configuration screen. Our first pipeline will consist of three actions: Node.js (build), DigitalOcean droplet (deployment), and post-deployment notification.
Node.js
Look up Node on the action list and click it do define its details. We are using Node mostly because the WordPress theme uses Webpack which creates *.css style files once the dependencies are installed and checks js and scss files for errors. When configuring Node.js you should use the following commands:
npm install
npm run build
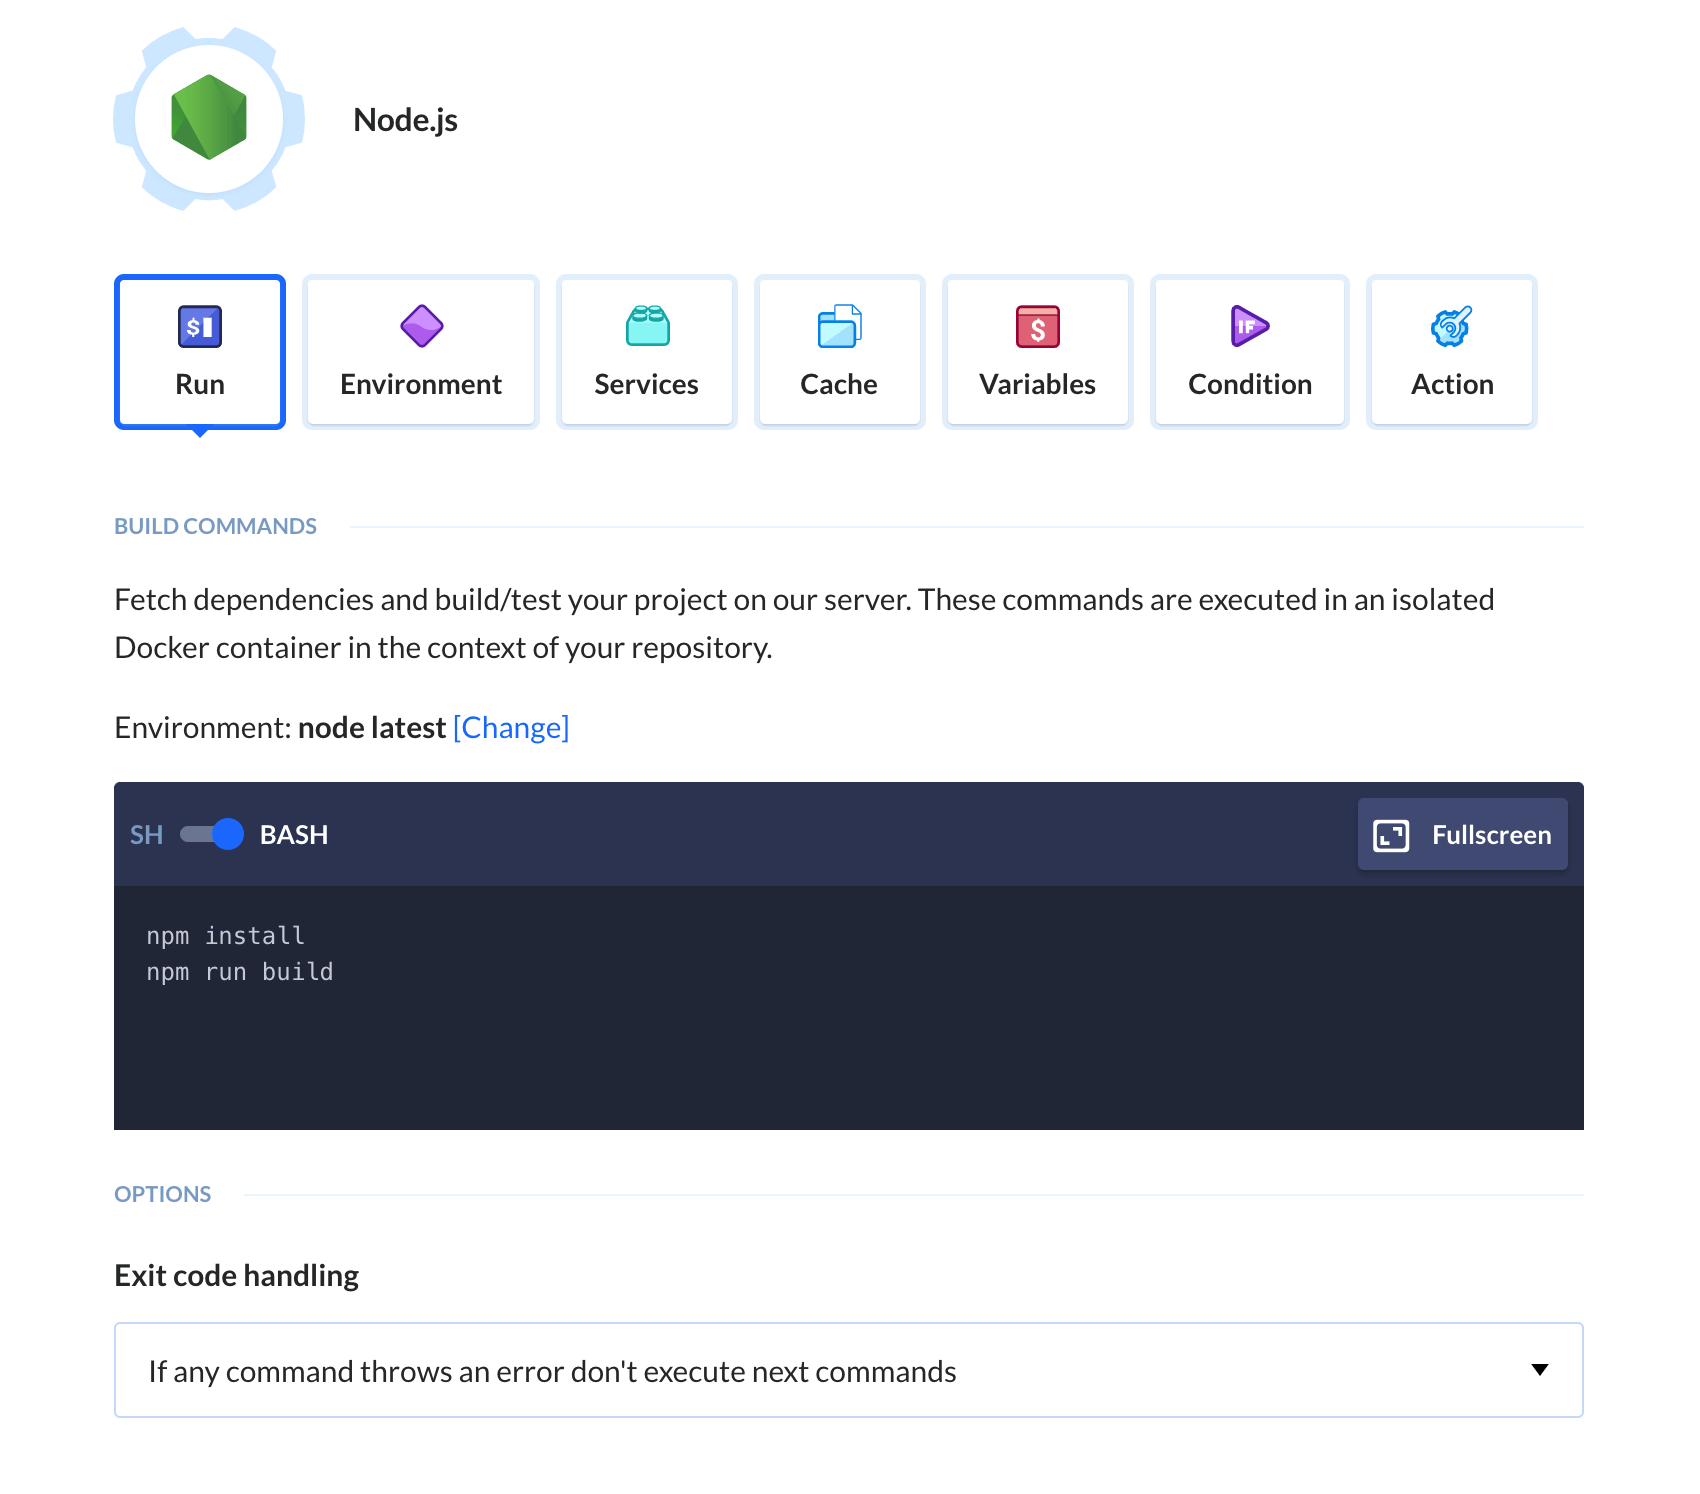
You can change the version of Node used in the Environment tab.
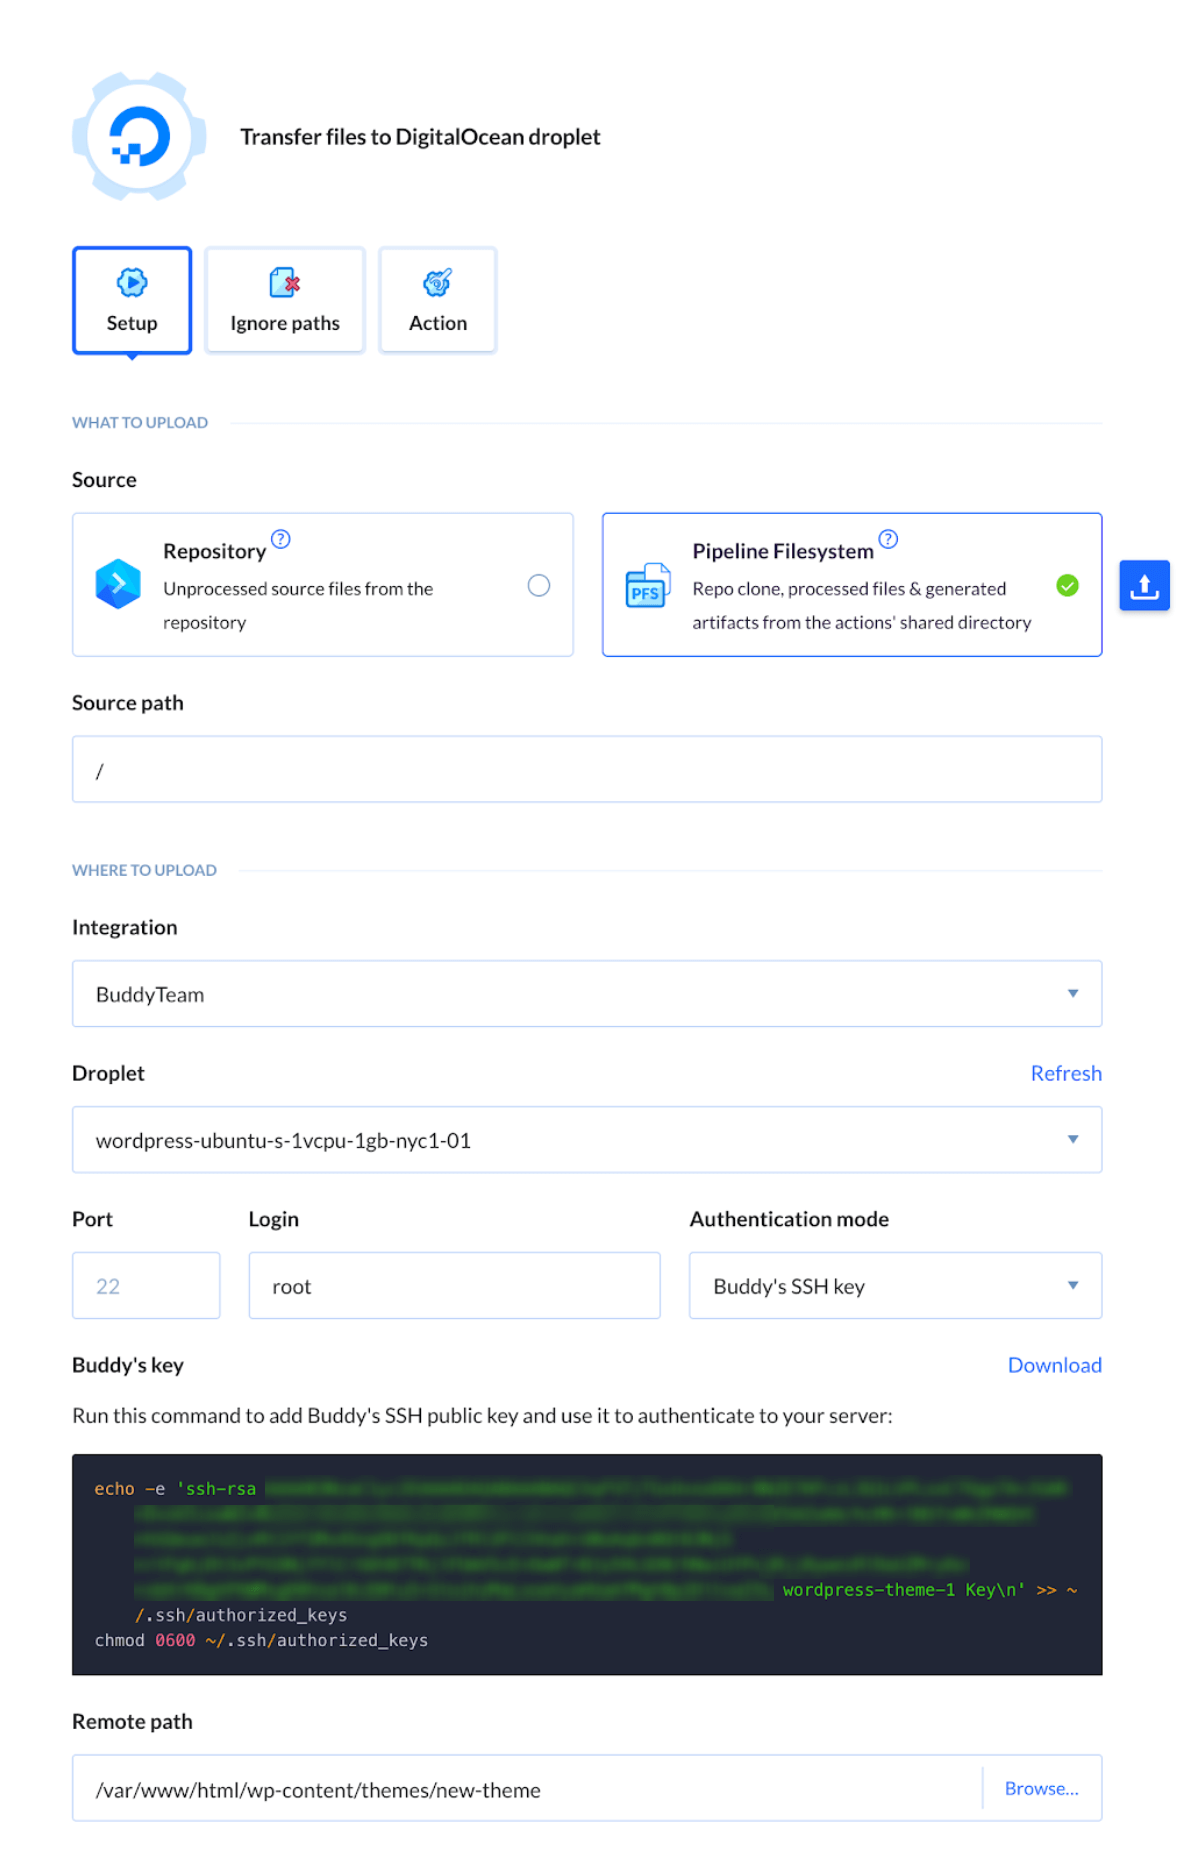
DigitalOcean Droplet
Selecting a DO droplet is not enough – we still need to allow Buddy to connect to it. In the Authentication mode select Buddy's SSH key. Now open up your terminal, and execute the following while still being connected to your droplet:
echo -e 'ssh-rsa YOUR_BUDDY_PUBLIC_HEY buddy-wordpress-page Key\n' >> ~/.ssh/authorized_keys
chmod 0600 ~/.ssh/authorized_keys
Example configuration should look something like this:
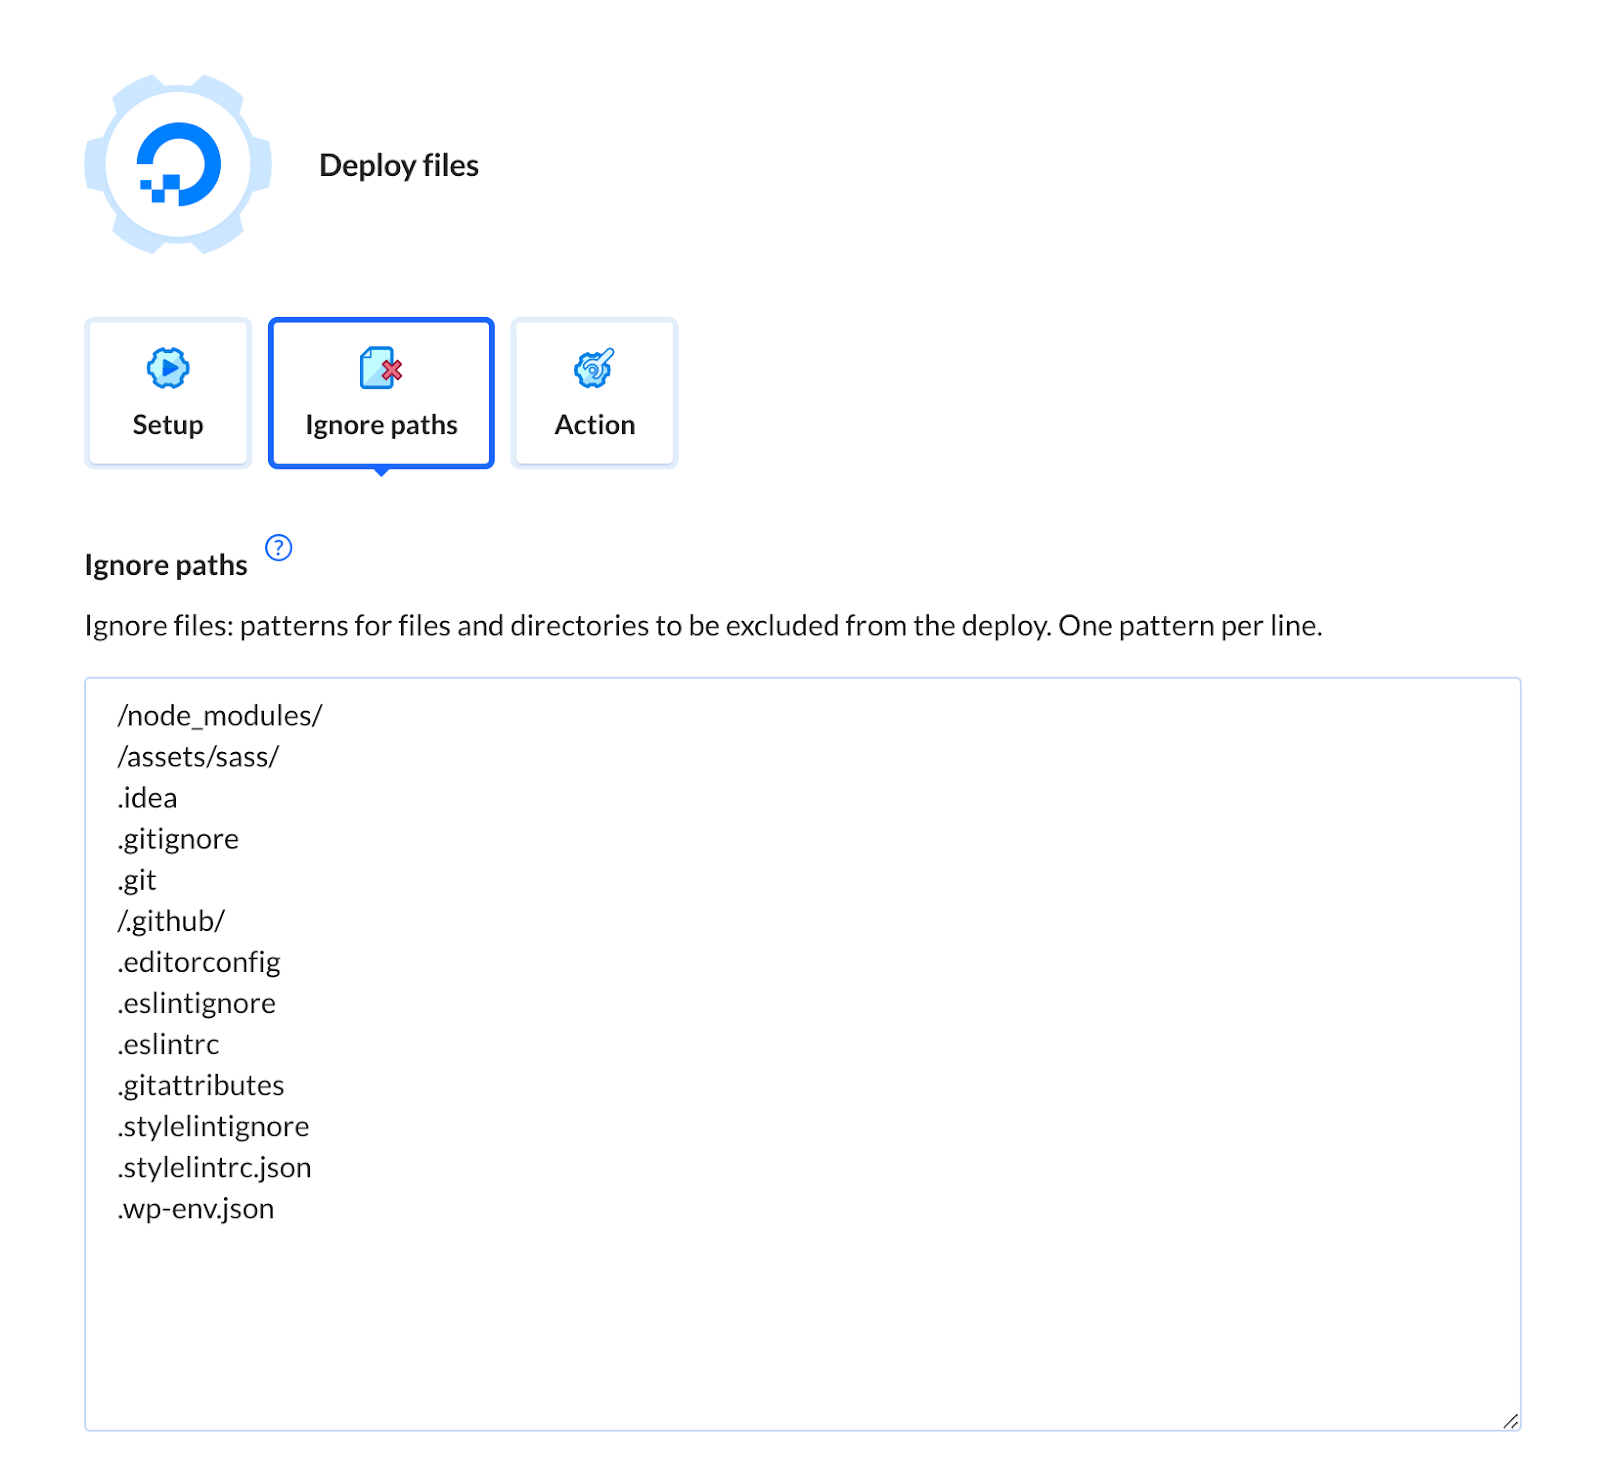
The last step of the droplet configuration would be excluding the paths that we don't want to send to the server. The Screenshot below shows some example exclusions:
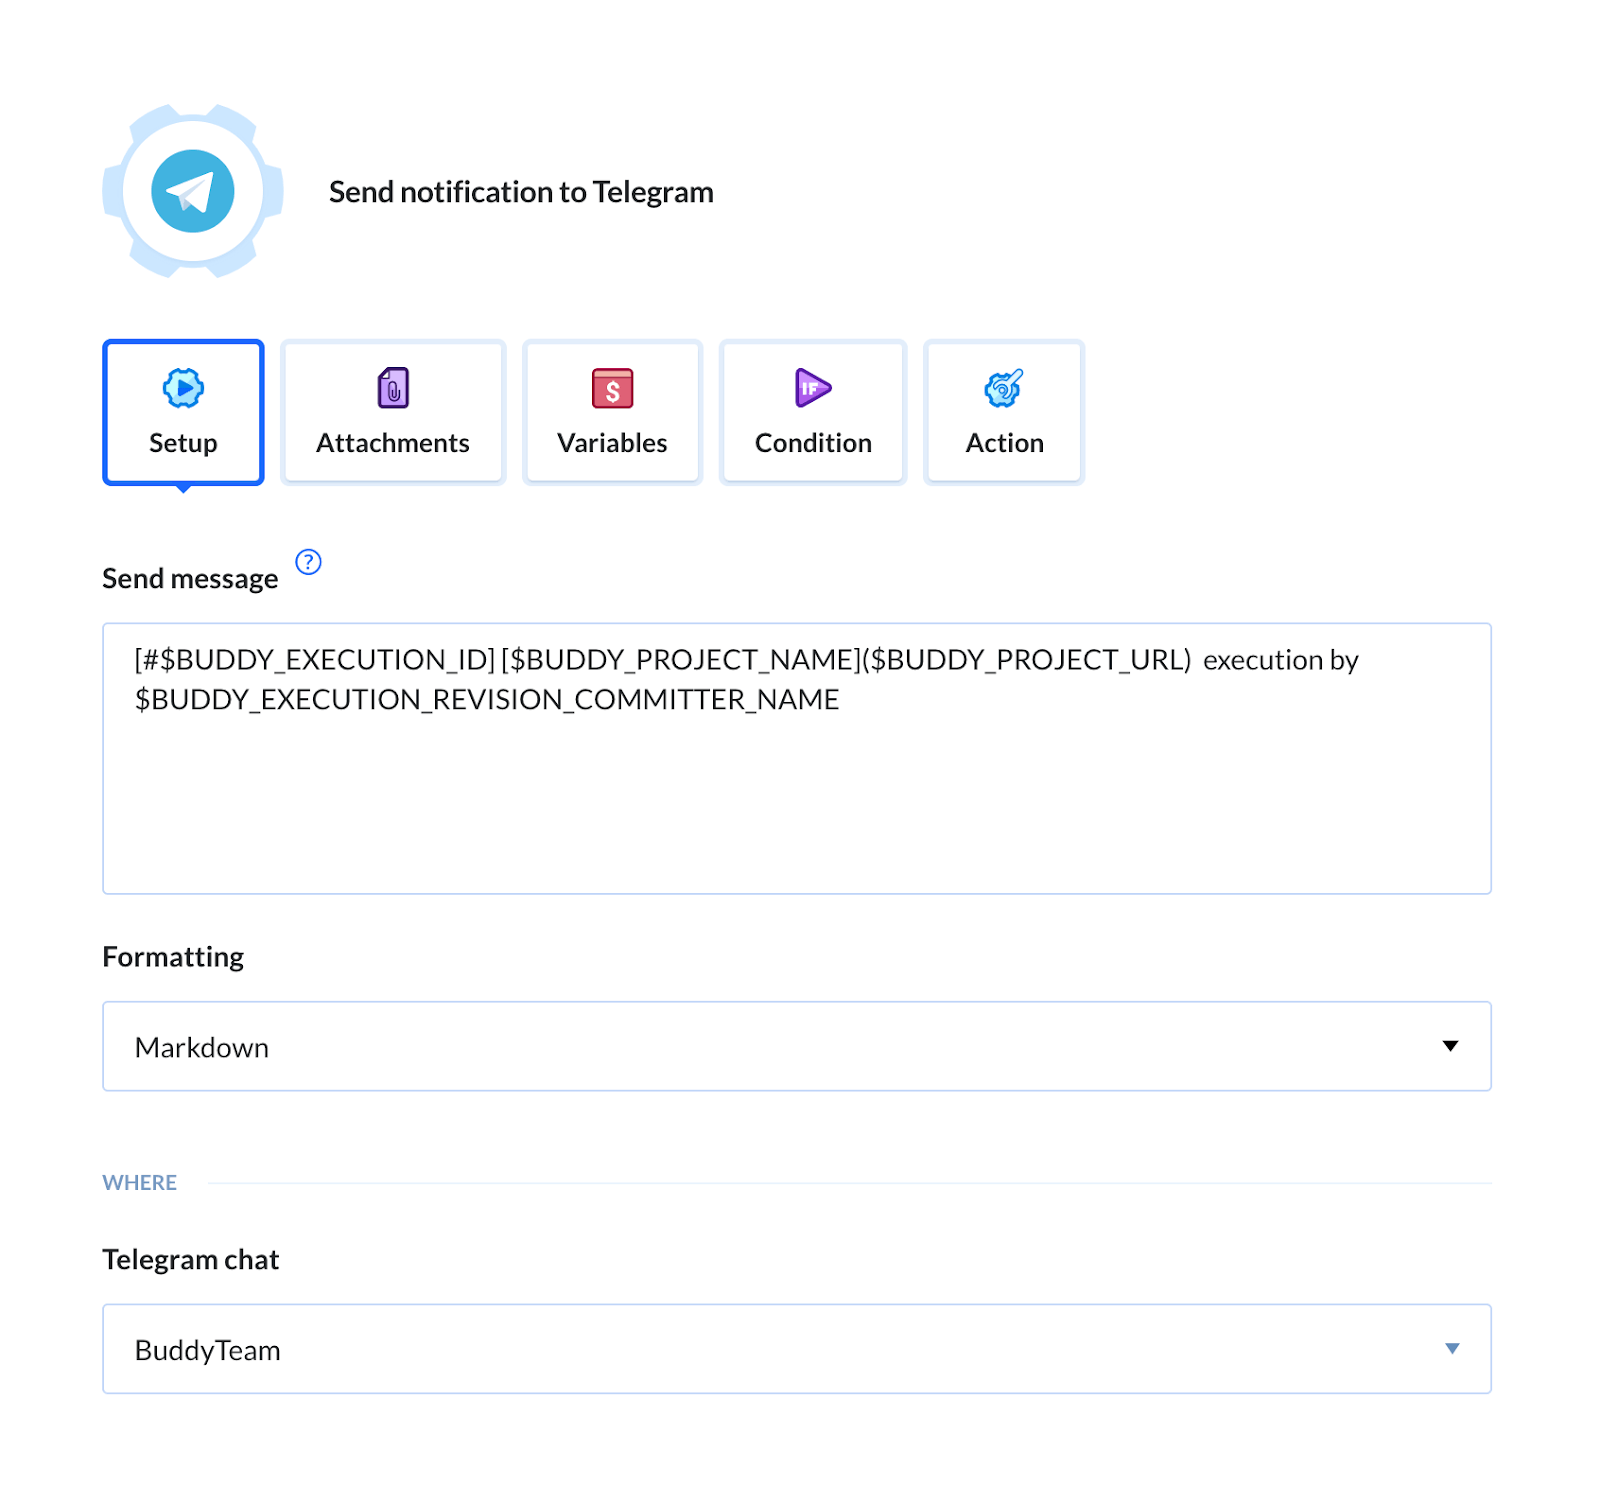
Telegram / Slack / Microsoft Teams
The last thing to do is adding a notification action that will inform our team whenever a new deployment is being made. There is a wide variety of actions you can choose from, including Slack, Email and SMS. In this guide we will use Telegram. Upon adding the action, you will have to integrate it with your Telegram account and once this is done you will be able to modify messages that your team will receive:
Our pipeline is now ready. Make a push to the trunk branch or click 'Run pipeline' to check if everything works.
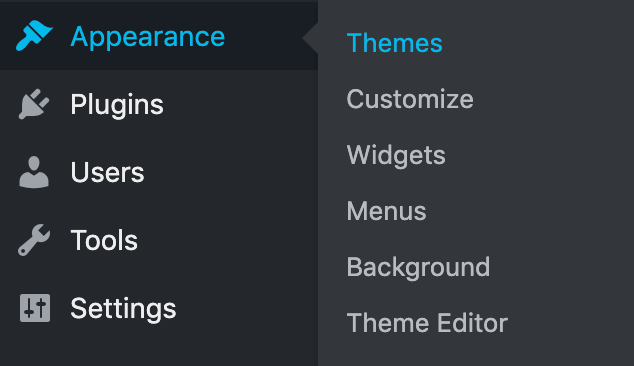
Activating the theme
Once the pipeline executes, the last thing to do is activating your new theme. Go to your WordPress admin panel and navigate to Appearance -> Themes. Click 'Activate' next to your new theme:
Monitoring your app
The existing delivery pipeline can be expanded with various actions. For example, you can add an action that will check the performance of your website using Lighthouse. If you wish to optimize the images in your theme assets, you can use the Image Compression action. Want to snipe down those pesky 404's? Use our Link Validator to audit the URL's on your website. You can add those actions to your current pipeline, or create a new one that will perform those tests recurrently.
Summary
In this guide we have went through the process of configuring your DigitalOcean droplet and uploading your theme to it using Buddy. Those are the basics and the possibilities are endless, so go out there and create your own WordPress CI/CD delivery system.