如何自动化部署Python/Flask至Azure应用服务
Flask is a simple Python-based web framework with a small core and no ORM. As such it is devoid of advanced features like url routing or template engine. Combined with its Pythonic structure, Flask is very easy to get started with.
This guide will focus on setting a Continuous Delivery pipeline for a Python Flask application. Enabling CI/CD in the delivery process unlocks a series of benefits:
- deployment automation lets you immediately preview changes and reduces the risk of manual error
- unit and integration tests allows for a rapid response to any issues
- releasing sofware in shorter circles lets you get more feedback and faster introduce new features
Upon reading this guide you will be able to automatically build a Flask project and deploy it to the Azure App service with Kudu and Buddy CI/CD.
For the purposes of this tutorial, we'll use a simple Flask project hosted on GitHub. You can fork and clone the repository here.
Deployment automation alone is worth the effort, so, without further ado, let's get down to business.
Step 1: Configuring Azure App Service
We will begin by connecting to the Azure App Service through the command-line-interface.
- Sign in to the Azure portal and open the Azure CLI by selecting the Cloud Shell button on the portal's toolbar
- In the shell, clone the repository and change the directories in the repository using the following commands:
git clone https://github.com/<your-alias>/python-sample-vscode-flask-tutorial
cd python-sample-vscode-flask-tutorial
- Use Azure
webapp upto create an App Service and make the initial deployment of your app:
az webapp up -n <your-appservice>
your-appservice must be unique across Azure.
- Set the config for the App Service to use a custom startup command for the Flask Application using gunicorn:
az webapp config set -g <your-resource-group> -n <your-appservice> --startup-file <your-startup-file-or-command>
The startup file in our case will be startup.txt.
- Wait for the service to be up and running at
http://<your-appservice>.azurewebsites.net.
Step 2: Connecting Buddy to GitHub
- Sign up to Buddy with your GitHub account at http://app.buddy.works/
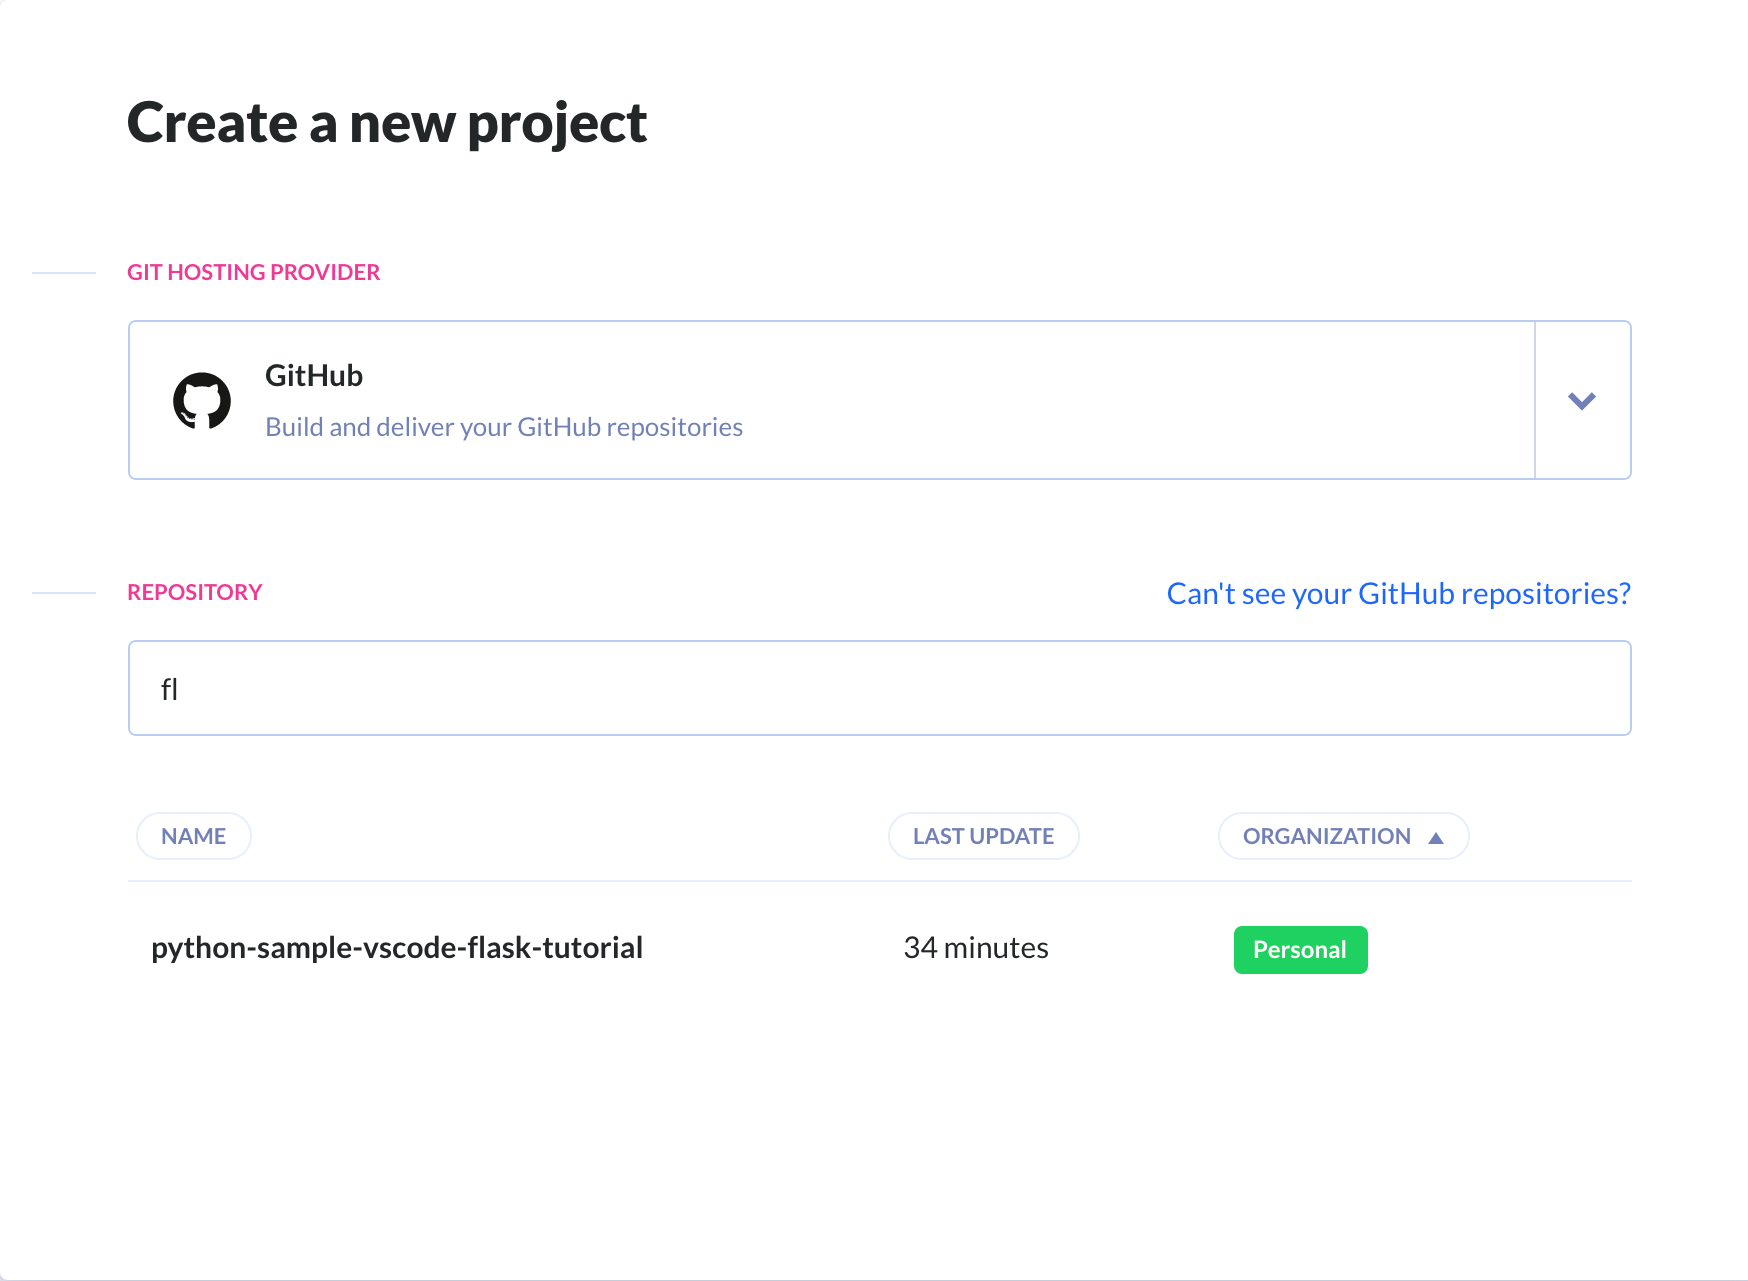
- Create a new project and select the Flask project from the list.
Of course you can select a different provider than GitHub. Buddy natively supports Bitbucket and GitLab, or any private Git repository.
Getting Details from Azure App Service
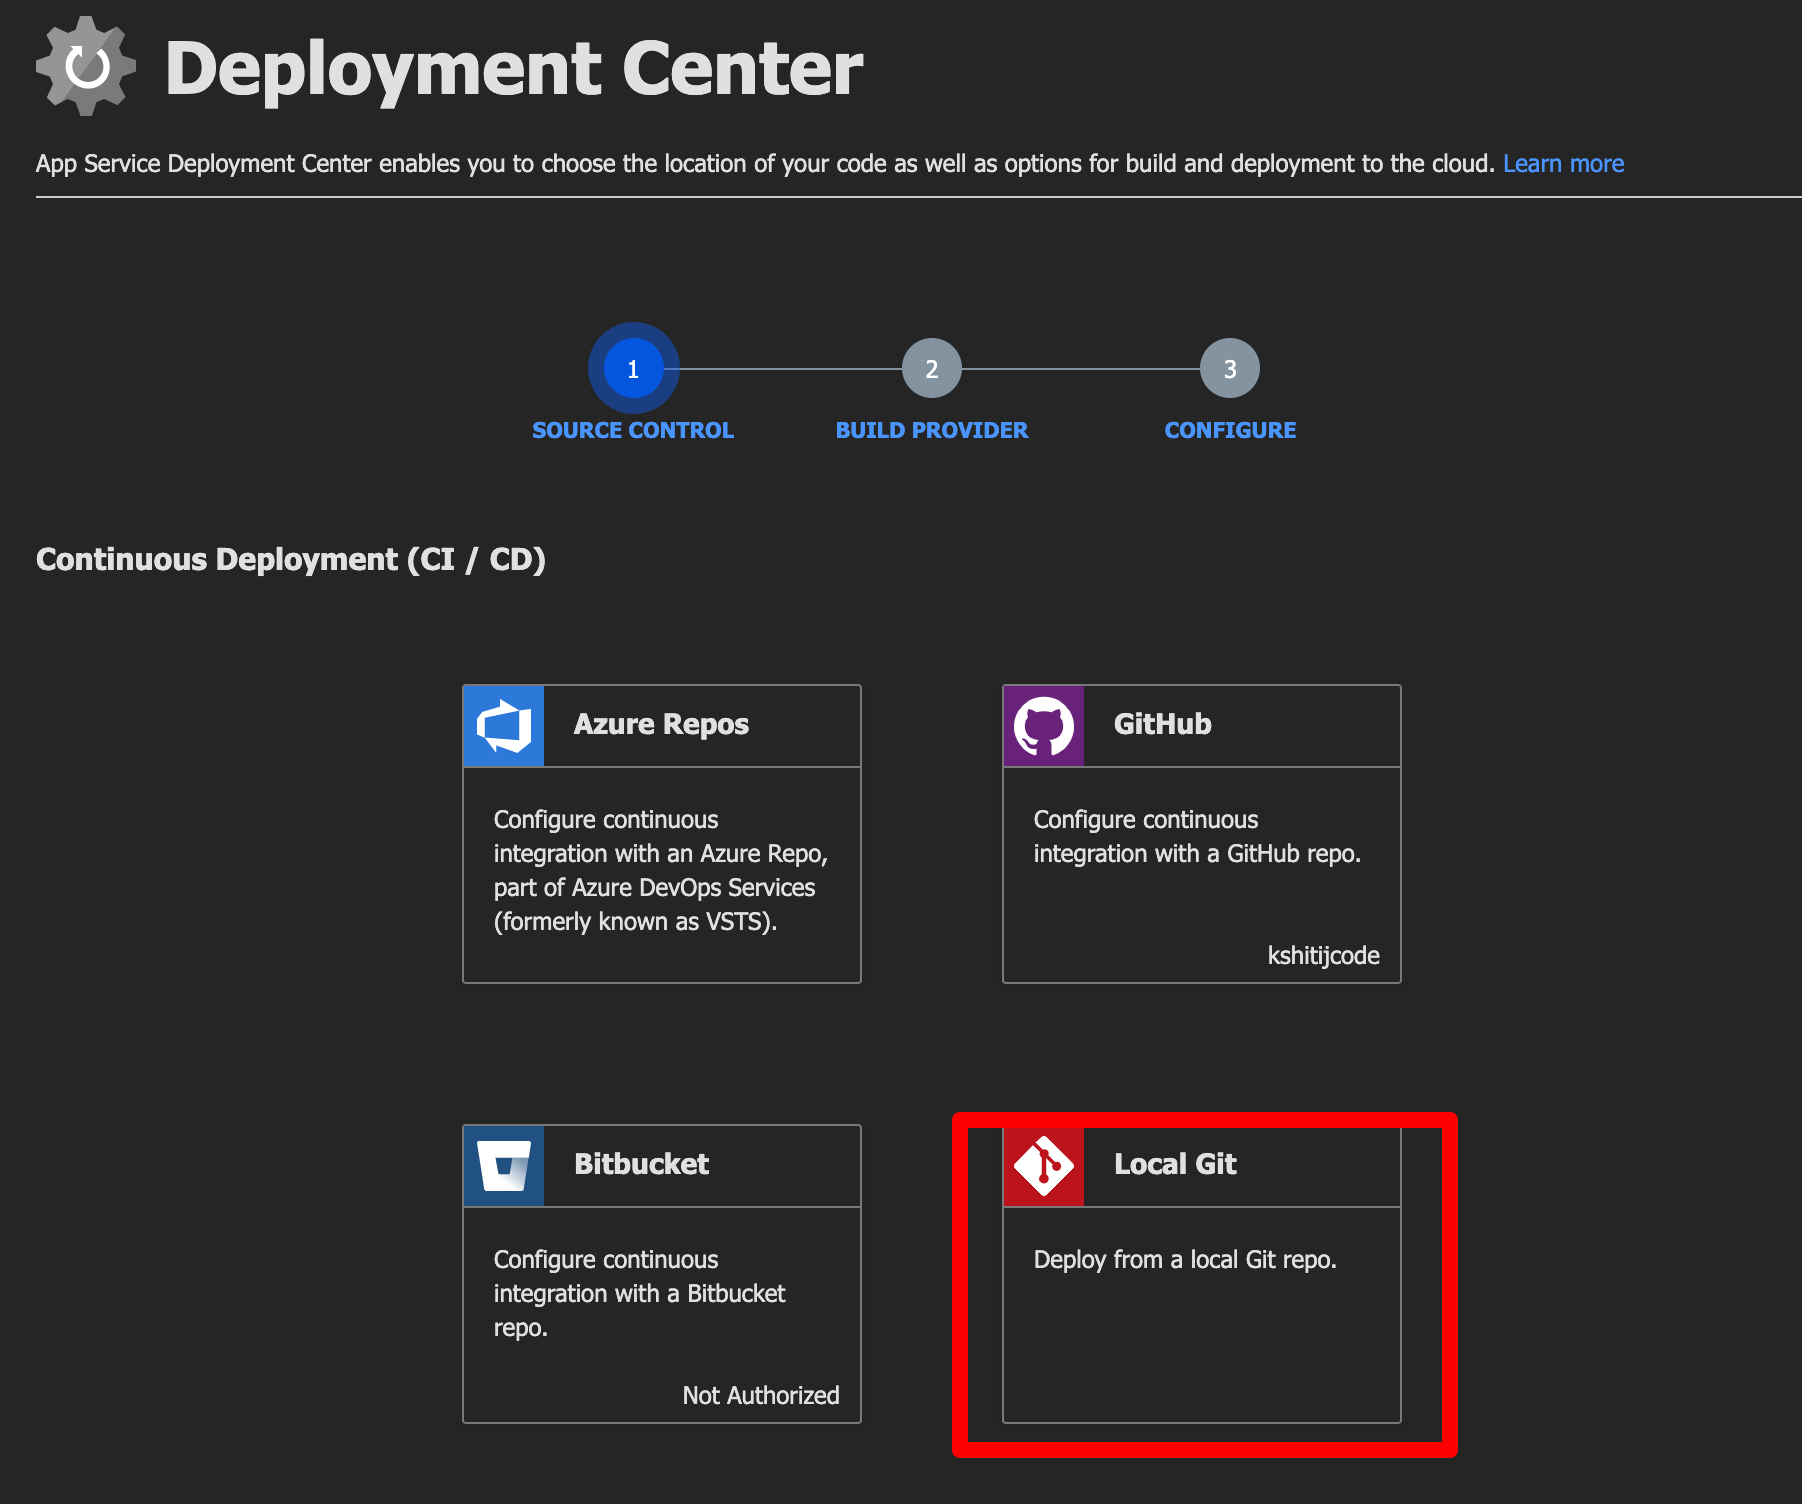
- Go to the Azure App and click on the Deployment Center blade.
- Select the Local Git option and click continue:
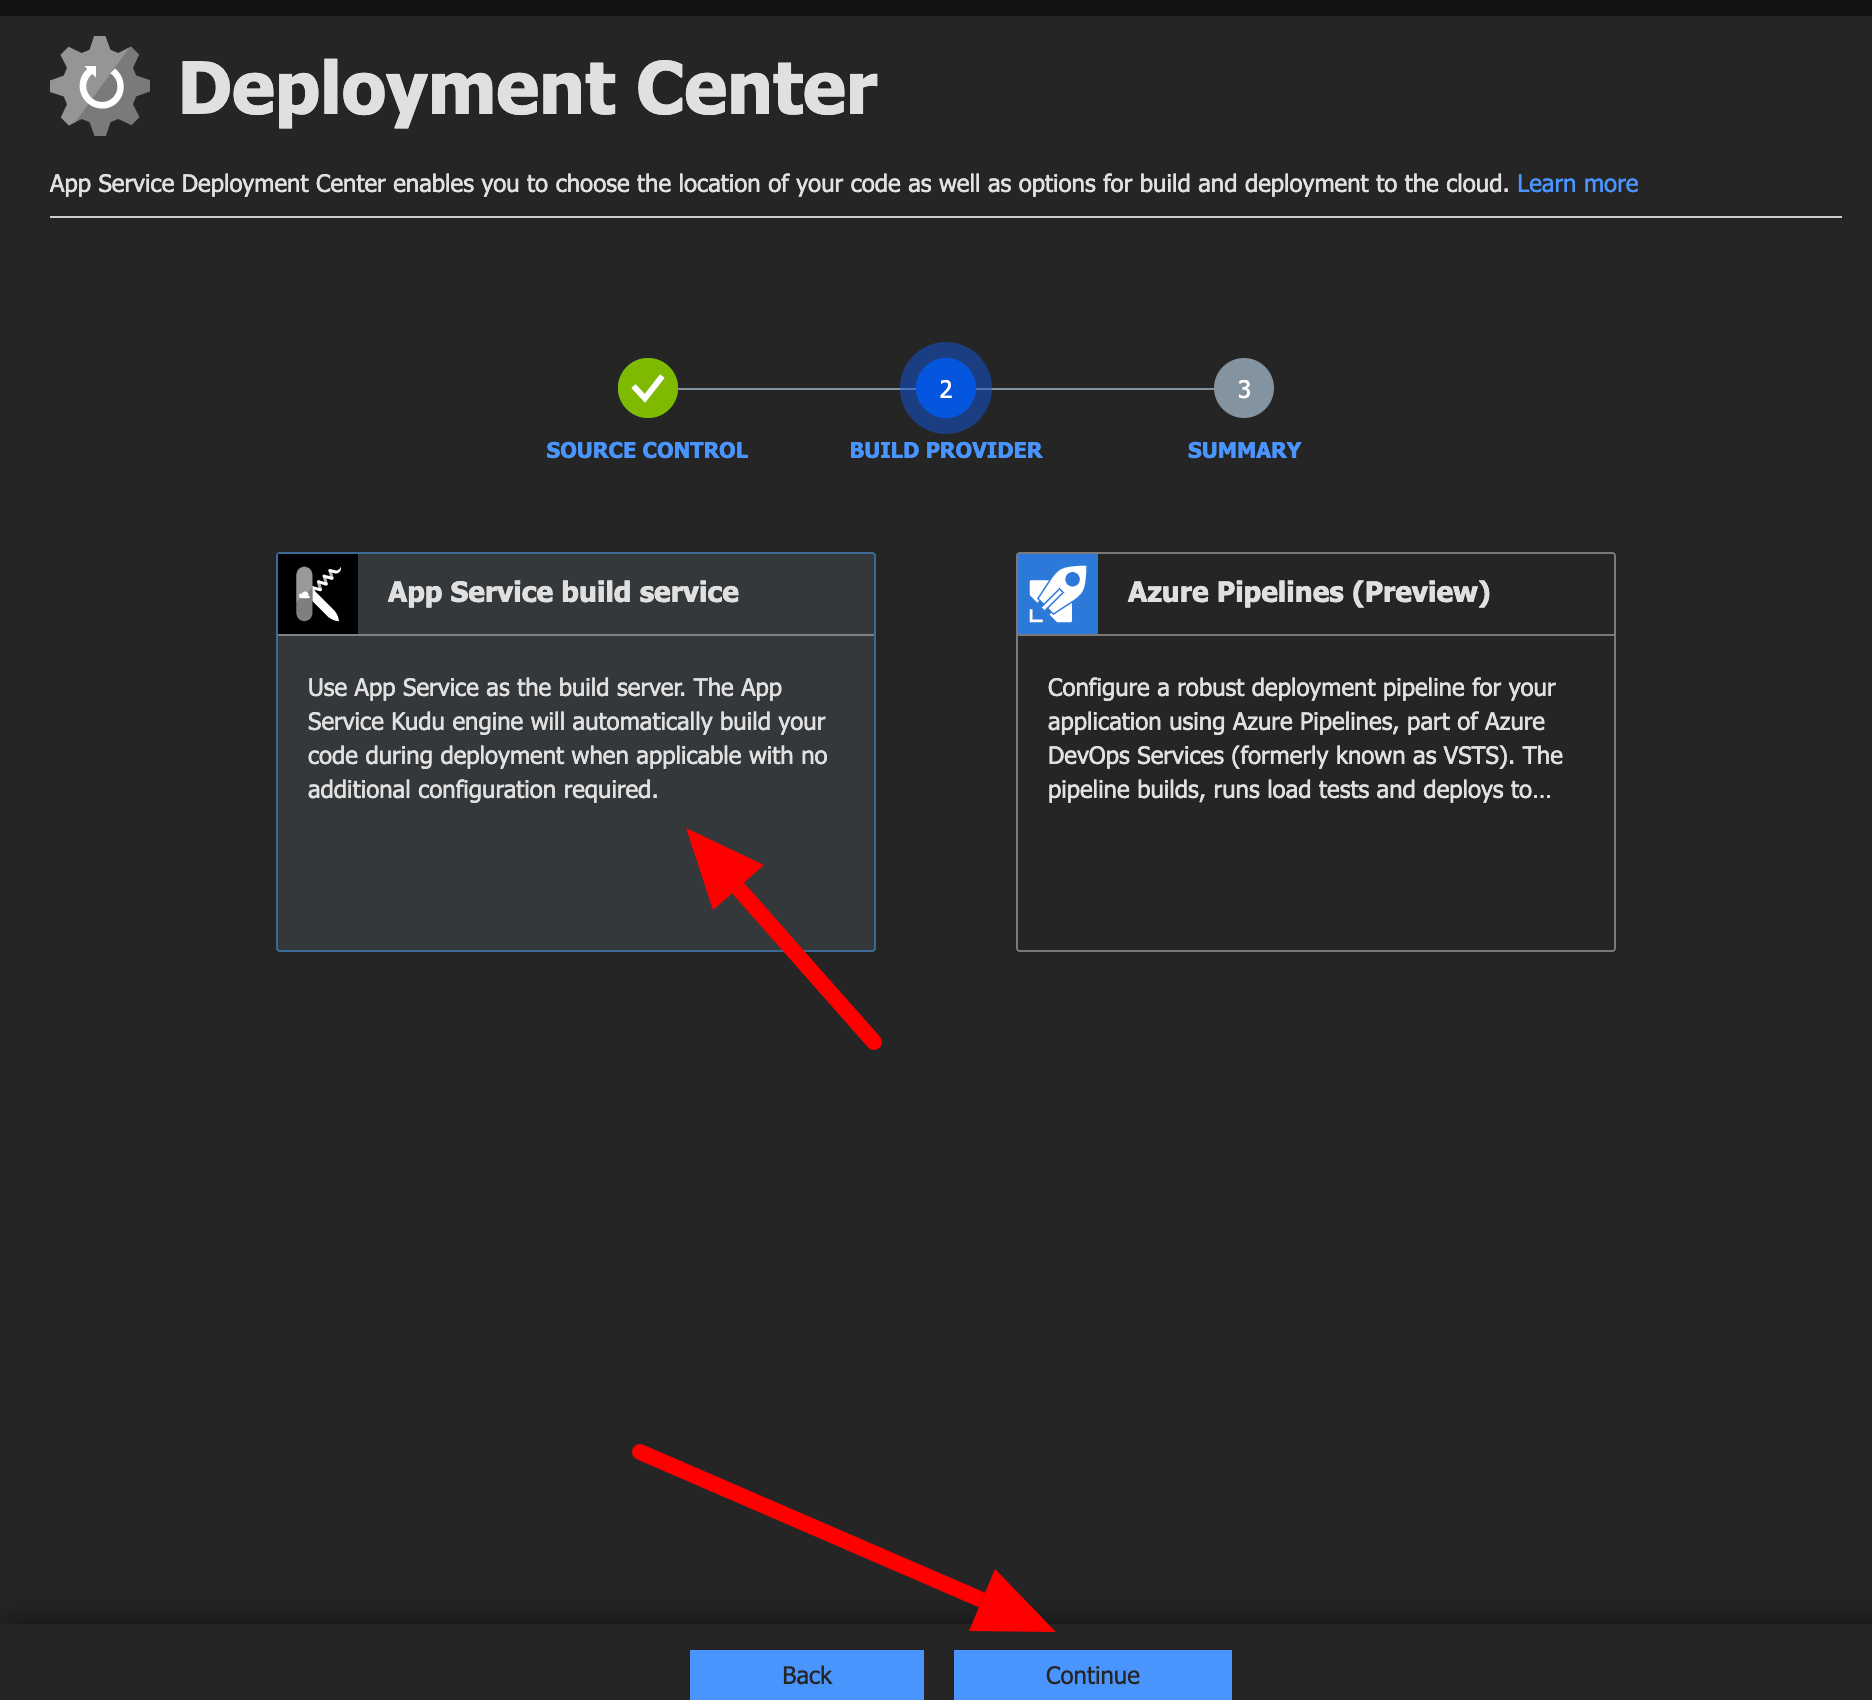
- Select App Service build service and click the button to proceed:
- Switch to the Deployment Credentials tab and copy the Git Clone URL. We will use the URL in later steps.
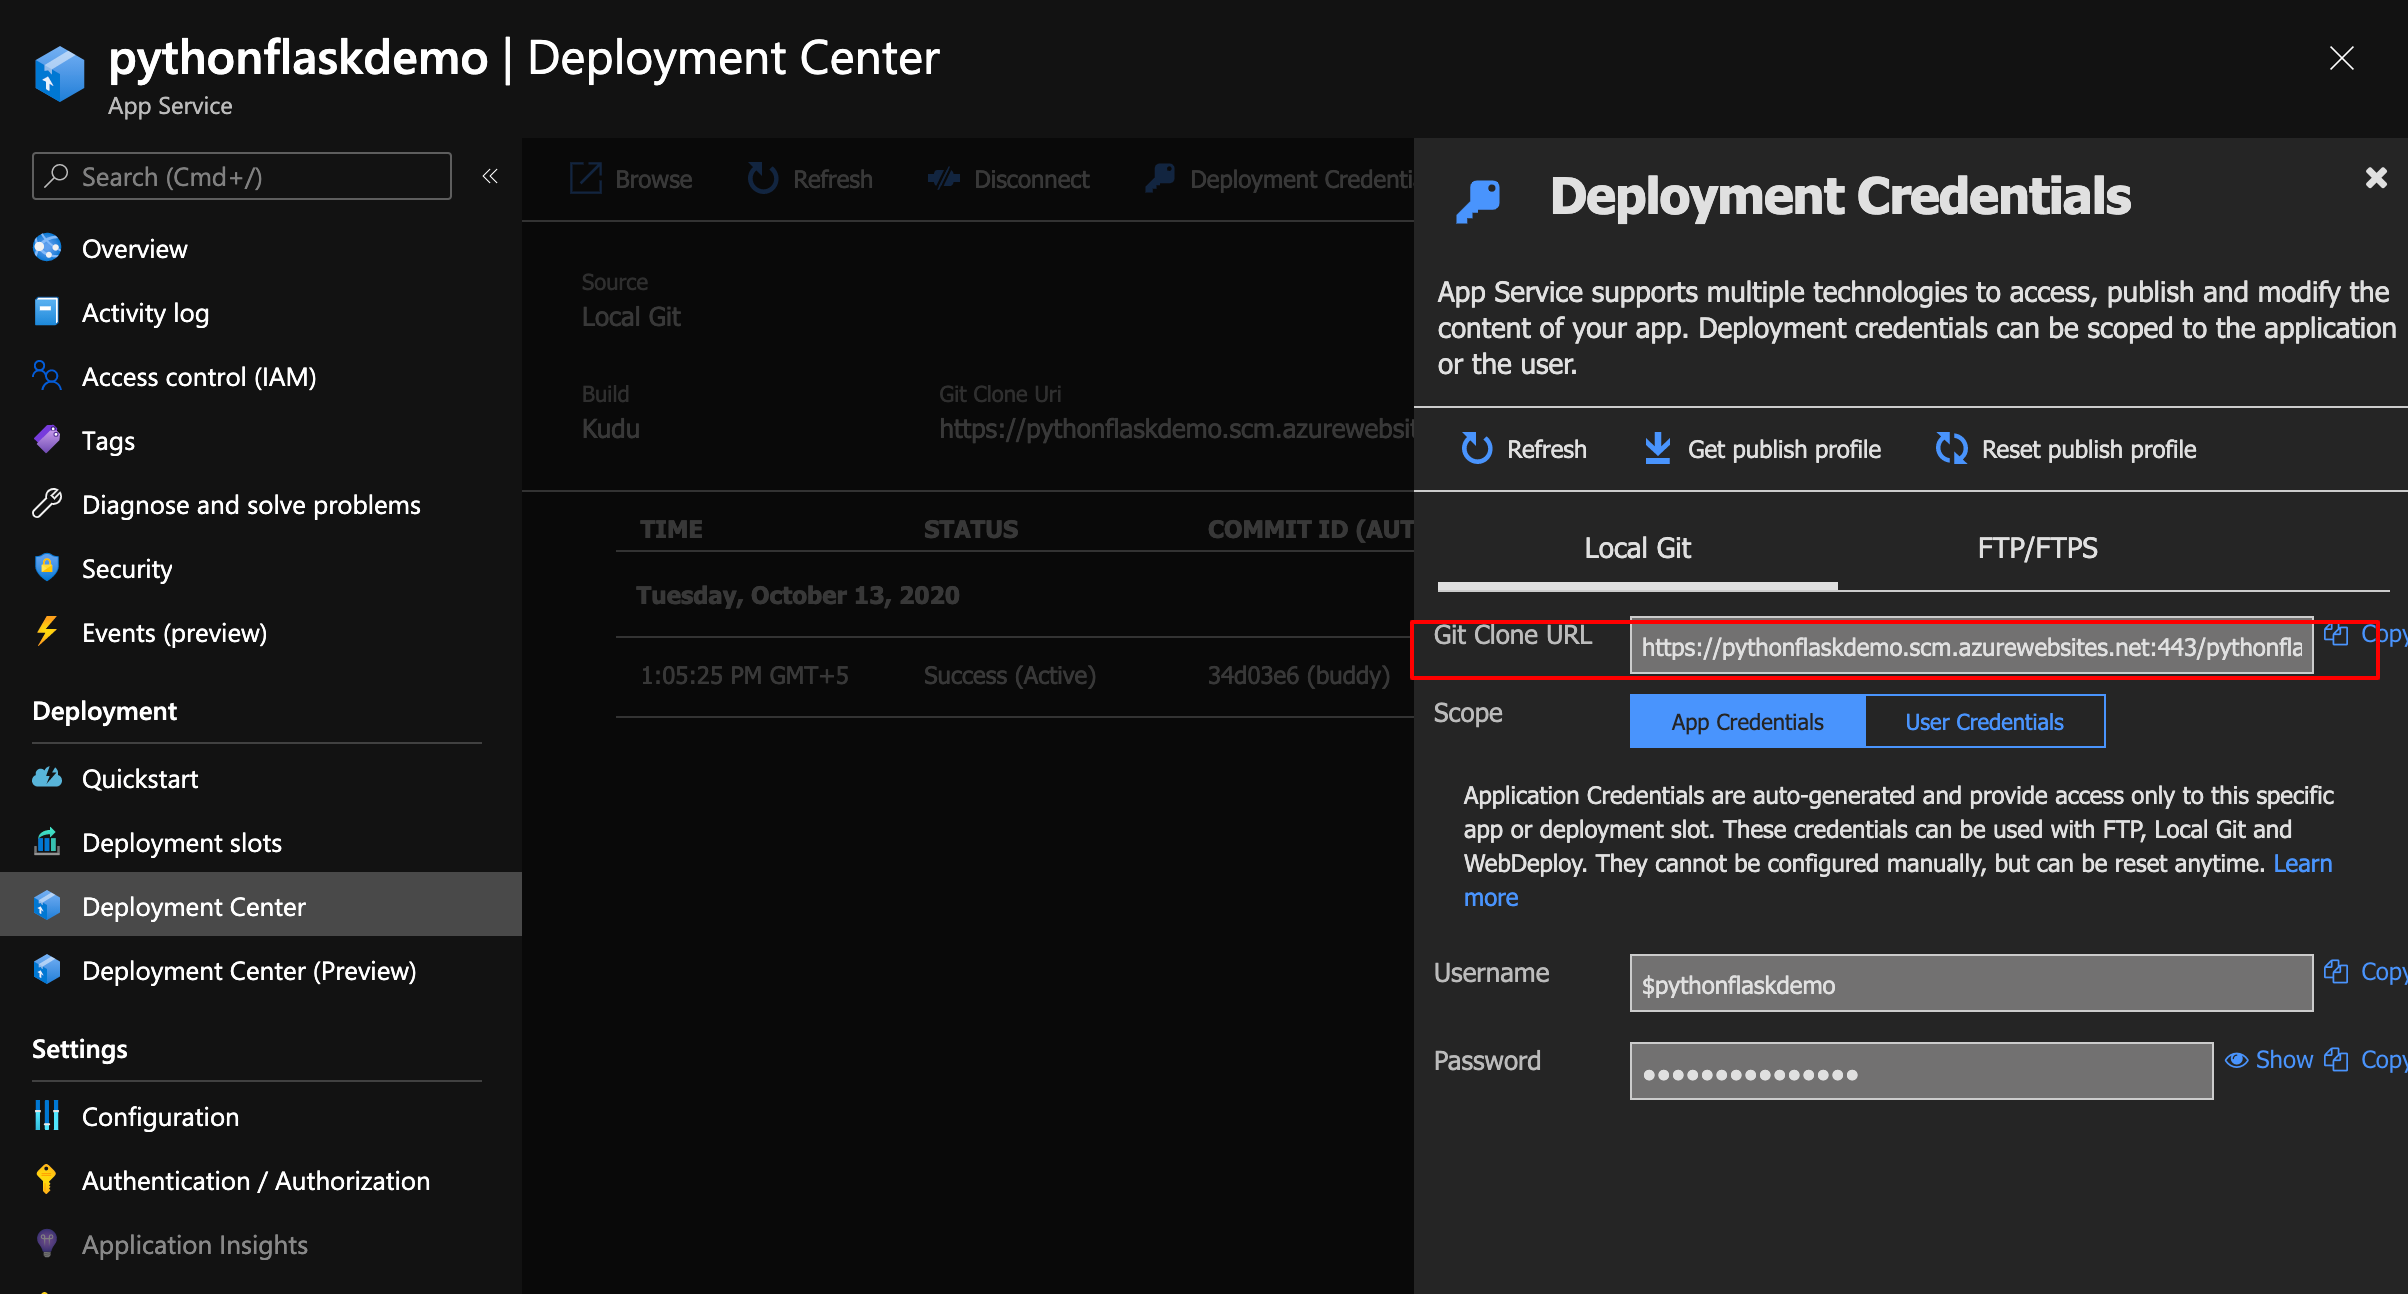
- Click Get Publish Profile to download the credentials required to authenticate Buddy in Azure.
Step 3: Connecting Buddy to Azure
In this step, we'll configure a pipeline that will push files to the App Service.
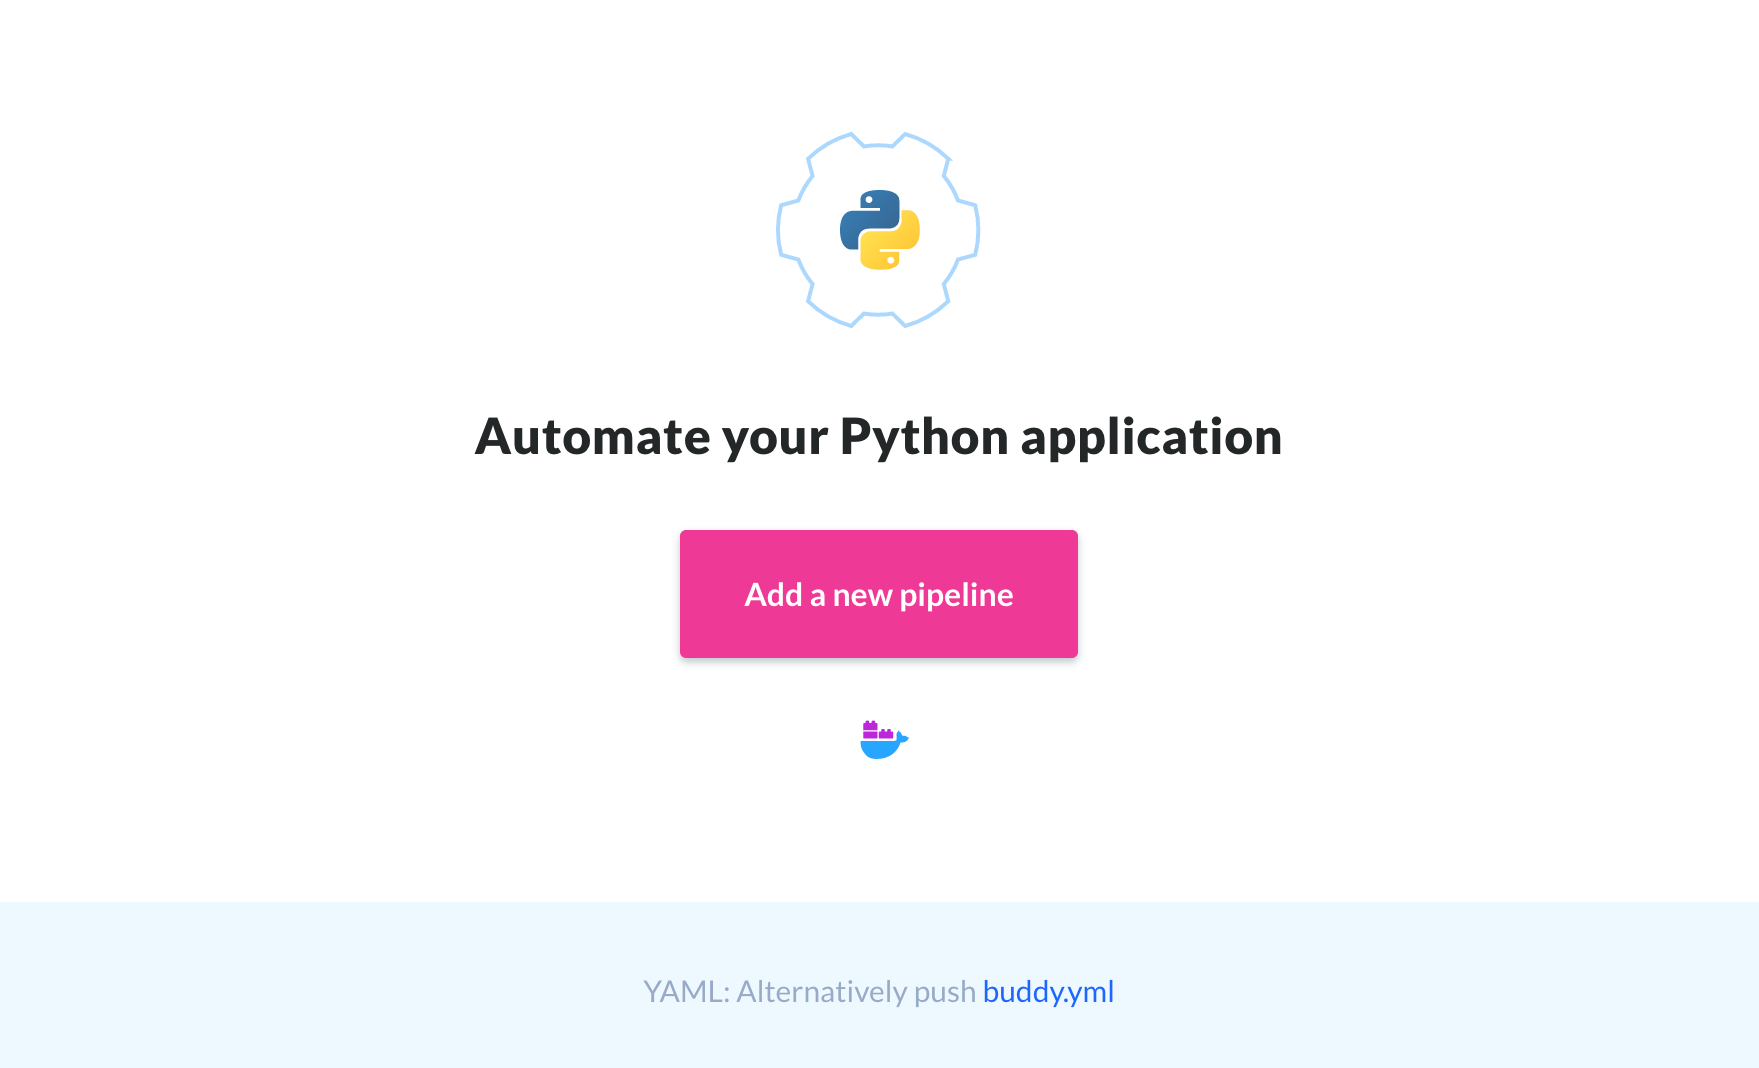
- Add a New Pipeline
- Fill in the pipeline details:
- Name: A telling name of the pipeline, e.g. 'Deploy to Azure App Service'
- Trigger Mode: Select whether you want the pipeline to execute automatically on push, recurrently on a time interval, or manually on click
- Branch or Tag: Enter the branch, tag, or wildcard that you want to deploy
When ready, click Add Pipeline:
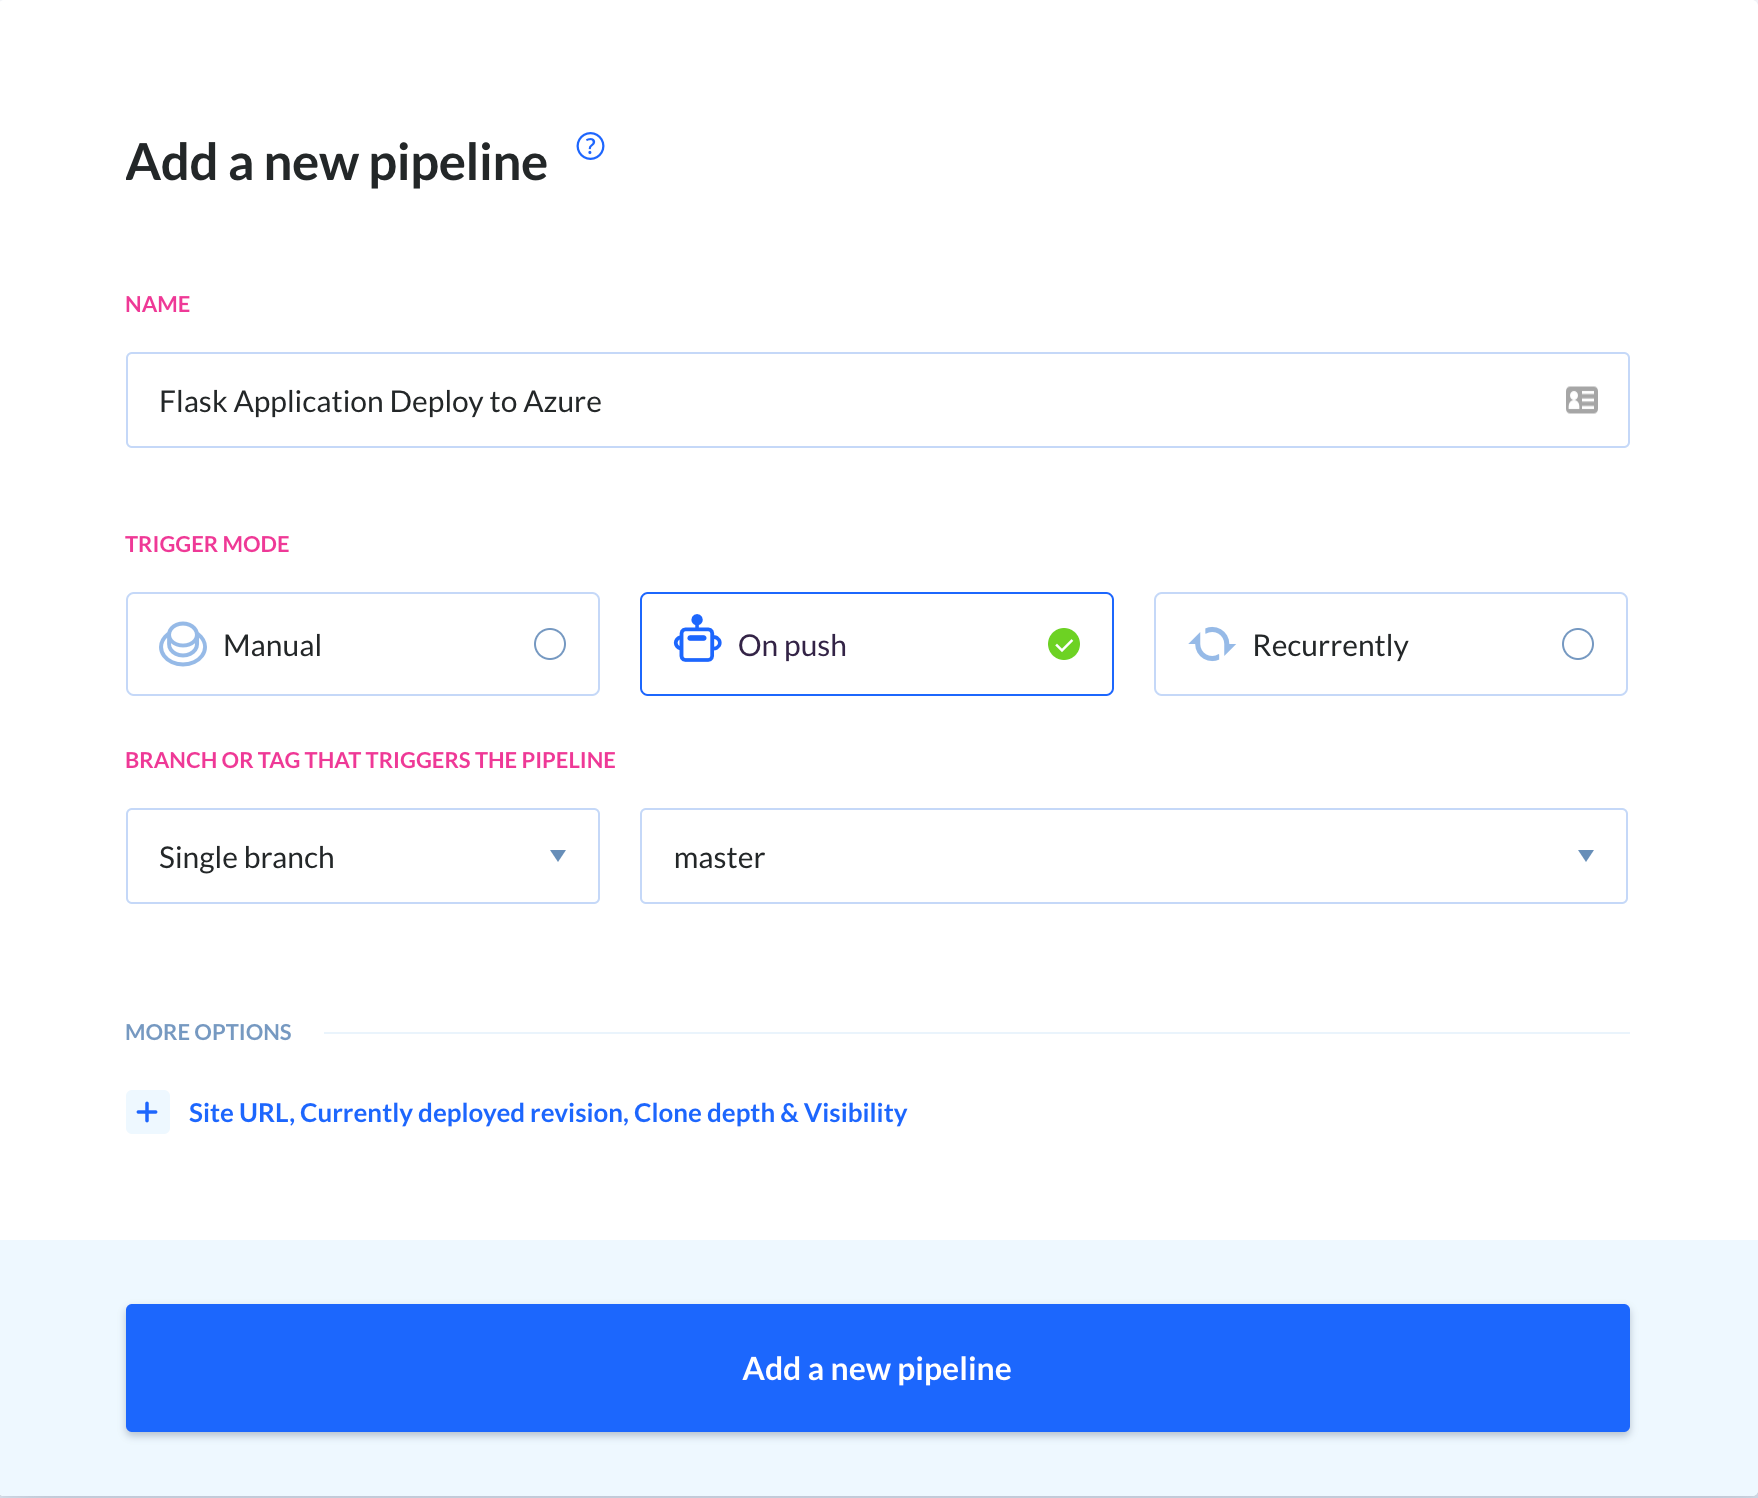
The above configuration, will deploy to Azure App Service on every push to the master branch of our repository.
- Select Azure App Service from the action roster:
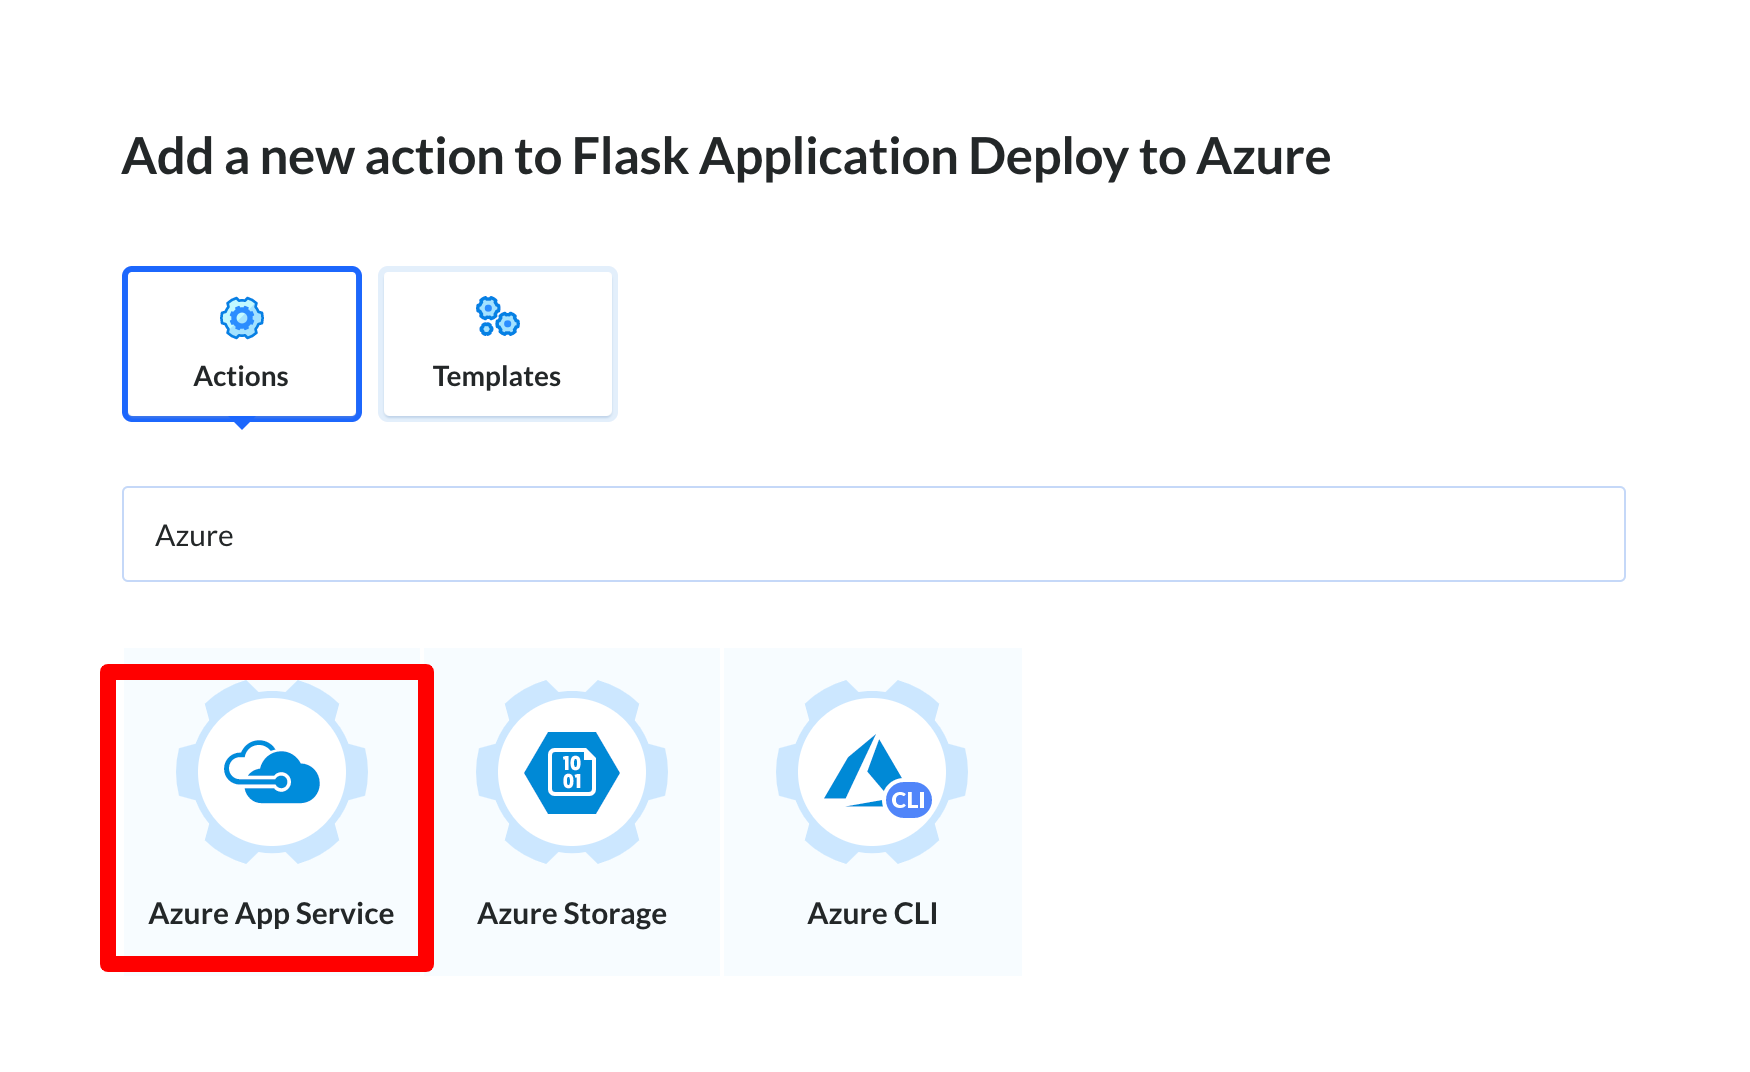
- Here you need to set up the deployment credentials that you downloaded from your App Service:
- URL: The Git URL copied before`
- Login:
userName - Password:
userPWD
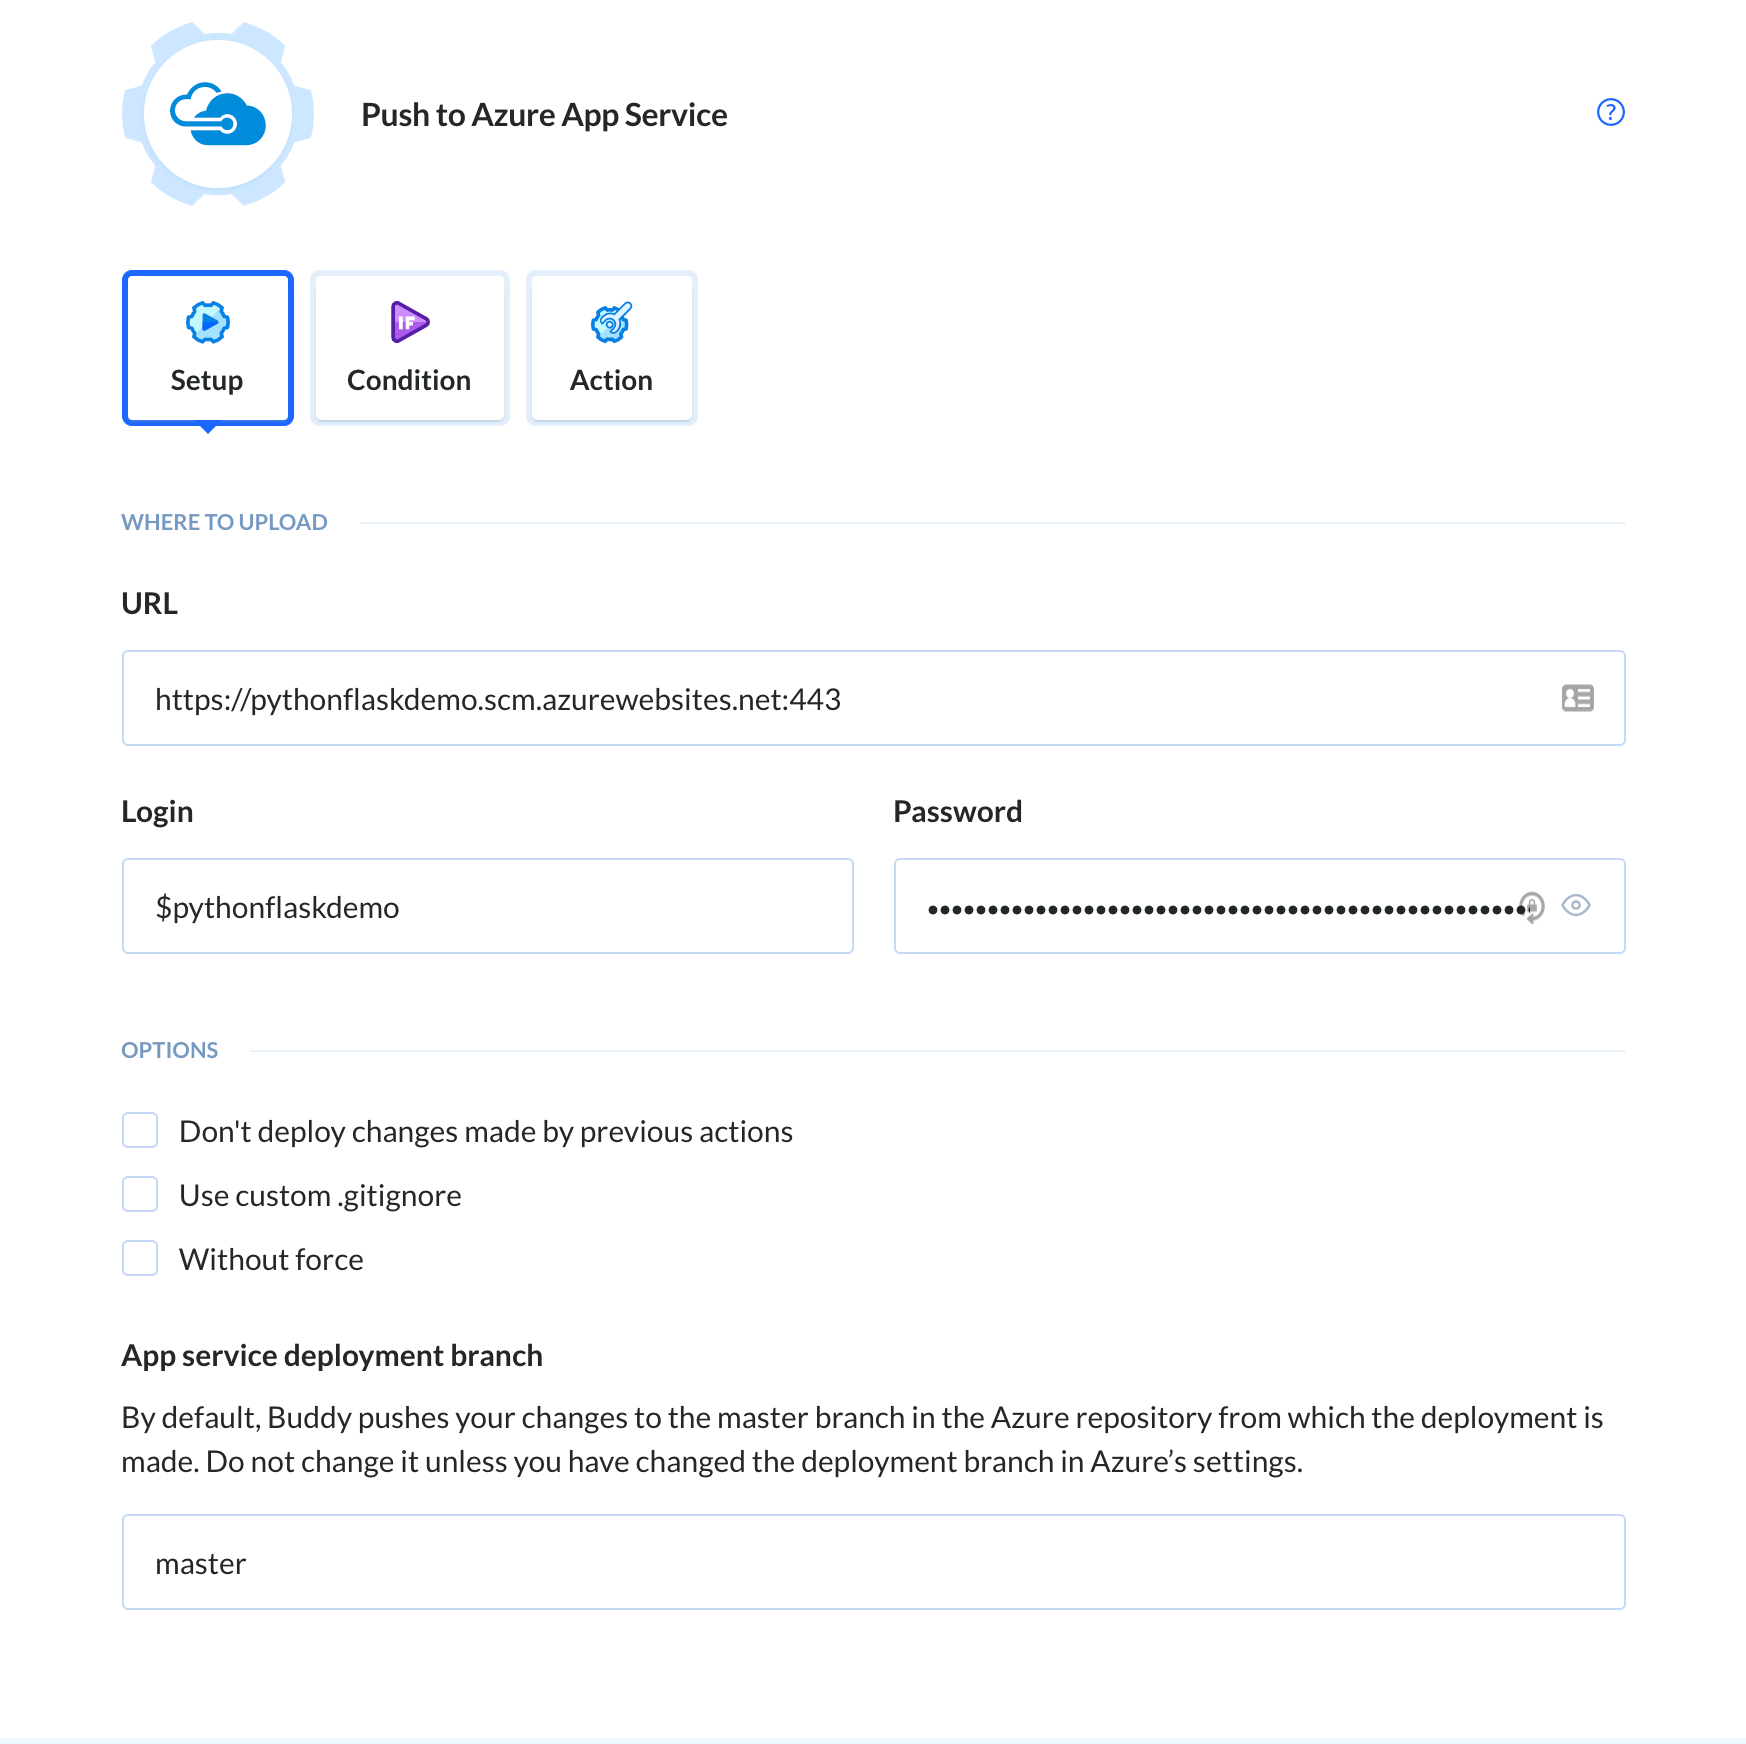
When done, click the button at the bottom to finish the configuration. Well done – Buddy is now connected to your Azure application and can take care of deployments!
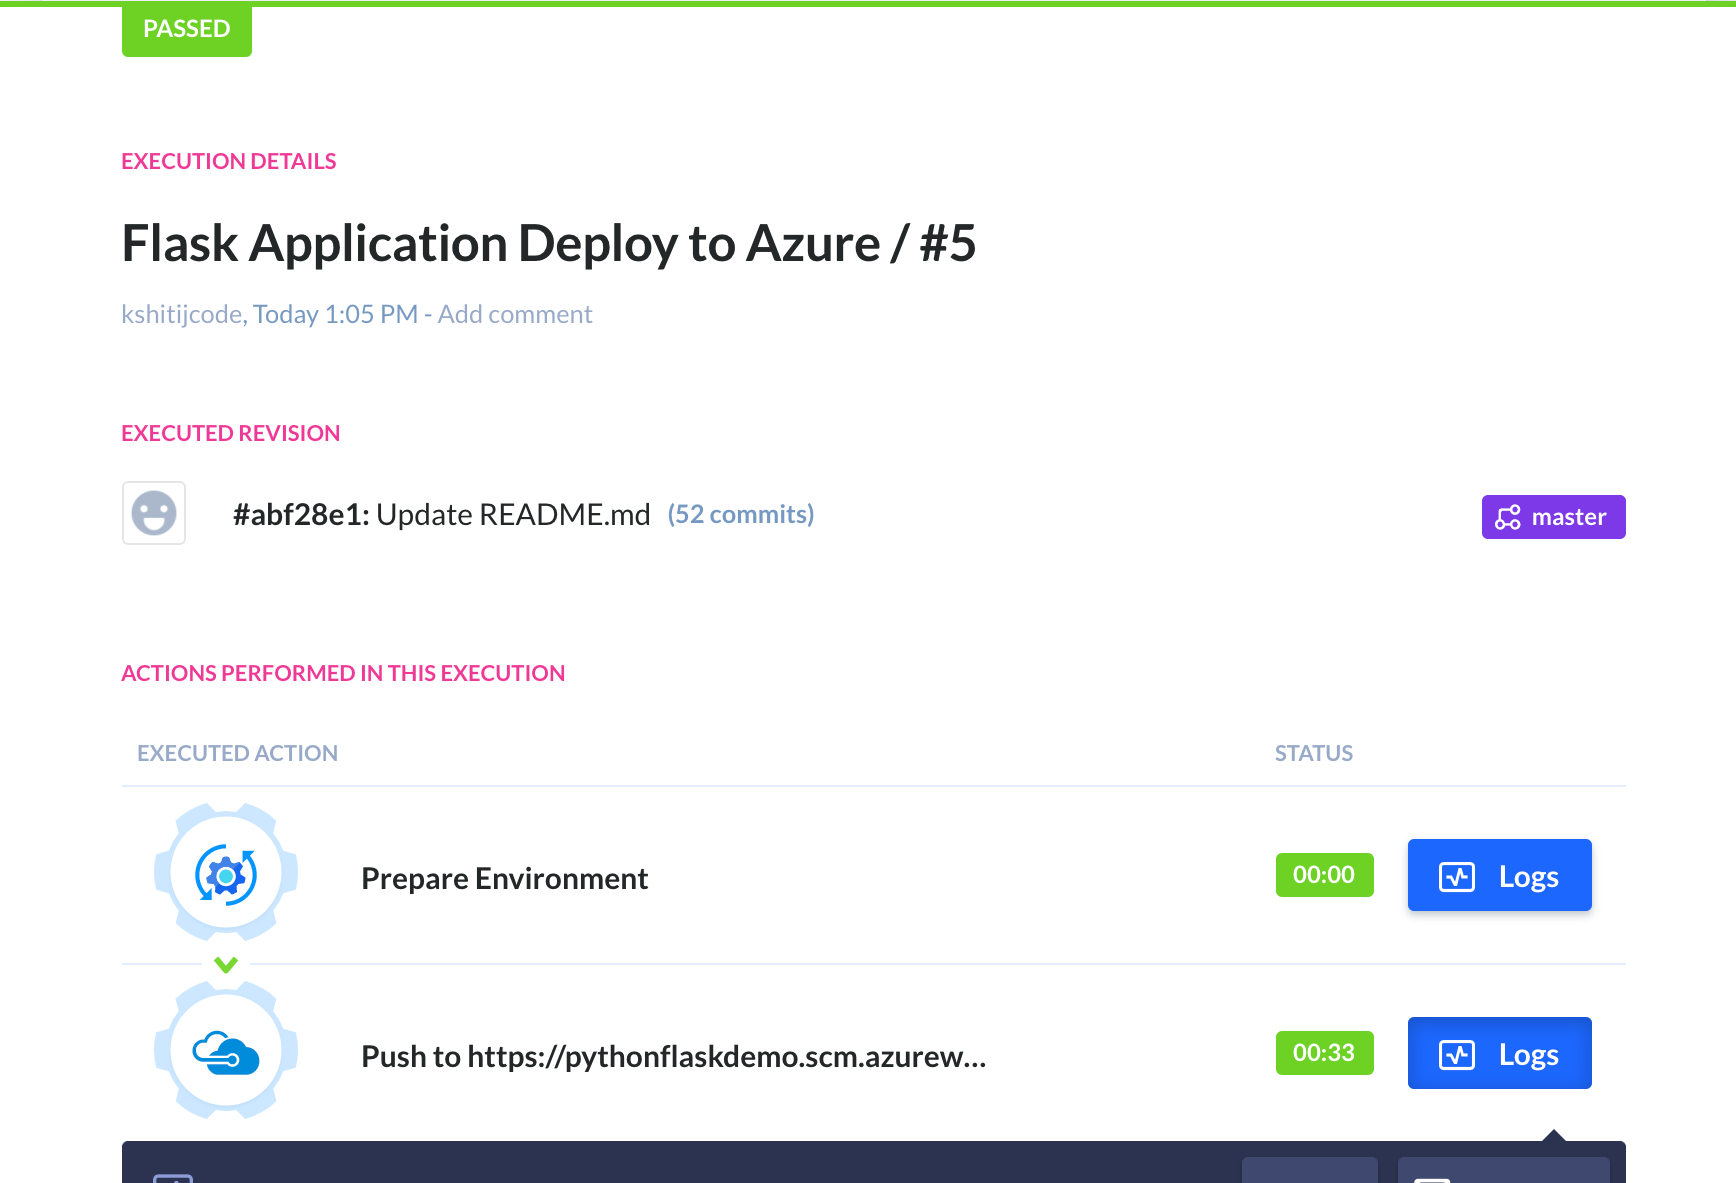
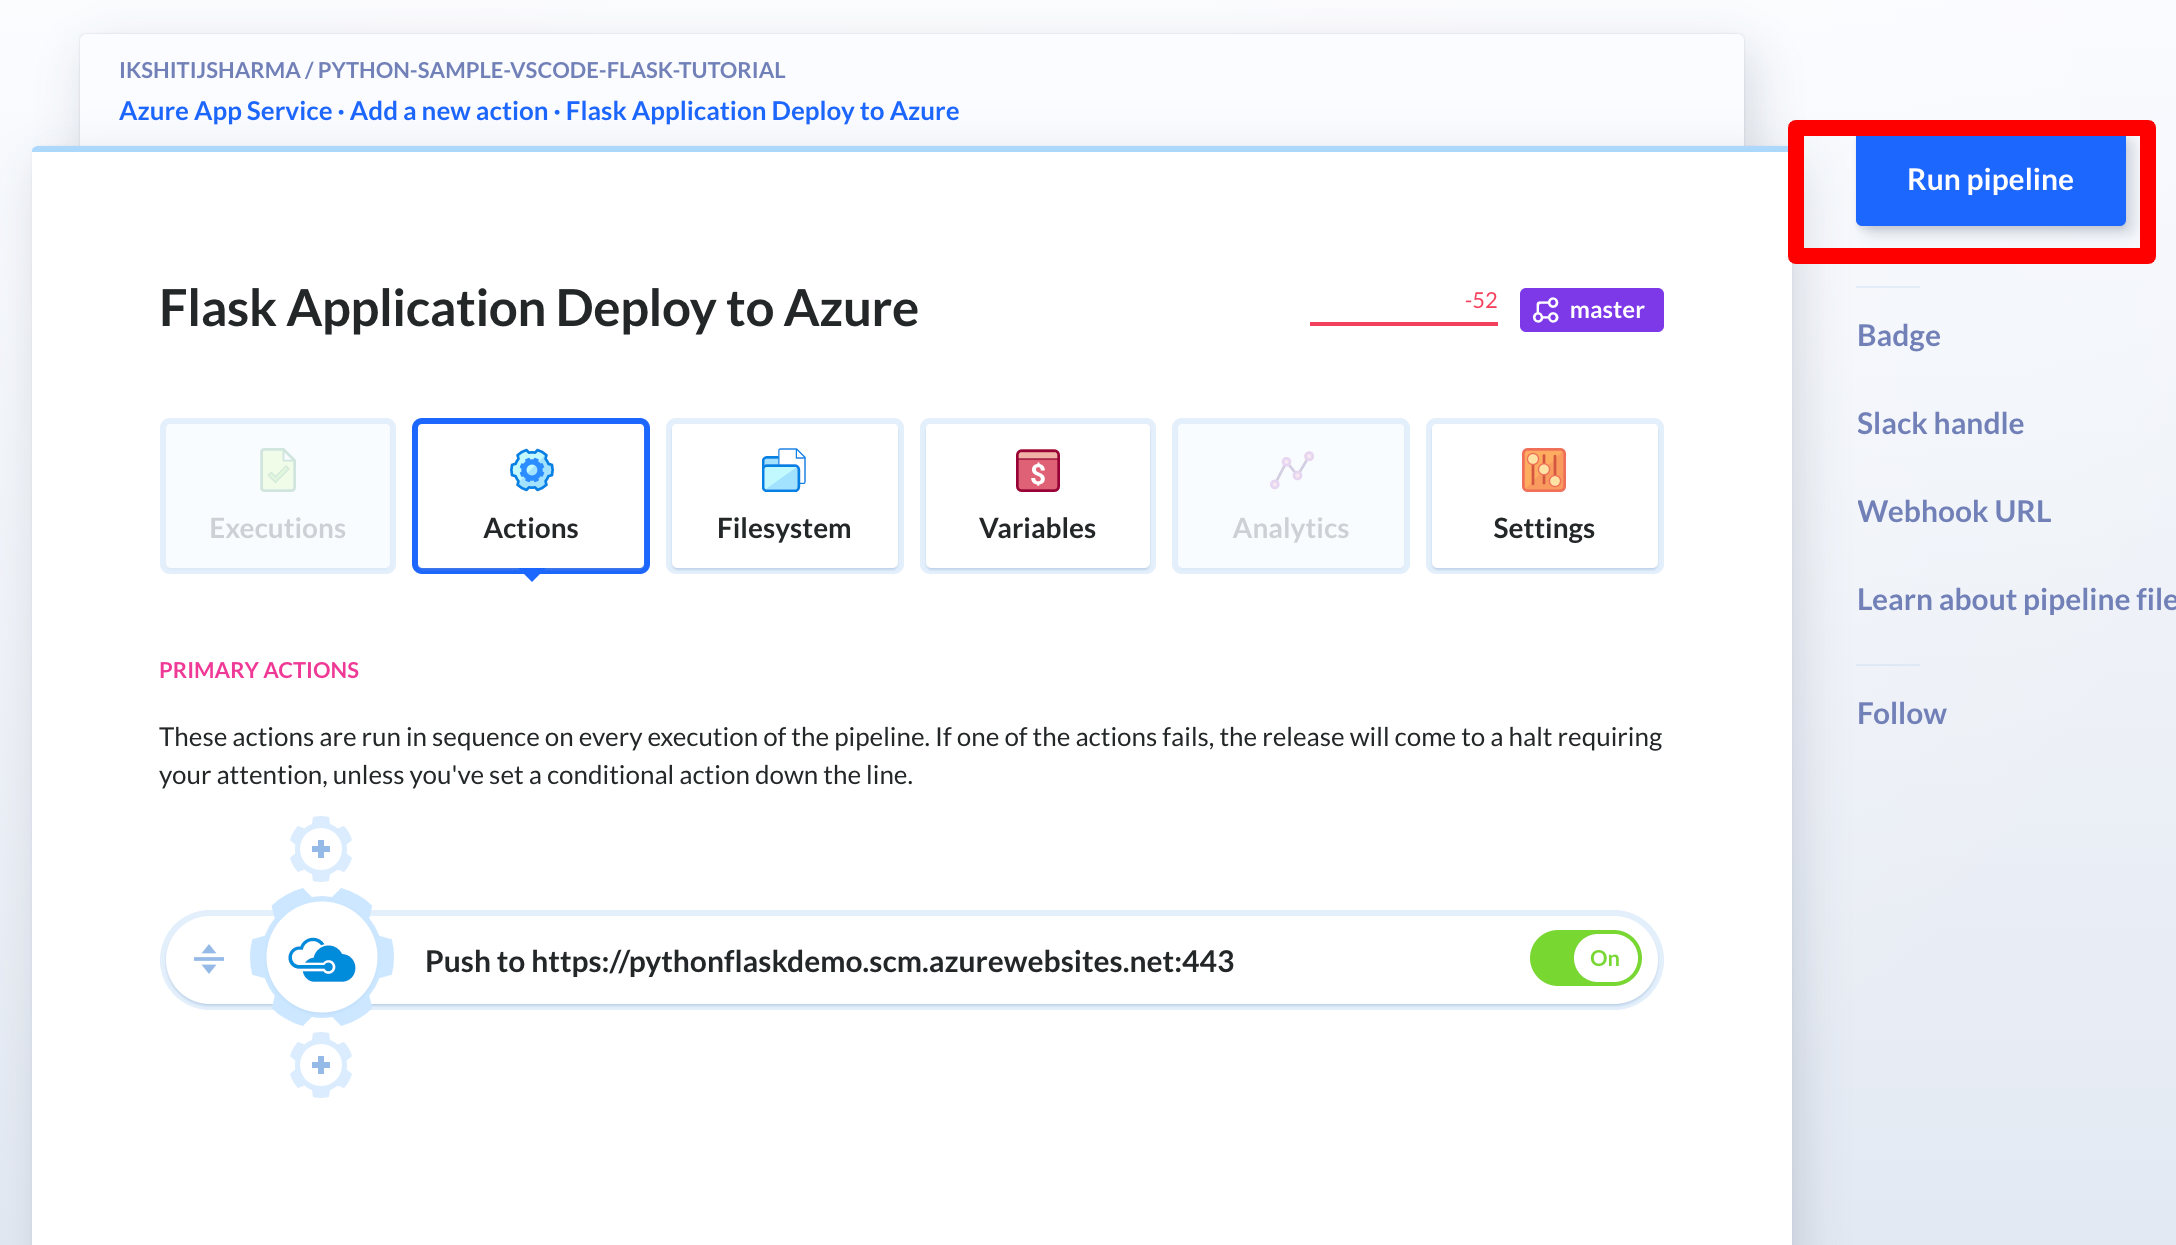
Step 4: Testing deployment
With everything configured, we can now check if everything is working as expected. Depending on the selected trigger mode, make a push to your repository or click Run pipeline to deploy the application.
- Clicking the pipeline manually will bring up the execution box. Click
Run Nowto proceed:
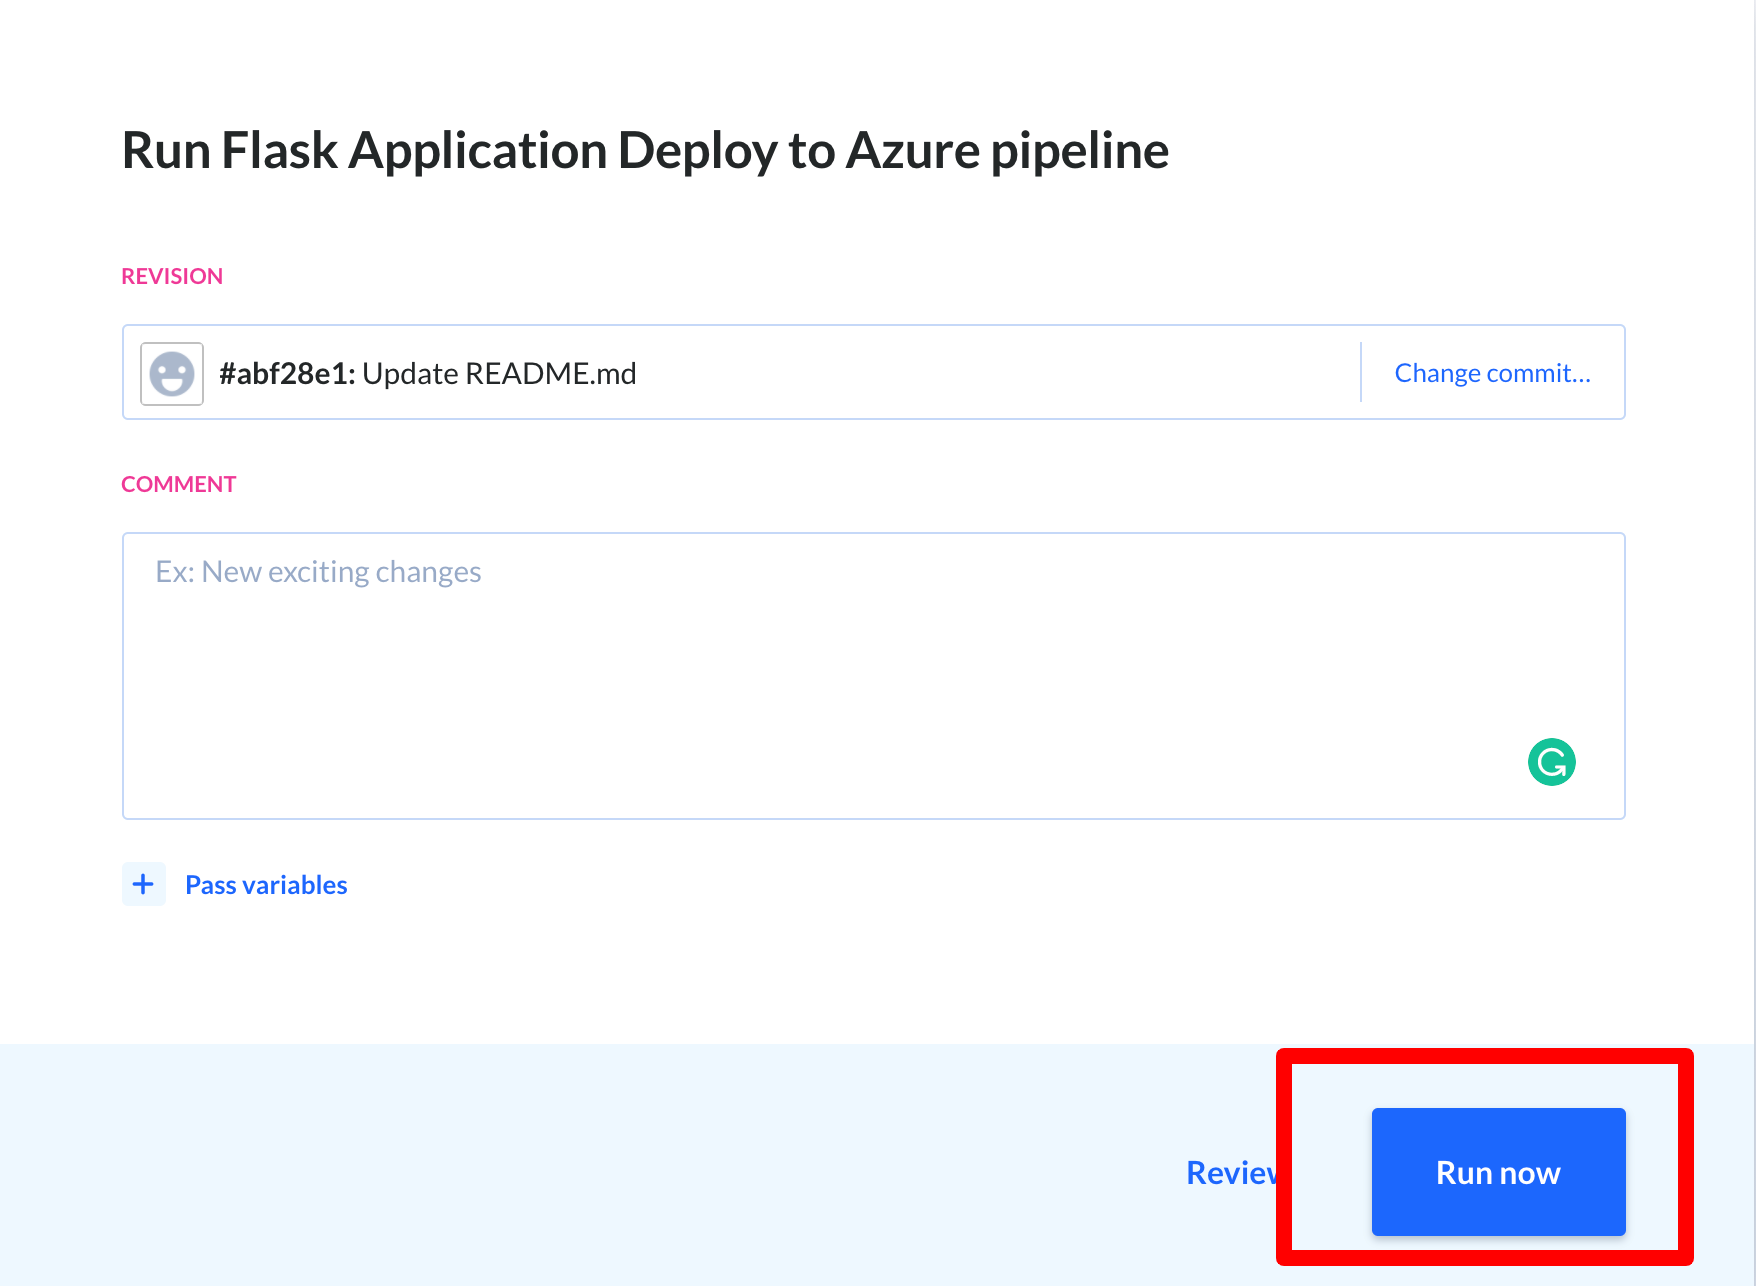
- And that's it! You have successfully automated deployment to your Azure App Service.