如何构建与部署Docker容器至Azure容器实例
Containerization is an incredibly popular approach for developers to package and deploy their applications. The tooling available has made it simple and fast to build a Docker image and get a container up and running.
This tutorial will demonstrate how to continuously build a Docker image of a sample Node.js web app and deploy a container instance based on that image to Azure Container Instances using Buddy.
If you get stuck at any point during this tutorial, you can review the final solution on GitHub at briandesousa/project-showcase (branch: azure-container-instance-finish).
You can also start from this branch if you want to skip over the app containerization section and focus on creating a pipeline to build and deploy to Azure instead.
Step 1: Getting started
Actions used in this guide:
In order to complete this tutorial, make sure you have the following tools installed:
- Docker so that you can build images and run containers locally.
- The Azure CLI so that you can set up Azure resources that are required for the pipeline.
- A code editor of your choosing. Visual Studio Code has some great extensions that add support for Docker and Azure.
Interoperability
A huge benefit of containerization is interoperability between cloud providers. There are a plethora of cloud providers that can host Docker containers. You may want to deploy your containers to Docker Hub, Azure, Google Cloud, AWS, or the next big cloud. Picking a CI/CD system that lets you deploy to any cloud is key if you want to take advantage of that interoperability.
Buddy integrates with all major providers, including private Docker registries. It's also fast as it caches Dockers layers – you don't need to build an image from scratch on every update. That's why chose it as my to-go solution for this tutorial.
Testing application
In this tutorial, we're going to use an existing app called Project Showcase. The app is very basic and displays a list of public GitHub projects for a specific user. The front-end is built with React, and the backend is built with Express.
Let’s start by downloading and spinning the app without a container:
Clone the source code from the
azure-container-instance-startbranch of the briandesousa/project-showcase project.Run
npm installin the root of the cloned repo to download and install npm packages.Run the front-end and back-end separately with the following commands in two separate terminals:
# terminal 1 - run the back-end on port 3001
node server.js
# terminal 2 - run the front-end with React on port 3000
npm startAccess the web app at http://localhost:3000. You should see a list of GitHub projects confirming that everything works as expected.
The "proxy": "http://localhost:3001" setting in package.json allows us to run the front-end and back-end on different ports without having to worry about cross-origin resource sharing (CORS). This is great for development; however, once we build our Docker image, a production build of the front-end will be served directly from the same Node.js server that the back-end is running on, rather than using React scripts to serve the front-end.
Step 2: Docker
Dockerization
In order to containerize our application, we need to create a couple of files. The first one is the Dockerfile which contains the definition of your Docker image. Create a new file named Dockerfile in the root of the Git repository and paste the following code into it:
FROM node:14.2
RUN mkdir -p /home/node/app/node_modules && chown -R node:node /home/node/app
WORKDIR /home/node/app
ENV NODE_ENV production
ENV PORT 8080
COPY package*.json ./
USER node
RUN npm install
COPY --chown=node:node . .
RUN npm run build
EXPOSE 8080
CMD [ "node", "server.js" ]
Each line in the Dockerfile equates to a step in the process for creating a container instance. There are a few things you should note:
Line 1 defines the base image from which we are starting: the official Node.js 14.2 Docker image.
The server will run on
port 8080(line 5). We will access the web app using that same port (line 11).Instead of copying the
node_modulesfolder directly to the container, we will runnpm install(line 8) in the container.提示Node modules can be operating system dependent. Running
npm installas a step in the Dockerfile ensures that the operating systems we use to develop, build, and deploy to don’t need to match. An appropriate version of Node modules will be automatically installed for the operating system the image is using – in this case, a flavor of Linux.提示You can read more about this approach in this Docker blog entry.
You will also need to add a .dockerignore file to the root of the Git repository:
node_modules
npm-debug.log
Dockerfile
.dockerignore
.git
.gitignore
.vscode
The Docker ignore file lists files and paths that should not be copied to the container. Notice that node_modules won’t be copied since it will be installed directly into the container as a step.
Launching Docker image
Run these commands to test the Docker image build and run a container instance from that image on your local machine:
docker build --tag projectshowcase:v1.0.0 .
docker run --publish 8080:8080 --name ps projectshowcase:v1.0.0
During the build, you will see each of the steps in your Dockerfile being executed and ultimately creating layers within the Docker image.
If you are running the built-in Windows and see a security warning asking you to double-check and reset permissions, you can ignore it. We don’t have any sensitive files in this build that we should be concerned with.
The run command creates a container instance from our image and opens the port 8080 to the container so that we can access our web app in the browser. Open http://localhost:8080 in the browser and verify that the app is functioning as expected.
Step 3: Setting up Azure resources
Now that you have the app running in a container on your local machine, the next step is setting up a pipeline that will enable continuous build and deployment. However, before we do that, we need to create a few resources in Azure to support that pipeline.
warning
Some of the Azure resources that we're going to create will incur a small cost depending on how long you run them for. You will need an active Azure subscription that can accept charges. It is best to clean up the resources at the end of the tutorial to avoid unexpected charges. I will provide sample pricing for each resource to give you an idea of the cost as well as instructions on how to clean up all created resources at the end of the tutorial.
:::
Creating resource group
To create the resources we'll use the Azure CLI. Launch the terminal, log in with az login, and create a new resource group with the command below. Resource groups are free and will make cleaning up a lot simpler at the end of the tutorial.
az group create --name ProjectShowcaseRG --location eastus
Creating Azure Container Registry
We're going to use an Azure Container Registry to store the images. Azure Container Registry is not a free resource. We shall use the Basic SKU as it's the cheapest and best option for the purposes of this tutorial. Create a new registry with the following command:
az acr create --resource-group ProjectShowcaseRG --name ProjectShowcaseRegistry --sku Basic
The name of the registry must be unique as it becomes a part of the access URL to the registry itself. In this case, the URL will be https://projectshowcaseregistry.azurecr.io.
Creating service principal
The service principal is a special type of account that the CI/CD pipeline will use to connect to our Azure subscription. Service principals are free to use. You could configure the pipeline to use your main Azure account, but the best practice is to use a separate account limited to the required resources – in this case, ProjectShowcaseRG.
Use this script to create the service principal. Inline comments help explain each step along the way:
# get the subscription and tenant ID
SUB_ID=$(az account list --query [0].id -o tsv)
TENANT_ID=$(az account list --query [0].tenantId -o tsv)

# get the ID of the container registry (--name)
ACR_REGISTRY_ID=$(az acr show --name projectshowcaseregistry --query id --output tsv)
RESOURCE_GROUP_ID=$(az group show --name ProjectShowcaseRG --query id --output tsv)

# create a service principal with the role that allows it to pull and push images
SP_PASSWD=$(az ad sp create-for-rbac --name http://project-showcase --scopes /$RESOURCE_GROUP_ID --role contributor --query password --output tsv)

# log into the container registry with the service principal (substitute --id with your URL)
SP_APP_ID=$(az ad sp show --id http://project-showcase --query appId --output tsv)
docker login projectshowcaseregistry.azurecr.io --username $SP_APP_ID --password $SP_PASSWD

# copy the tenant ID, app ID, and password of the service principal

echo $TENANT_ID
echo $SP_APP_ID
echo $SP_PASSWD
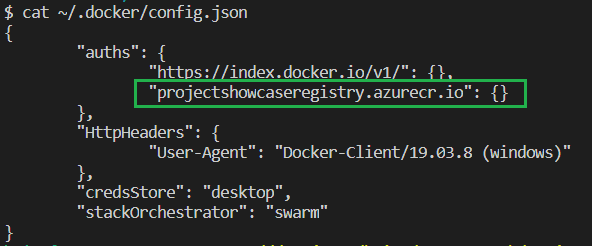
Testing authorization
Your local Docker installation should now be logged into your Azure Container Registry. You can confirm this by viewing the Docker config file at ~/.docker/config.json, for example:
Step 4: Continuous Build pipeline
Before setting up the pipeline, you will need to create an account on Buddy. The service has a 14-day trial with a free plan limited to 5 projects available later on.
Now that we have a place to store our Docker images and a connected account, we can create a pipeline that will build and test our application and image as we make changes to it. In other words, the pipeline will quickly validate that our codebase is always in a buildable state. We will set up a second pipeline later that will publish the image to the registry and deploy it to Azure.
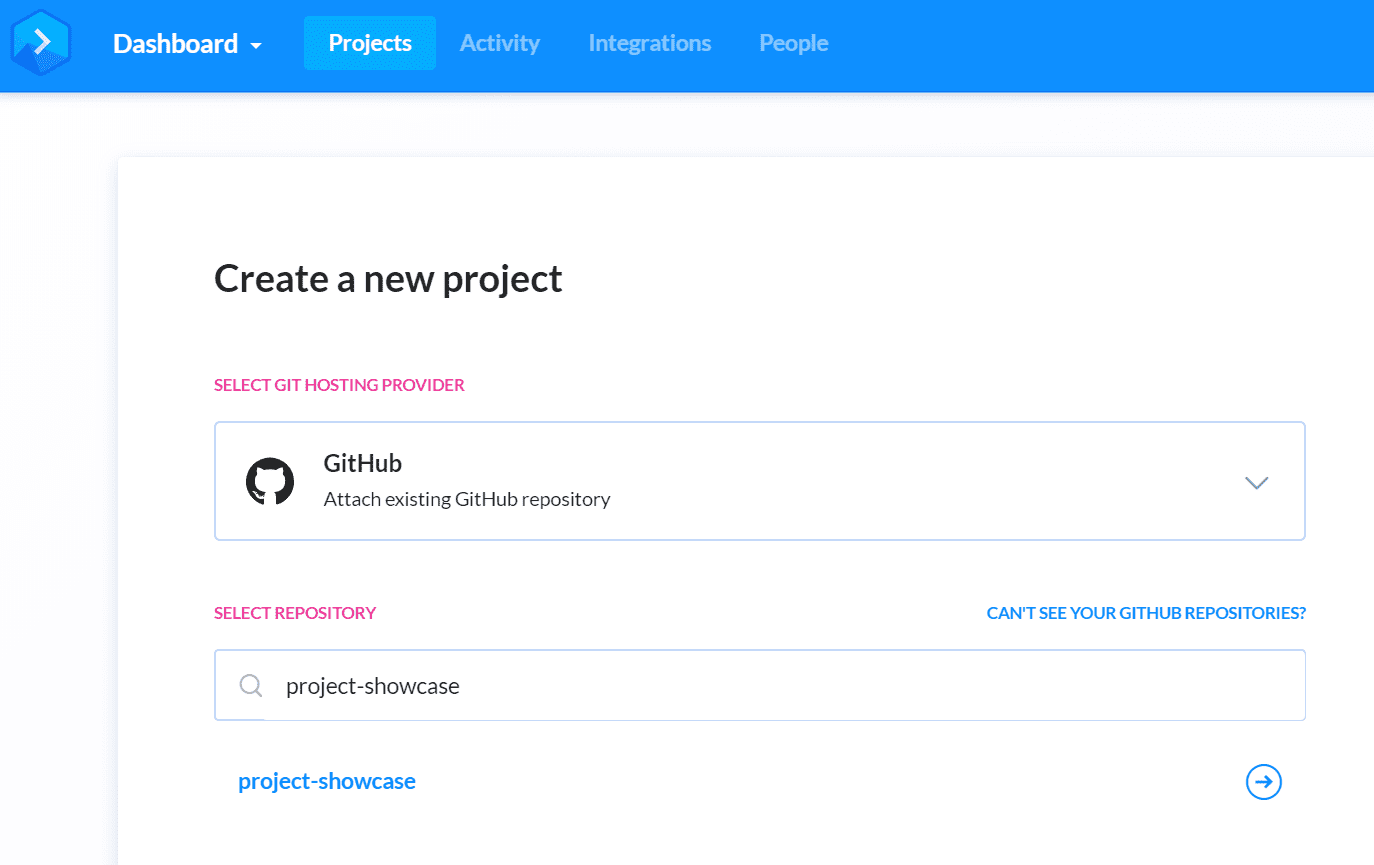
Project configuration
Create a new project, choose GitHub for the Git hosting provider, and select the project-showcase project. If you haven’t done it already, feel free to create a fork of briandesousa/project-showcase.
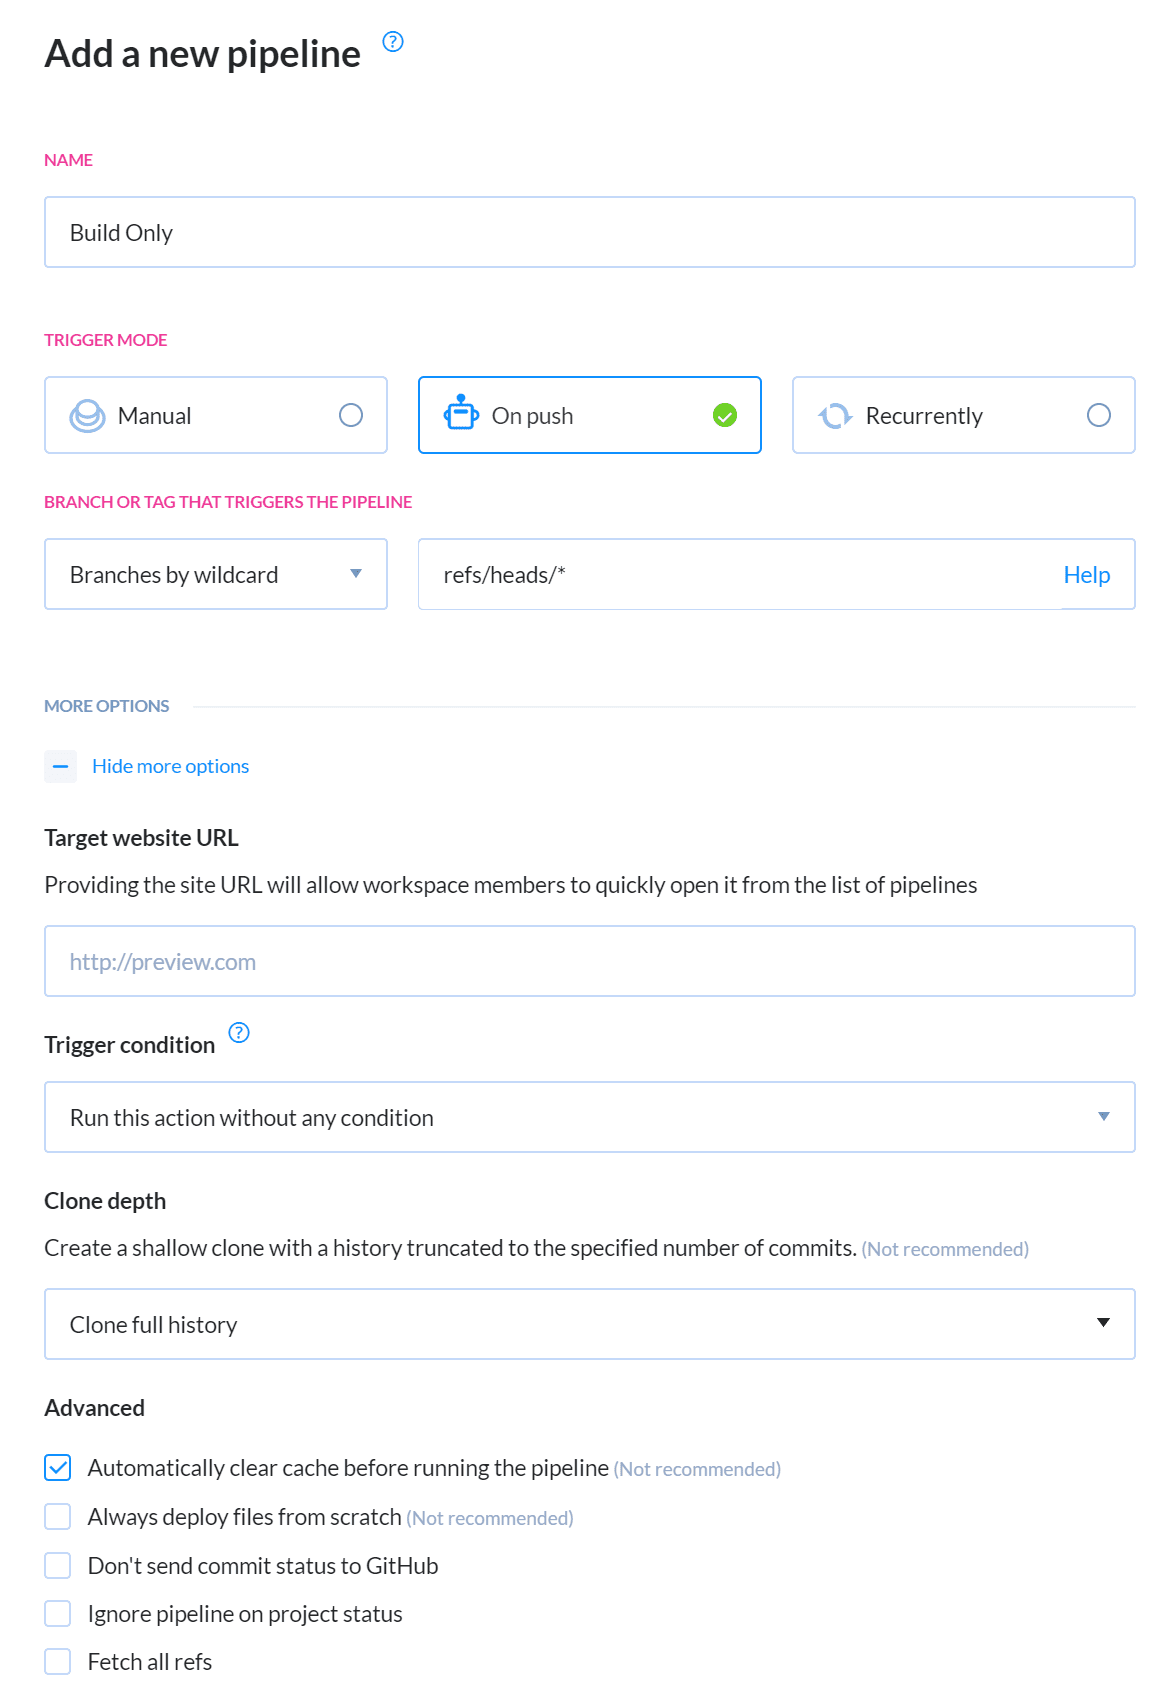
Pipeline configuration
Add a new pipeline and name it Build Only. Set the trigger mode to On Push so that the pipeline is run whenever changes are pushed. Select Branches by wildcard as the deployment branch and leave the default value set to refs/heads/*. Since this pipeline will only be used to build and run tests, it will run whenever changes are committed to any branch in the repository.
On the next screen, Buddy will automatically detect that the Git project contains a Node.js application and thus will suggest adding the Node.js action to the pipeline. Select the Node action to continue:
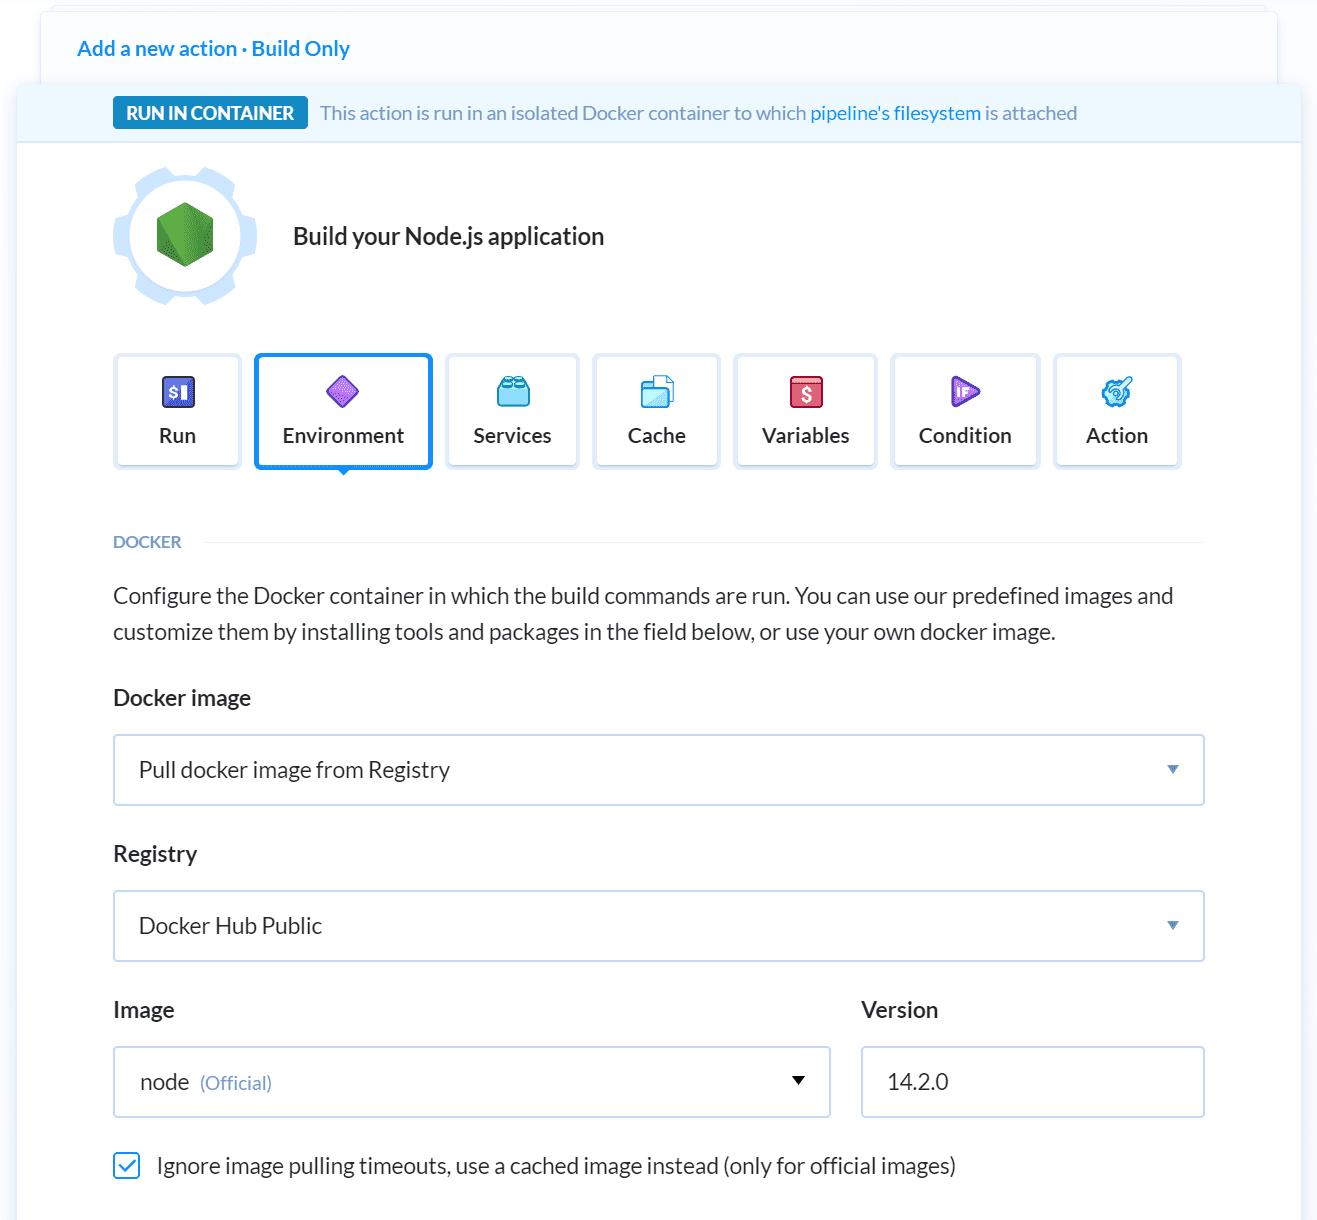
The default npm install and npm test commands are sufficient to build and run unit tests. Switch to the Environment tab and select the official Node 14.2.0 image from the public Docker registry so that it matches the version that we used to build the image locally. Click the Add button to add the action to the pipeline when ready.
Add another action directly below the Node action. Select the Build Image action from the Docker section and leave it at the default values provided by Buddy. This action will validate the Docker build, but won’t publish the image to a registry.
There is one more thing we should set up. If a build fails for any reason, we should be notified about the failure. This can be achieved by adding a notification action in the On failure section of the pipeline. There are plenty of ways to be notified, but let’s keep it simple and use the Email action. In the action’s settings, set the type to HTML and add your email address to the recipients list. Add the following to the email body:
<p><strong>Who broke the build?</strong></p>
<p>$BUDDY_EXECUTION_REVISION_COMMITTER_NAME owes everyone donuts.</p>
<p>The commit that caused the build to fail was $BUDDY_EXECUTION_REVISION_URL. I hope the unit tests aren't broken again? </p>
<p>Can someone please fix $BUDDY_PIPELINE_URL already!</p>
Buddy will automatically populate the ENV VARs with proper values so that everyone knows it was John Smith who now needs to make the run to Krispy Kreme's.
Testing pipeline
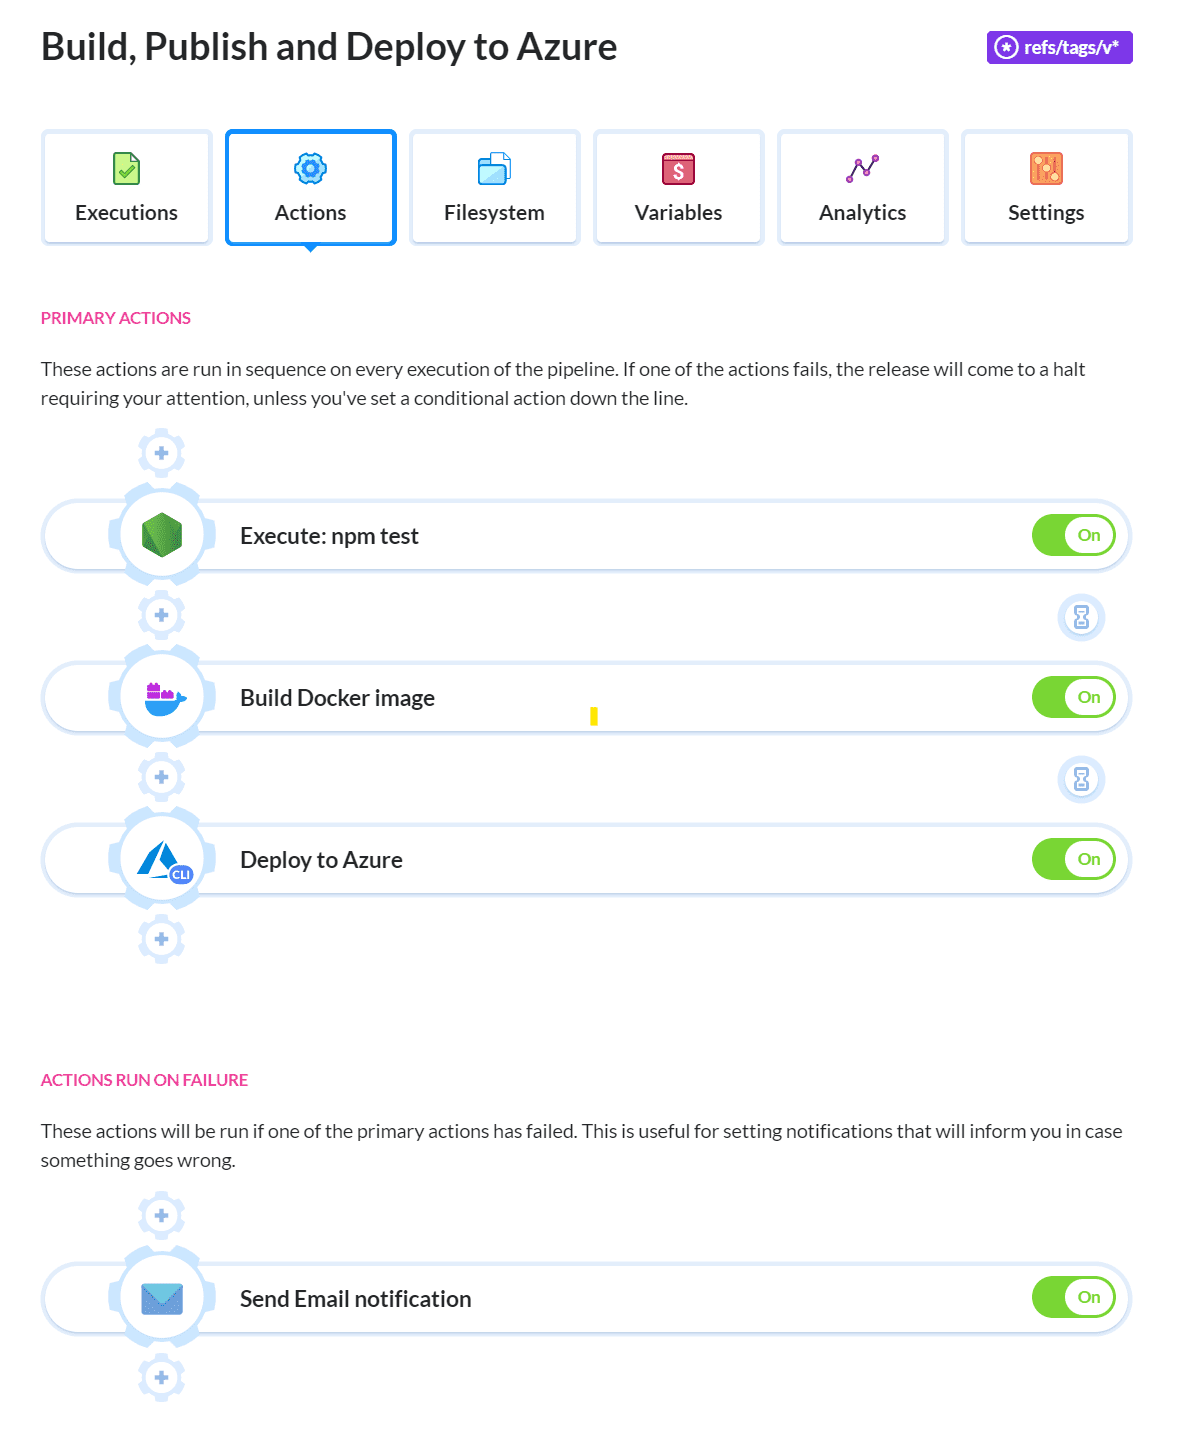
Once you're done, this is what the Build Only pipeline should look like:
To test the pipeline, we need to push something to the Git repository. The changes we made to the Project Showcase repo to containerize the app were never committed and pushed. We can do that now:
git add *
git commit -m "containerize the application"
git push origin azure-container-instance-start
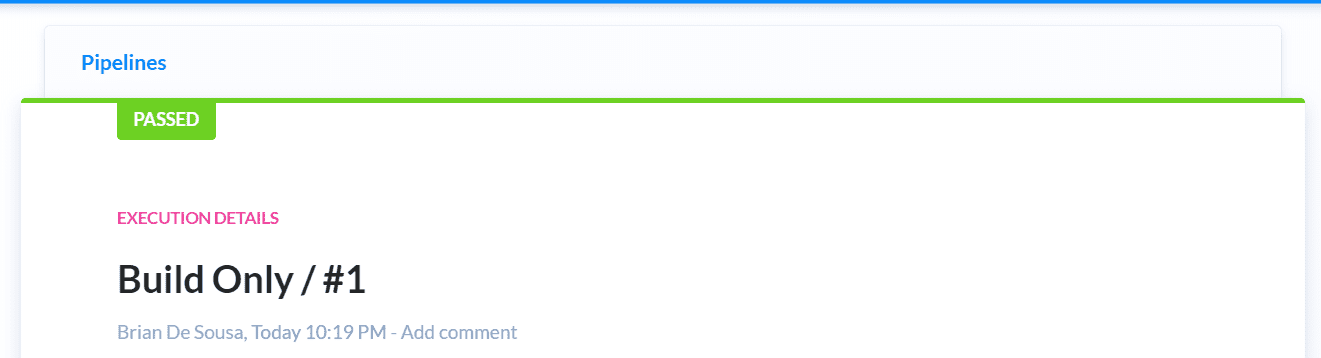
The push will trigger the build pipeline. Monitor the pipeline progress and look for a successful build:
Let’s intentionally break the build to test the failed build notification. Open up the App.test.js file and add a simple unit test to the bottom of the file:
it('fails every time, why?', async () => {
    expect('everything').toBe('wrong');
})
Commit and push the change. Observe the pipeline and wait for the build failure notification in your email inbox (you might want to check the spambox in case you didn't receive it).
Don’t forget to remove the failing unit test or your pipeline will continue to fail for the rest of the tutorial!
Step 5: Continuous Deployment pipeline
This is where the real magic happens. Creating a build pipeline was fun but the ultimate goal is to deploy the app to Azure – but only when its ready to be released.
Pipeline configuration
Let’s clone our building pipeline and use it as the starting point. You will find the clone option on the Settings tab of the existing pipeline:
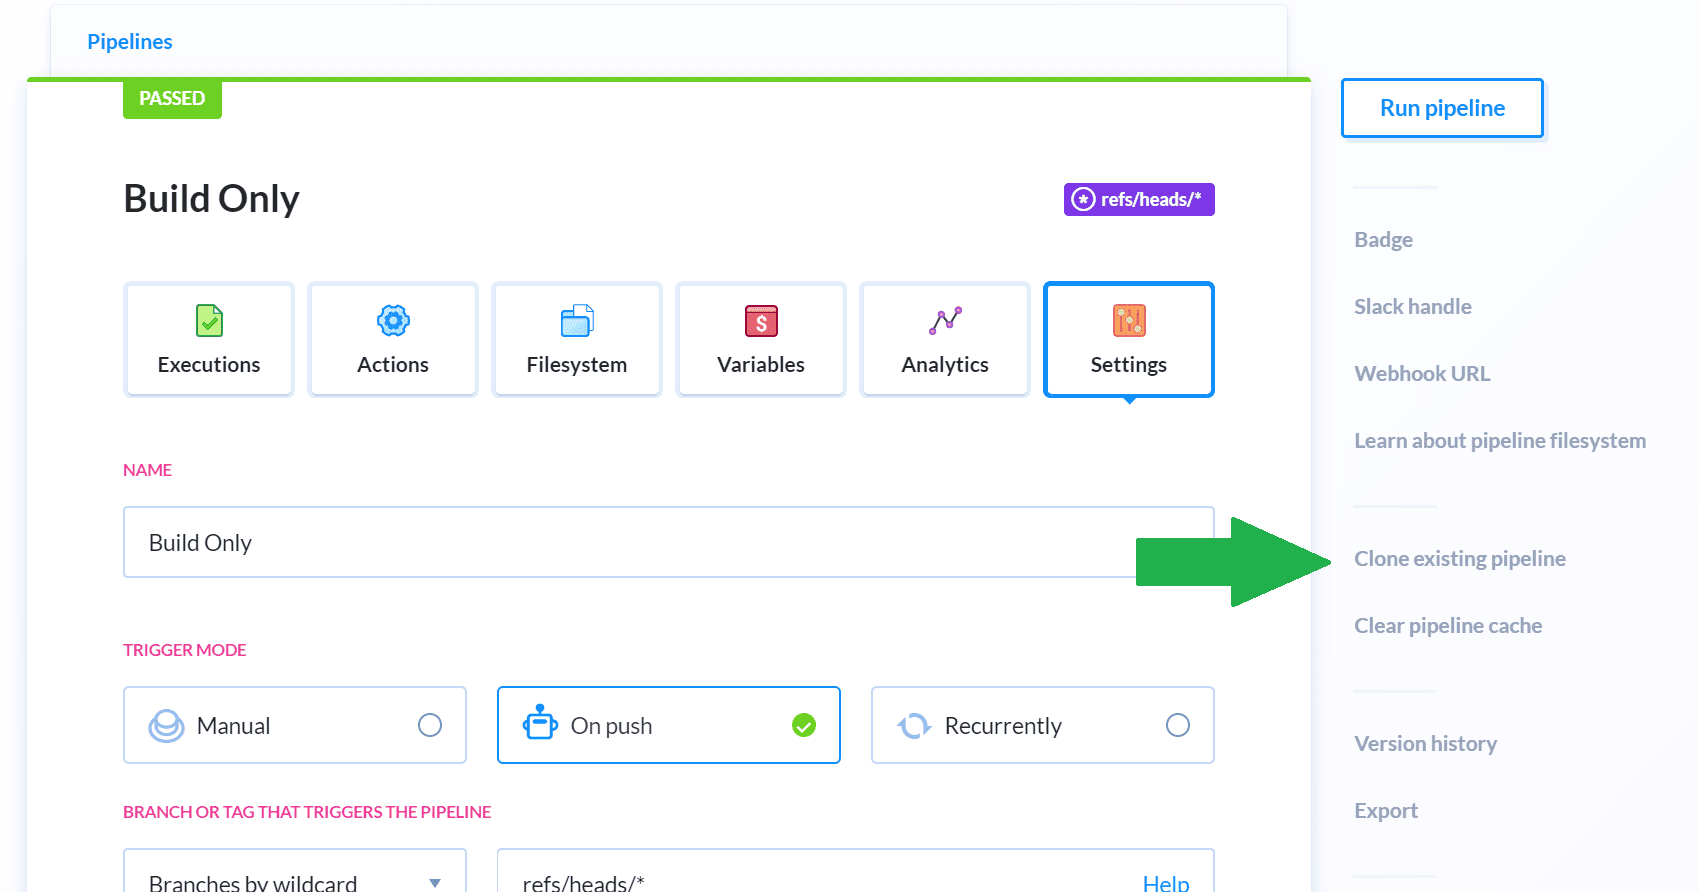
Leave all options as default and click Clone actions. Switch to the Settings tab of the cloned pipeline and rename it to Build, Publish and Deploy to Azure. There are a few other settings that need to be changed.
Make sure to click the Save settings button before flipping to another tab in the pipeline.
Publishing new image versions to the Azure Container Registry consumes storage space, and storage space costs money. One strategy to limit what you publish is to treat certain Git tags as releasable code. In our case, any tags beginning with v (for example v1.0.0). On the Settings tab, set the trigger mode to Tags by wildcard with the value of refs/tags/v*:

Storing Azure credentials
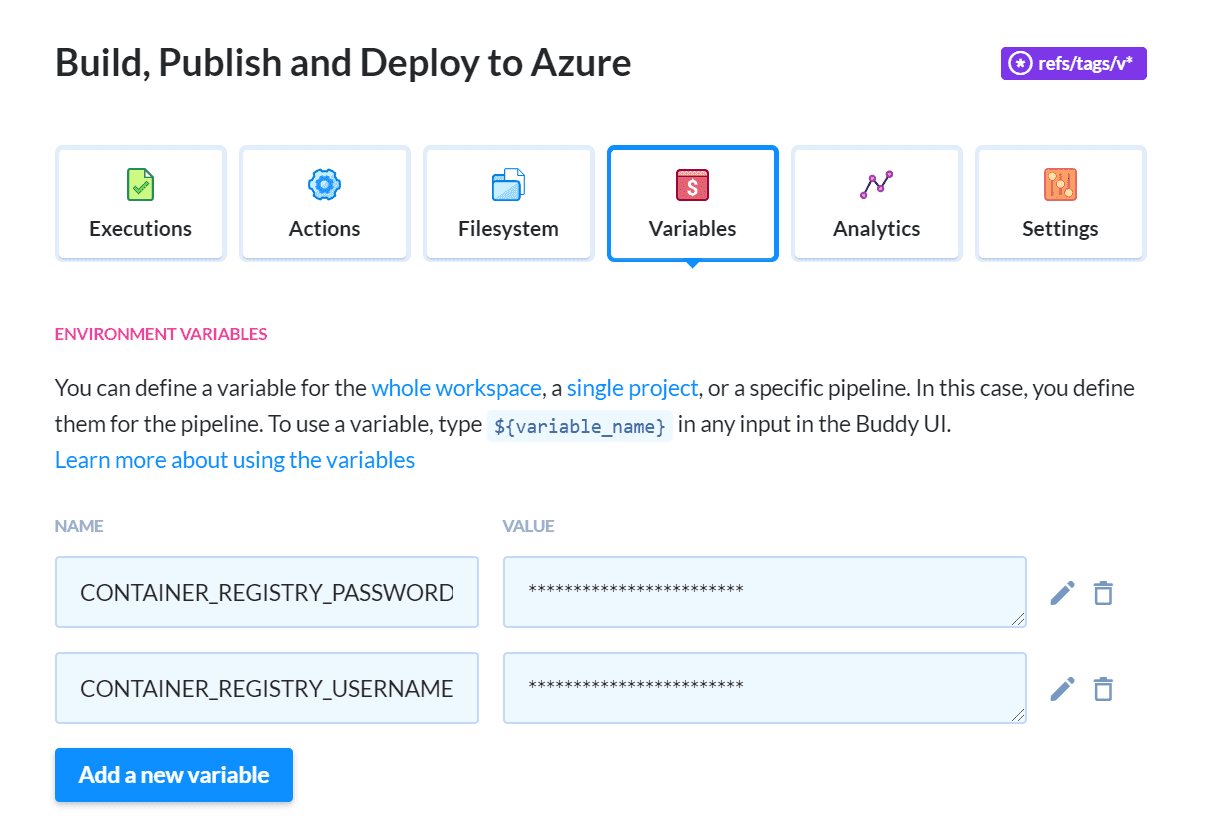
Now we need to provide the username and password that the pipeline will use to connect to Azure. These credentials are sensitive so the best place to store them are variables. Switch to the Variables tab and create two new variables named CONTAINER_REGISTRY_PASSWORD and CONTAINER_REGISTRY_USERNAME. Scope the variables to this pipeline, enable encryption, and set their values to the app ID and password of the service principal created earlier:
Publication to ACR
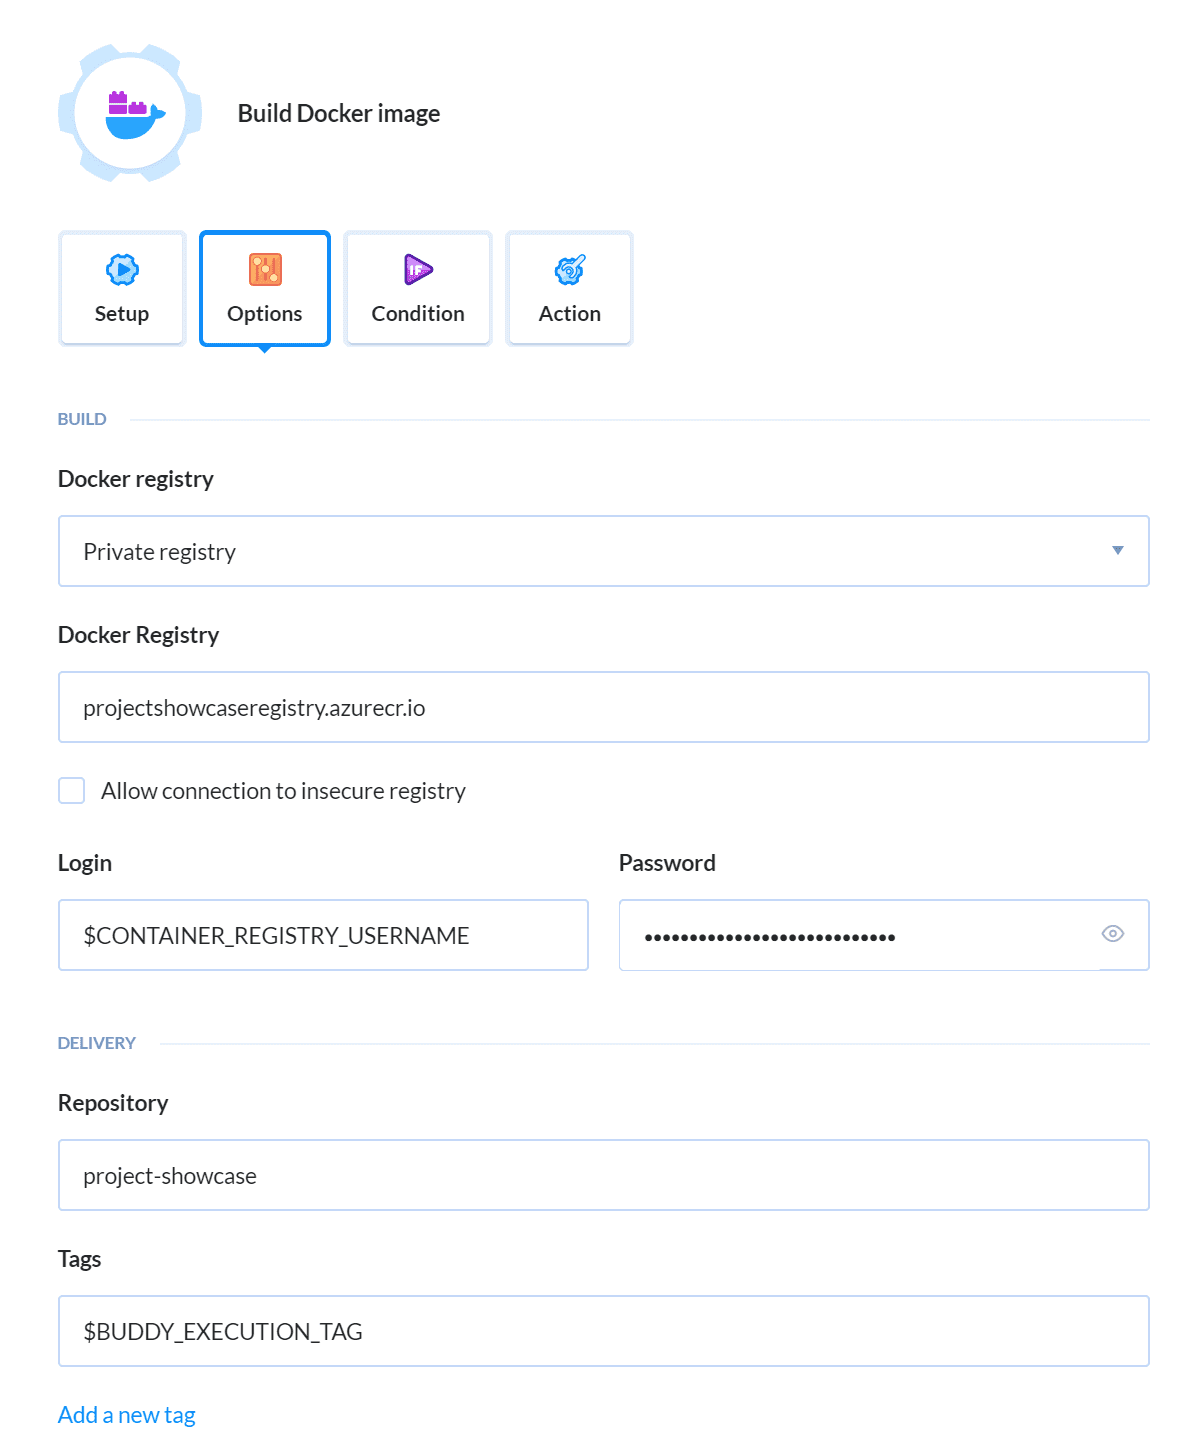
The Docker build action needs to be altered so that it also publishes the Docker image to your Azure Container Registry. Go to the Options tab of the Build Docker image action and change the following settings:
- Set the Docker registry setting to Private registry.
- Specify the URL of your Azure Container Registry.
- The Login and Password fields can be set to the two variables you just created. Images will be stored in the repository named
project-showcase. - Set the image tag name to
$BUDDY_EXECUTION TAG– it'll make it easier to associate published images with the source code. – Save the action when ready.
Deployment to ACI
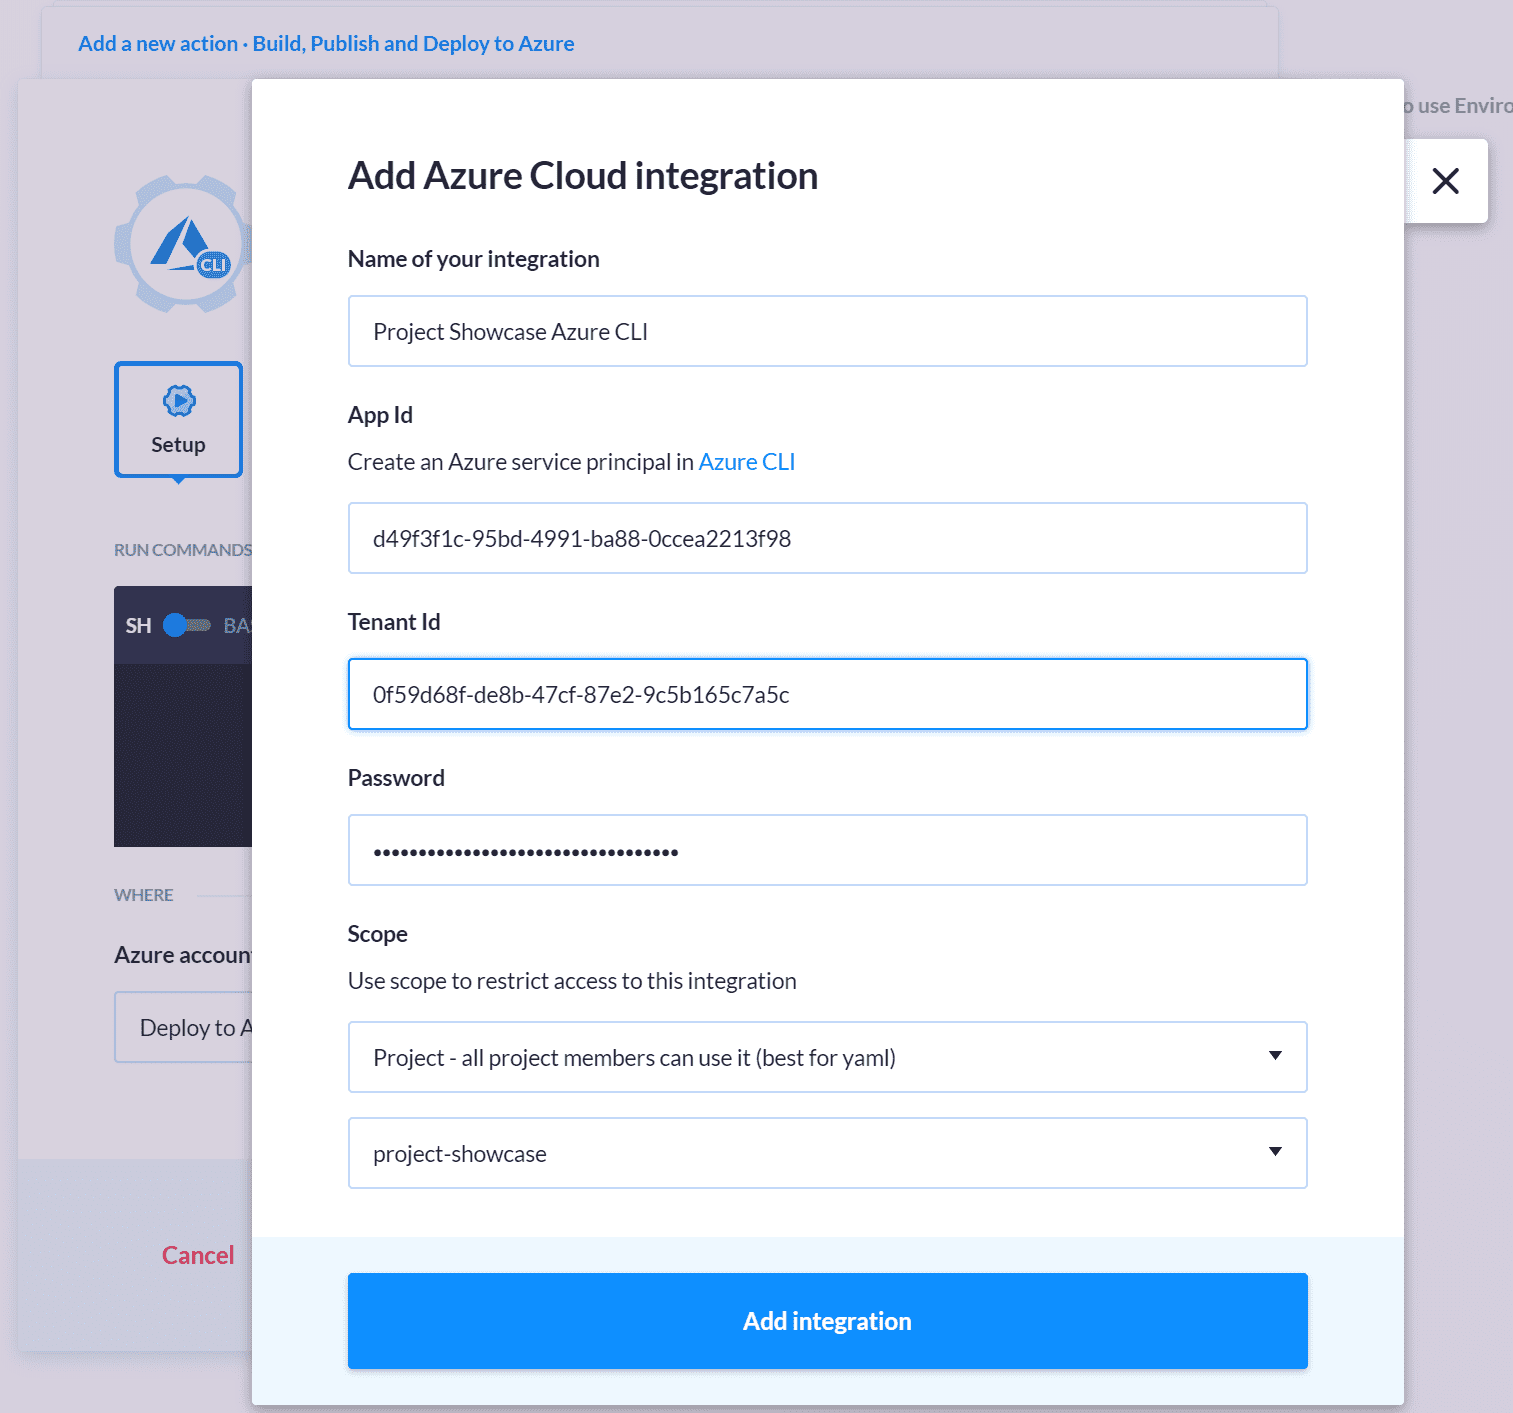
The last step is adding a new action that will deploy the container to the Azure Container Instance using the image that was just built. Add a new Azure CLI action immediately after the Build Docker image action. If you're adding this type of action for the first time, you'll be prompted to create a new Azure integration to connect the pipeline to your Azure account. Use the tenant ID, service principal app ID, and password that you created earlier.
Pipeline variables cannot be used when adding integrations.
Switch to the action’s Setup tab. This tab lets us specify the command that will deploy the container. Flip the switch from sh to bash and enter the following command with a few modifications:
az container create --resource-group ProjectShowcaseRG --name project-showcase-container --image projectshowcaseregistry.azurecr.io/project-showcase:$BUDDY_EXECUTION_TAG --dns-name-label project-showcase-demo --ports 8080 --registry-username $CONTAINER_REGISTRY_USERNAME --registry-password $CONTAINER_REGISTRY_PASSWORD
NOTE:
- Use your own container registry URL.
- The
dns-name-labelproperty must be unique within the Azure region you are deploying to, so you will want to add a suffix to it – for exampleproject-showcase-demo-myinitials. If the DNS name label is not available, you will receive the “DNS name label not available” error when the command is executed on deployment.
Click the Add button to add the action to the pipeline. This is what the pipeline should look like now:

Testing pipeline
Time to test the pipeline. Create and push a Git tag using the correct naming pattern to trigger the pipeline.
git tag v1.0.0
git push origin v1.0.0
If the pipeline fails because you have run out of space in your free Buddy account, you can clear the cache of the Build Only pipeline to reclaim space. The option is available in the pipeline settings.
Monitor the pipeline’s progress. After the Build Docker image action completes, navigate to the container registry in the Azure portal to view the first version of the image (v1.0.0) in the project-showcase image repository:
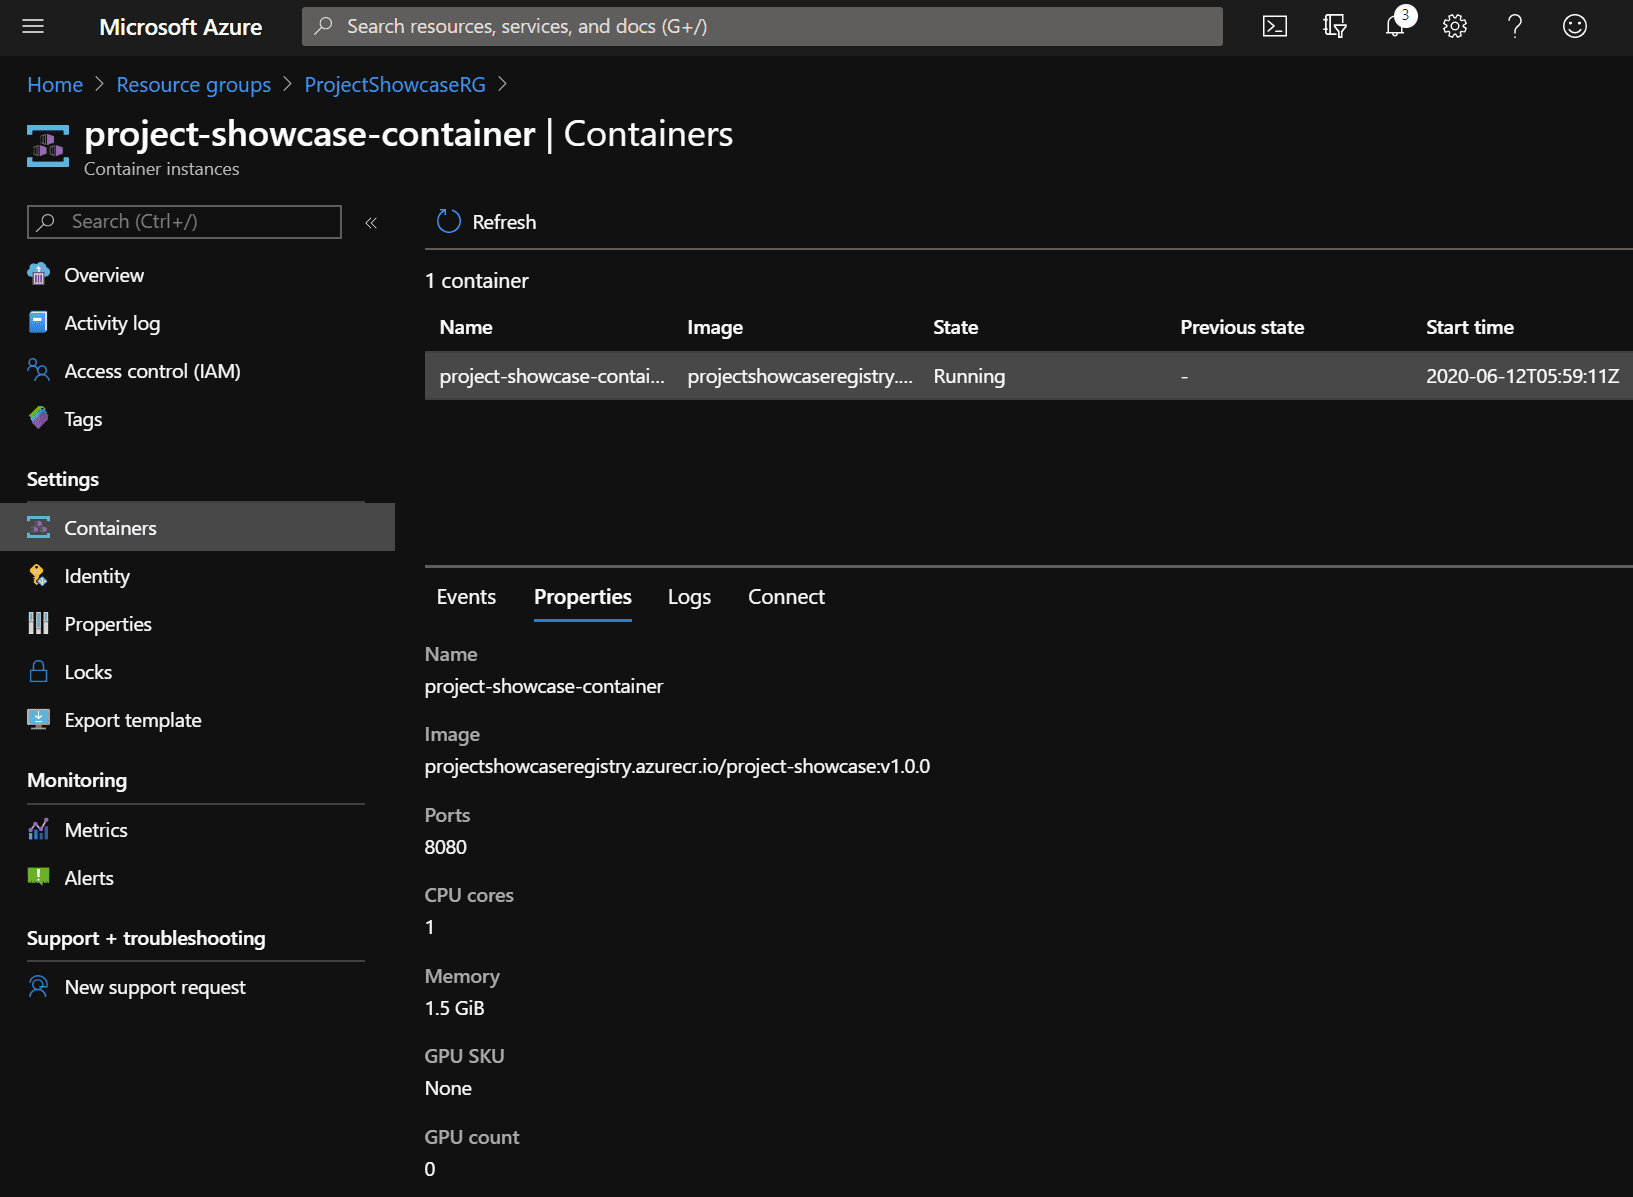
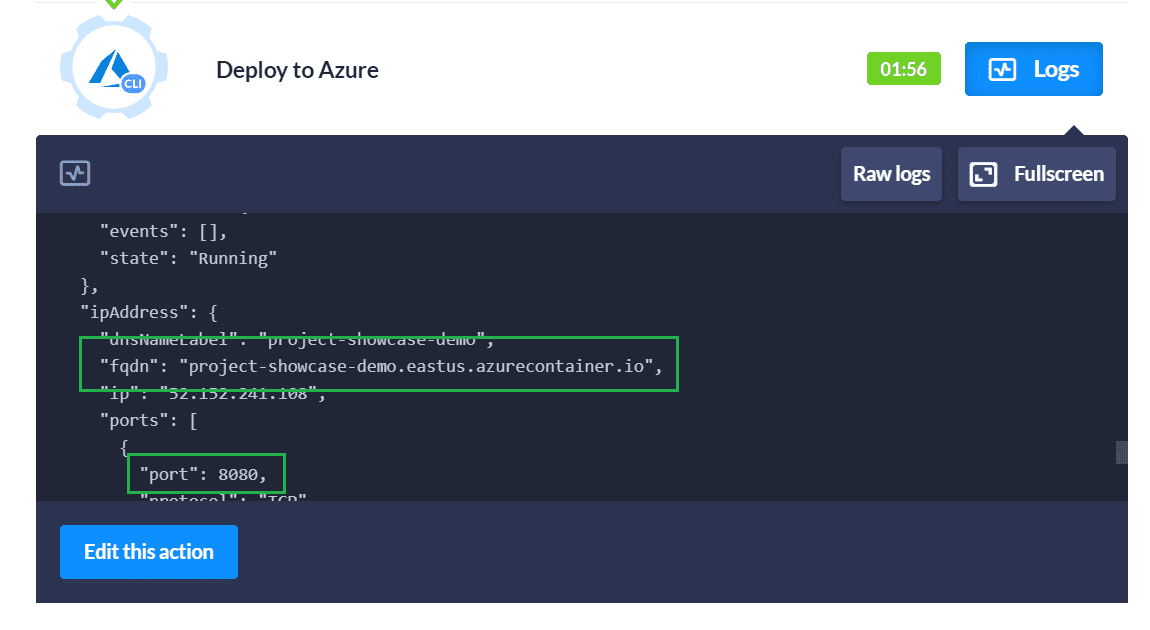 You may also want to inspect your container instance in the Azure portal:
And there you have it, a pipeline that continuously builds and deploys a Docker image to Azure! As you make changes, the building pipeline will build and test the changes to validate that everything is still in working order. When you are ready to deploy a new version of the application, create and push a new Git tag. The second pipeline will deploy that code to the ACI.
The build and deploy process may seem a little complex at first, but Buddy's UX makes it incredibly easy to get everything up and running. When something goes wrong (and we all know something will go wrong eventually), Buddy makes it easy to locate what the error was exactly and view the log output to troubleshoot the failure.
Summary
Try making some more code changes and deploy those changes by creating new tags. Depending on what you do, you should find that your subsequent deployments are much faster. Part of the reason is that Azure is smart enough to update a container with only the layers of the Docker image that have been modified since the last deployment. A similar mechanism is implemented in Buddy when building Docker images – instead of building the image from scratch, Buddy caches the image and only updates the corresponding layers.
Once you are done experimenting with your new setup, you may want to clean up your Azure resources so you don’t receive any unexpected charges. Luckily clean-up is pretty straightforward since most resources are contained in the ProjectShowcaseRG resource group. Run the following commands in the shell that you used to log into the Azure CLI earlier:
az group delete --name ProjectShowcaseRG --yes
az ad sp delete --id http://project-showcase