基于React的静态站点持续交付
While Continuous Deployment might be the ultimate goal for a modern developer, not everybody is ready to automate the whole process top to bottom—and this is totally fine. Still, whether you are ready to go full-auto or need that human touch when your code enters the final stretch before the release, Buddy CI/CD is here to help you out.
Actions used in this guide:
In this article, we're going to have a look at a Continuous Delivery scenario focused on Docusaurus 2 – a React-based static site builder for documentation portals. We will create a pipeline that will automatically perform the following tasks:
- build a docs portal
- spellcheck its content
- send appropriate notifications
- deploy it to Firebase upon approval
Such delivery model makes a lot of sense, as it lets you deploy updated docs just as the software is delivered to the users and not a moment earlier.
The following guide is available in the form of a video tutorial here:
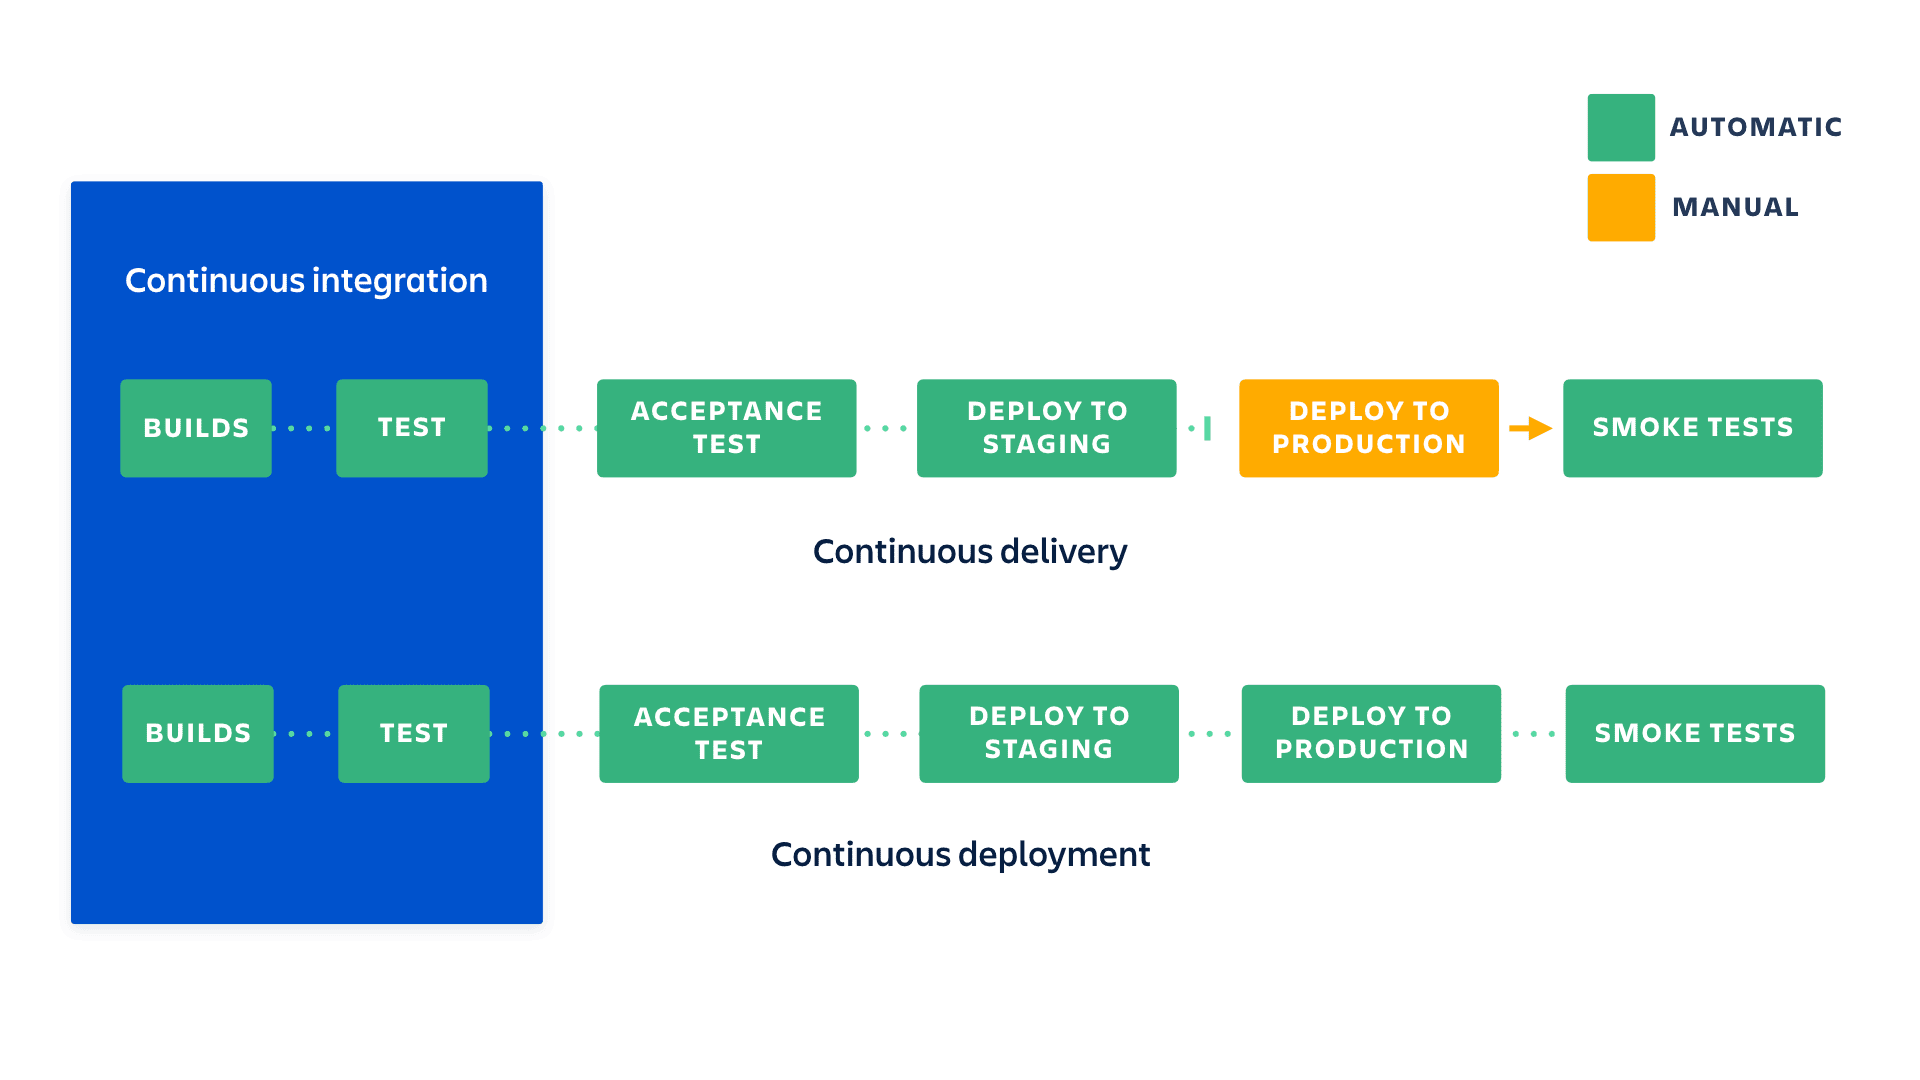
Three concepts of delivery automation
Before proceeding to the instructions, let's quickly recap the three key concepts of delivery automation:
Continuous Integration (CI) is an approach where all developers merge their changes to the main branch as often as they can. The changes are then validated by a suite of automated tests that ensure that whatever's on the master branch is 100% working.
Continuous Delivery takes the CI concept a step further and automatically builds the tested code and releases it to the selected environments, where you can manually deploy it with a click of a button. This is the approach we're looking at in this article.
Continuous Deployment goes even further and makes everything, including the deployment to the production environment, completely automatic. If you're confident that your test coverage is solid, the code quality is there, and there are no other blockers - this is the Nirvana every DevOps engineer strives to reach.
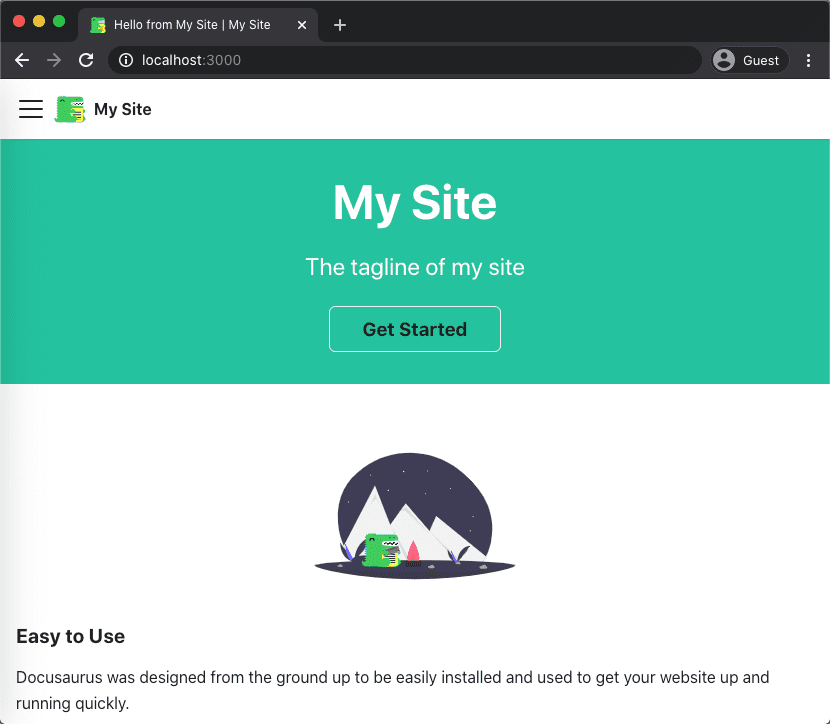
Step 1: Create a portal with Docusaurus
Let's start with our React app –the Docusaurus documentation portal. Follow these steps to create a new docs scaffolding in just a few seconds:
- Go to the selected directory on your local machine and enter the following command to create a new scaffolding for your documentation portal:
npx @docusaurus/init@latest init {PROJECT_NAME} classic
Replace {PROJECT_NAME} with the name of your project. This will effectively become the name of your website and a folder in which all Docusaurus files are stored.
- Go to the directory with your project and spin up the local dev server:
cd {PROJECT_NAME}
npm run start
- By default, the server runs at
http://localhost:3000– so go there and see your infant documentation portal in the flesh.
Take your time to fiddle with the service and configure the look and feel to your liking. Since this guide is focused on delivery automation, we assume that you have some content to fill it with.
Testing writing with Node Markdown Check
You can't make an omelet without breaking some eggs and it's almost guaranteed that you'll make a spelling mistake or two when writing your docs. That's totally fine, but you wouldn't want these mistakes to end up on your website, would you? To make sure that your writing is impeccable, let's add a Node markdown spellcheck test to our portal:
- Go to your project and open
package.json - Add this line to the
scriptsarray:
"test": "mdspell --en-us -a -r docs/*.md"
Running npm test will run the spellchecker with a couple of useful flags. If you want to run the test locally, you install the npm package first, but in our scenario, we'll leave running the test to the Buddy pipeline.
Step 2: Set up Firebase hosting
Now that the Docusaurus is ready and fed with content, let's deploy the finished product to a hosting service—in this case, Google Firebase. Make sure that you're still in the directory of your documentation portal and follow these steps:
- Install the Firebase CLI in your local environment:
npm install -g firebase-tools
- Sign in to the Firebase account:
firebase login
You can check the connection and list all your Firebase projects by running firebase projects:list
- Connect the current directory to your Firebase project:
firebase init
When you run this command, Firebase will ask you a couple of configuration questions. Here's what you need to choose for our use case:
# Which Firebase CLI features do you want to set up for this folder?: `Hosting: Configure and deploy Firebase Hosting sites`
# Project Setup: `Use an existing project`
# What do you want to use as your public directory?: `build`
# Configure as a single-page app? (...): `Yes`
# Set up automatic builds and deploys with GitHub?: `No`
- The last step is generating a token that we'll use to authenticate Buddy CI/CD in your Firebase account. Save it somewhere safe as we'll need it very soon.
firebase login:ci
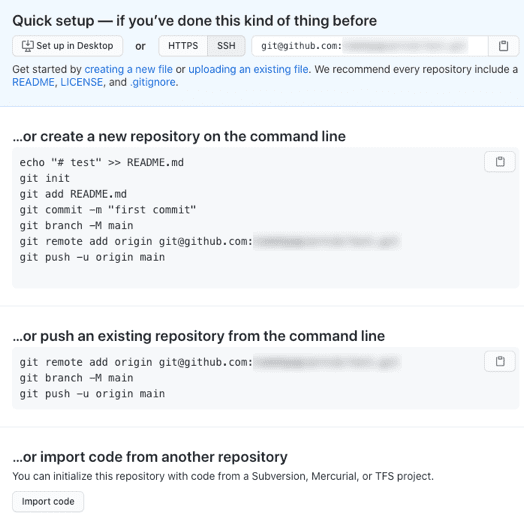
Step 3: Initialize a Git repository
For our final push in the configuration realm, we're going to initialize Git repository in our directory and push it to GitHub. Create a GitHub repository for your brand new documentation portal, and use one of the recommended methods to start.
When this is done, remember to commit and push all files in the directory to the newly initialized repository.
Step 4: Set up the pipeline in Buddy
With the portal and hosting configuration done, let's move on to creating a pipeline in Buddy.
- First, create a new project and choose GitHub as the Git hosting provider.
- Select the repository you initialized in the previous step.
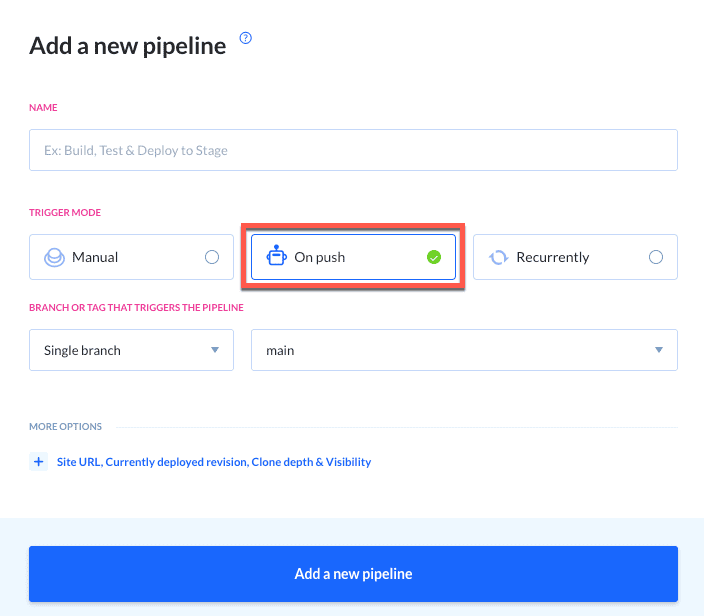
- Click Add a new pipeline and choose the name for your pipeline, the trigger mode, and the branch or tag that triggers the pipeline.
While the name is totally up to you, the triggering branch should stay at its default, which in our case is main. Go ahead and choose the On push trigger mode, which makes the pipeline run every time you push changes to the defined branch.
Now, let's set up the actions.
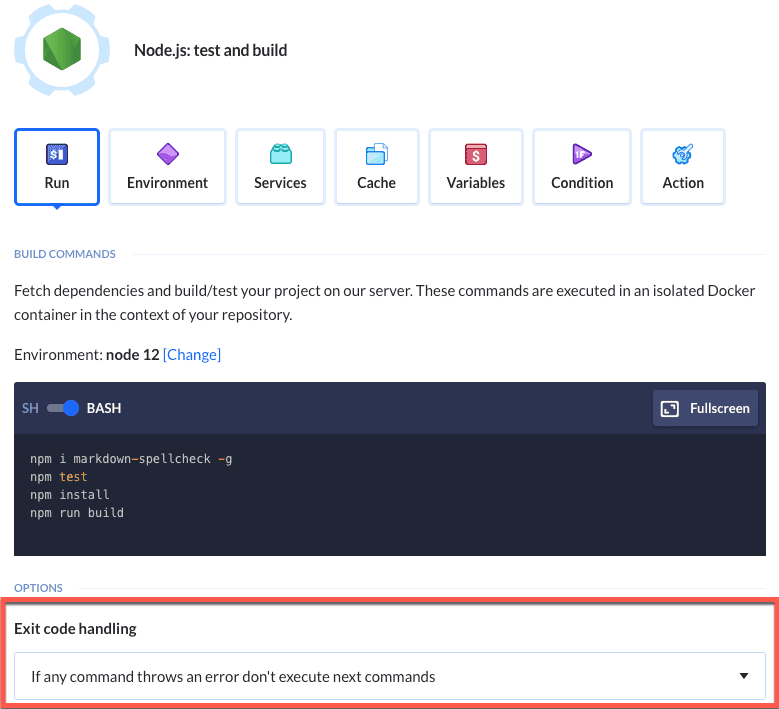
Node.js build & test
Find the Node action and add it to the list. This single action will handle the first of the two main parts of the pipeline, which is testing (spell-checking) the documentation and building the Docusaurus portal. Add these commands to the Node.js step:
npm i markdown-spellcheck -g
npm test
npm install
npm run build
Here's a breakdown of the commands one by one:
npm i markdown-spellcheck -g- pulls the spellchecker to the containernpm test- tests the content using the spellcheckernpm install- installs Docusaurus and its dependenciesnpm run build- builds the Docusaurus portal
Putting the commands in this order and leaving the default error handling method ensures that your documentation portal is built only when no spelling mistakes are found.
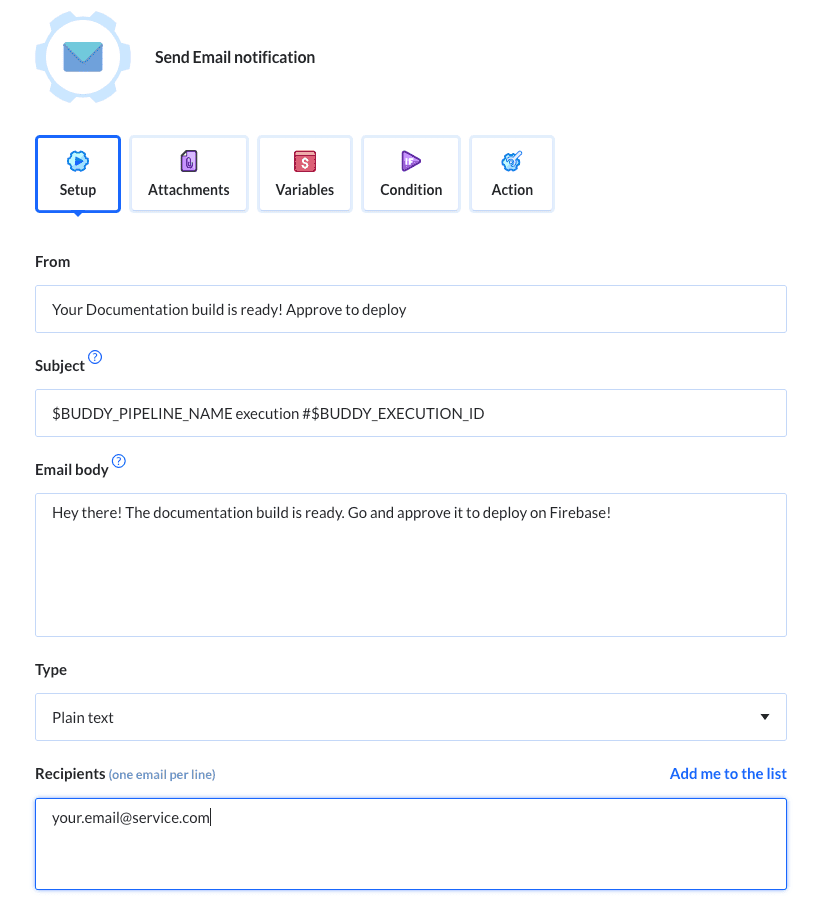
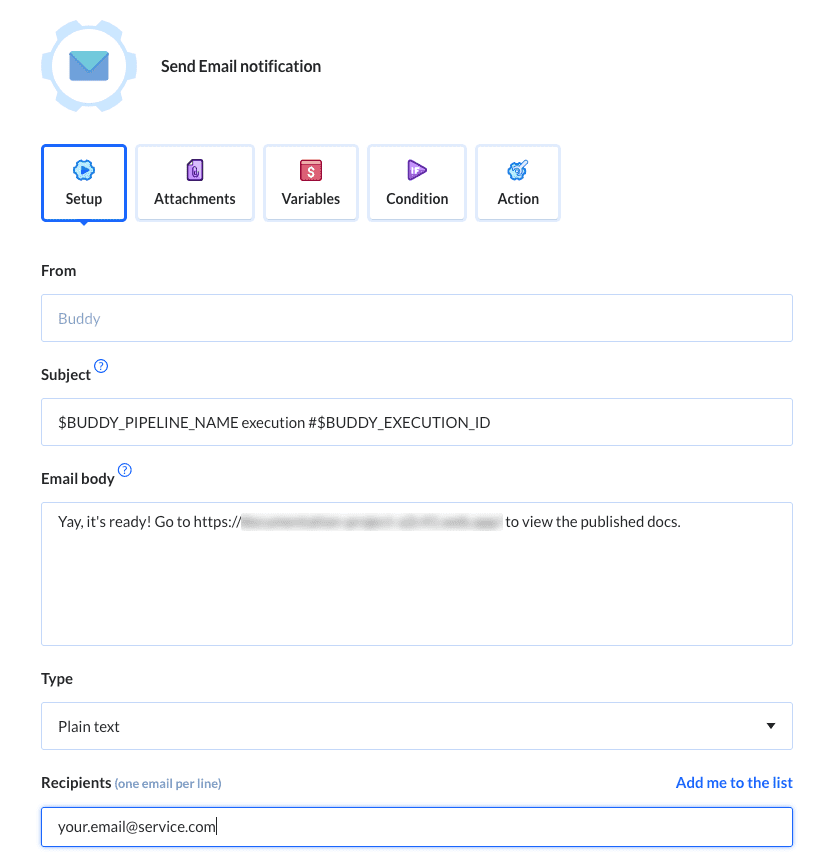
Send Email notification
Next, find and add a Send Email notification action. This action lets the pipeline send an information email after the Node.js runs successfully. In the body of the message, invite the recipient to inspect the pipeline and approve the next step.
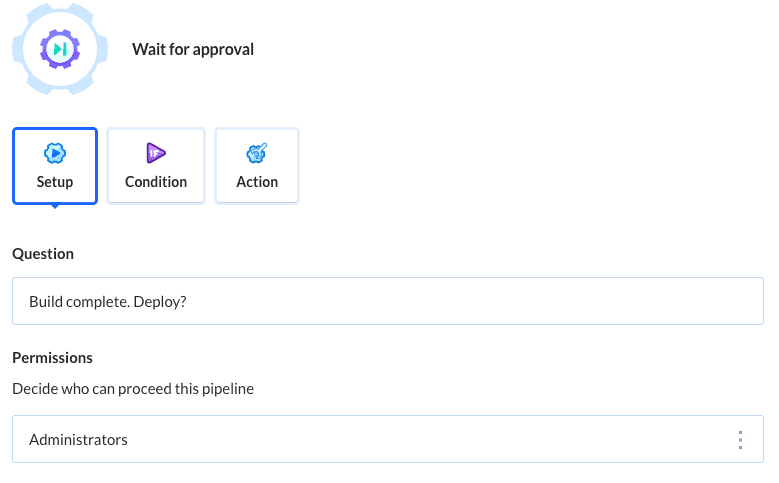
Wait for approval
The next action stops the pipeline and requires the approval of a qualified user to proceed to the next step. This is a must for the pipeline to work in the Continuous Delivery model, allowing a human to choose the right time for deployment of the React app. The configuration of this step requires you to define the question, i.e. what should be approved, and select a person or a group of people authorized to make this call:
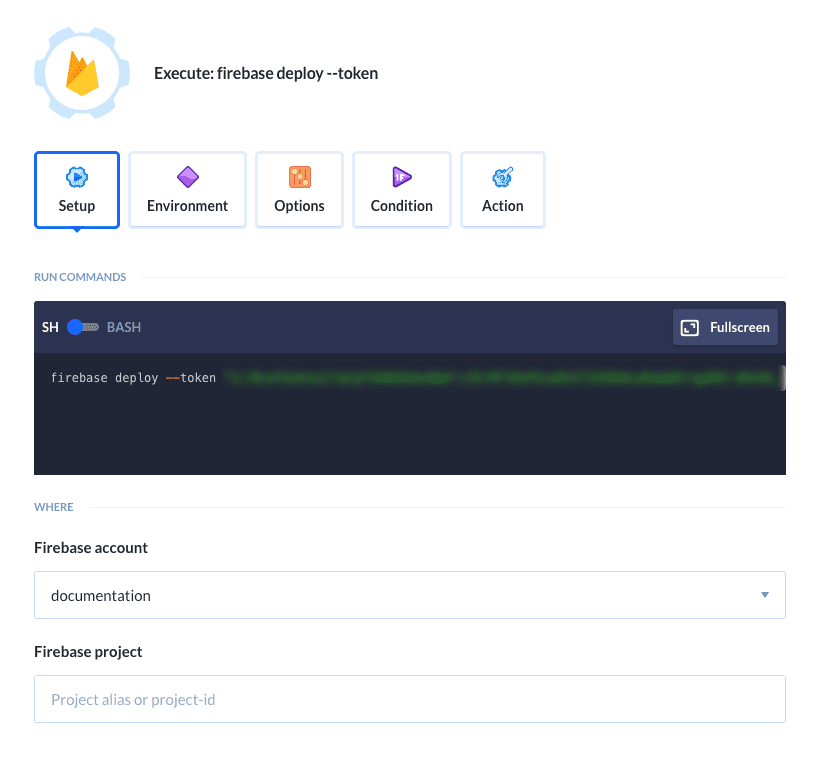
Firebase deploy
Now for the star of the show—add the Firebase action to the pipeline. This takes care of deploying the Docusaurus portal. In the action's terminal, enter this command:
firebase deploy --token "{YOUR_FIREBASE_CI_TOKEN}"
As you can see, this is where the Firebase token you obtained in step 2 comes into play. If you didn't save it - don't worry! Simply re-run the command from step 2 to get this token and use it to replace the {YOUR_FIREBASE_CI_TOKEN} placeholder.
You can also save the token as an environment variable, a good (and more secure) idea to share values across several pipelines.
Send Email notification (again)
As a final step, we're going to add another Send Email notification action. This one will act as icing on the cake, informing selected people that the website has been successfully deployed. If you want to be extra fancy, you can include the web address of your Docusaurus portal to make it even easier to check out the latest version deployed—everything thanks to the magic of Buddy.
Summary
Any action in the guide can be replaced with one that matches your actual workflow, be it the build, deployment, notifications, or anything else. Automating the deployment alone is worth giving a shot, giving a massive boost to performance. Take it slow, add one thing at a time, test, rinse, repeat—and enjoy the world of Automation.