如何使用Puppeteer截图
Puppeteer is a Node.js library that you can use to control headless Chrome.
It can be used to automate things that are usually performed manually in the browser, such as submitting forms, UI testing, keyboard input, or capturing a timeline trace to diagnose performance. The idea is similar to Selenium, although it's much faster and much more reliable.
Configuring the script
Before you start, make sure you have Node.js 6.4.0 or higher with npm installed, or the Puppeteer will not work.
Begin with creating a JS script that will grab the screenshot. Make sure to name the file test.js so that it will match the package.json:
const puppeteer = require('puppeteer');

(async () => {
  const browser = await puppeteer.launch({args: ['--no-sandbox', '--disable-setuid-sandbox']});
  const page = await browser.newPage();
  await page.goto('https://buddy.works');
  await page.screenshot({path: 'buddy-screenshot.png'});

  await browser.close();
})();
Prepare package.json
The second step is defining the metadata for npm:
{
  "name": "test",
  "version": "1.0.0",
  "description": "",
  "main": "index.js",
  "dependencies": {
    "puppeteer": "^0.13.0"
  },
  "devDependencies": {},
  "scripts": {
    "test": "node test.js"
  },
  "author": "",
  "license": "ISC"
}
Run Puppeteer
With everything in place, you can test the script by running:
npm install
npm test
The screenshot will be grabbed to the folder where you run the script.
Automate Puppeteer with Buddy
With Buddy, you can run your script on every push to the branch assigned. The configuration is very easy and takes 10-15 minutes.
For the purposes of this guide you can use our example repository with the script and json already generated.
Sign up to Buddy with your GitHub/Bitbucket account or email
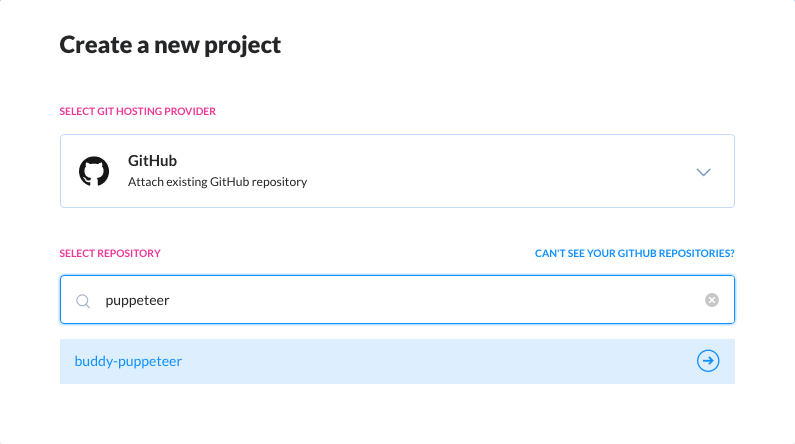
Create a new project, select your Git provider, and choose the repository with the Puppeteer script:
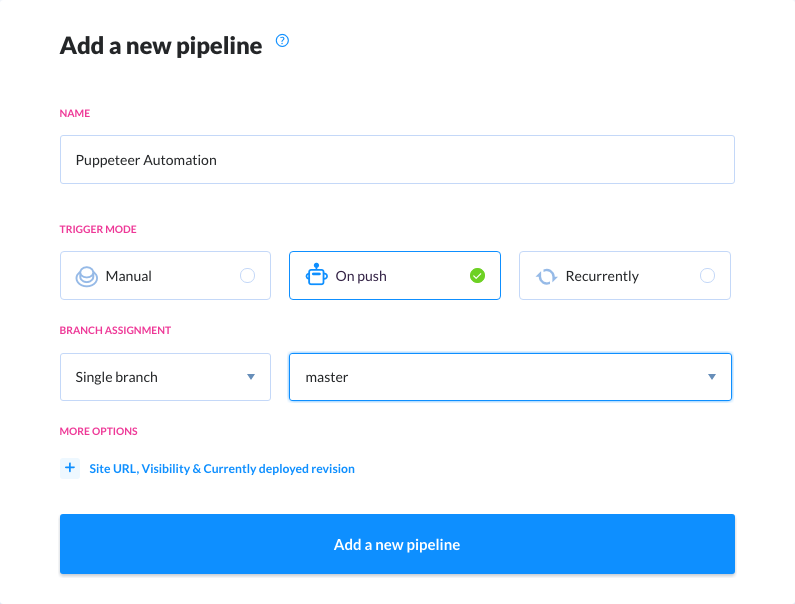
Add and configure a new pipeline:
- enter the name (eg. Puppeteer automation)
- set the trigger mode to On every push
- select the branch that will trigger the execution
- save changes when ready
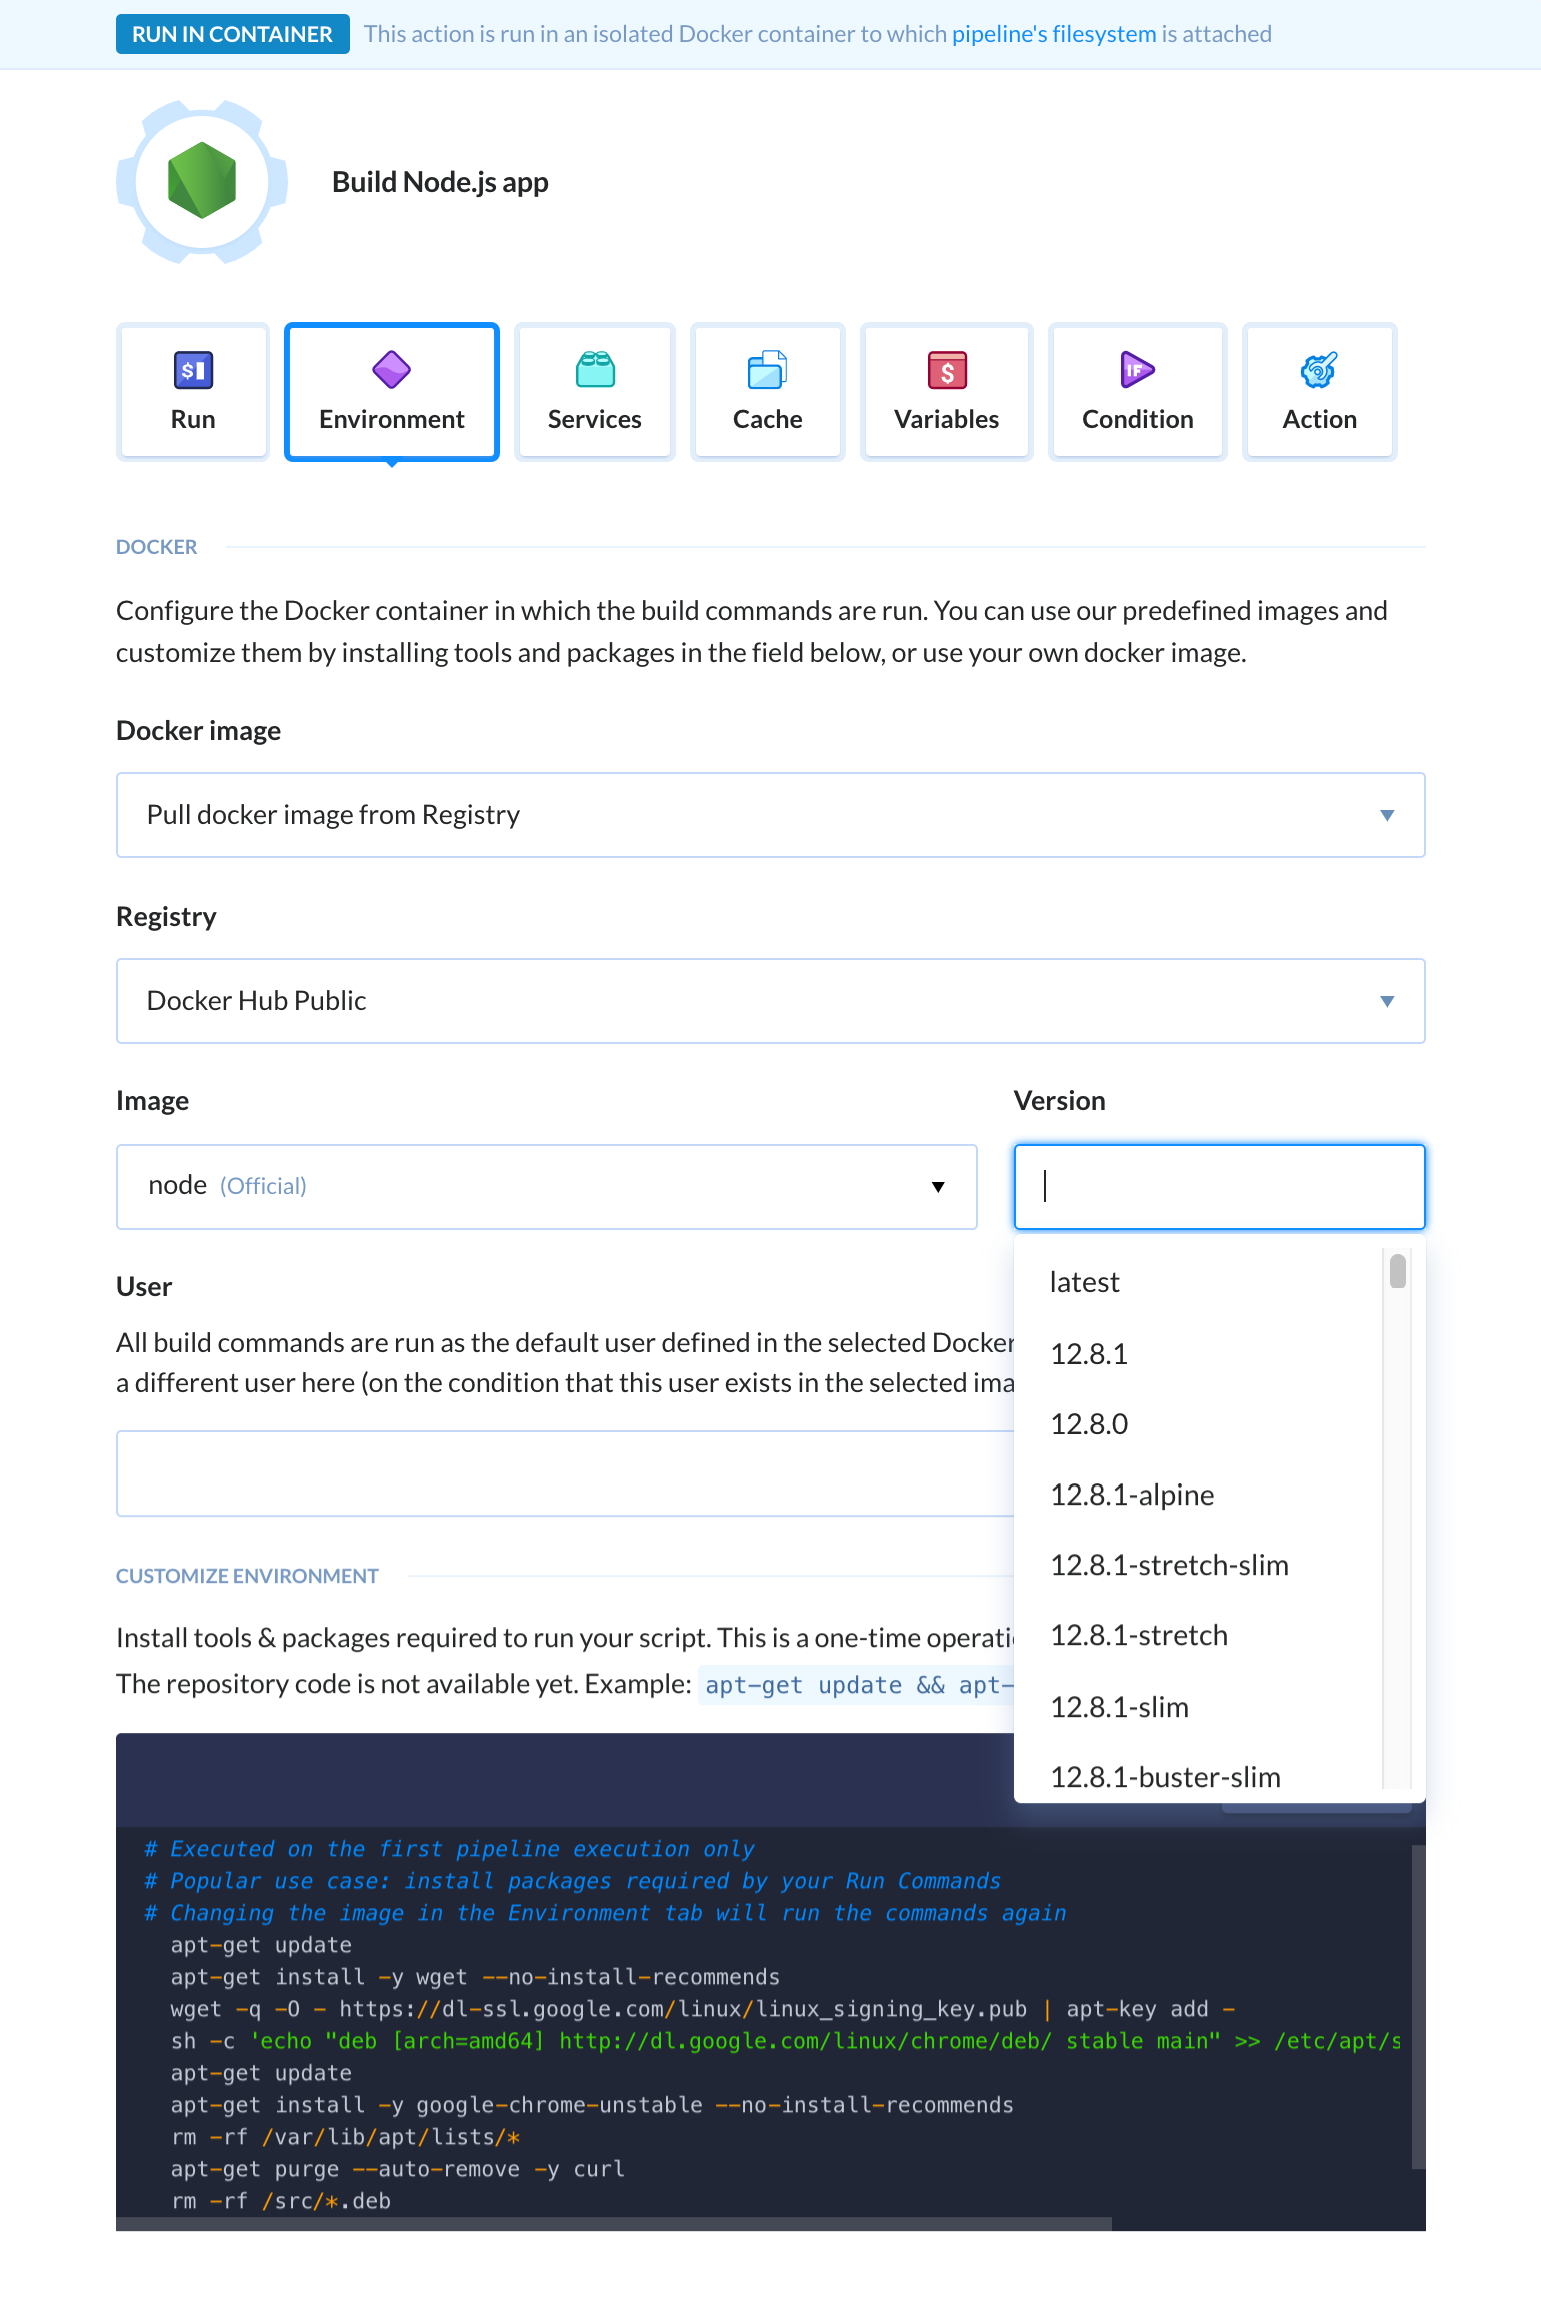
Look up and add the Node action. Switch to the Environment tab and install Puppeteer in the customization field at the bottom:
apt-get update
apt-get install -y wget --no-install-recommends
wget -q -O - https://dl-ssl.google.com/linux/linux_signing_key.pub | apt-key add -
sh -c 'echo "deb [arch=amd64] http://dl.google.com/linux/chrome/deb/ stable main" >> /etc/apt/sources.list.d/google.list'
apt-get update
apt-get install -y google-chrome-unstable --no-install-recommends
rm -rf /var/lib/apt/lists/*
apt-get purge --auto-remove -y curl
rm -rf /src/*.deb
Make sure to change the image version to Node 6.4.0 or higher or the Puppeteer will not work.
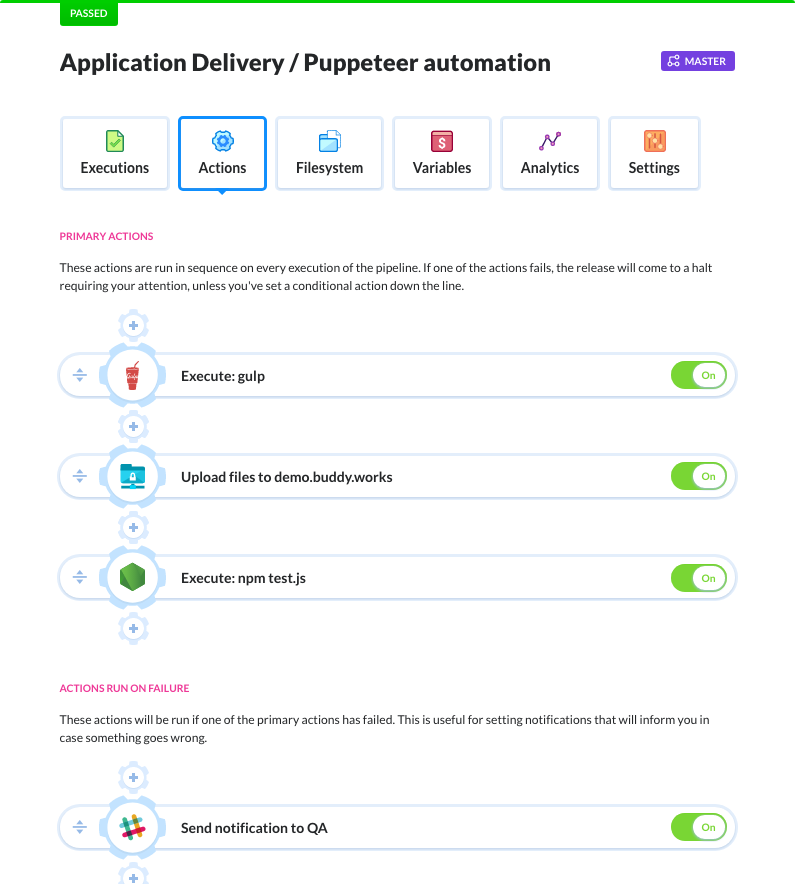
When ready, make a push to the assigned branch and Buddy will automatically run the script:
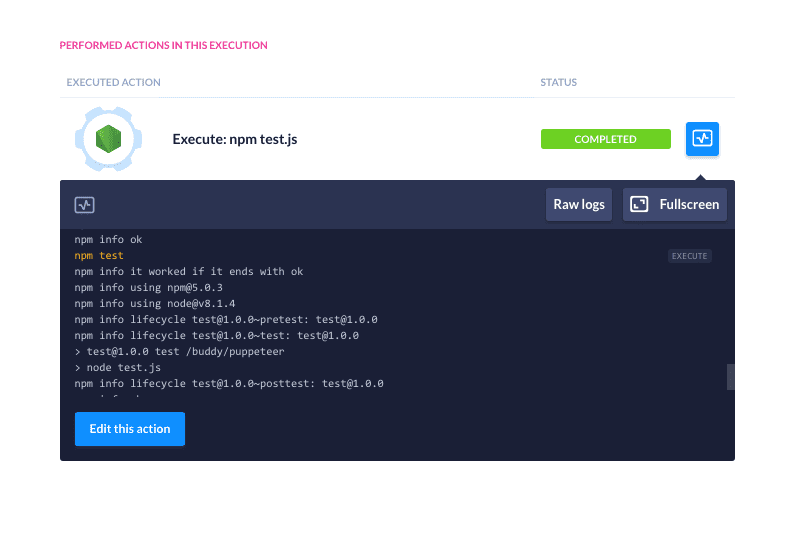
Congratulations! You have just automated a process with Buddy and Puppeteer. You can view the screenshots captured in the pipeline's filesystem.
Expand the pipeline
Buddy lets you easily automate your whole delivery workflow with over 70 dedicated pipeline actions. Before grabbing the screenshot, you can, for example:
build your application & test code for errors
deploy to FTP/SFTP, AWS, Google, Azure & DigitalOcean
send a notification in case something goes wrong
Do you have any questions regarding this article? Or perhaps you would like to share your feedback with us? Contact us at support@buddy.works or leave a message at our community forum