如何自动化部署Shopify商店
E-commerce is surging under the lockdown, with thousands of businesses opening online stores every week. This means more work for developers, including those working with Shopify themes. With the numbers growing, deploying, and managing multiple shops at once can get tricky. Buddy solves this problem with delivery pipelines, a fast and elegant solution that lets you automate deployments and preview changes before going live.
In this guide, we will set up automatic deployment of a Shopify theme to an existing store. We will create two environments: live, where your theme is hosted, and stage, to preview changes before publishing them to production.
Actions used in this guide:
Step 1: Configuring Theme Kit CLI
Start with downloading Shopify's Theme Kit CLI. The CLI lets you run various operations in the context of Shopify themes by running commands. You can find installation instructions for your OS on their documentation page.
Adding new private app
When you're done, you'll need to create a new private app in the store's admin panel to gain access to Shopify's API.
- Log in into your store admin panel
- Go to the Apps tab
- Click Manage private apps under the list of installed apps
- Click Create new private app
- Fill in name of the app (for example,
theme-kit-cli) - At the Admin API section, scroll down to Themes and set it to
Read and write(you may need to expand inactive Admin API permissions) - Save the app and copy the newly generated password
The password is required to run Shopify Theme Kit CLI commands – make sure to copy it as we'll need it later on!
Step 2: Bootstrapping theme project
For this guide, we'll be using the default Debut Shopify theme. To bootstrap our project we will download it using Theme Kit CLI.
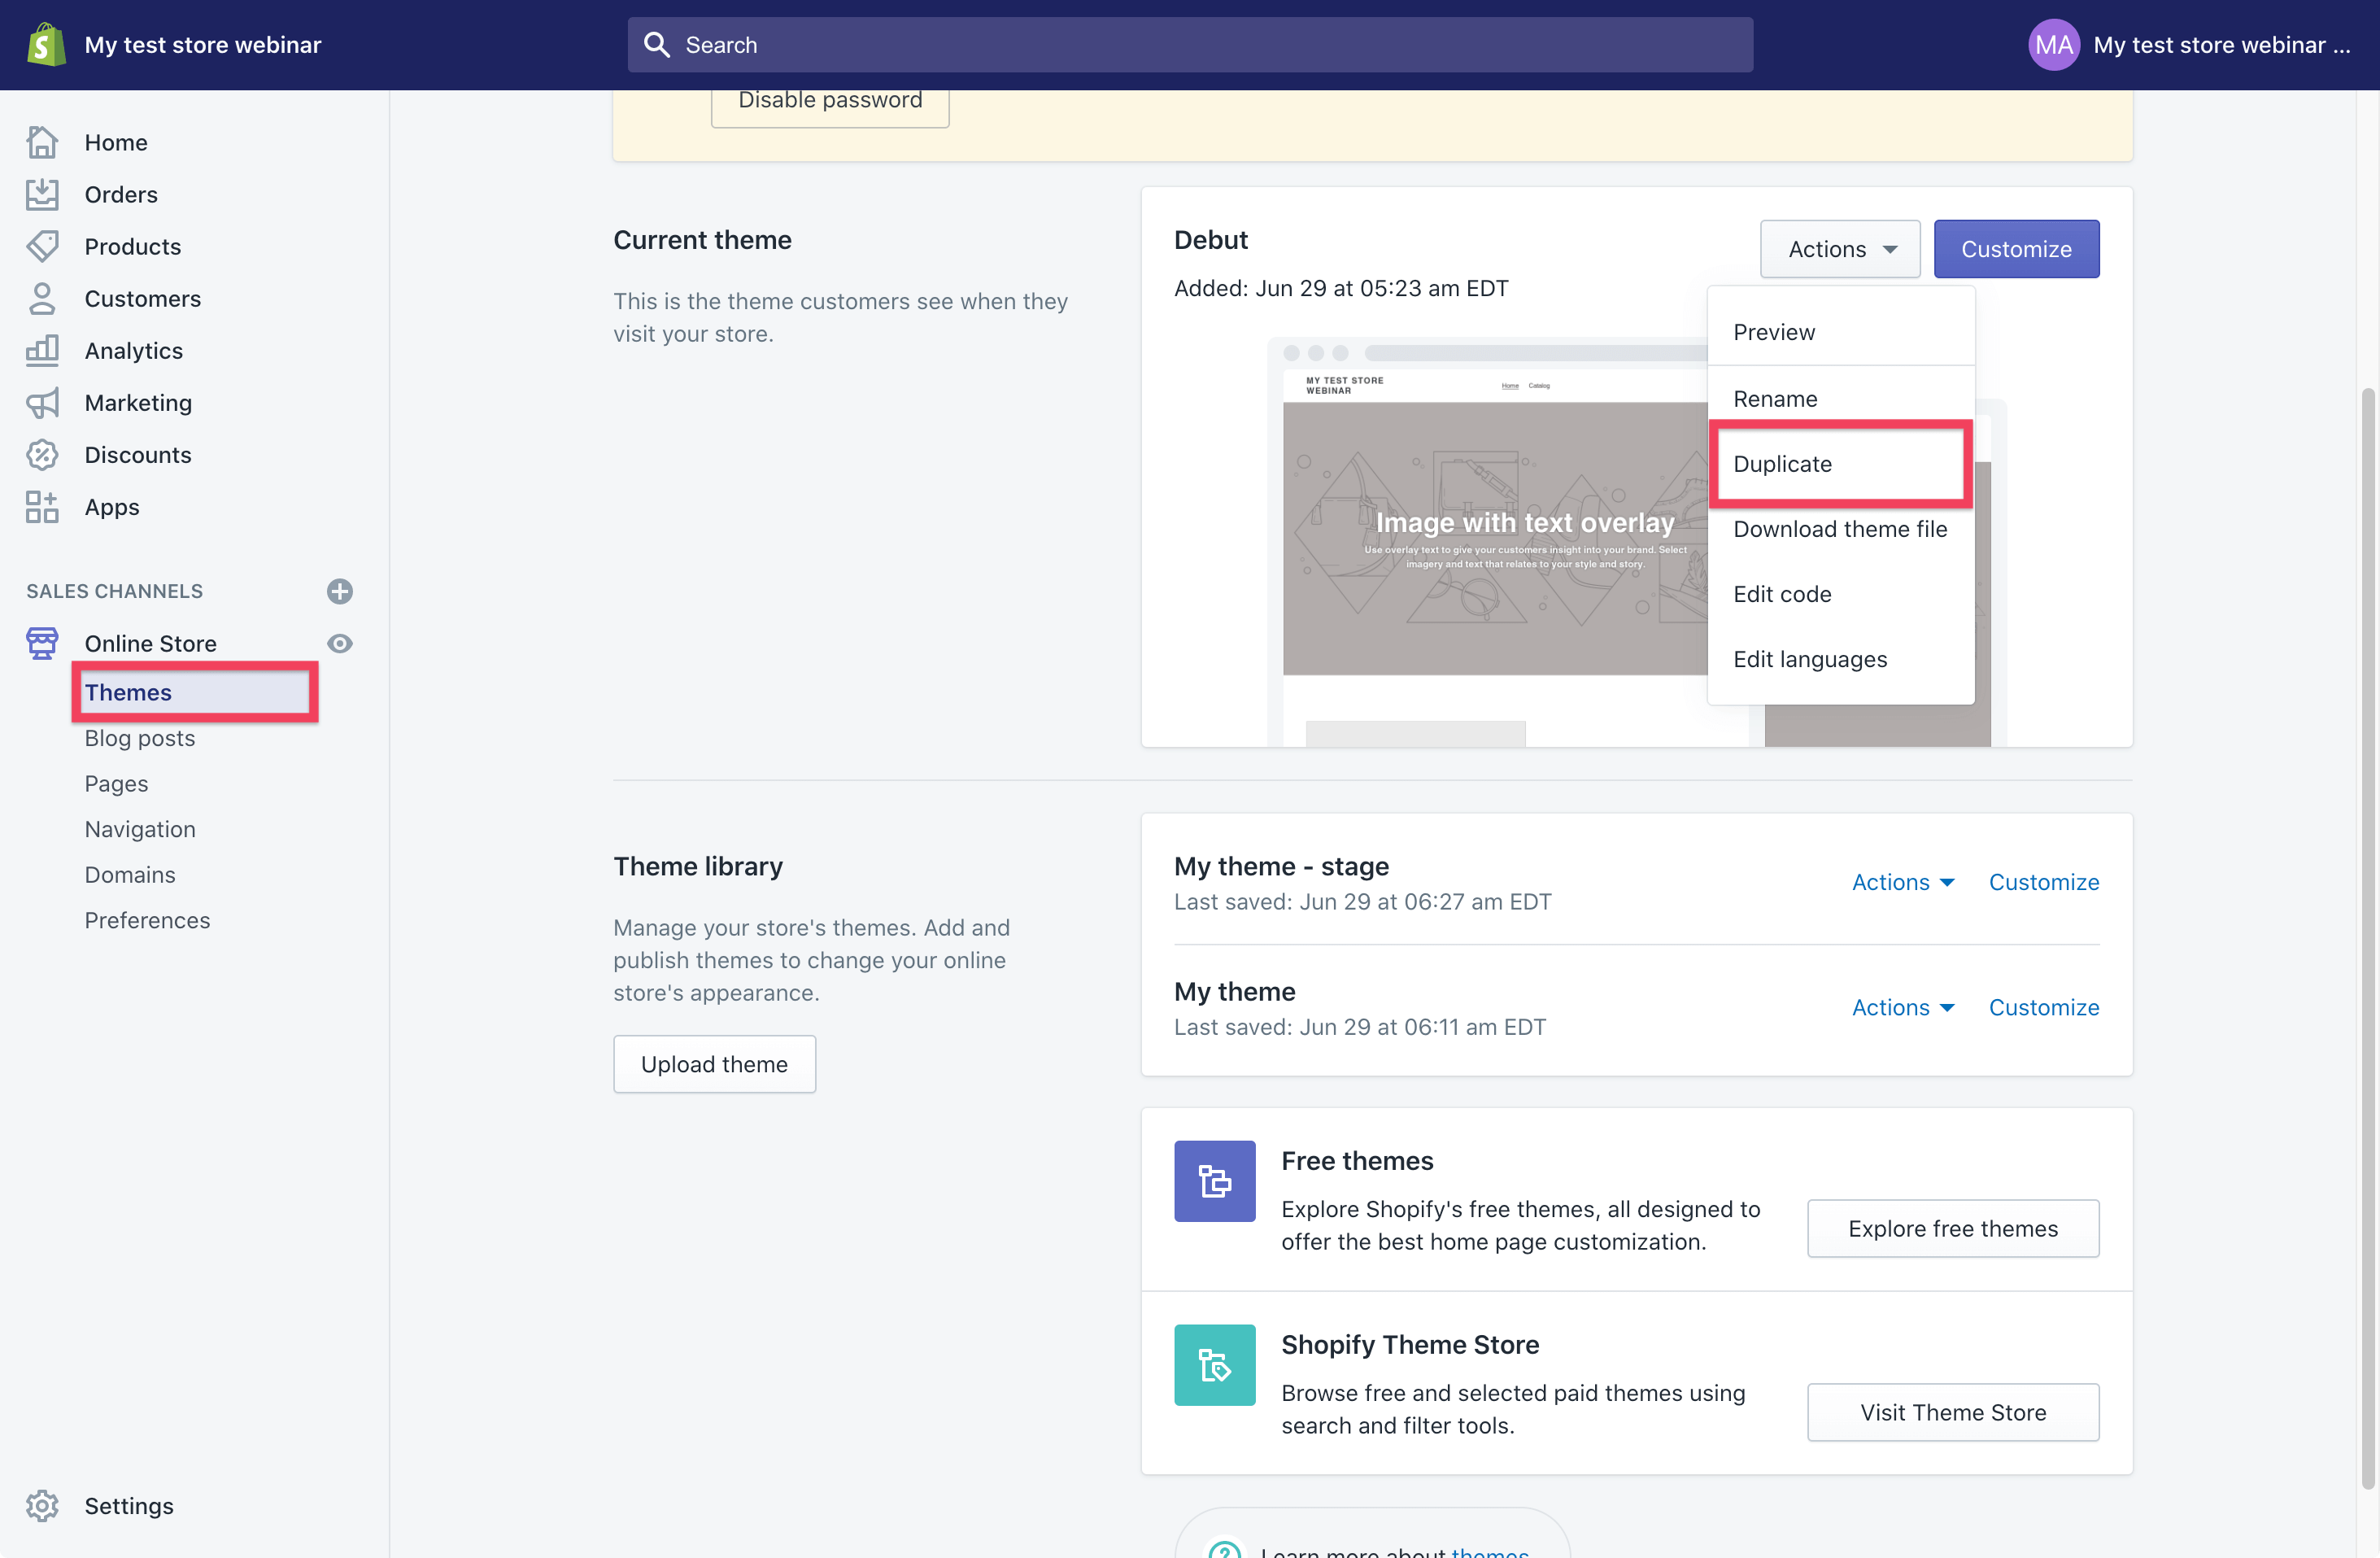
- Go to the store admin panel and visit the Online Store / Themes tab
- Click the Actions button and select Duplicate
- When the process is done, duplicate the theme again with the name
Stage. We will use this theme for previewing changes in the stage environment.
Downloading theme with Theme Kit CLI
After creating a new theme, we have to download it.
- Create a directory on your computer and go there from the command line.
- Before we download the theme, we have to know its ID. To list all themes installed in your store, run this command:
theme get --list -p=[PASSWORD] -s=[SHOP_NAME].myshopify.com
where:
PASSWORD– is the password to the Shopify's API we have created earlierSHOP_NAME– your shop's name used in the website URL (for example,my-shop.myshopify.com)
You should get this output from the command with two new themes – one for production and one for staging environment:
Available theme versions:
    [103746207896] Debut
    [103747092632][live] My theme
    [103749681304] My theme - stage
The number in brackets is the theme's ID. We can use it now to download the files from Shopify:
theme get --themeid=[THEME_ID] -p=[PASSWORD] -s=[SHOP_NAME].myshopify.com
Lastly, check if all files were downloaded successfully. Your folder structure should look like this:
❯ ls
assets config config.yml layout locales sections snippets templates
The Shopify Theme Kit CLI is also available as a dedicated action in Buddy (see below).
Setting up Git repository
In this tutorial, we'll use Buddy as the code provider. You can use any VCS if you wish, though, as Buddy integrates with all types of Git providers, including GitHub, Bitbucket, and GitLab. In this case, reproduce the steps below, but select a different provider at the beginning.
Start with setting up a new repository in the folder with your theme:
git init
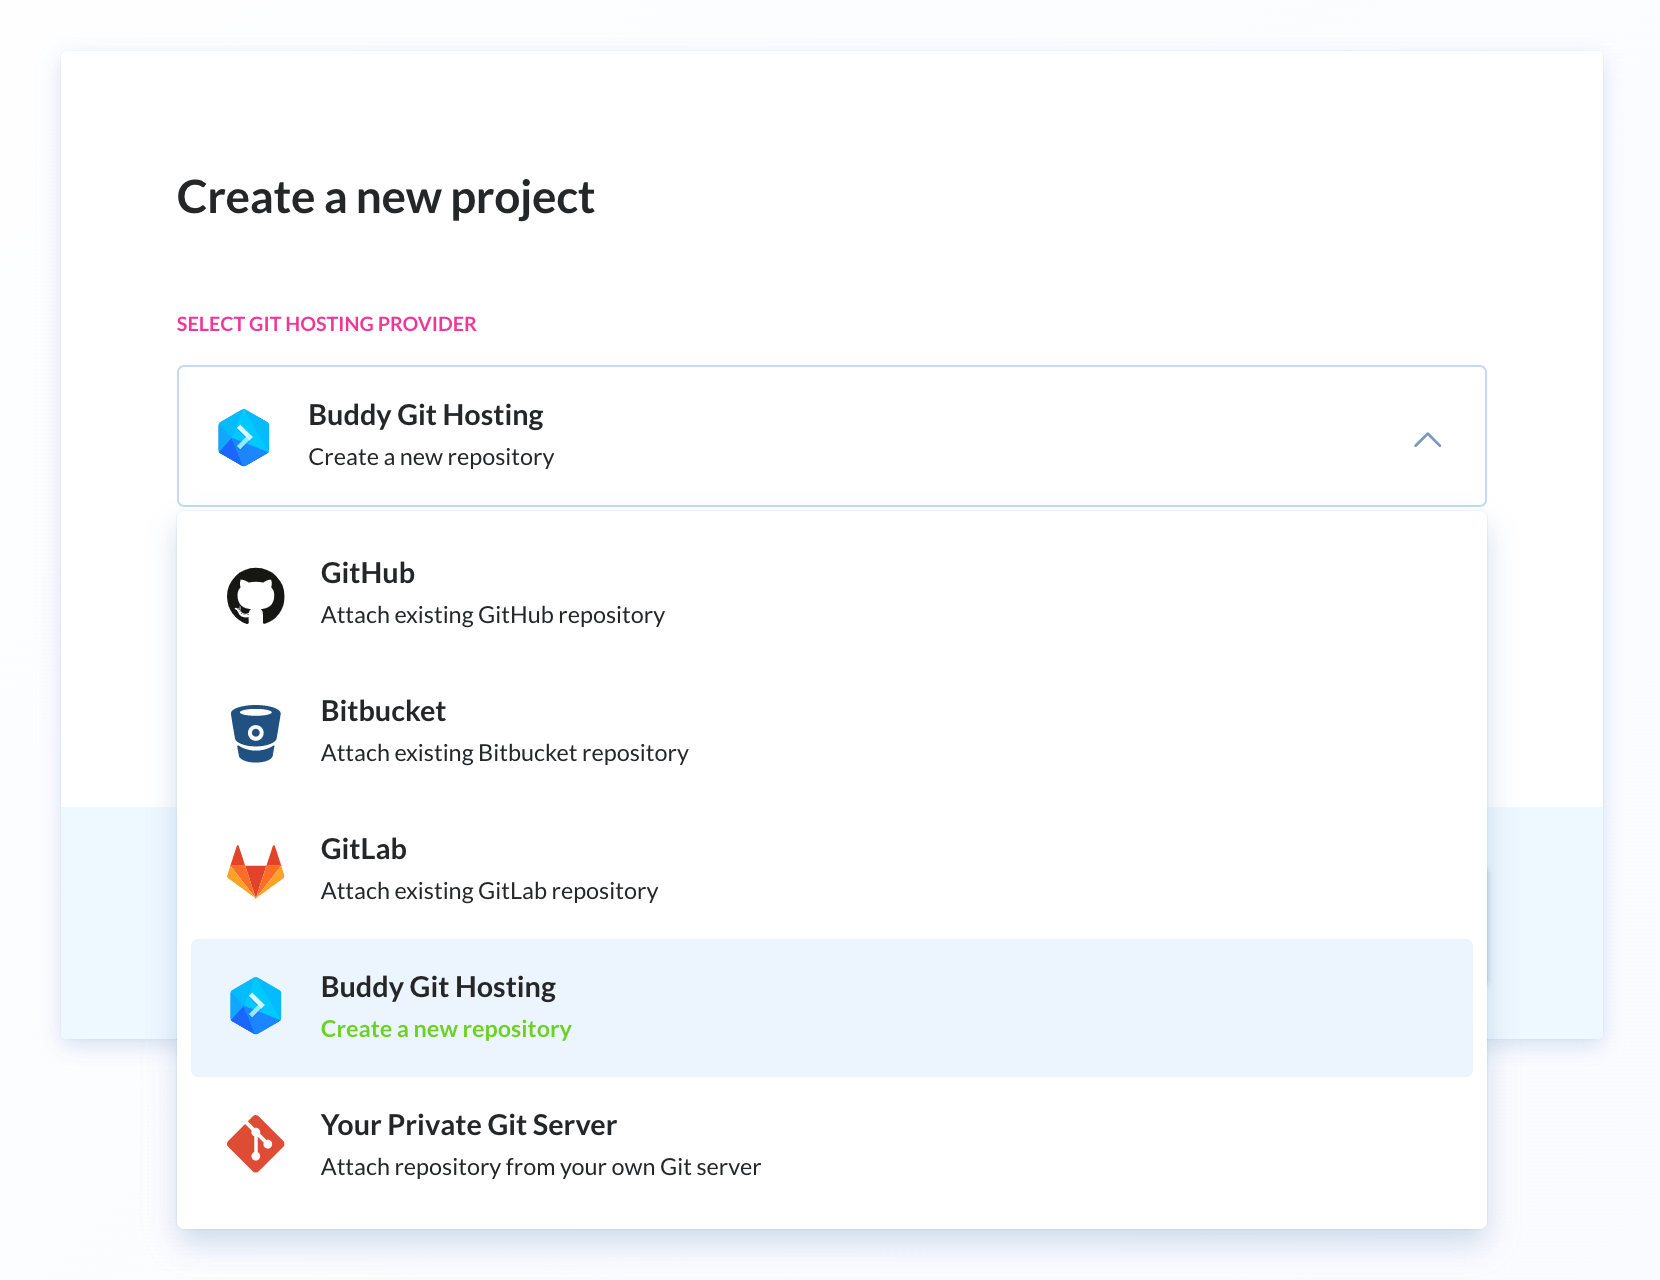
Sign in to your Buddy account, create a new project and select Buddy as the provider:
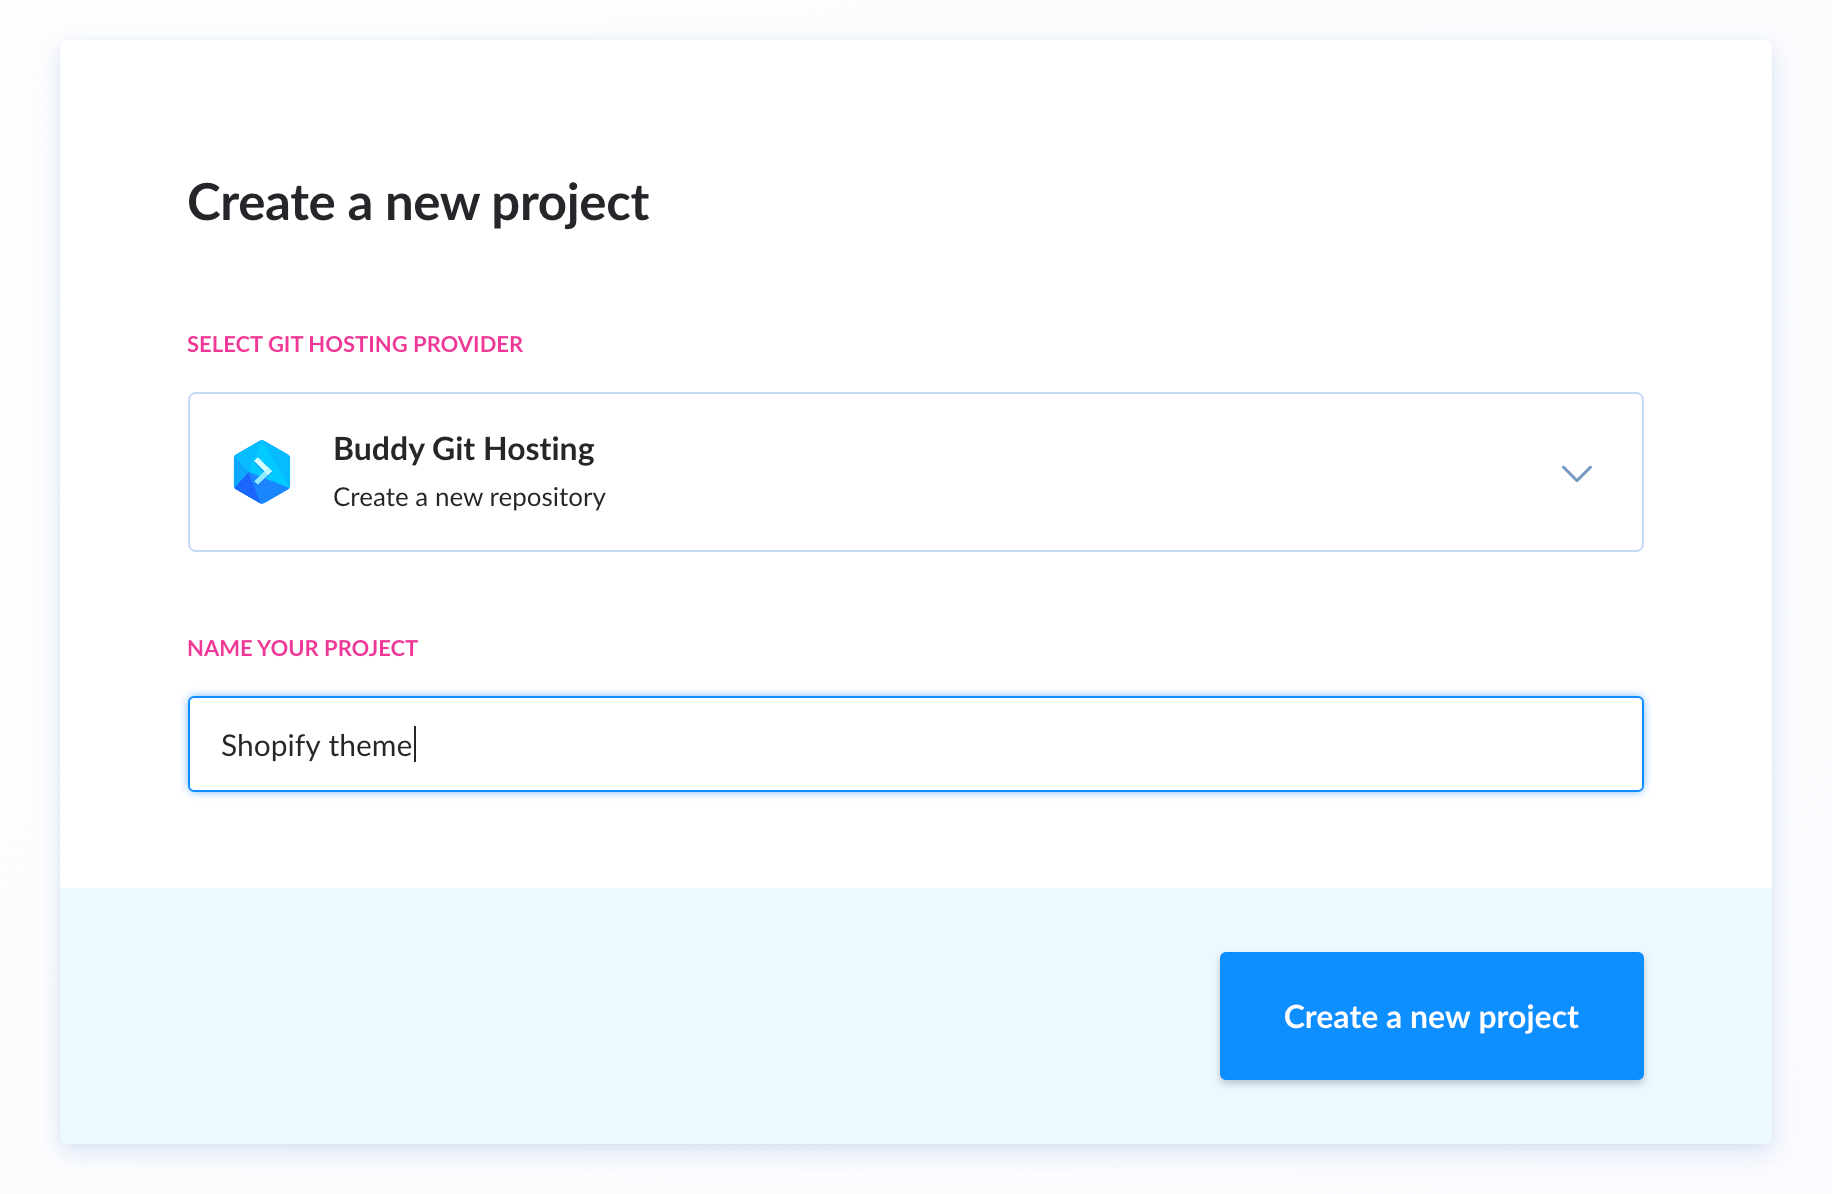
Enter the name and click the button to proceed:
Copy the URL of the newly created remote repository:
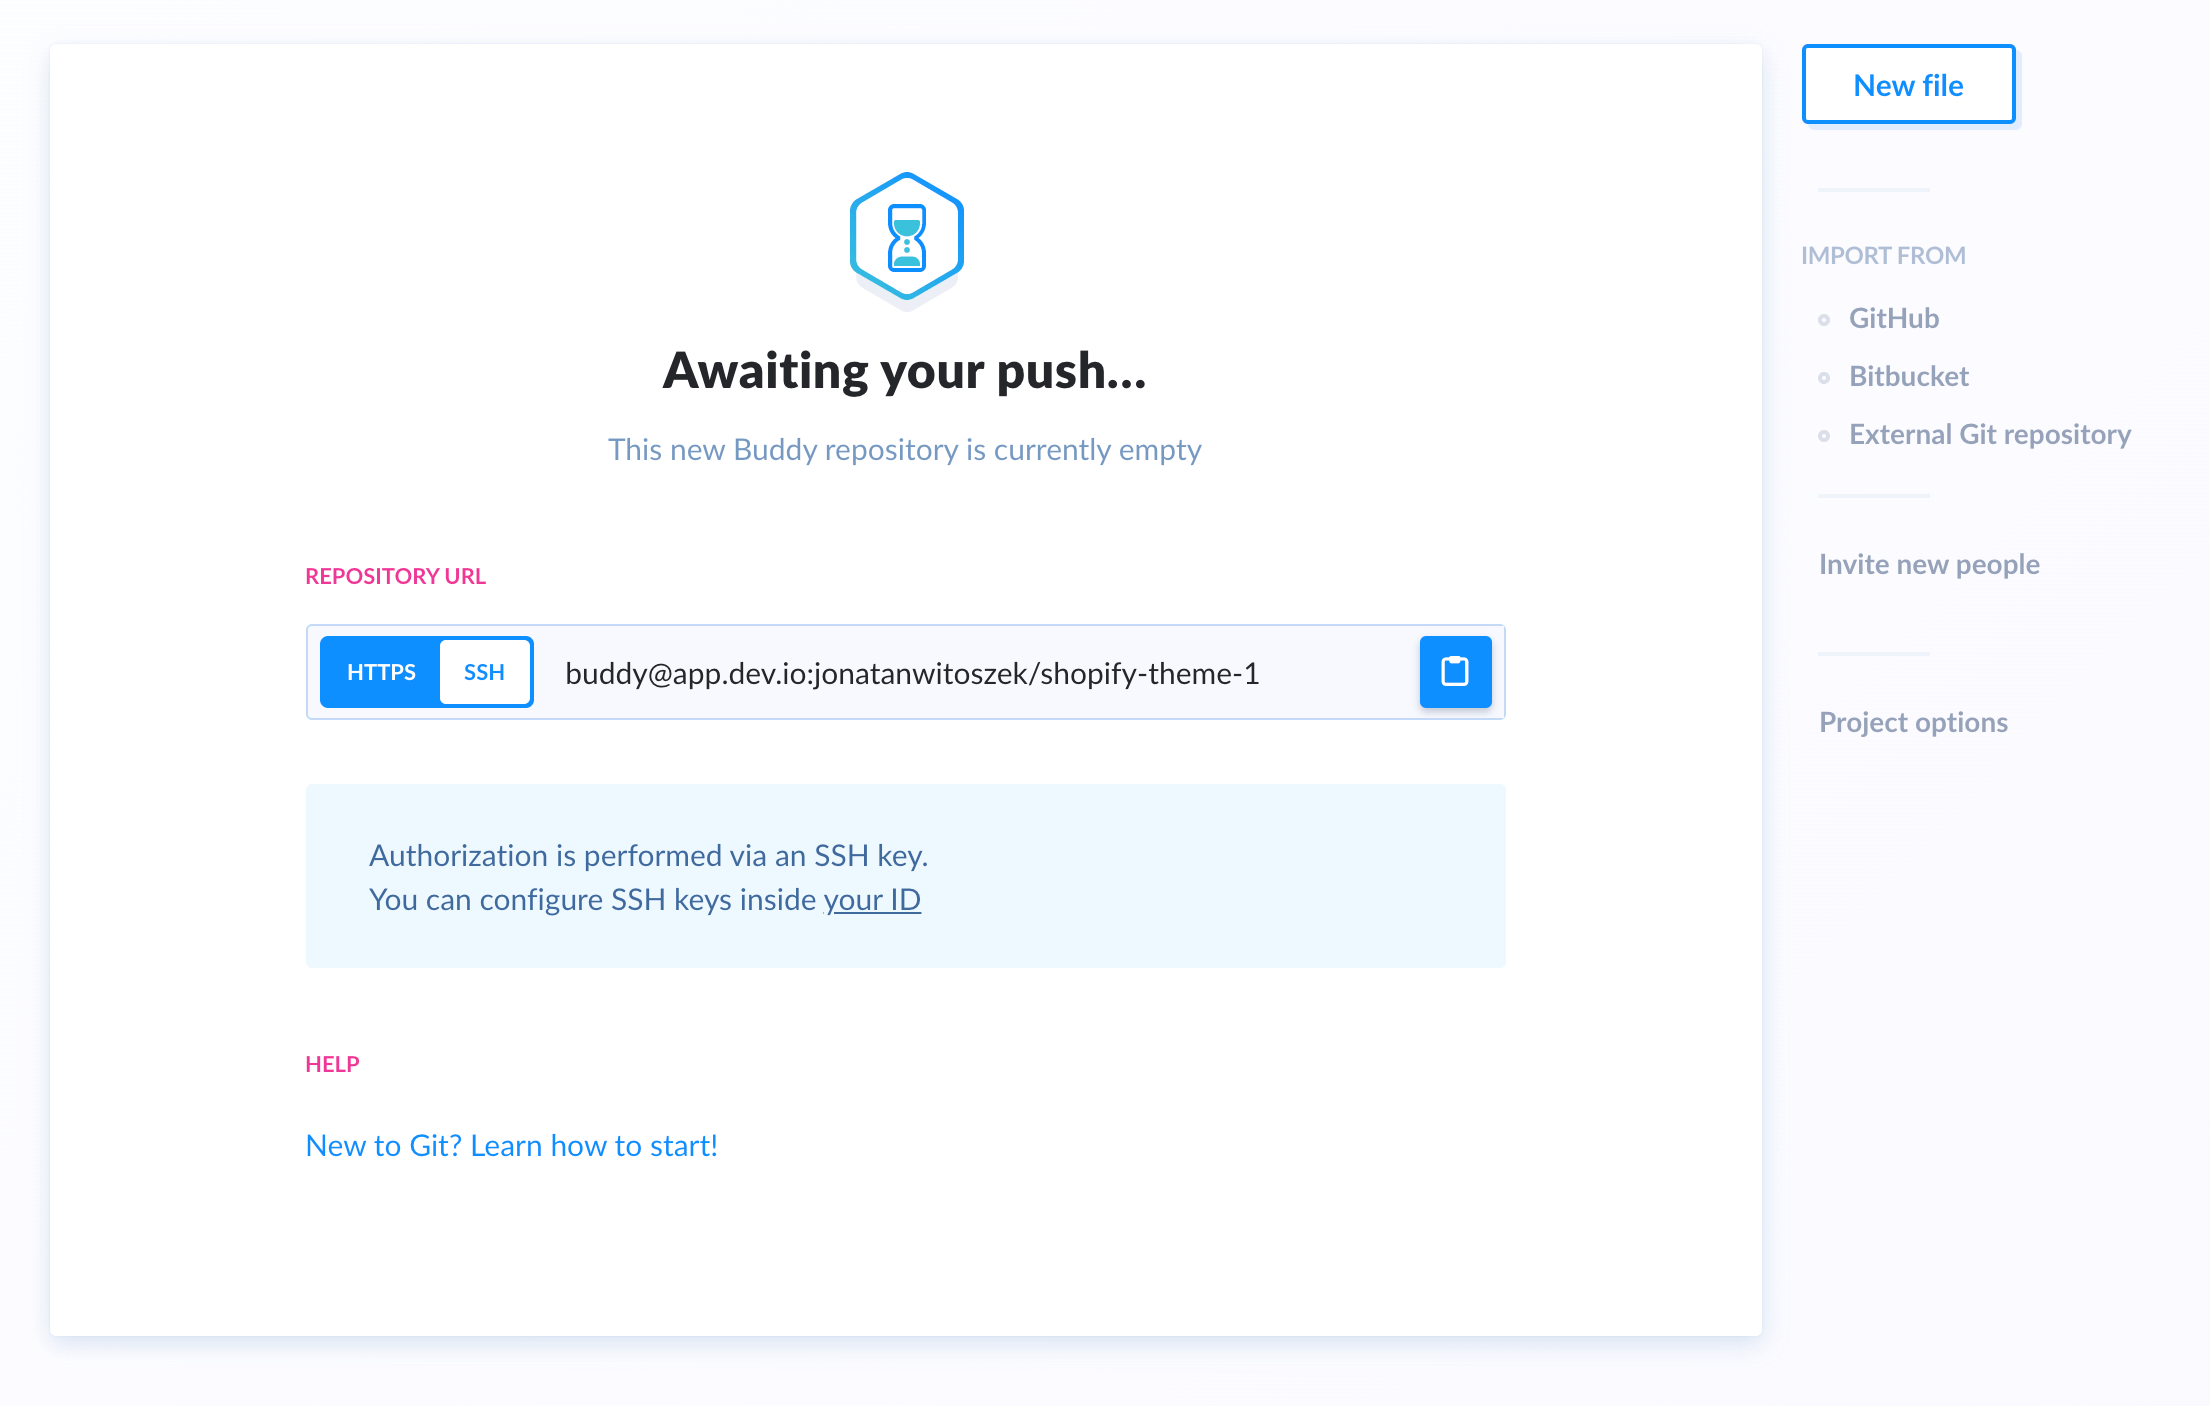
For improved security, we'll use SSH for authentication. Make sure that you have added your SSH key in Buddy's account settings!
Add the remote to the repository on your computer using the copied URL:
git remote add origin [REPOSITORY_URL]
Now, create an initial commit with all files from the folder:
git add .
git commit -m "first commit"
Create and checkout the stage branch. We'll use it to deploy changes to the preview environment:
git checkout -b stage
With everything ready, push the commit to the remote repository on Buddy:
git push -u origin --all
Step 3: Delivery to Production
With the theme safe and sound in the repository, it's time to configure two pipelines that will be deploying changes to the Shopify store.
Pipeline configuration
The live pipeline will reflect what is visible to your customers on the Shopify store. It will be watching for changes on the master branch.
- Click Add a new pipeline on the project's page
- Set the name to
Liveor similar - Select
Manualas the trigger mode - Select
masteras the deployment branch - Click the blue button to finish configuration
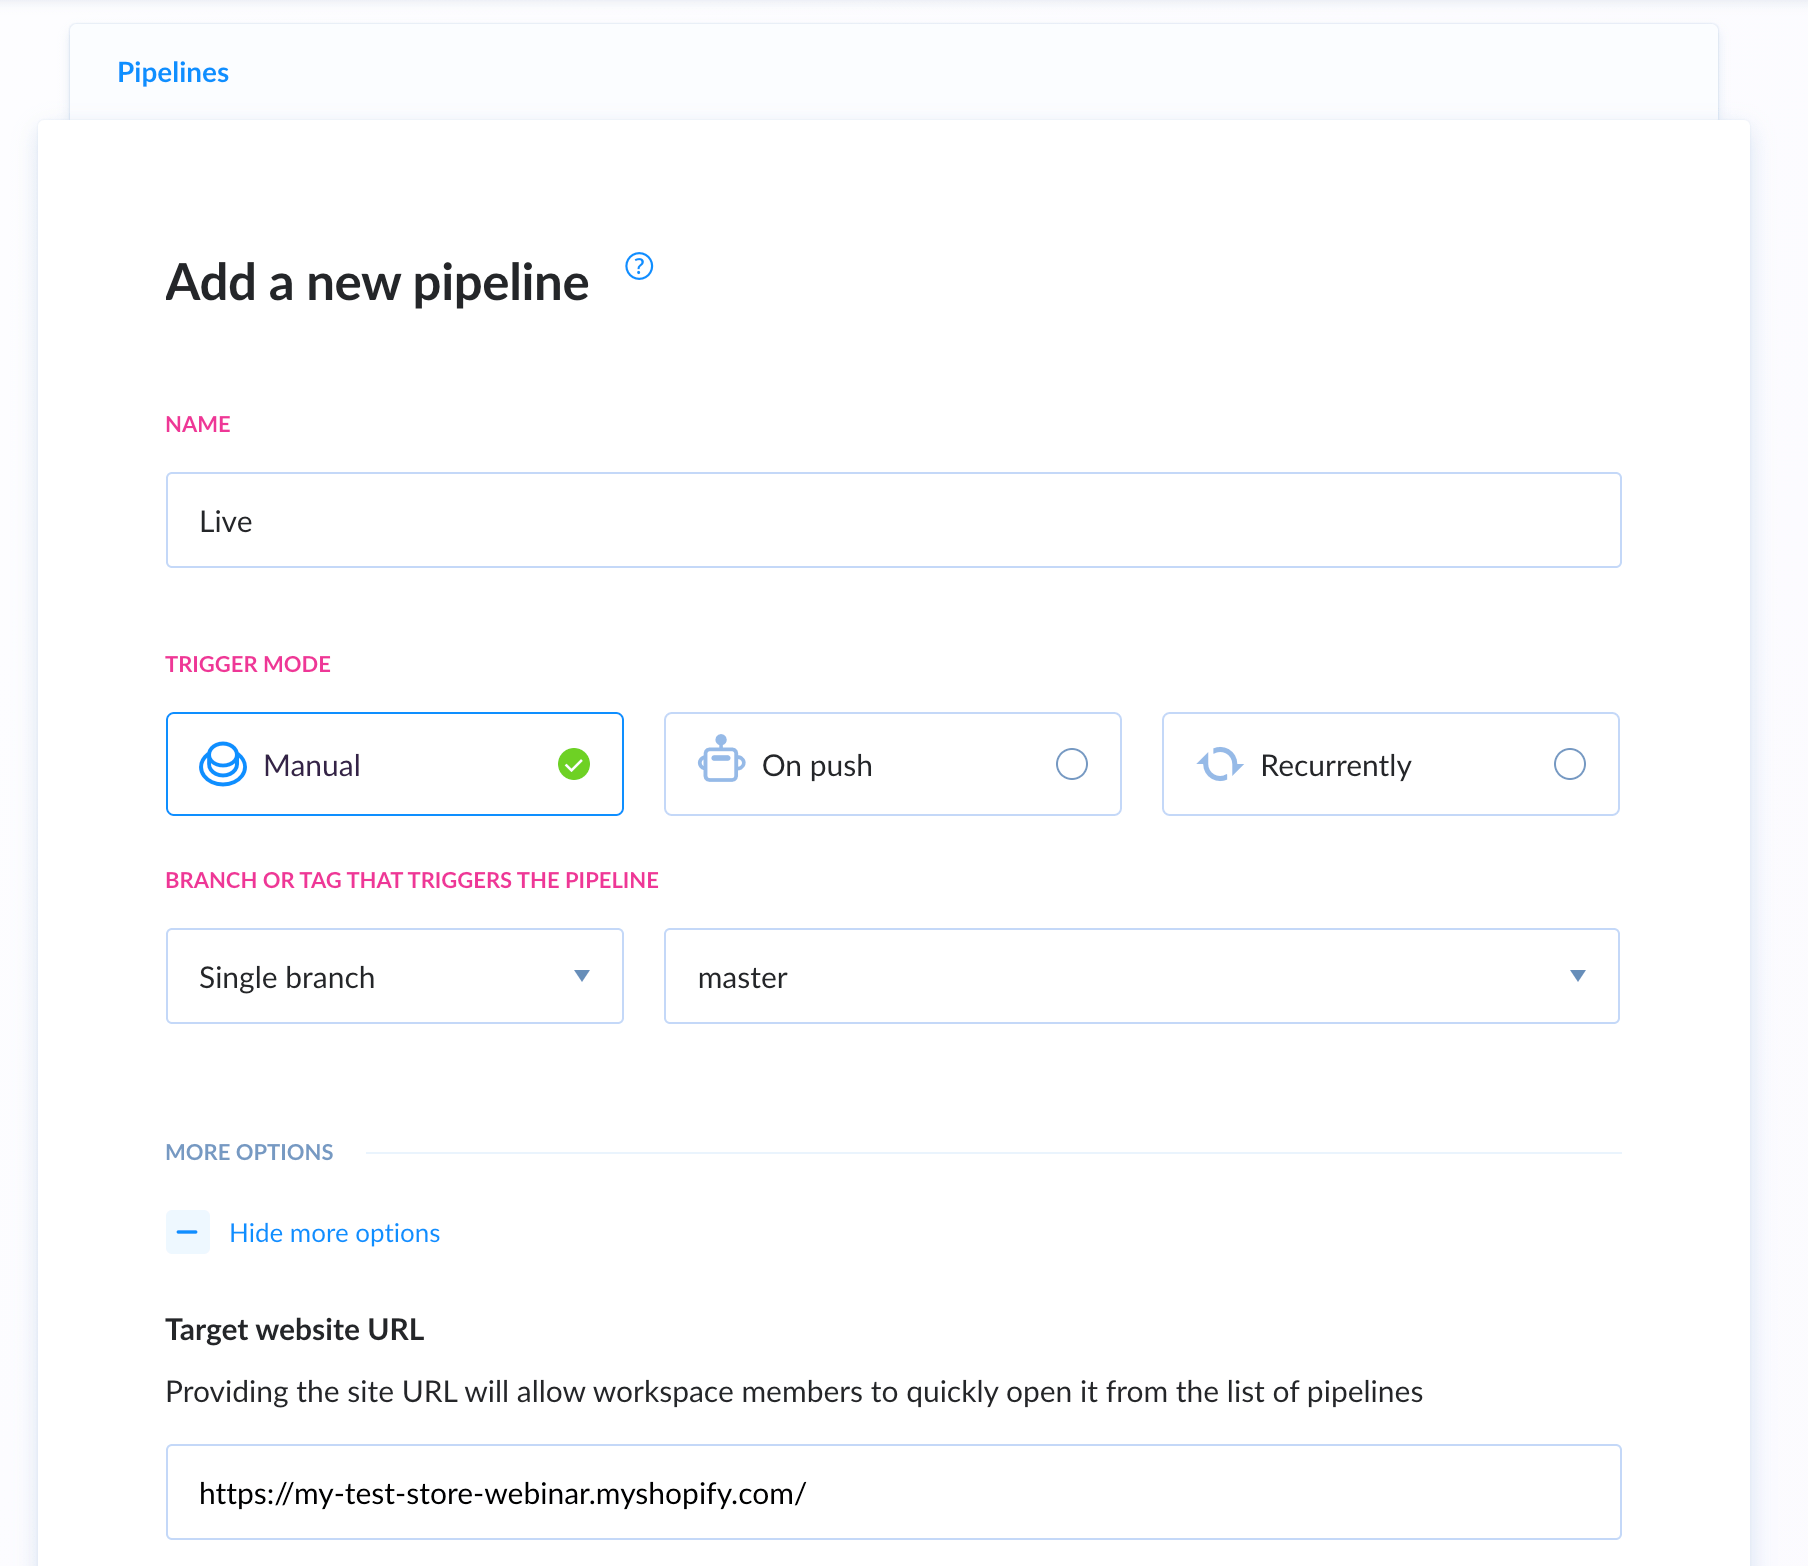
Setting the trigger mode to manual (on click) will secure the pipeline from accidental deployment. However, the master branch should always be ready for deployment to live – be sure that whatever your merge is 100% tested and verified.
You can expand the options menu and provide the URL to your store in the Target website URL so that you can quickly access it from the pipeline view after the deployment.
Deployment to Shopify
With the pipeline configured, we can add the Shopify deployment action:
- Look up Shopify on the action list
- In the integration box, paste the URL to your shop and click the button when ready
- Buddy will redirect you to your store settings. Install Buddy in the store to proceed
- With the integration added, select the theme and shop to which you want to deploy
Step 4: Delivery to Stage
Pipeline configuration
Creating the staging pipeline works the same as with the production pipeline. The differences are the branch from which we deploy, and the triggering mode:
- Go to the Pipelines tab and click Add a new pipeline
- Set the name to
Stagingor similar - Select
On pushas the trigger mode - Select
stagingas the deployment branch - Click the blue button to finish configuration
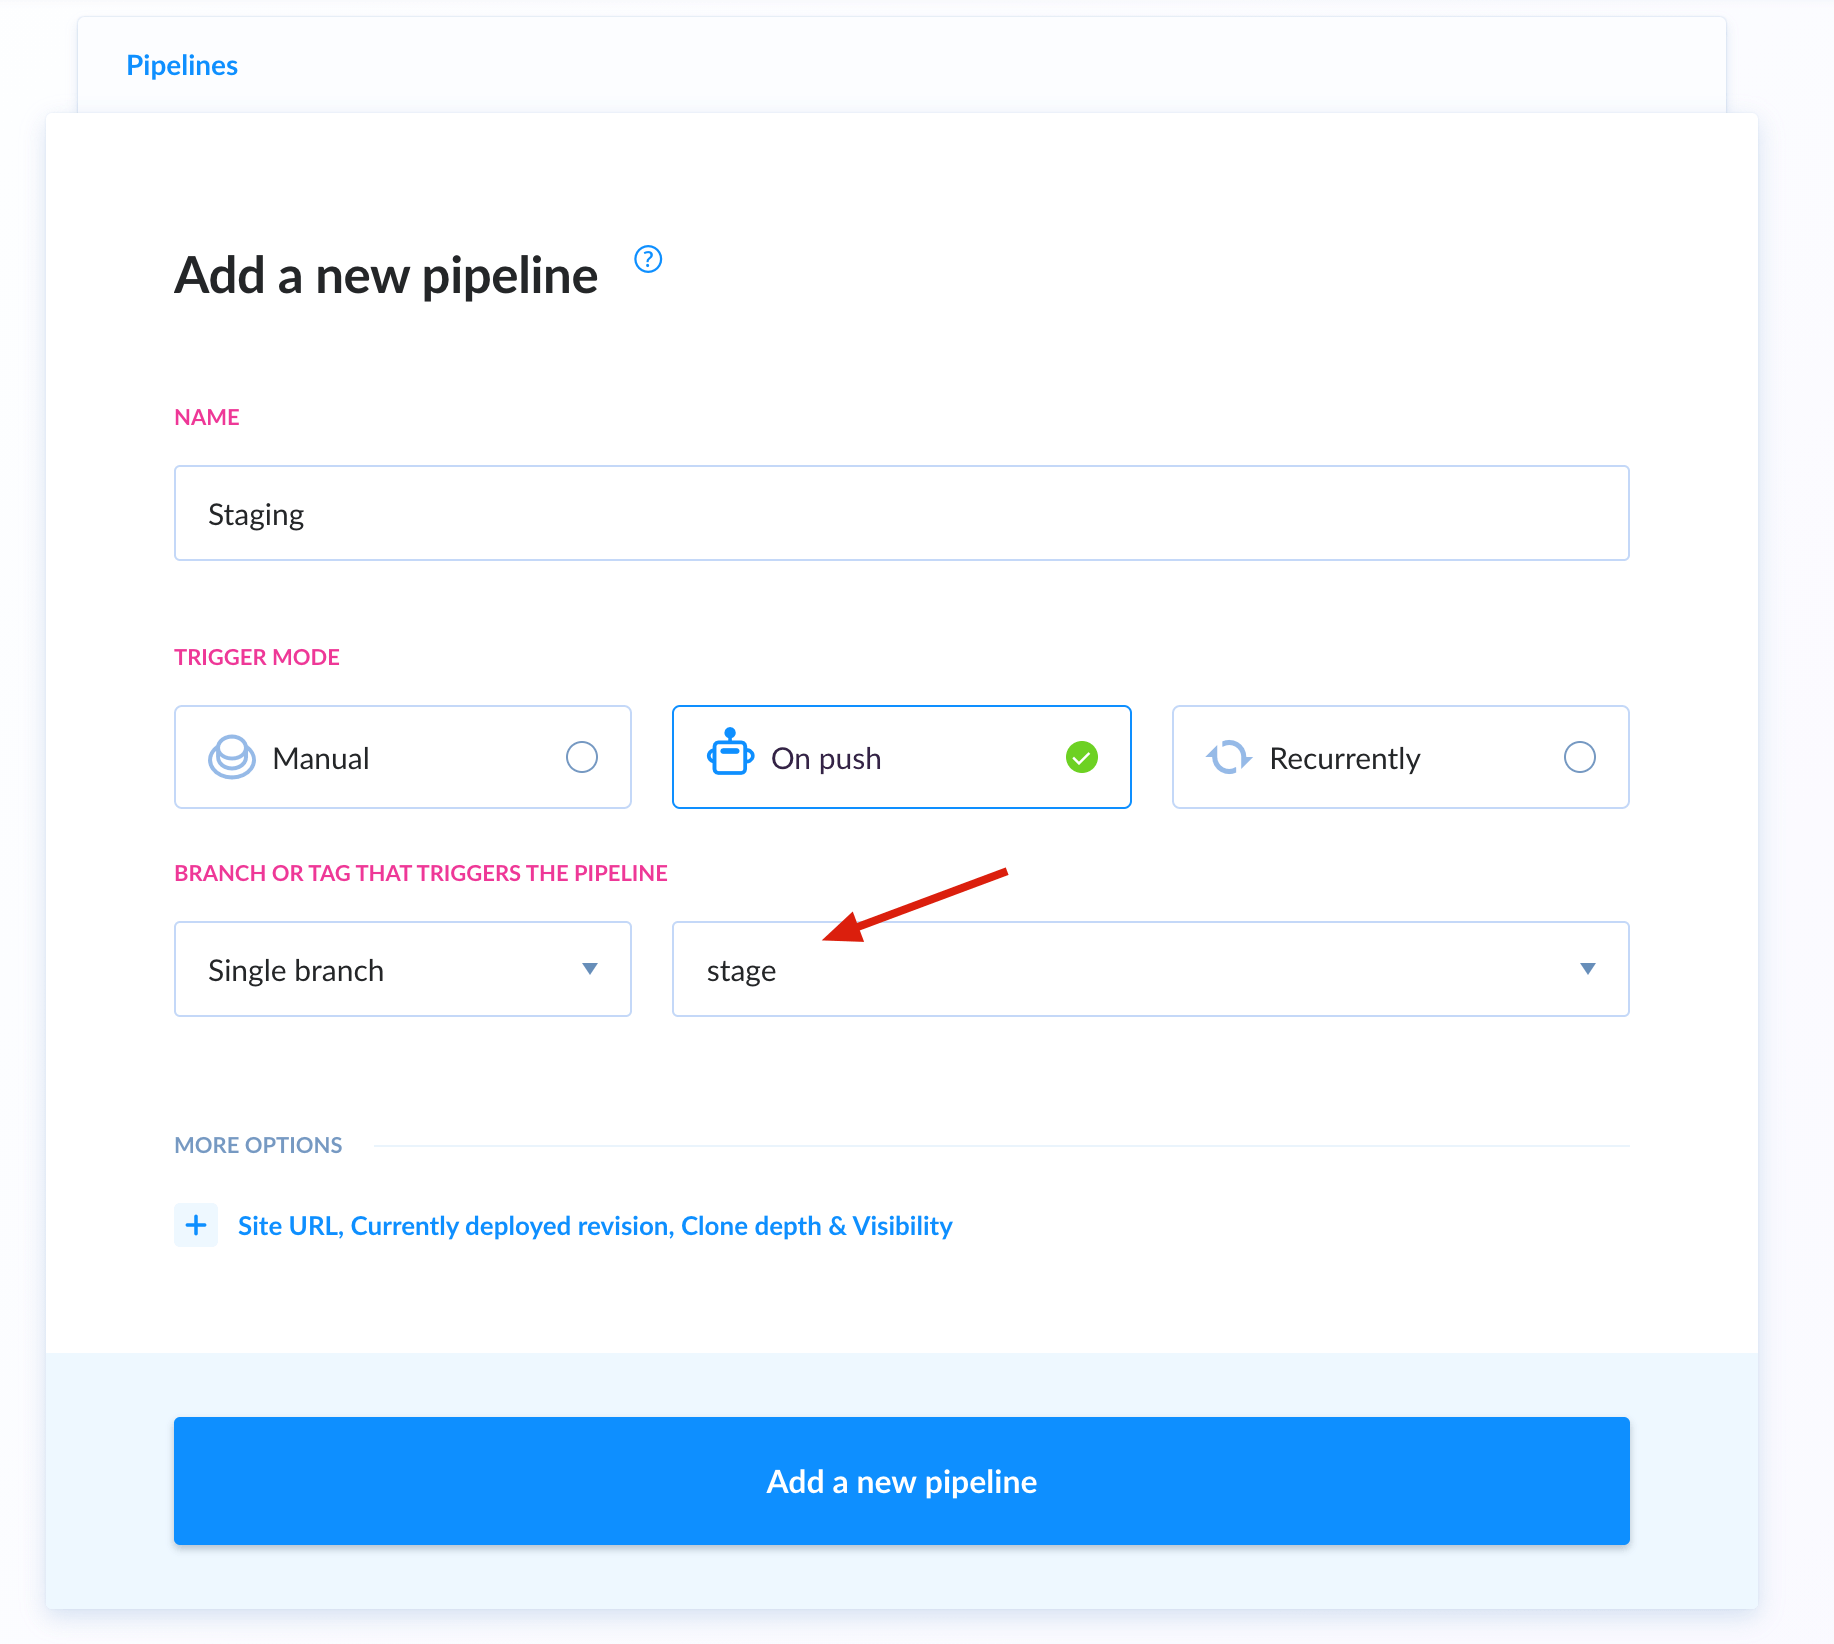
With these settings, the pipeline will automatically deploy changes on every push.
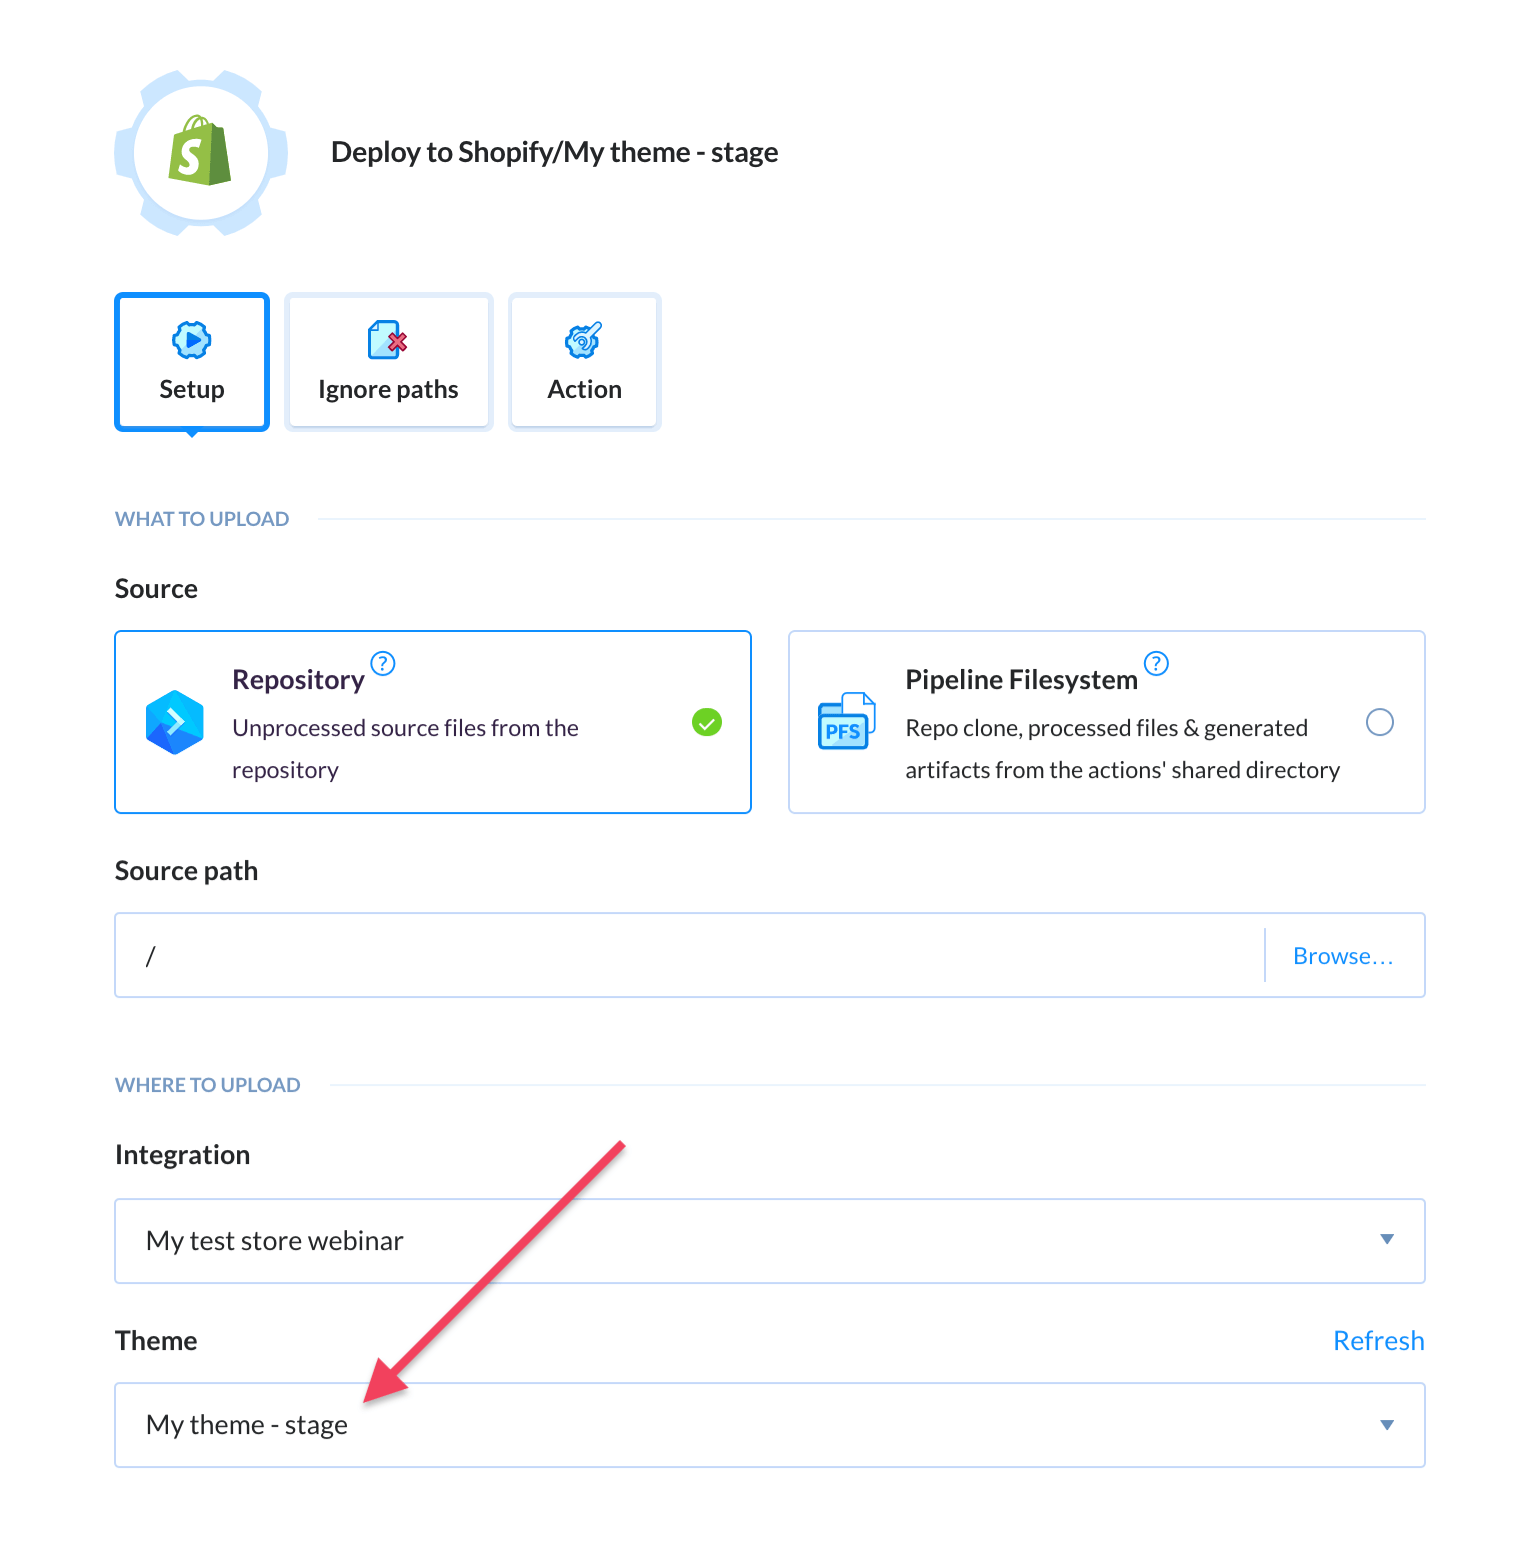
Deployment to Shopify
Add the Shopify action once again. This time, change the theme to which the action will deploy:
Step 4: Testing delivery pipelines
You should now have two pipelines: one for previewing changes on stage (automatic), and another one with deployment to production (manual):
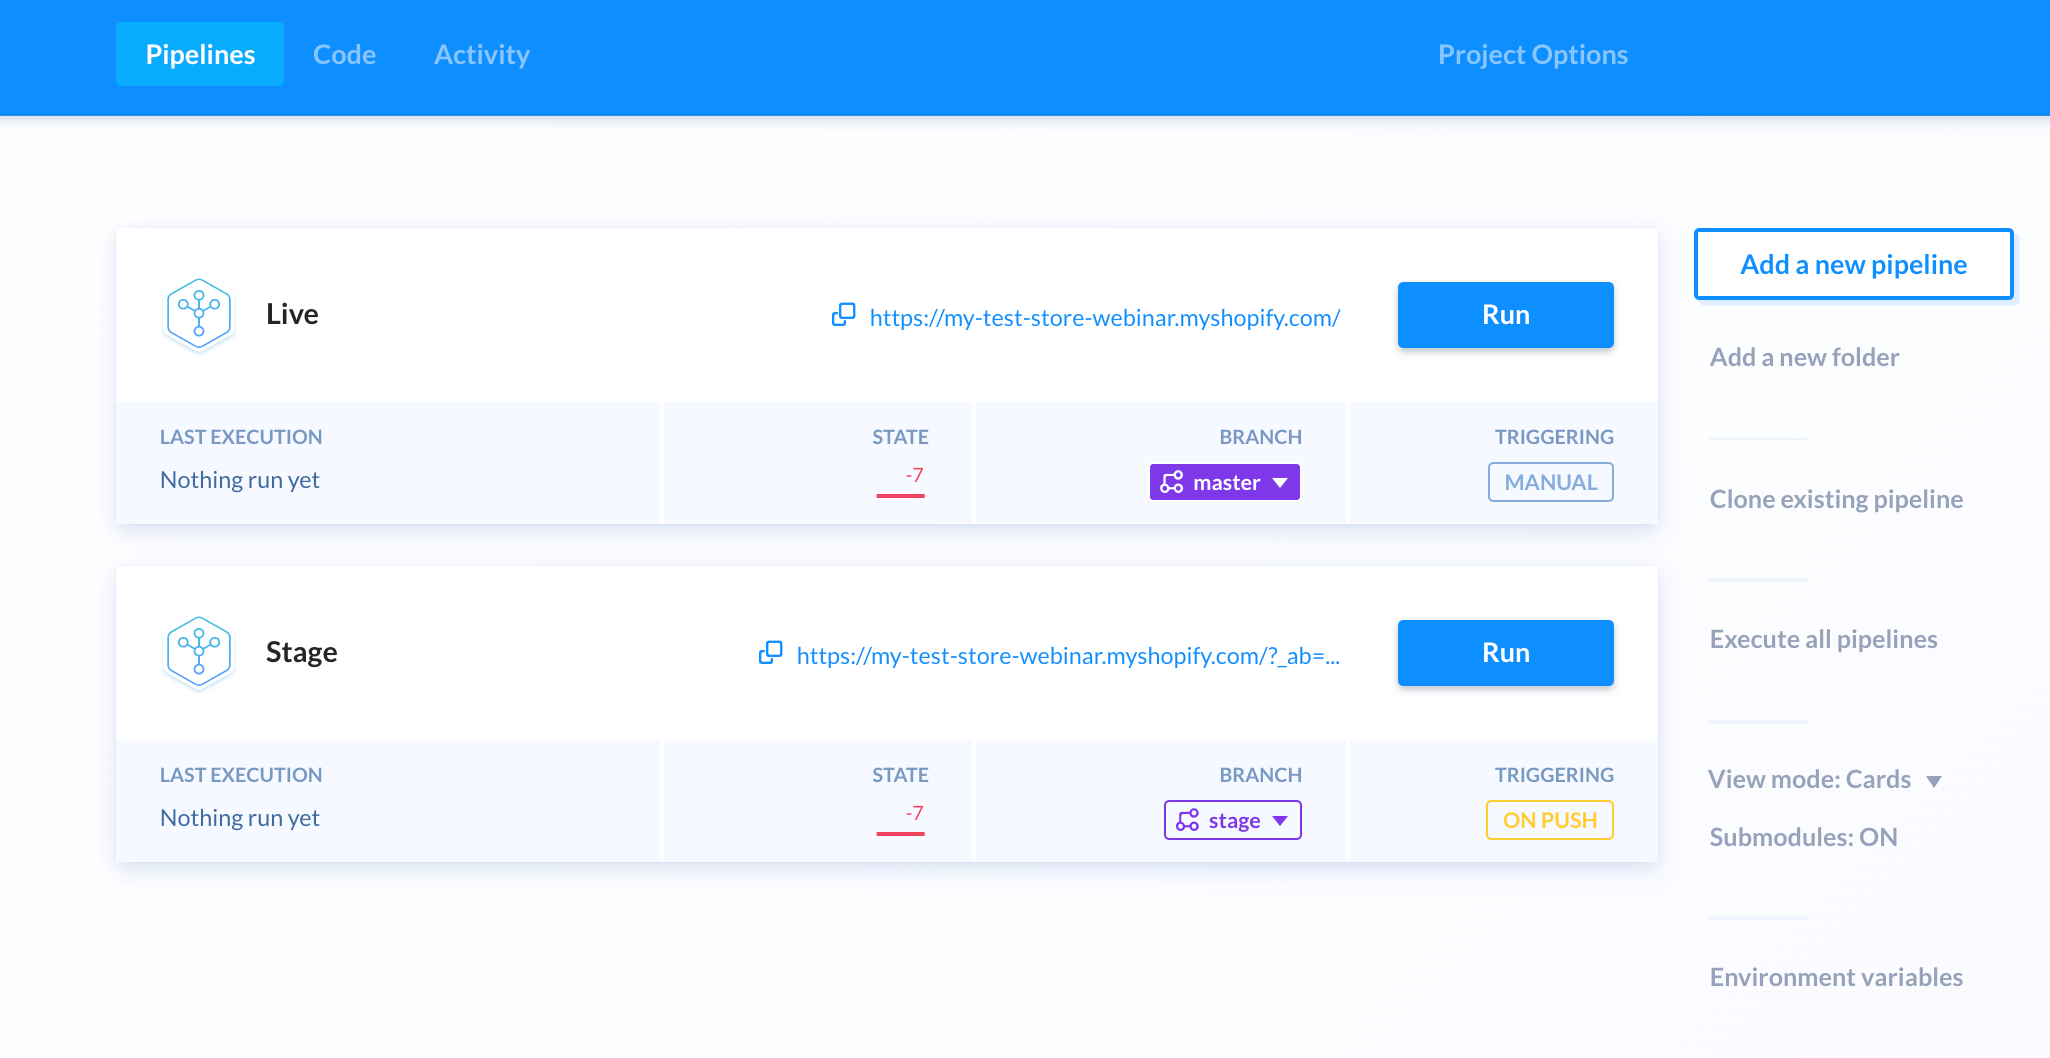
Let's see how they work in practice. First, make some changes to your theme and push them to your staging branch. You will see that Buddy will automatically pick up those changes and upload them to My theme - stage:
Check the website and see if everything looks fine. If yes, merge the branch to master and run the production pipeline. If you host the source code on Buddy, you can merge branches in the Code tab:
Congratulations! You have successfully introduced Continuous Delivery to your workflow!
Step 5: Expansion
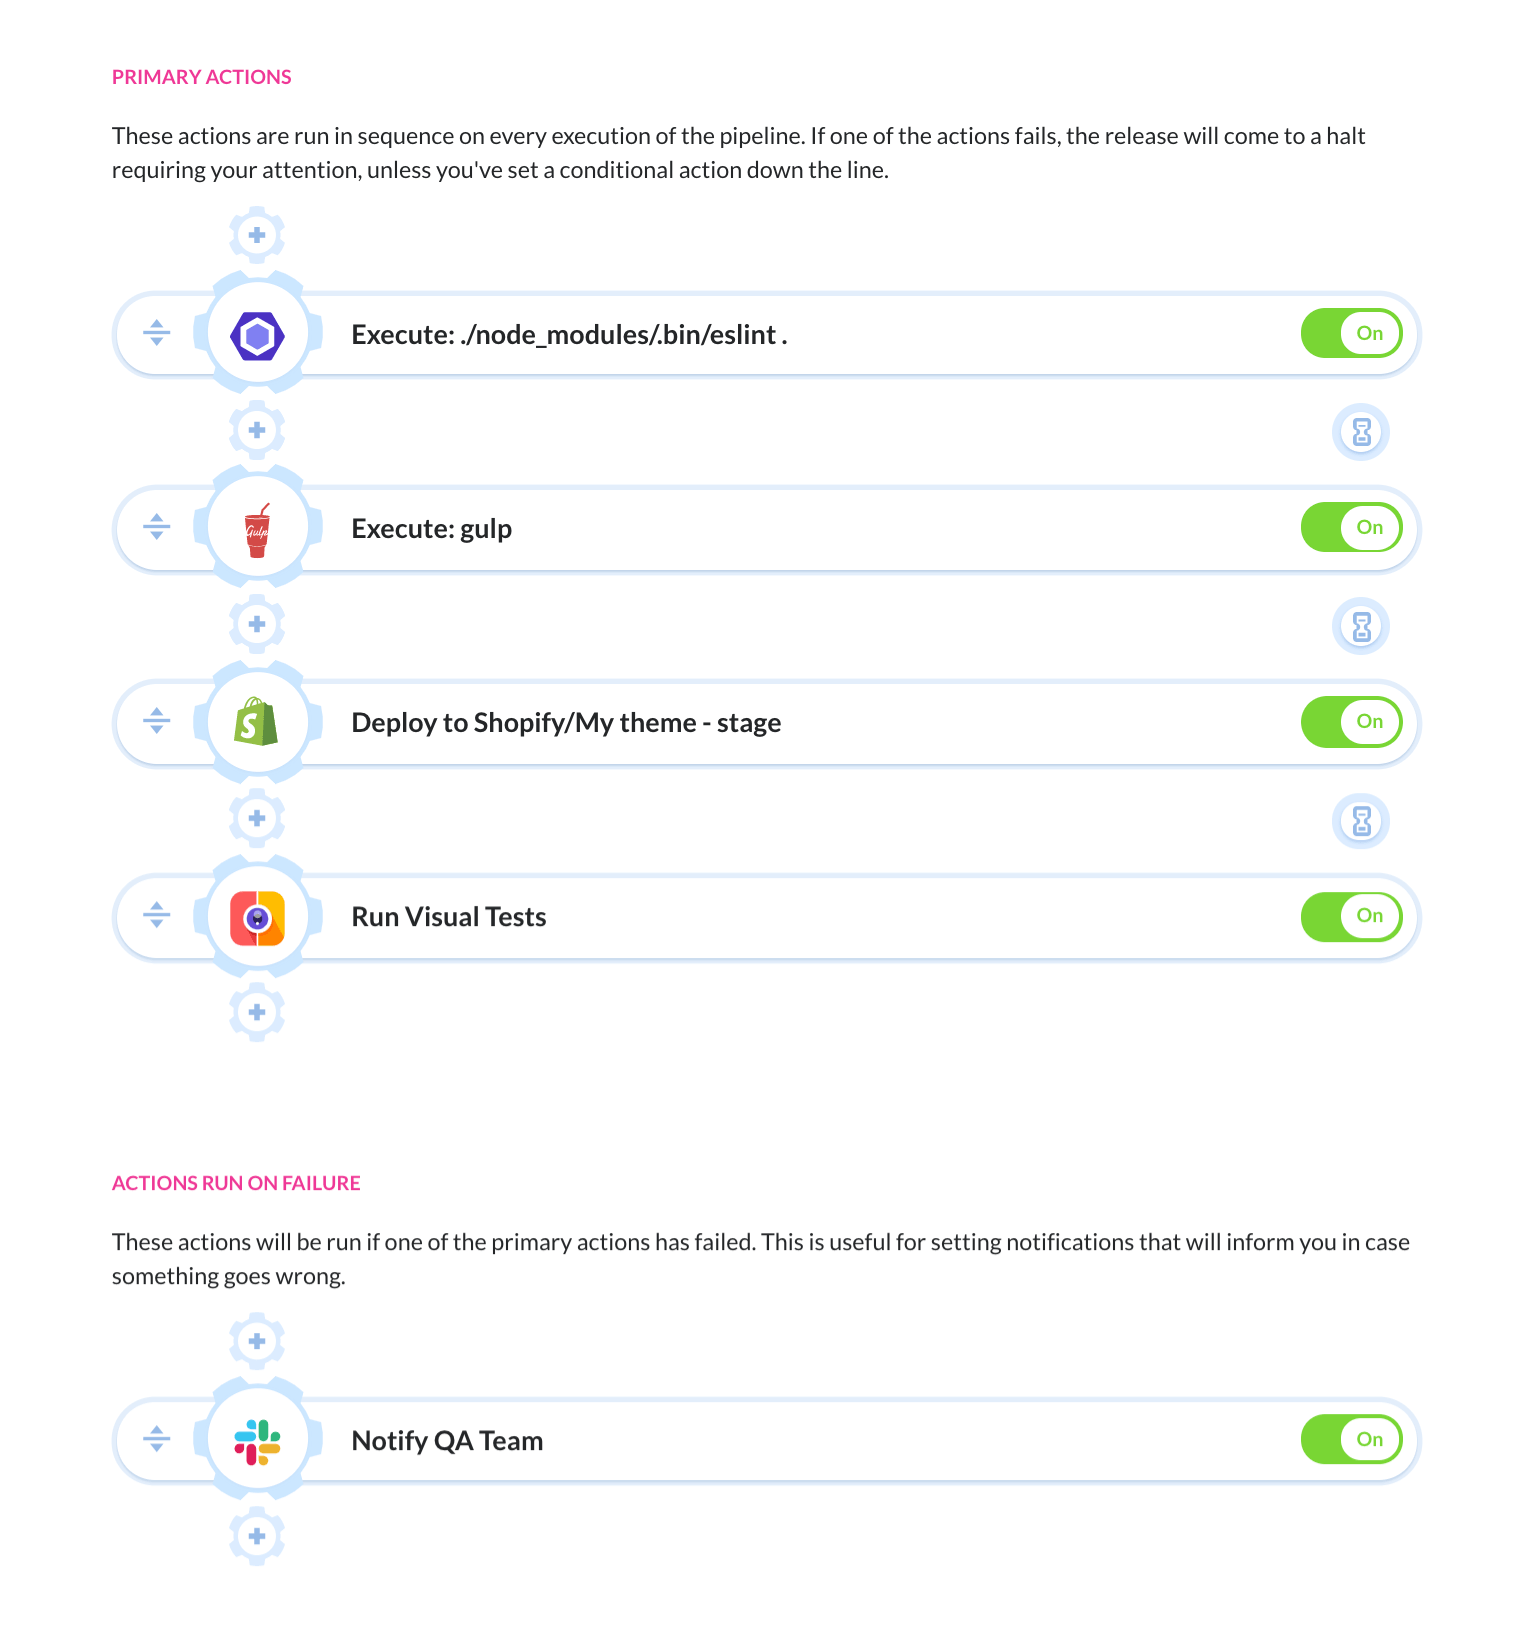
This guide covers only one of the issues that can be solved with pipelines. A cool feature of Buddy is that it lets you quickly expand existing pipelines without disrupting your workflow. You can, for example:
- send notifications when the deployment fails
- test code for errors with ESlint and PHP Codesniffer
- minify assets and bundle files with Gulp and Webpack
- perform visual tests in the browser
The most important thing, however, is to keep things simple: add one step, test it for a while, and only when you're 100% sure everything works fine add another one. With this approach and Buddy at your side, you will soon be able to focus strictly on developing awesome themes, and leave the operational hassle far behind.