使用Buddy将WordPress部署自动化到Strattic托管
Strattic is a platform that allows you to turn your WordPress project into a static site in a couple of clicks.
In this guide, we will show you how to automate deploying code from a git repository to Strattic. Version control and delivery automation both give a serious edge when developing WordPress:
- No need to use 3rd-party FTP clients
- Thanks to Git, all of your code is hosted in one place enabling seamless collaboration
- All changes are stored in the repository allowing for a quick roll-back if required
- With tools like Buddy you can configure additional actions in your delivery pipeline, such as creating a CSS file from SCSS
Prerequisites
Here's what you need to follow this guide:
Let's start with putting your project under version control.
WordPress and Git
The first thing to take care of is hosting your source code in Git—the minimum requirement towards embracing CI/CD. While it's not exactly rocket science, there isn't a single right way to do it. If you're not familiar with Git, check out these articles to decide which approach is the best for you:
- wpengine.com/support/development-workflow-best-practices
- roots.io/twelve-factor-wordpress
- git-tower.com/blog/git-wordpress-1
Creating a project in Buddy
With the code hosted safely in the repository, we can now configure (and automate) its deployment to Strattic.
- Sign in to your Buddy account and create a new project:

- Select Buddy as the code provider and enter the name of your project:
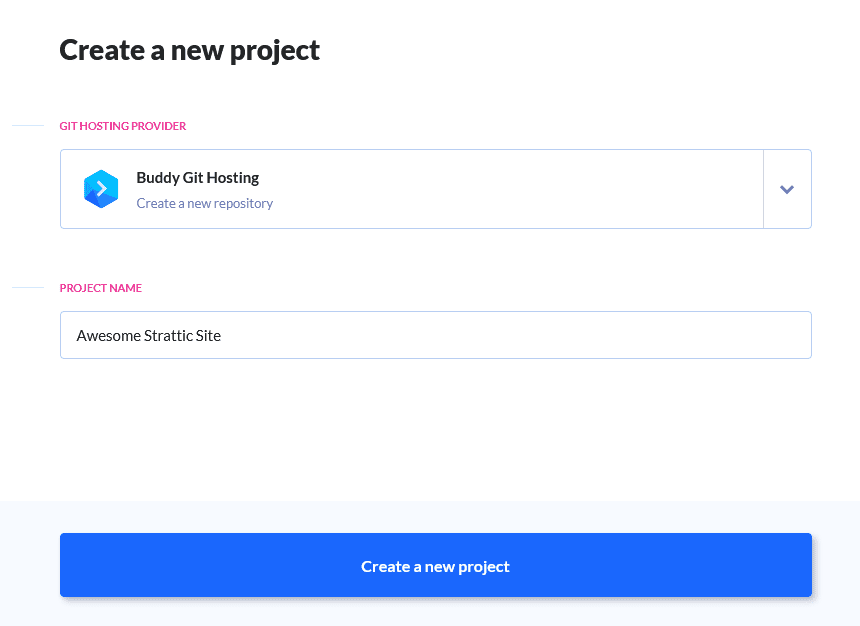
You can also select any external Git provider like GitHub or Bitbucket.
- Follow the instructions on the screen to push the repository to the remote on Buddy.
Pipeline
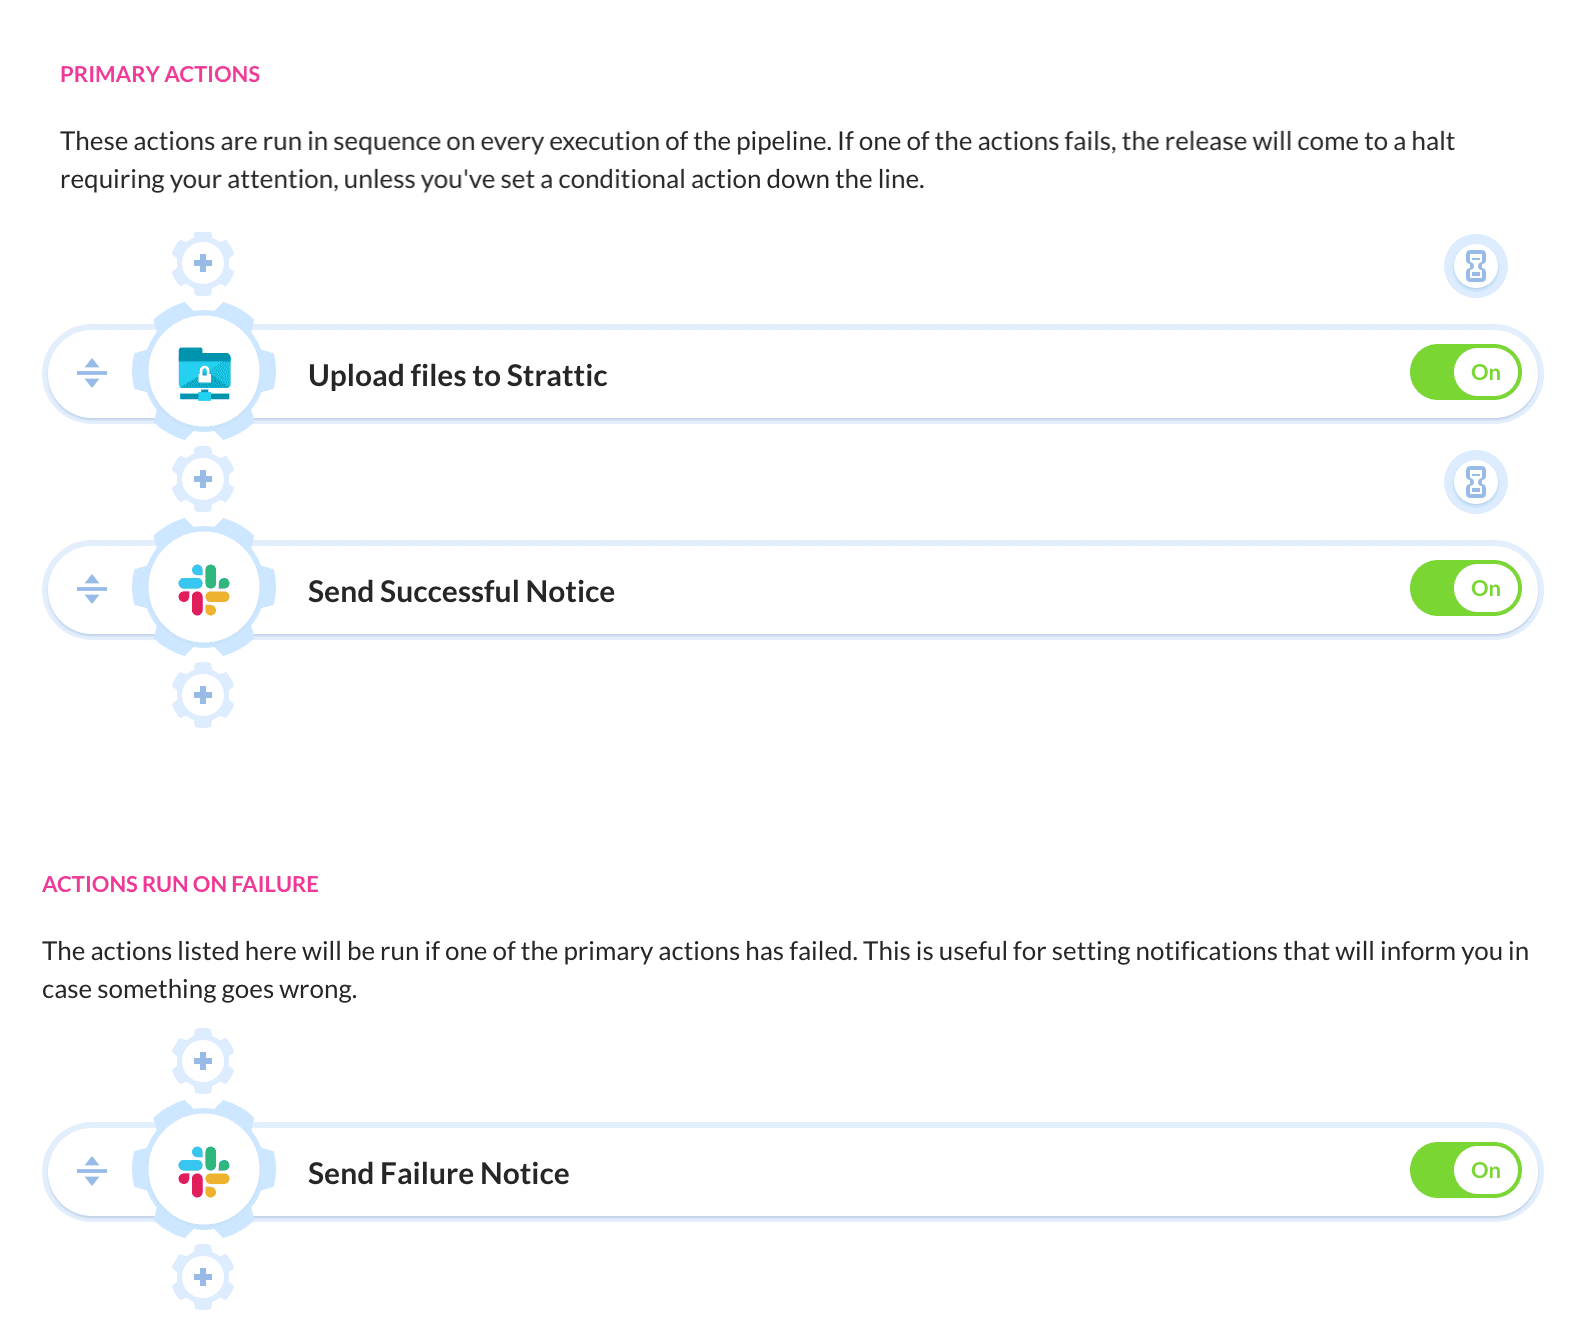
Pipelines are set of tasks performed in the context of a selected repository. The pipeline we're about to configure will perform these operations:
- Deploy all modified files to the Strattic server.
- Send out a post-deployment message to Slack.
Creating the pipeline
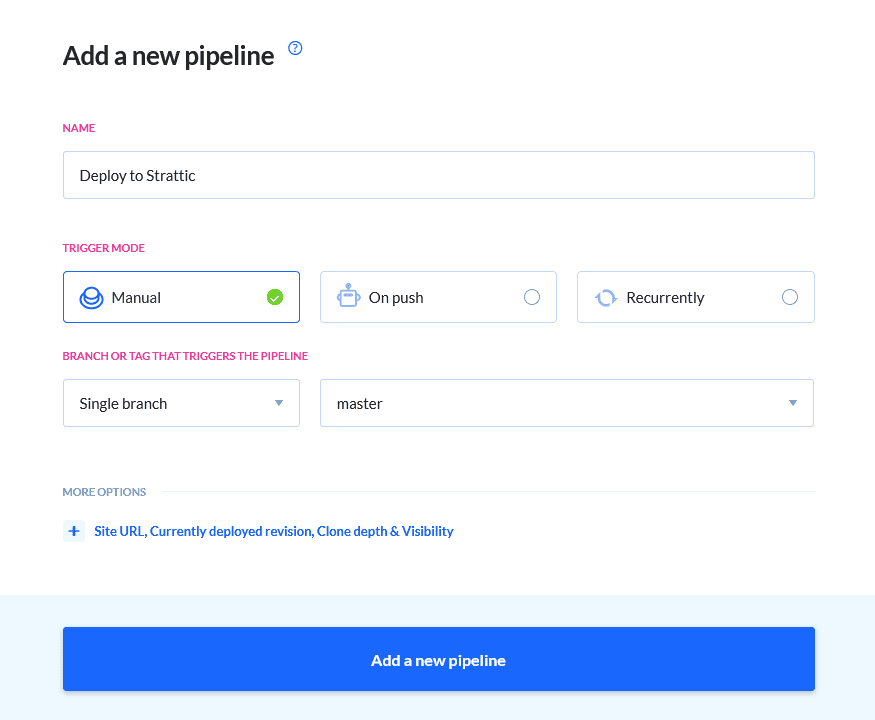
- Click the button to add a new pipeline:
- Define the name of the pipeline, choose the trigger mode – manual, on push (automatic), or recurrent (on a time interval) – and the branch watched by the pipeline.
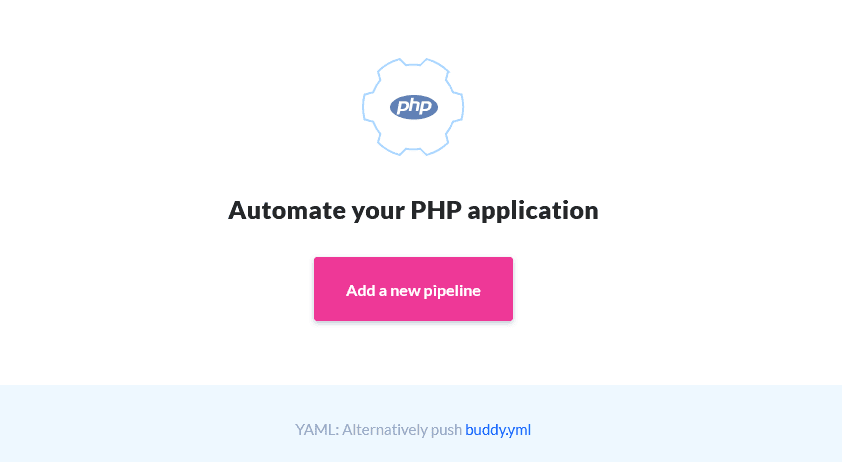
- With the pipeline created, we can add the actions (tasks). Since we are going to deploy to Strattic, we shall choose the SFTP action as this is the protocol used by the service.
Configure the details according to the data found in the Strattic user panel. Make sure to choose Pipeline Filesystem as the upload source:
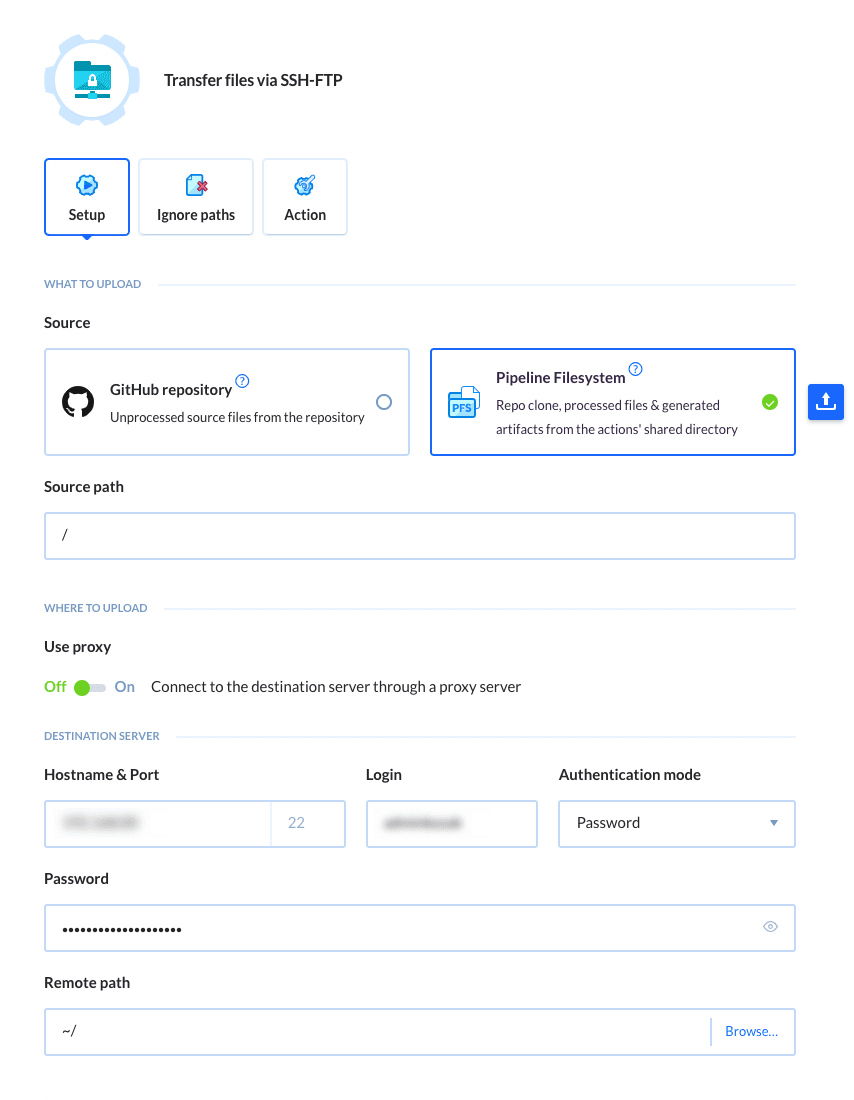
Remember that the Source path and Remote path configuration change depending on the repository contents.
If you want to exclude any directories or files from the process, add them to the Ignore paths tab.
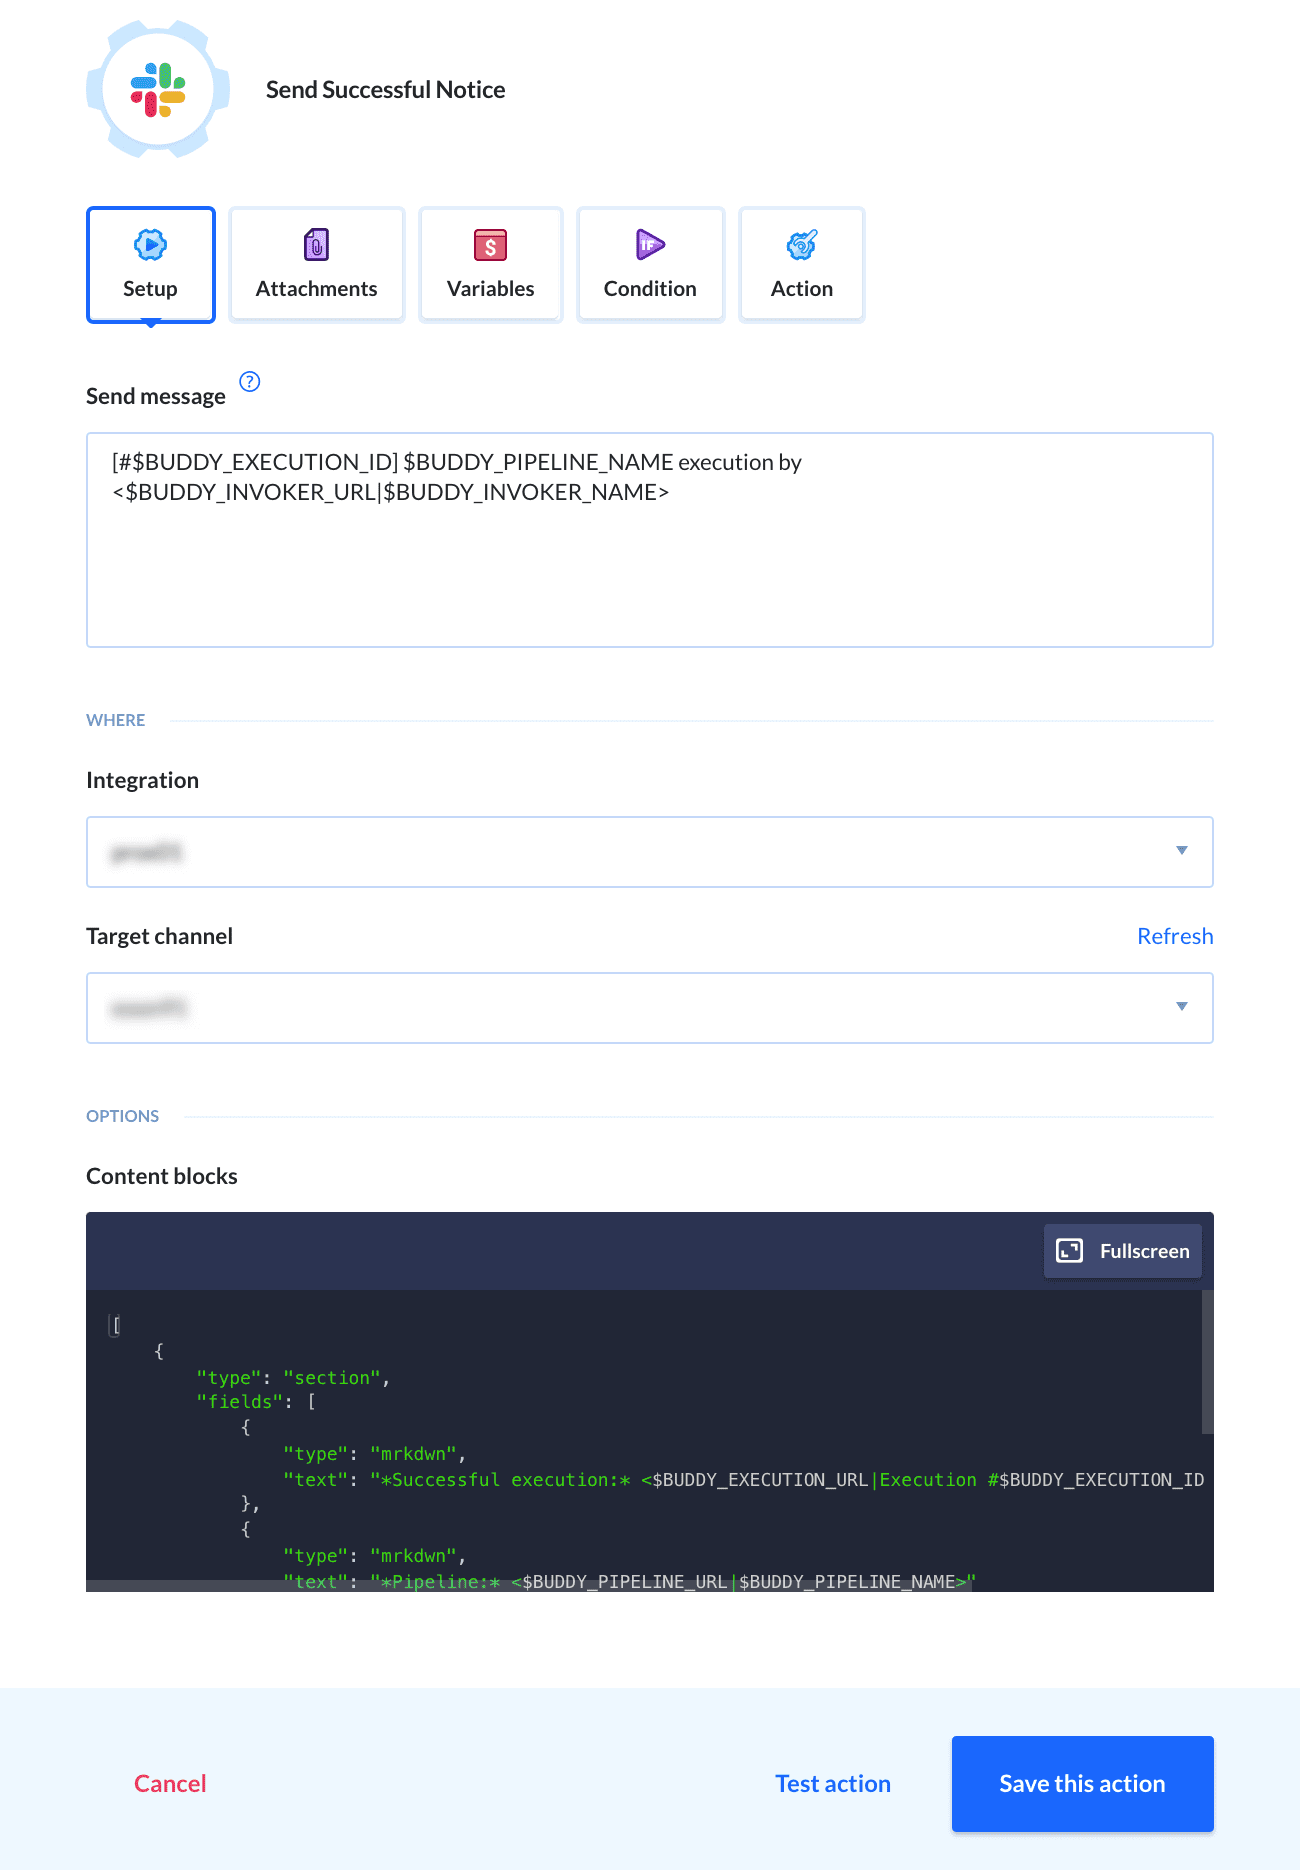
Now it's time to define the notification. In this case we will use Slack, simply because it's the most popular messaging service among Buddy users. You can add the action in two places in the pipeline depending on what you want to achieve:
- place it in the Primary Actions to get a notification once the files have been successfully uploaded
- or move it down to Actions Run on Failure to get an instant message in case the upload has failed
Adding a 3-rd party service to the pipeline for the first time will open an integration window in which you need to authenticate Buddy. Once configured, select the channel to which you want to receive the notifications and define the contents of your message:
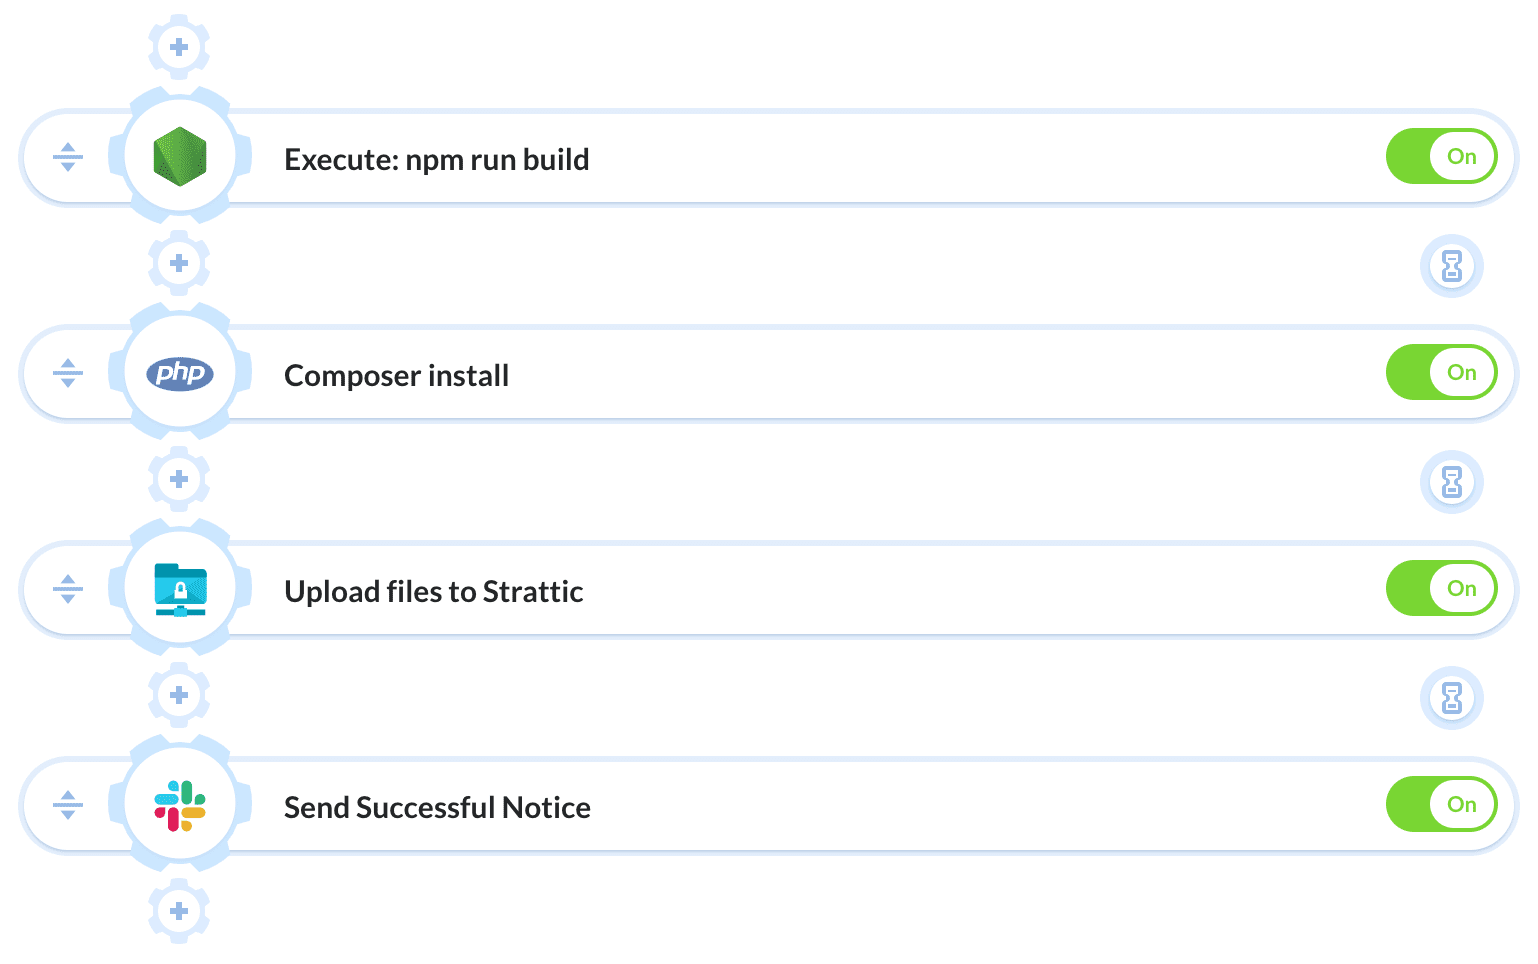
Here's what the pipeline should look like after adding all actions:
Click the Run pipeline button to deploy the files to the server — et voila! You just created a pipeline that makes deploying files from Git to a server so much easier! 🍾
Generating the static site
Once the deployment has finished, the last thing to do is to sign to your WordPress on Strattic and hit the publish the website to live by clicking that big red button:
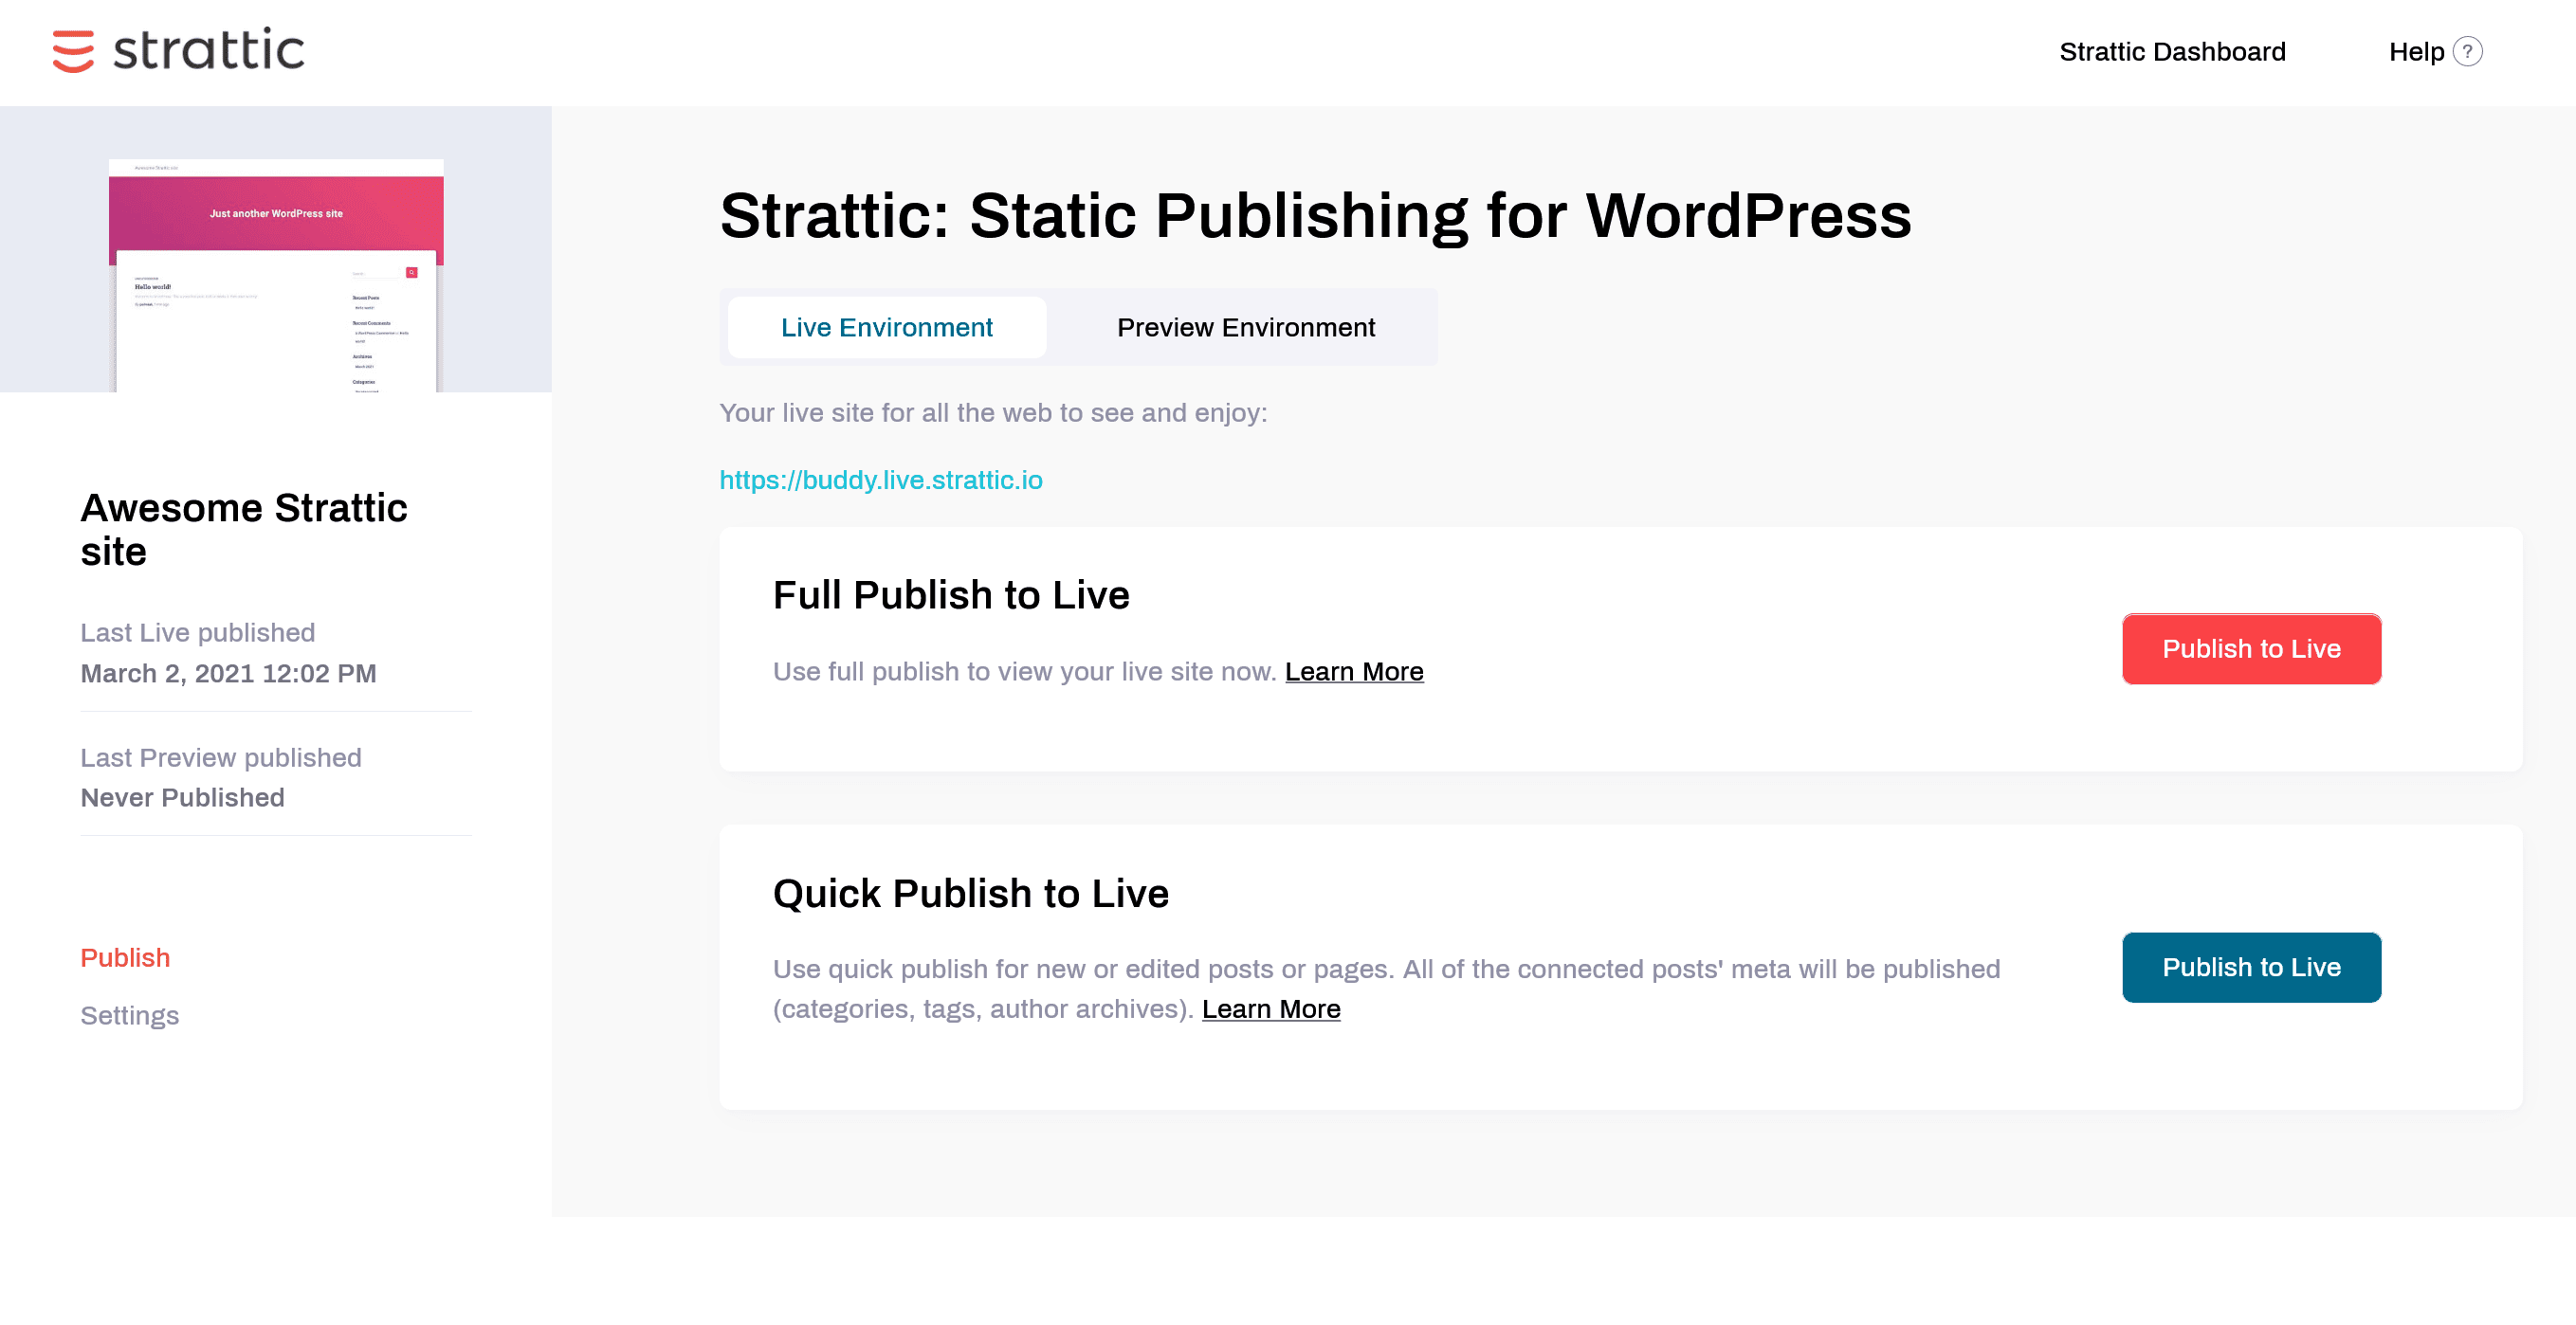
That's it – the website is live and published. 📰
Extending the pipeline
This pipeline already looks great, but Buddy lets you do much more than just deploying files to a server. Here's a couple things you can add to streamline the delivery.
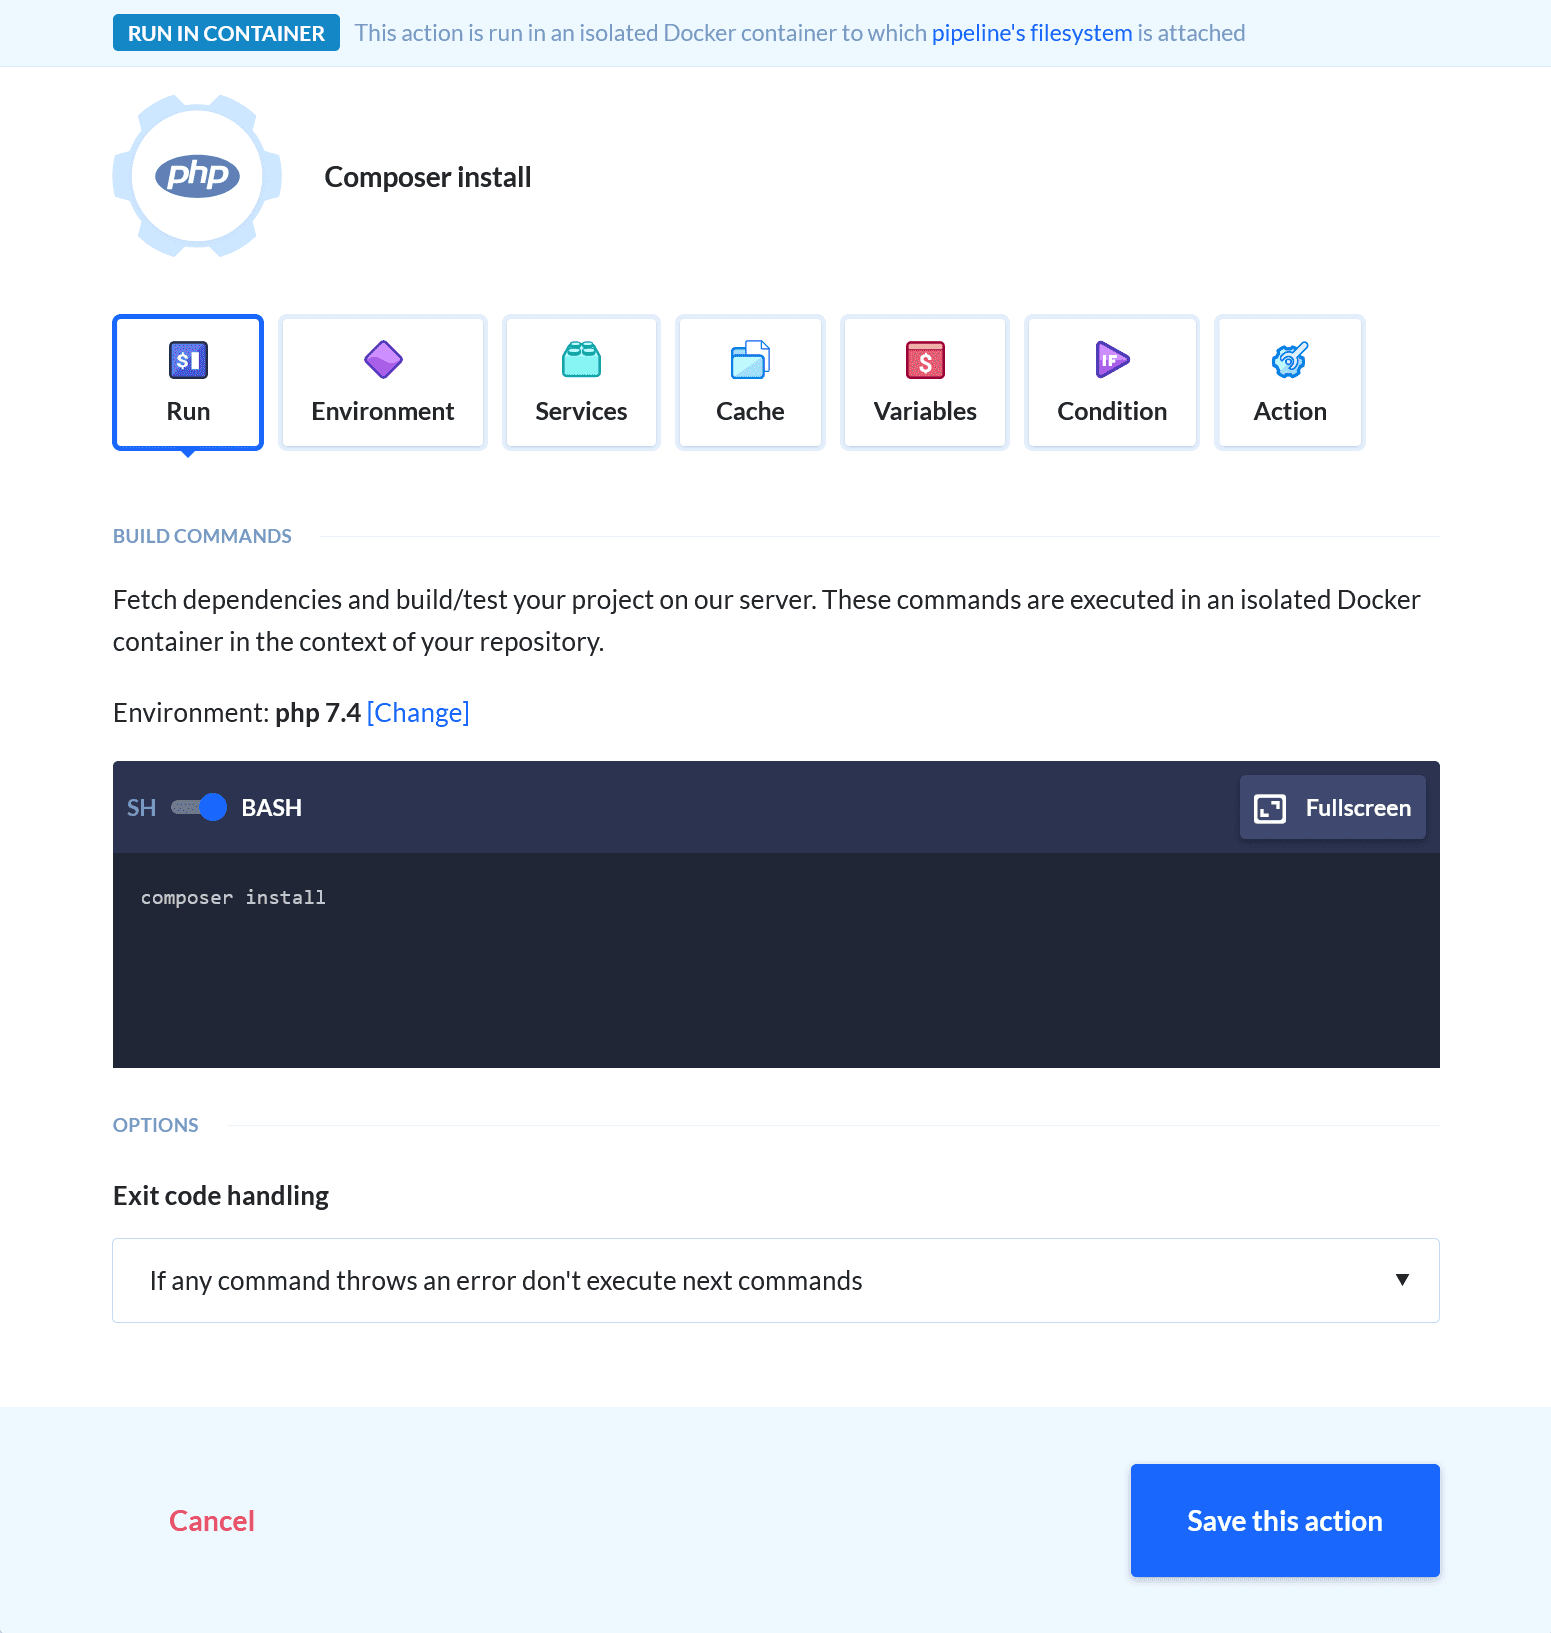
Composer
Let's say that we've used Composer in our theme to download the required libraries. Following the good practices we shouldn't host the vendor files in our repo, but instead run composer install
before each deployment. This guarantees that the right version of every library is installed every time.
With Buddy, you can automatically run the command on every deployment. Add the PHP action before the file transfer action:
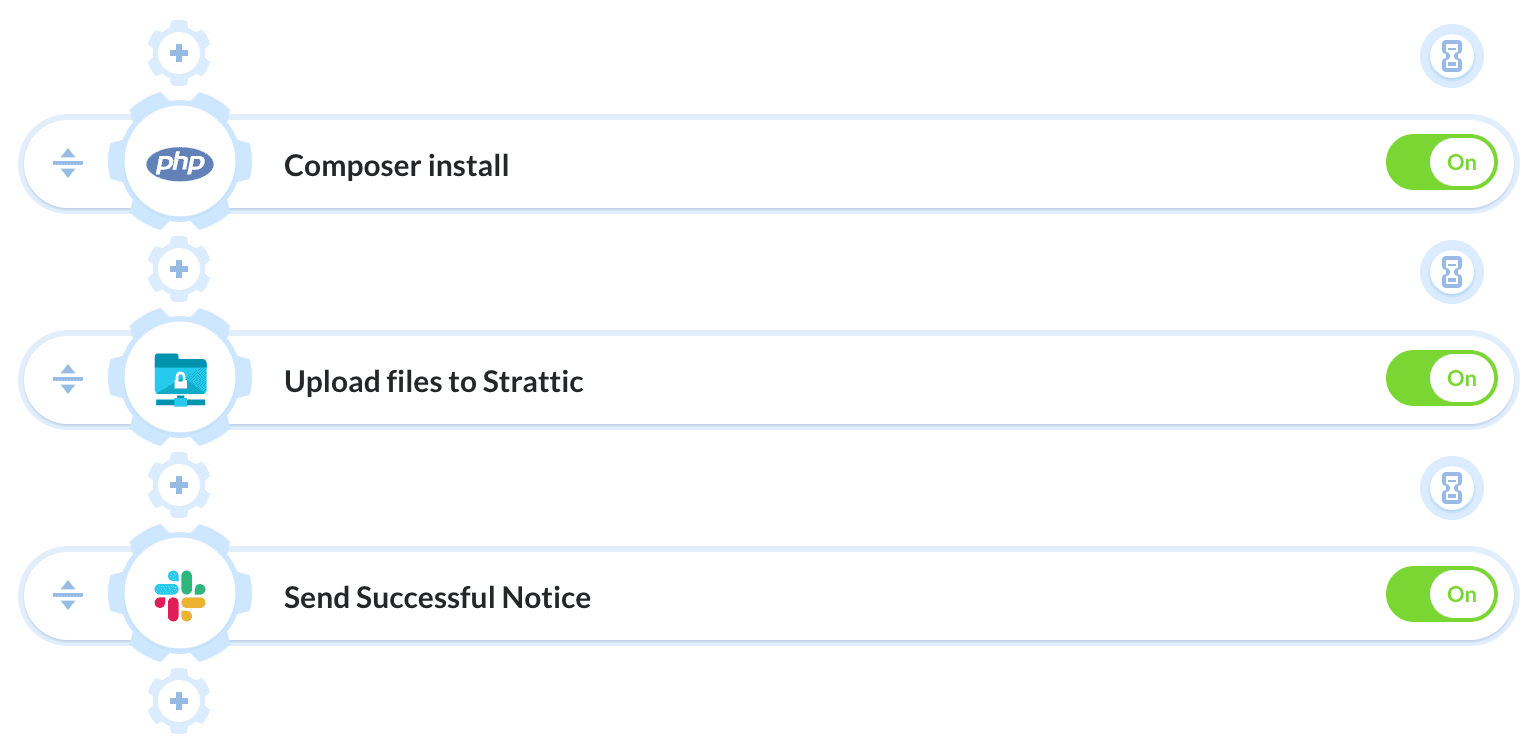
Use this configuration:
npm
In WordPress themes, we're often harnessing the power of SCSS of JS transcompilation. When that's the case, npm is the go-to solution for managing your libraries.
If you want to generate new CSS and JS files with every deployment, simply add the Node action at the beginning of the pipeline:
Configure the action as follows:

Make sure to use the command that you normally use to build the assets in place of npm run build.
More things you can do with Buddy
Deploying files to SFTP isn't the only thing you can do with WordPress in a Buddy pipeline. There are countless ways to customize and extend it with a number of actions. For example, you can:
- Run visual tests before the deployment
- Run smoke and E2E tests with Cypress.io
- Deploy WordPress directly from Slack
- Use status checks to protect code on GitHub