部署PHP应用的五种方式
In Buddy we help developers automate tests and deployments of their application. In this article we'll compare the most popular delivery workflows for PHP applications.
Actions used in this guide:
PHP delivery overview
Every application is different, and so is its delivery process. The most common steps for PHP delivery usually look like this:
- Test application
- Download dependencies (Composer)
- Compile assets (Gulp/Webpack/Grunt)
- Deploy to server
There can be more steps of course. For example, you may want to migrate the databases or restart your server via SSH – it all depends on the project specifications and hardware at disposal.
Two important things
Before we can proceed, there are two things that need to be emphasized every single time the word "deployment" comes into play:
I. Keep everything in version control!
Application source, configuration files, documentation, db migration scripts—all of them should be kept safe and sound in the repo, period. Of course, to every rule there are exceptions (especially in IT), which brings us to the second thing:
II. Never store dependencies and compiled apps in version control!
We have covered the reasons why you shouldn't do it in details in our guide to building and deploying frontend apps. Let's recall, however, the one reason that developers dread the most (apart from being treated like a 24/7 IT service by the family): solving conflicts in code. Keeping dependencies and artifacts in the repository will sooner or later result in some serious hodgepodge in your project, and this will happen rather sooner than later.
Looking for a flexible server to handle the workload types behind your PHP app? Dedicated servers by phoenixNAP offer a range of deployment and configuration options that make it ideal for hosting dynamic applications.
Types of delivery pipelines
Now that we know what to do and what not to do, let's proceed to the 5 ways of properly deploying PHP applications.
#1. Deploy repo w/o dependencies and artifacts and build your app on the server
- First, we need to build and test the app. We can do it either locally, on a build server (eg. Jenkins), or in cloud (Buddy).
- Once the tests pass, we can upload the source code to the server (in this case without dependencies and artifacts) via FTP, SFTP or Rsync.
- The final step is downloading the dependencies and building the app on the server. The easiest way is to run a script on the server via SSH.
The whole process looks like this:

Pros & Cons
- The build environment of the app is exactly the same as the running environment.
- Dependencies will download faster as they're fetched from the closest mirror.
- If you don't use any mechanism to minimize the downtime (eg. atomic deployment), the time required to download the dependencies and build the application may extend it.
- The build time may be long and impact the performance of the production server
#2. Deploy repo with dependencies and artifacts
In this workflow, the application is first compiled and tested, then deployed to the server in its final form (with dependencies and artifacts):
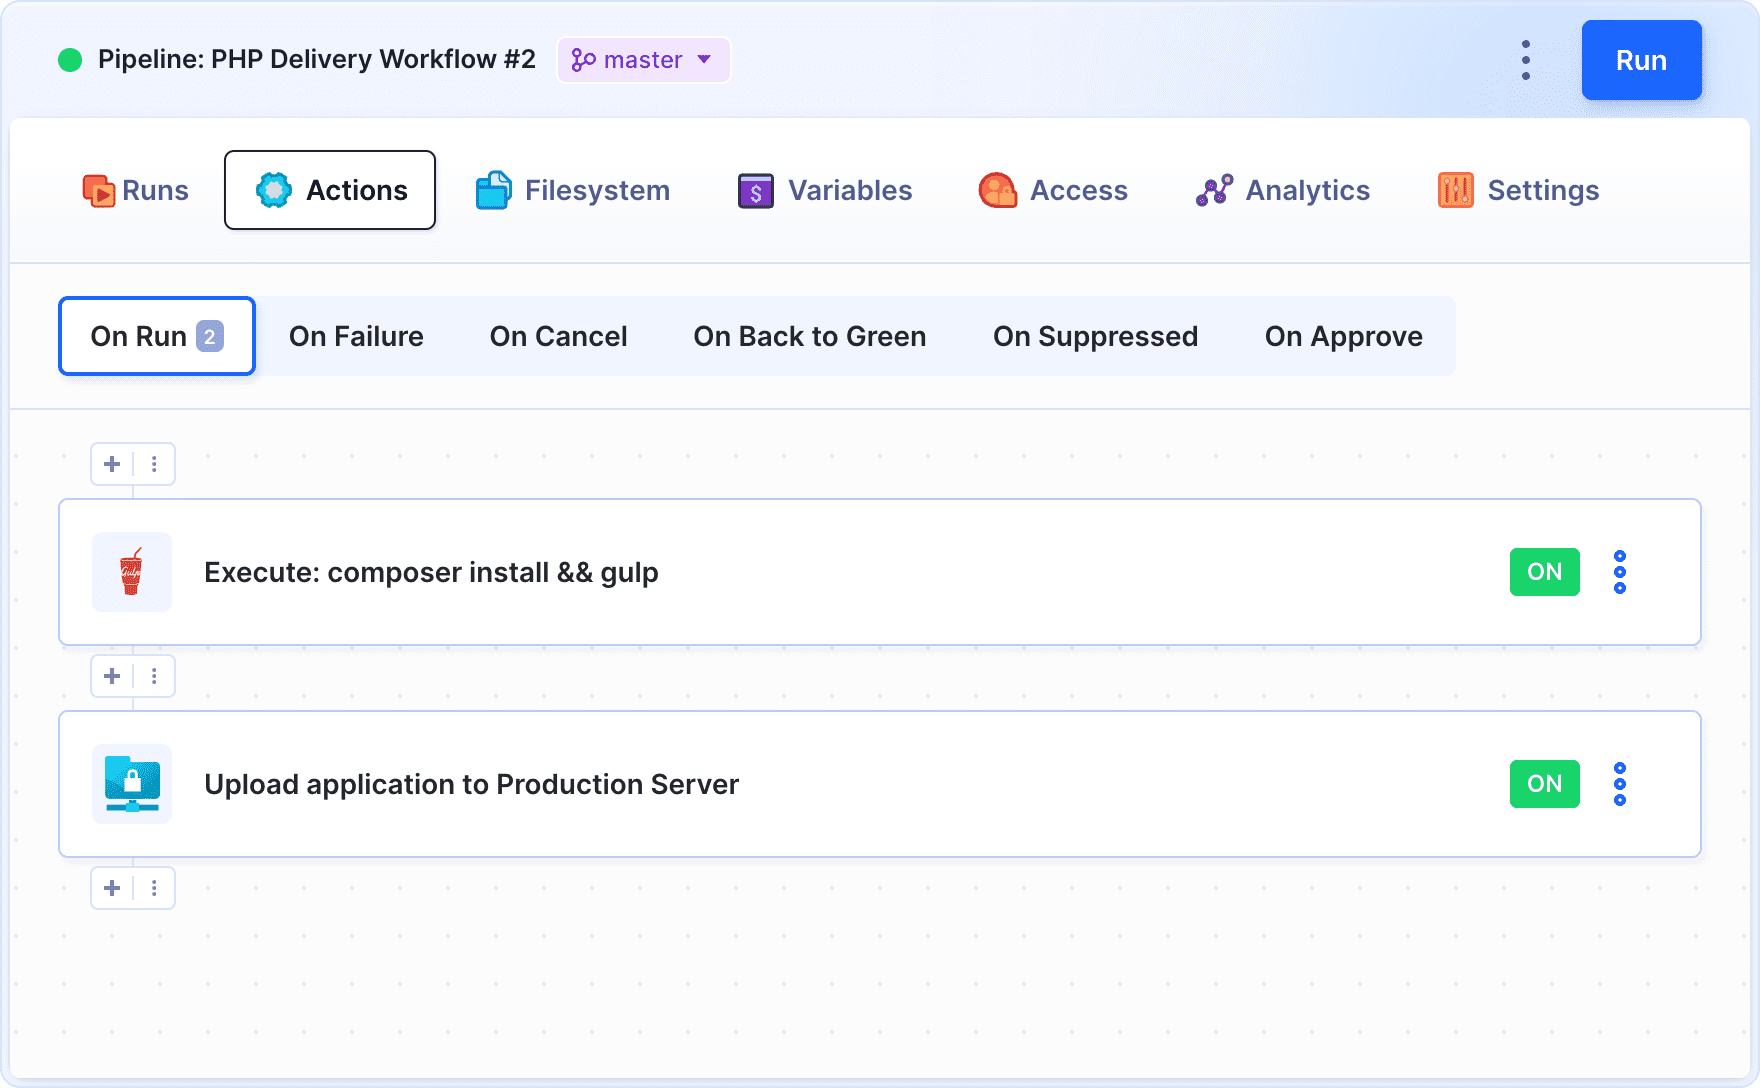
Pros & Cons
- The production server is not stressed with the build.
- The application on the production server is the same as the application from the test server.
- You don't need to SSH to the server to run scripts = any old school FTP will do.
- You must provide the same build environment as the running environment for the application.
- Since we deploy everything (including dependencies), the upload time can be long.
#3. The Git variation
This is basically the same as #1, but requires Git installed on the production server. The deployment is made with git push instead of regular file upload. Then, in Git, the post-receive hook triggers the build.
This method has been very well covered in this article.
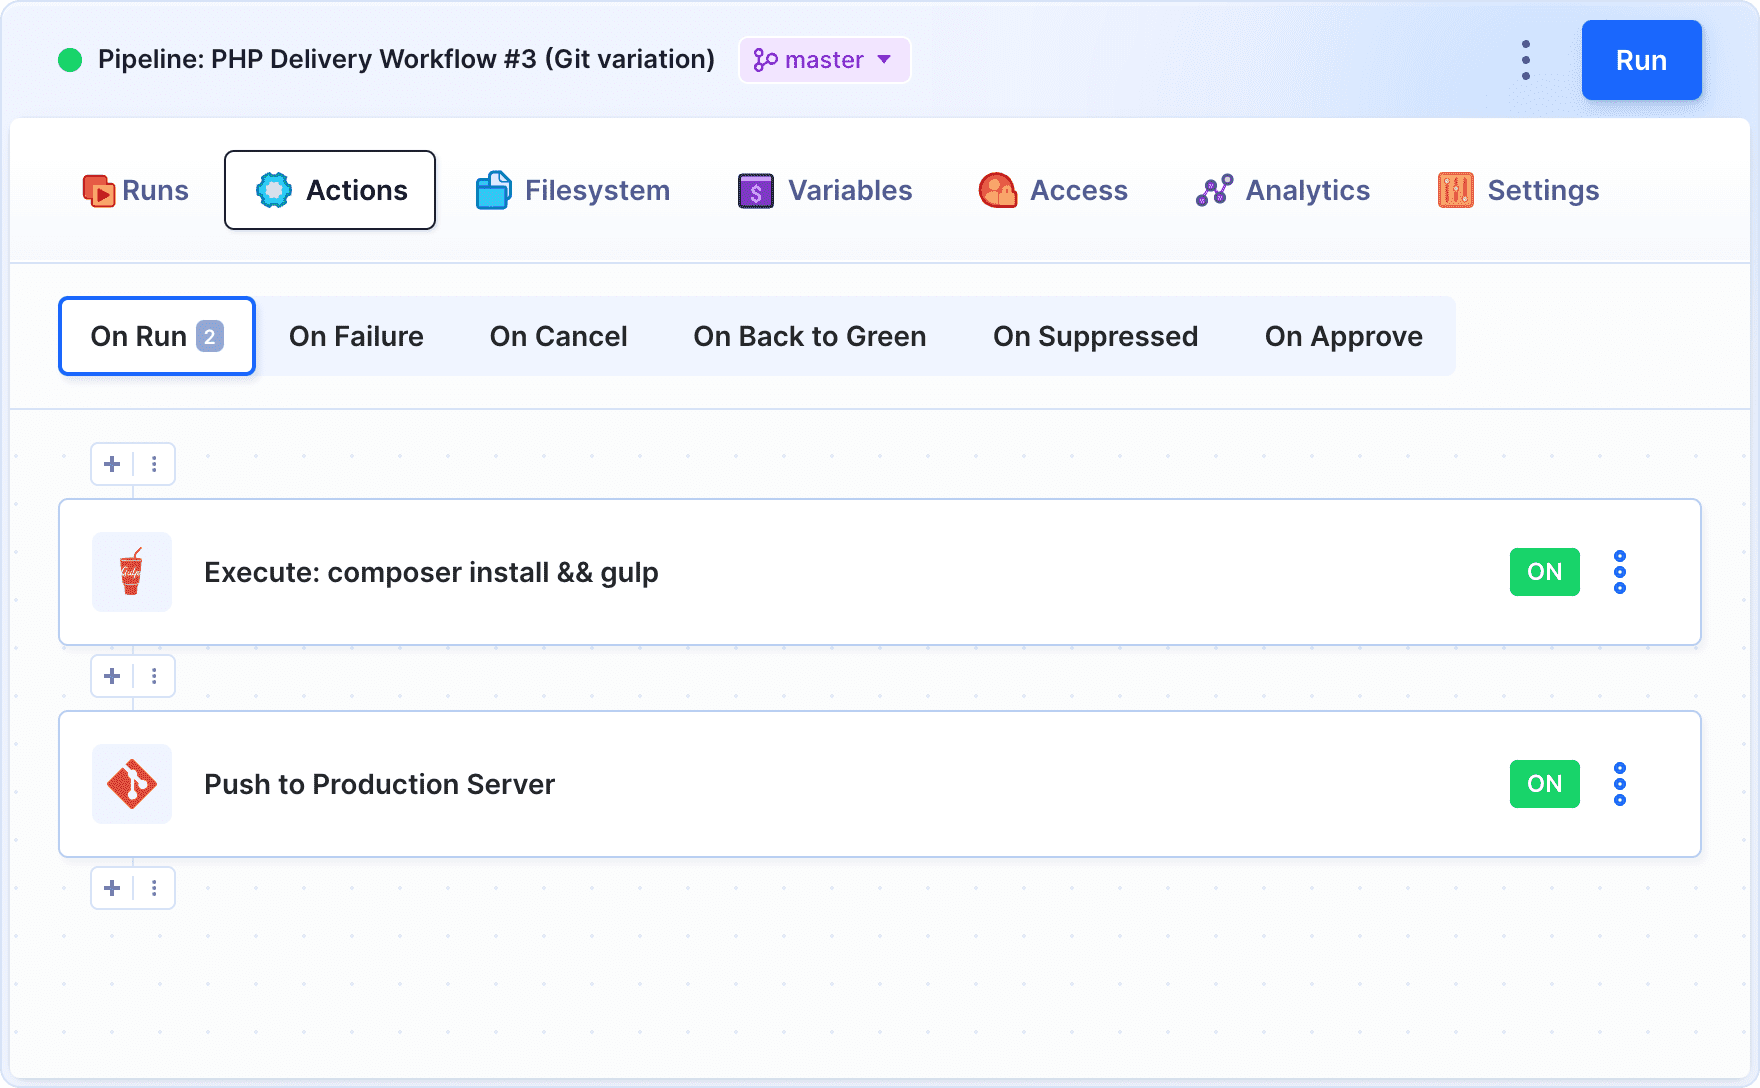
Pros & Cons
- Since this method employs Git mechanisms, the deploy is faster because only changesets are deployed
- You don't need to run SSH scripts, because the webhook will call them on the server
- If you don't use any mechanism to minimize the downtime (eg. atomic deployment), the time required to download the dependencies and build the application may extend the downtime
- The build time may be long and impact the performance of the production server
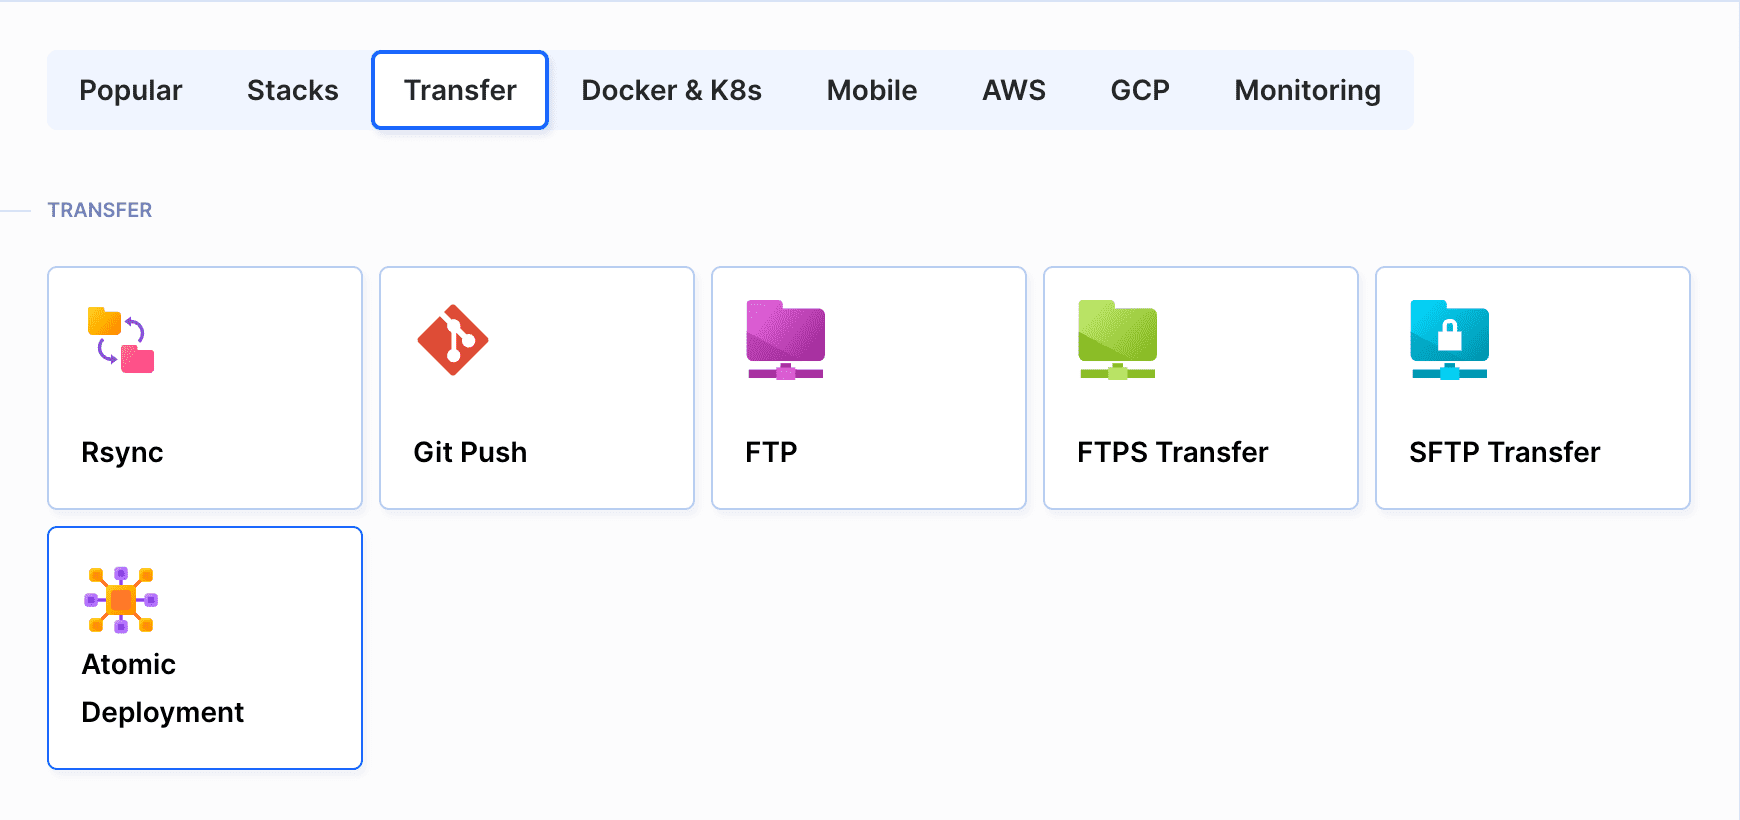
#4. Zero-downtime / Atomic deployment
The workflows above have one flaw: the downtime. This means your application will not be available for the client during the deployment. The solution to that is very simple: deploy and build the application in a different folder than the one from which it's served.
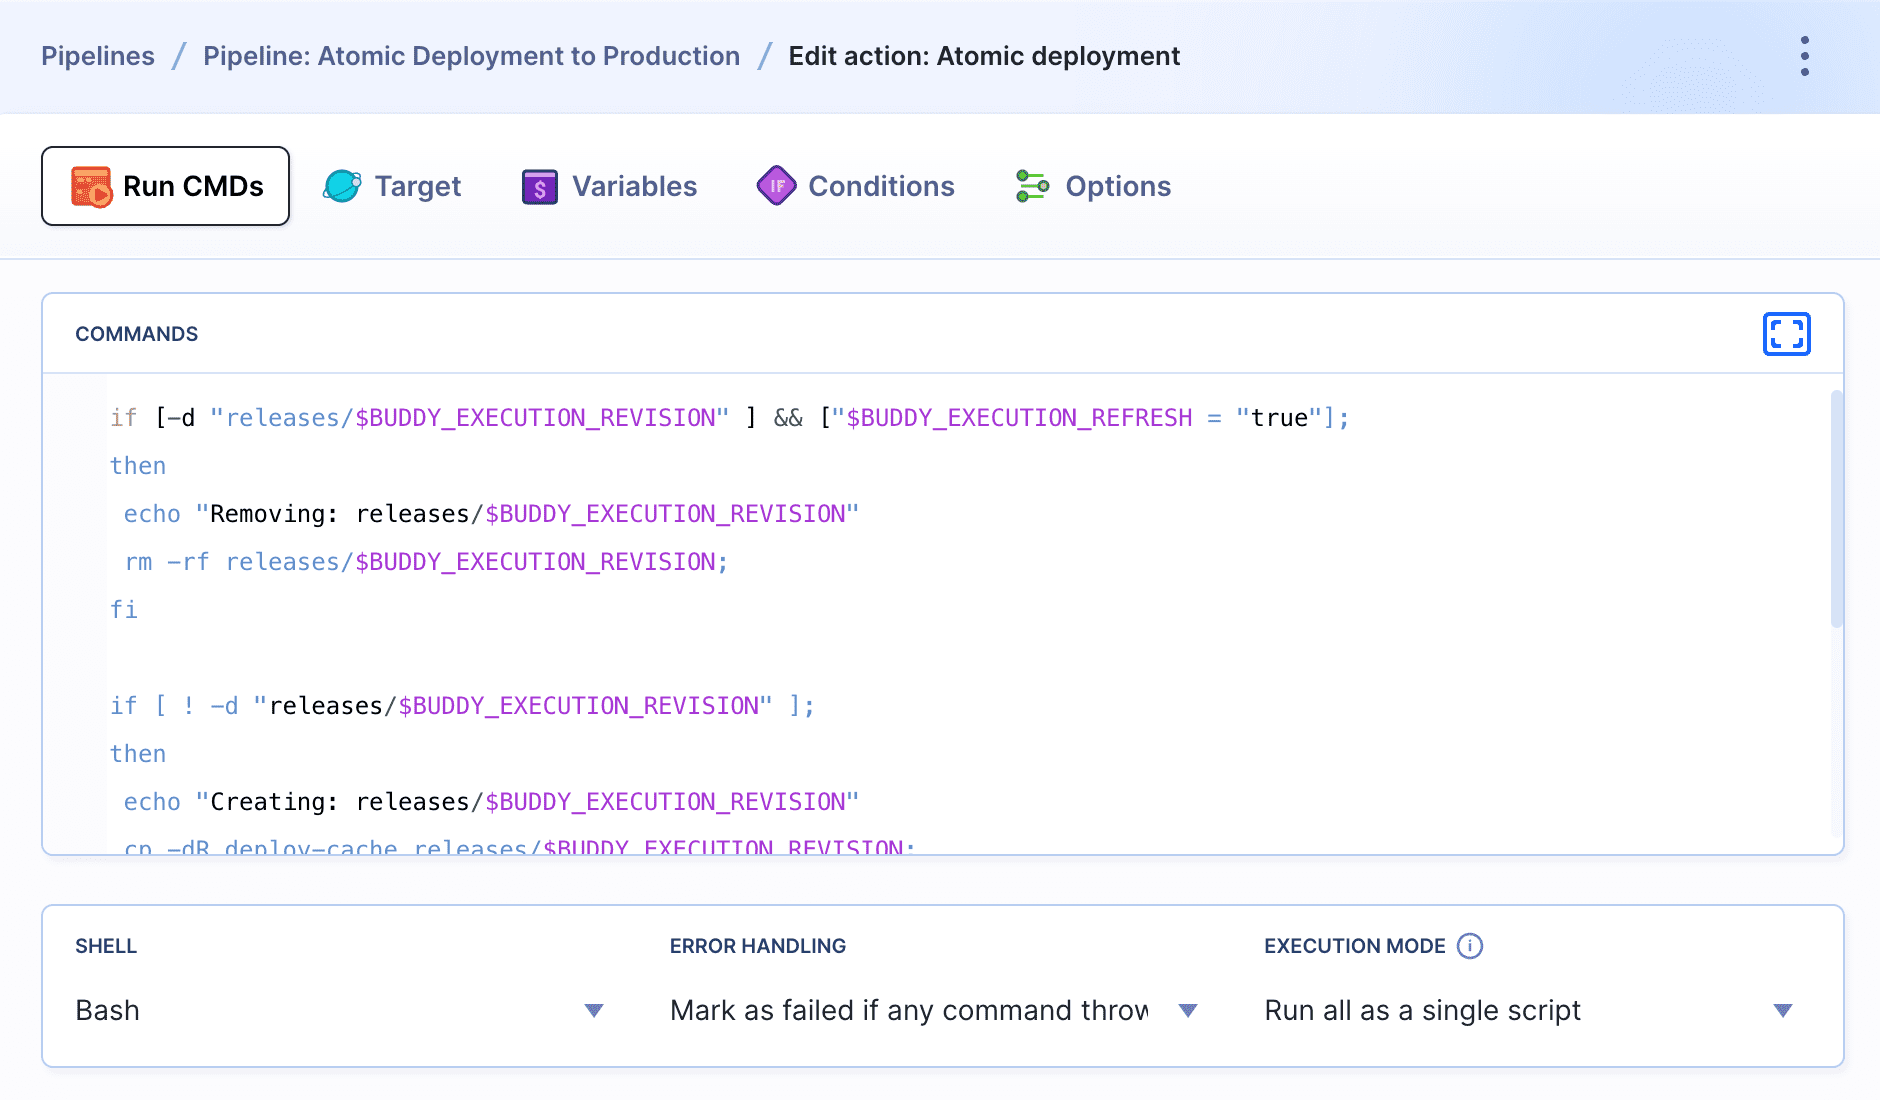
The process involves creating a couple of directories on the server:
/current- a symbolic link to the current version in the releases directory to which your web server points./releases- contains the history of uploaded. For each version a directory with the name of the revision tag is created./deploy-cache- used for storing new files during the deployment. Once the upload has finished, its contents are copied to a new directory in the/releasesdirectory.
Here's how it works:
- A new version of the application is uploaded to
deploy-cache - The contents of
deploy-cacheare copied to/releases/${revision} - The current symbolic link is switched to
/releases/${revision}
Pros & Cons
- Downtime reduced basically to zero (the time required to create a symlink)
- Instant rollback – the previous version of application remains on the server after the deployment; all you need to do is switch back the symlink
- More space on the server is required to keep the previous revisions
- A lot of scripts to write (although it's a one-time job)
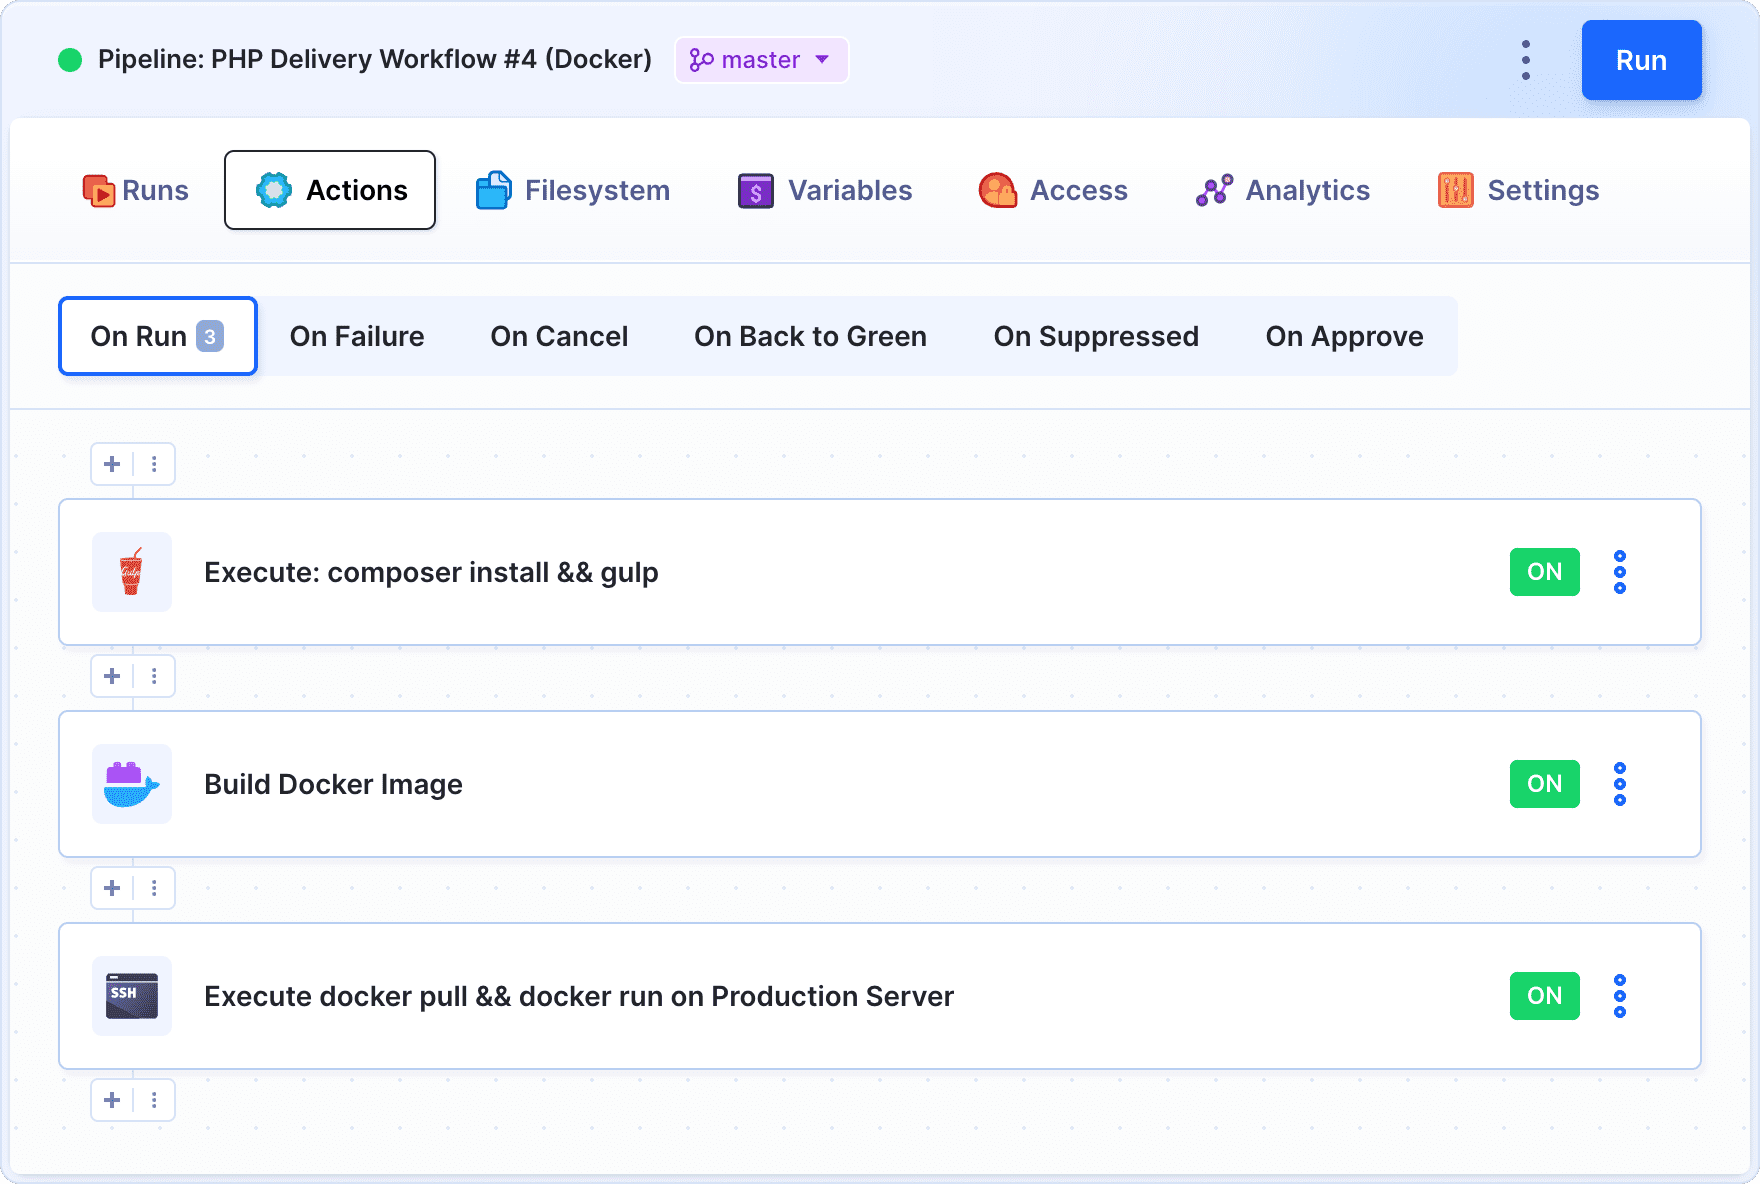
#5. Docker deployment
Docker is a virtualization method that allows you to define the working environment of your application in a single text file (Dockerfile), together with the way it should be built. The file is then used to build a Docker image with your app that can be launched in any environment supporting Docker (Linux/Mac OS/Windows). Docker is very fast and lightweight, contrary to "traditional" virtualization methods.
Here's an example Dockerfile for a PHP application:
FROM php:7
RUN apt-get update -y && apt-get install -y openssl zip unzip git
RUN curl -sS https://getcomposer.org/installer | php -- --install-dir=/usr/local/bin --filename=composer
RUN docker-php-ext-install pdo mbstring
WORKDIR /app
COPY . /app
RUN composer install

CMD php artisan serve --host=0.0.0.0 --port=8181
EXPOSE 8181
The file can be used to build a Docker image:
docker build -t my-image .
Once the image is built, you can launch your application in a Docker container isolated from its host
docker run -p 8081:8081 my-image
On top of that, Docker images can be pushed and pulled from a Docker registry. This way you can easily build and image on one server/PC and run it on another. In this case, the whole delivery process will look like this:
- Test application
- Build Docker image with application
- Push application to Docker registry
- SSH to production server a. Docker pull b. Docker run
Pros & Cons
- The application works on every type of setup which eliminates the "strange, it works for me" error
- Easy rollback – you just run the previous version of the image
- Build configuration and application environment is documentation in the Dockerfile in the repository
- Yet another tech that adds to the software stack
- Some users claim that Docker is not production ready
Final word
As always, the best delivery method is different for every working environment. It depends on the app specification, type of production server, team preferences, and infrastructure limitations. For us, at Buddy, Docker is the preferred way of deployment. Once automated, everything works like a breeze.
And what is yours? How do you deploy your app? Do you use Docker, too? Go on and share your workflow in the comments!